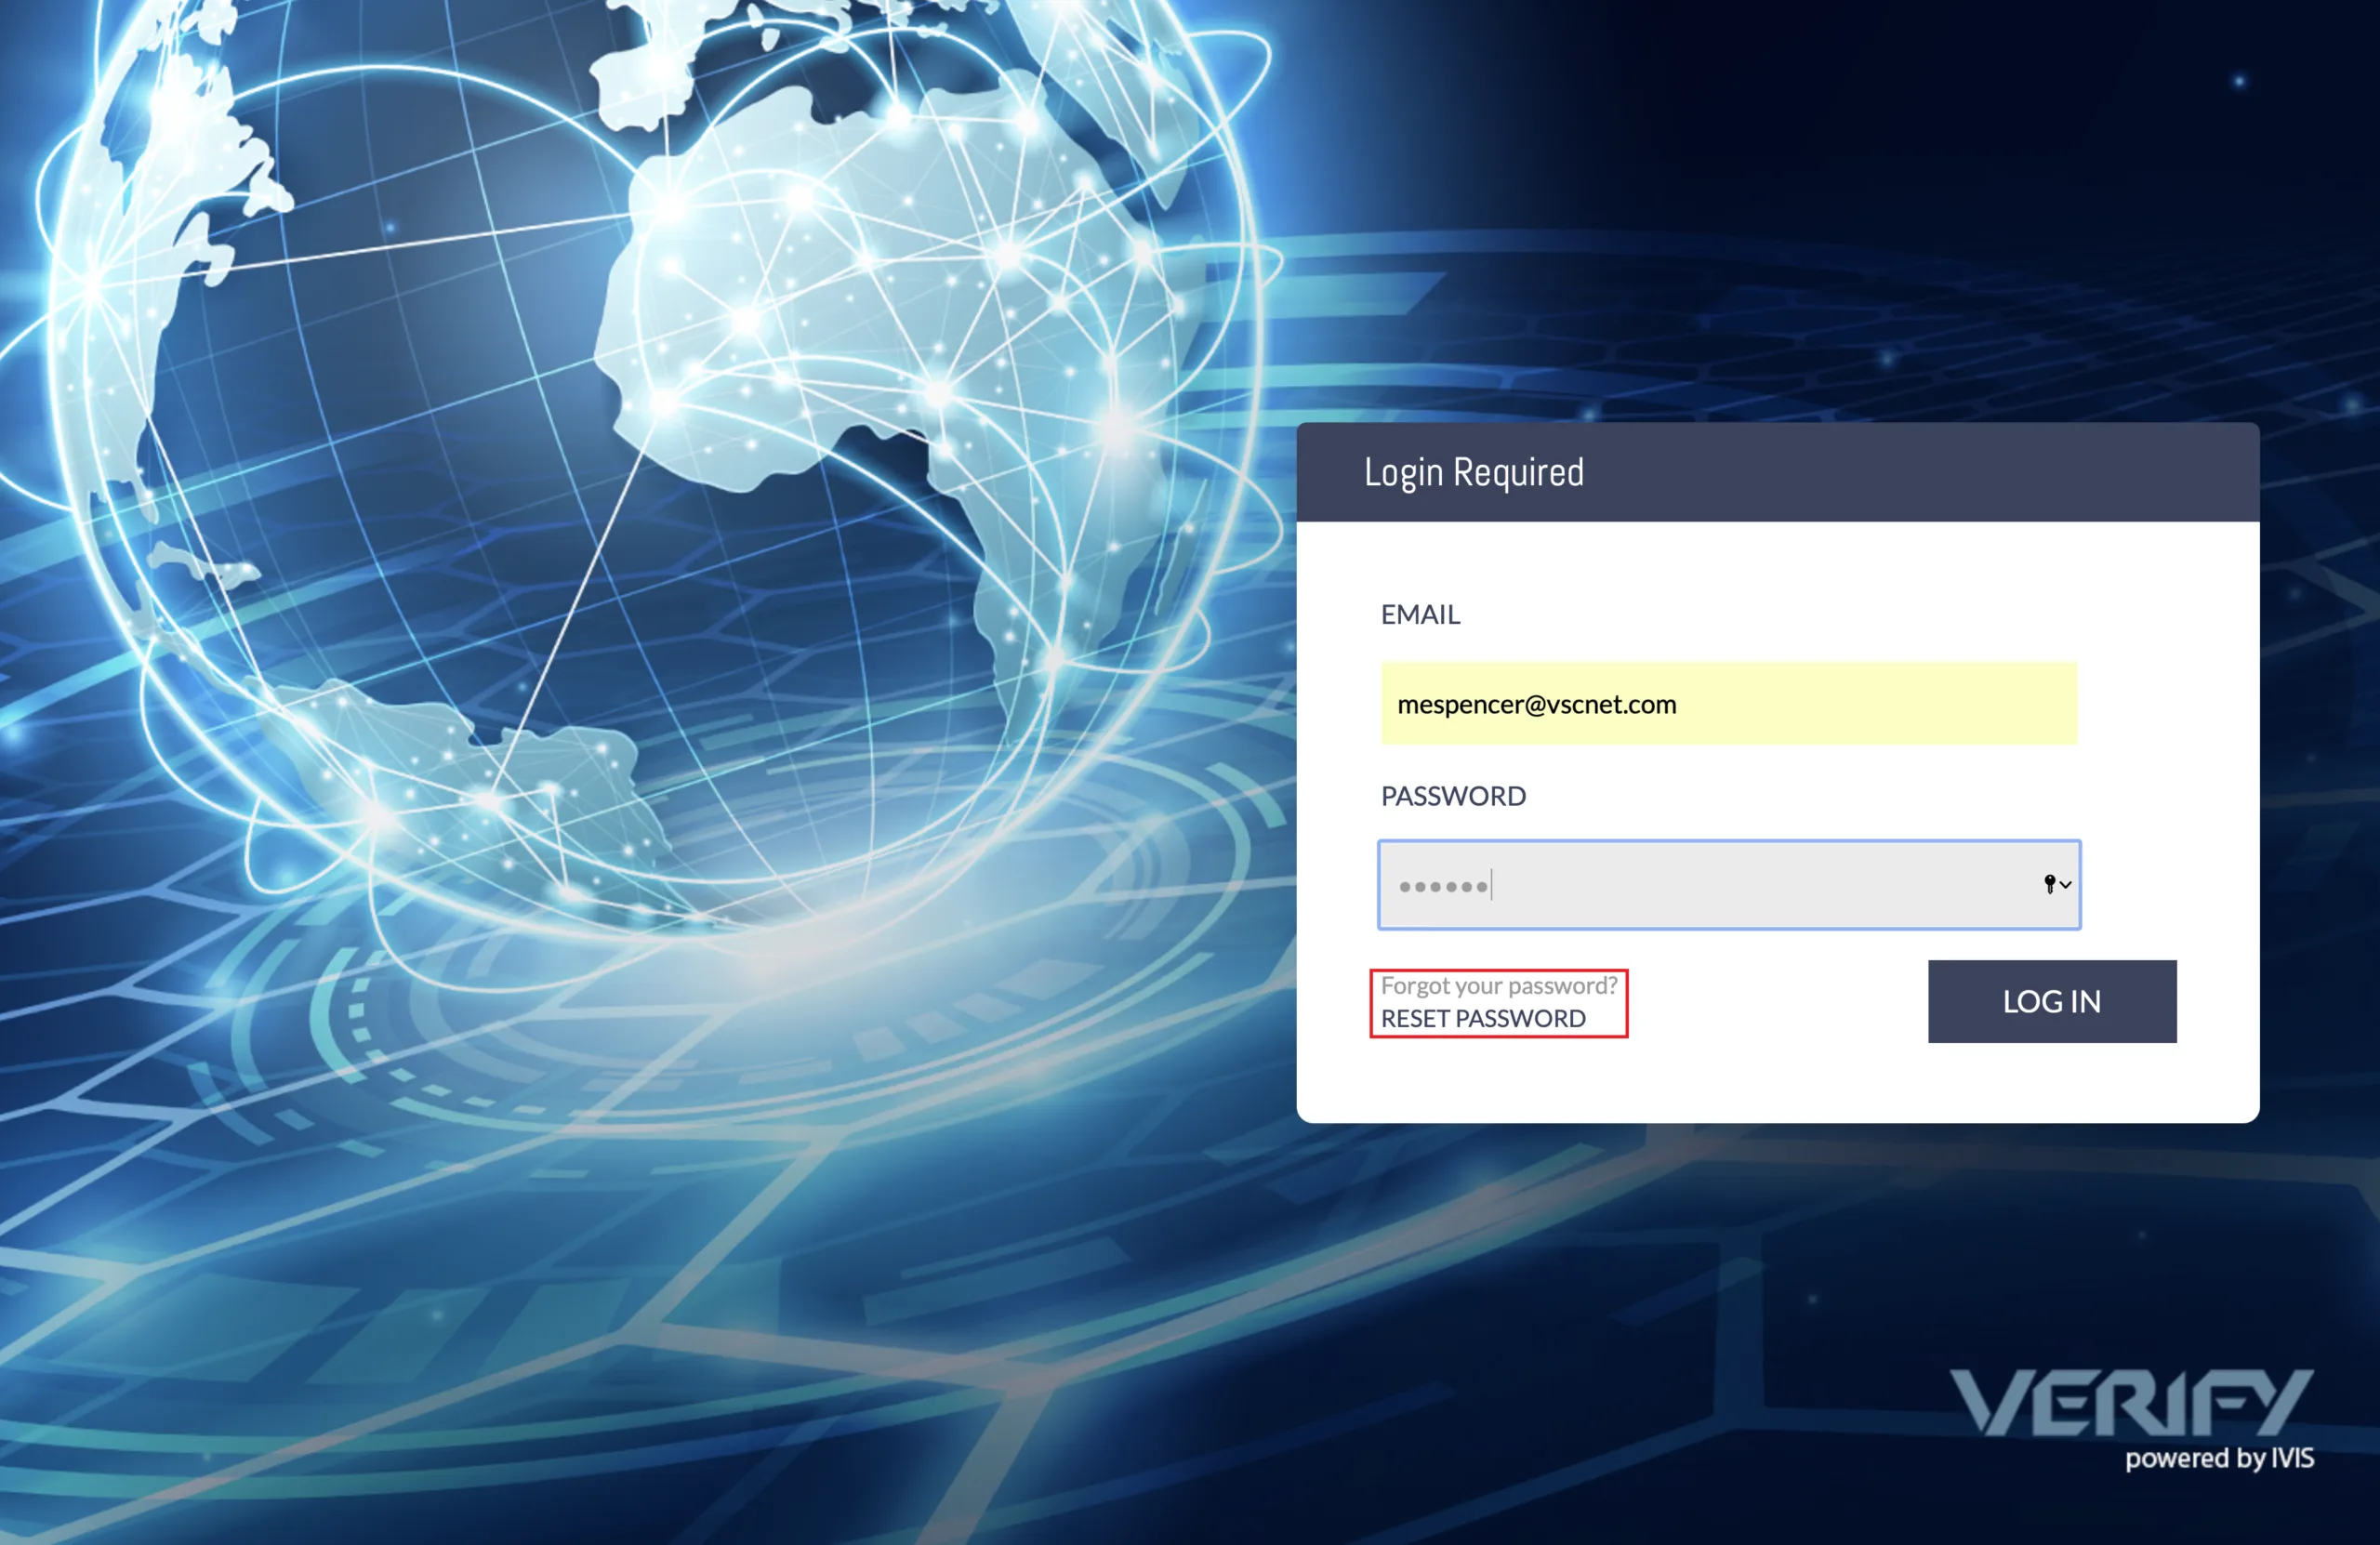
To begin, login to SCRM with your username and password. Your username is your email address, and your initial password is assigned by the system. If you forget your password, you can reset it by clicking the “Reset Password” link.
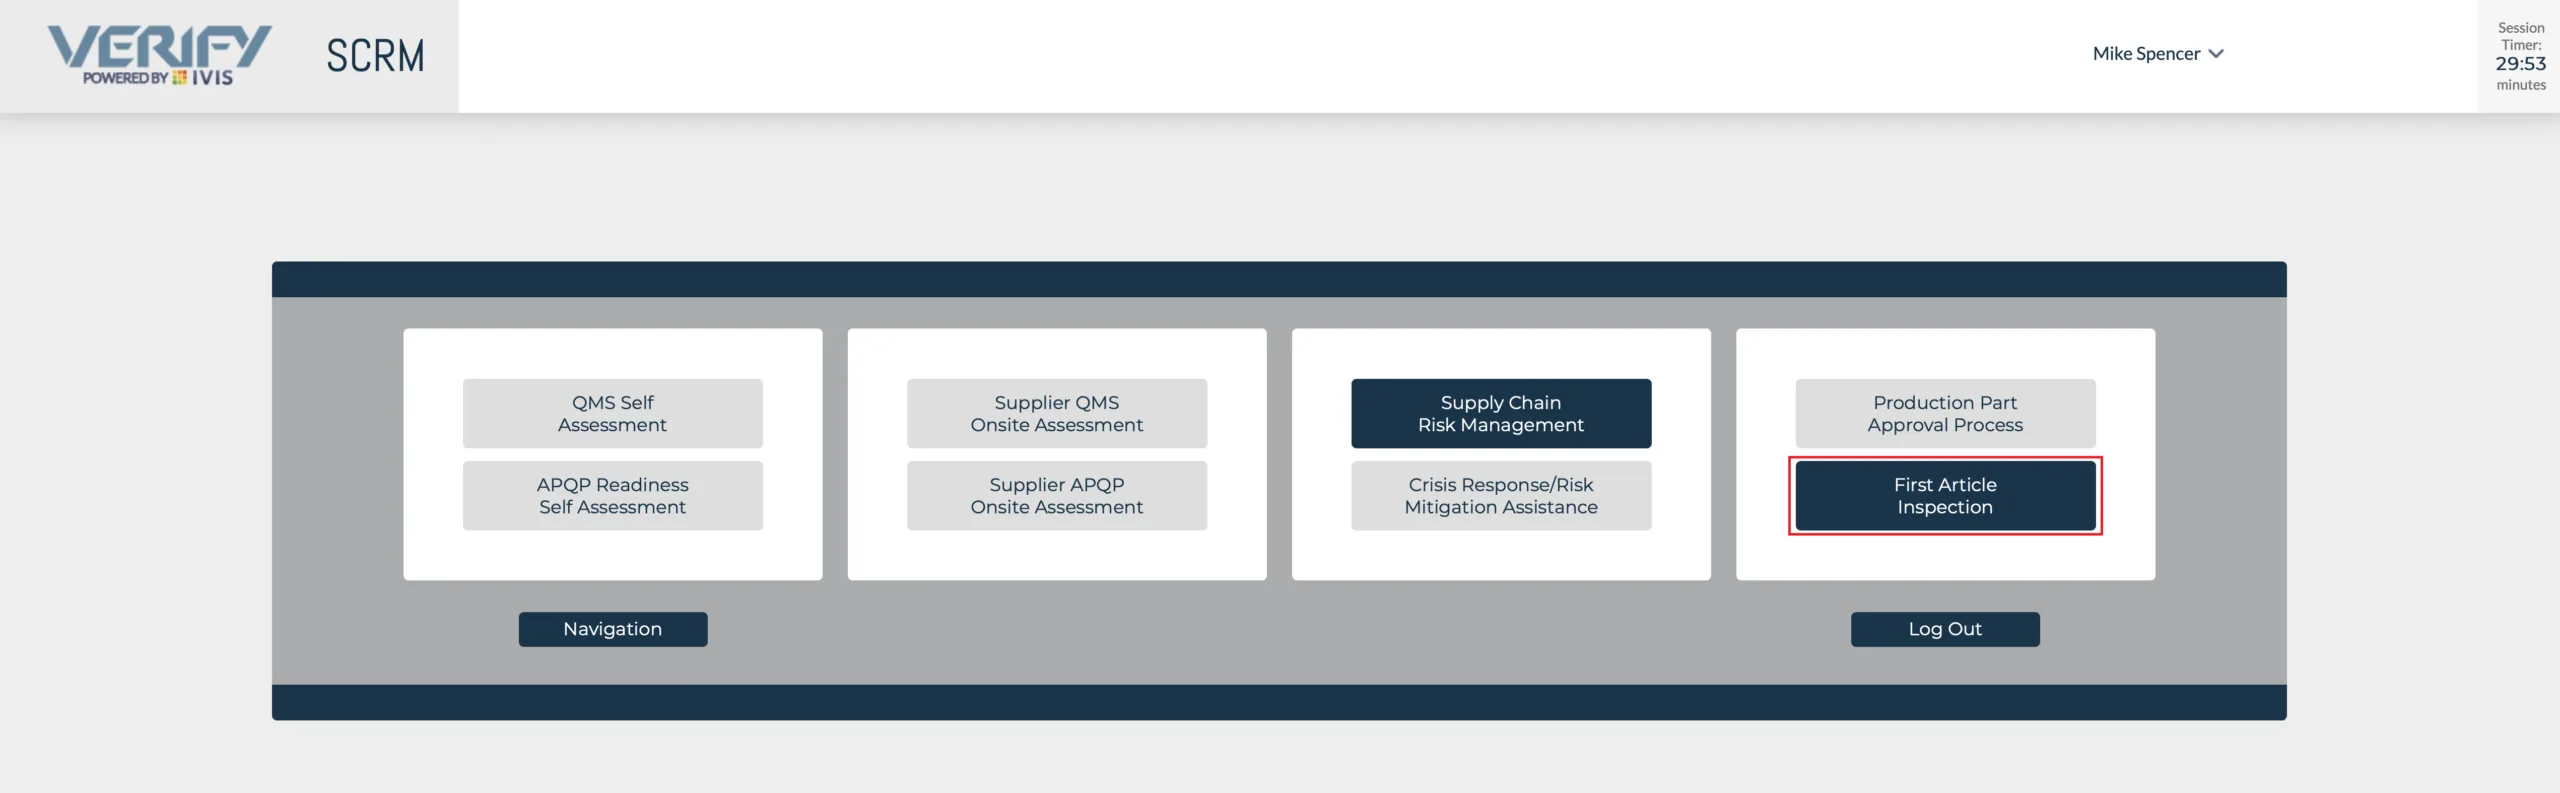
After login, every user will arrive on their landing page. The landing page consists of the various modules contained within the Supply Chain Risk Management Application. Only those applications that you have permission to access will be active, those that are not will be grayed out. We want to access the First Article Inspection Application. To do so we left click on the button titled “First Article Inspection”.
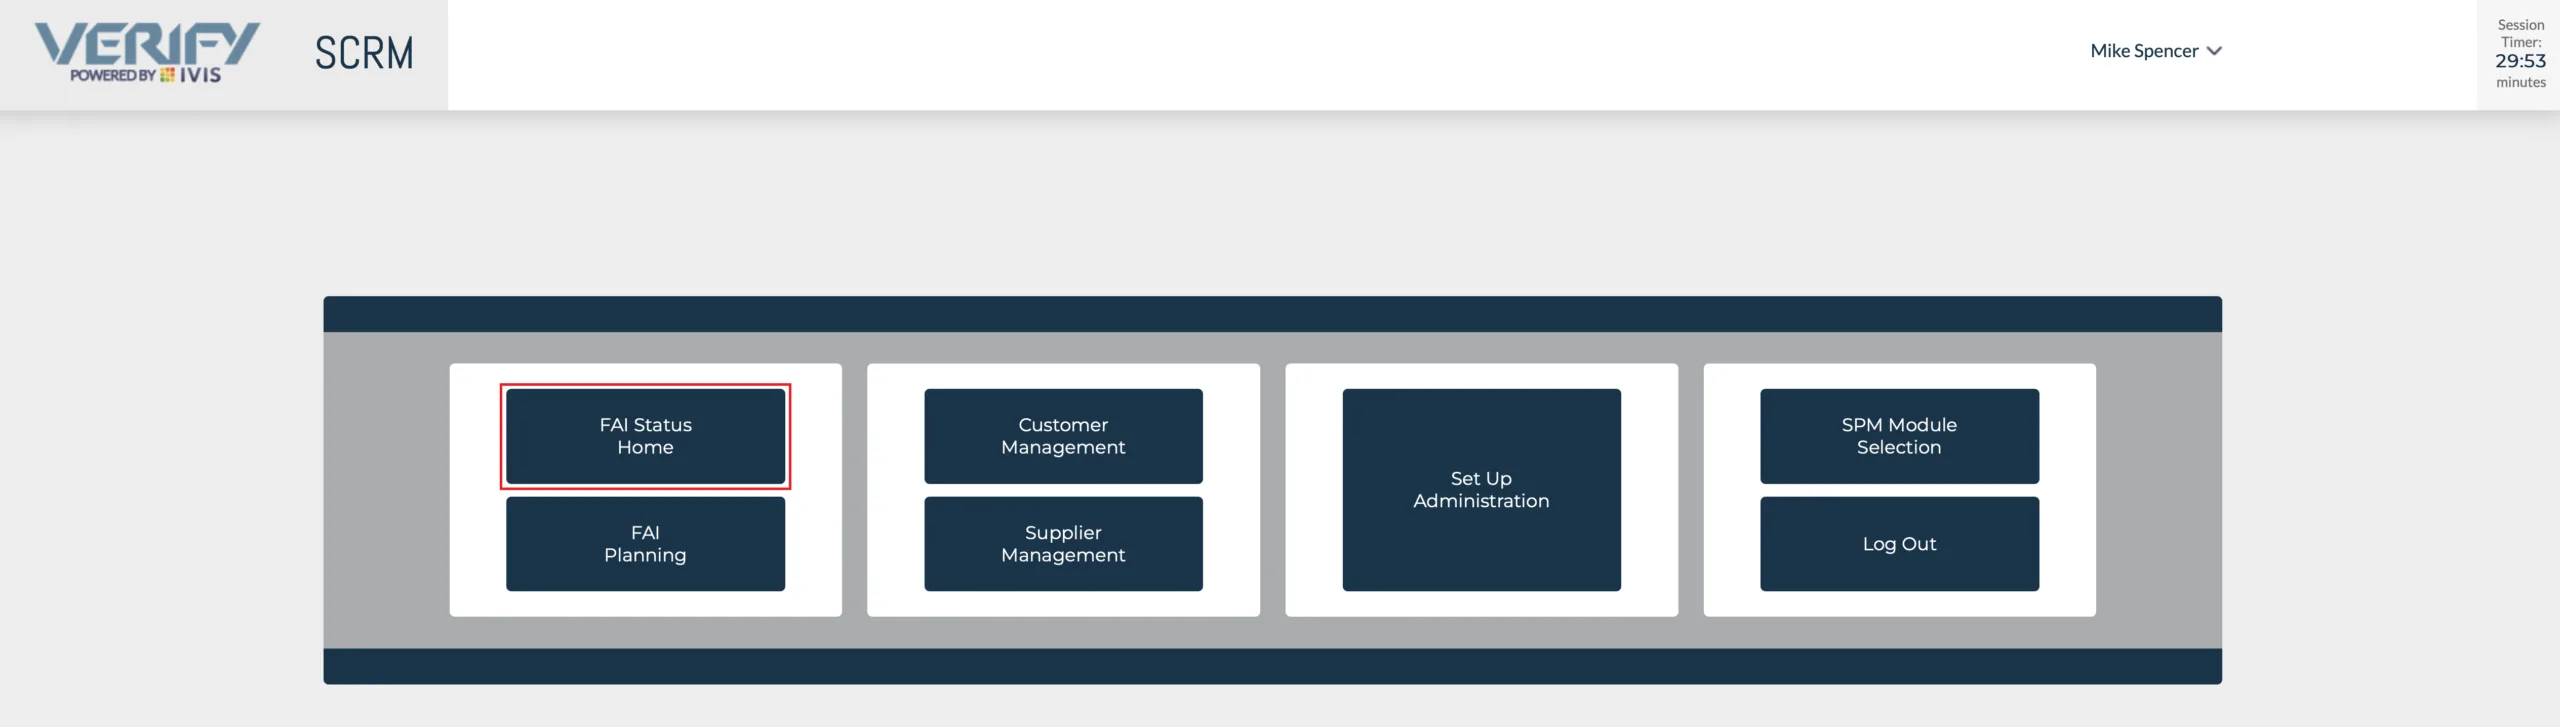
As in the prior menu, only those items you have permission to access will be active. There are several sub menus and actions you can access in the FAI menu. You can “Log Out”, Return to the previous menu, access; “Setup Administration”, “Supplier Management”, “Customer Management”, “FAI Planning” and the “FAI Status Home” page. We’ll access the “FAI Status Home” page by left clicking on the button.
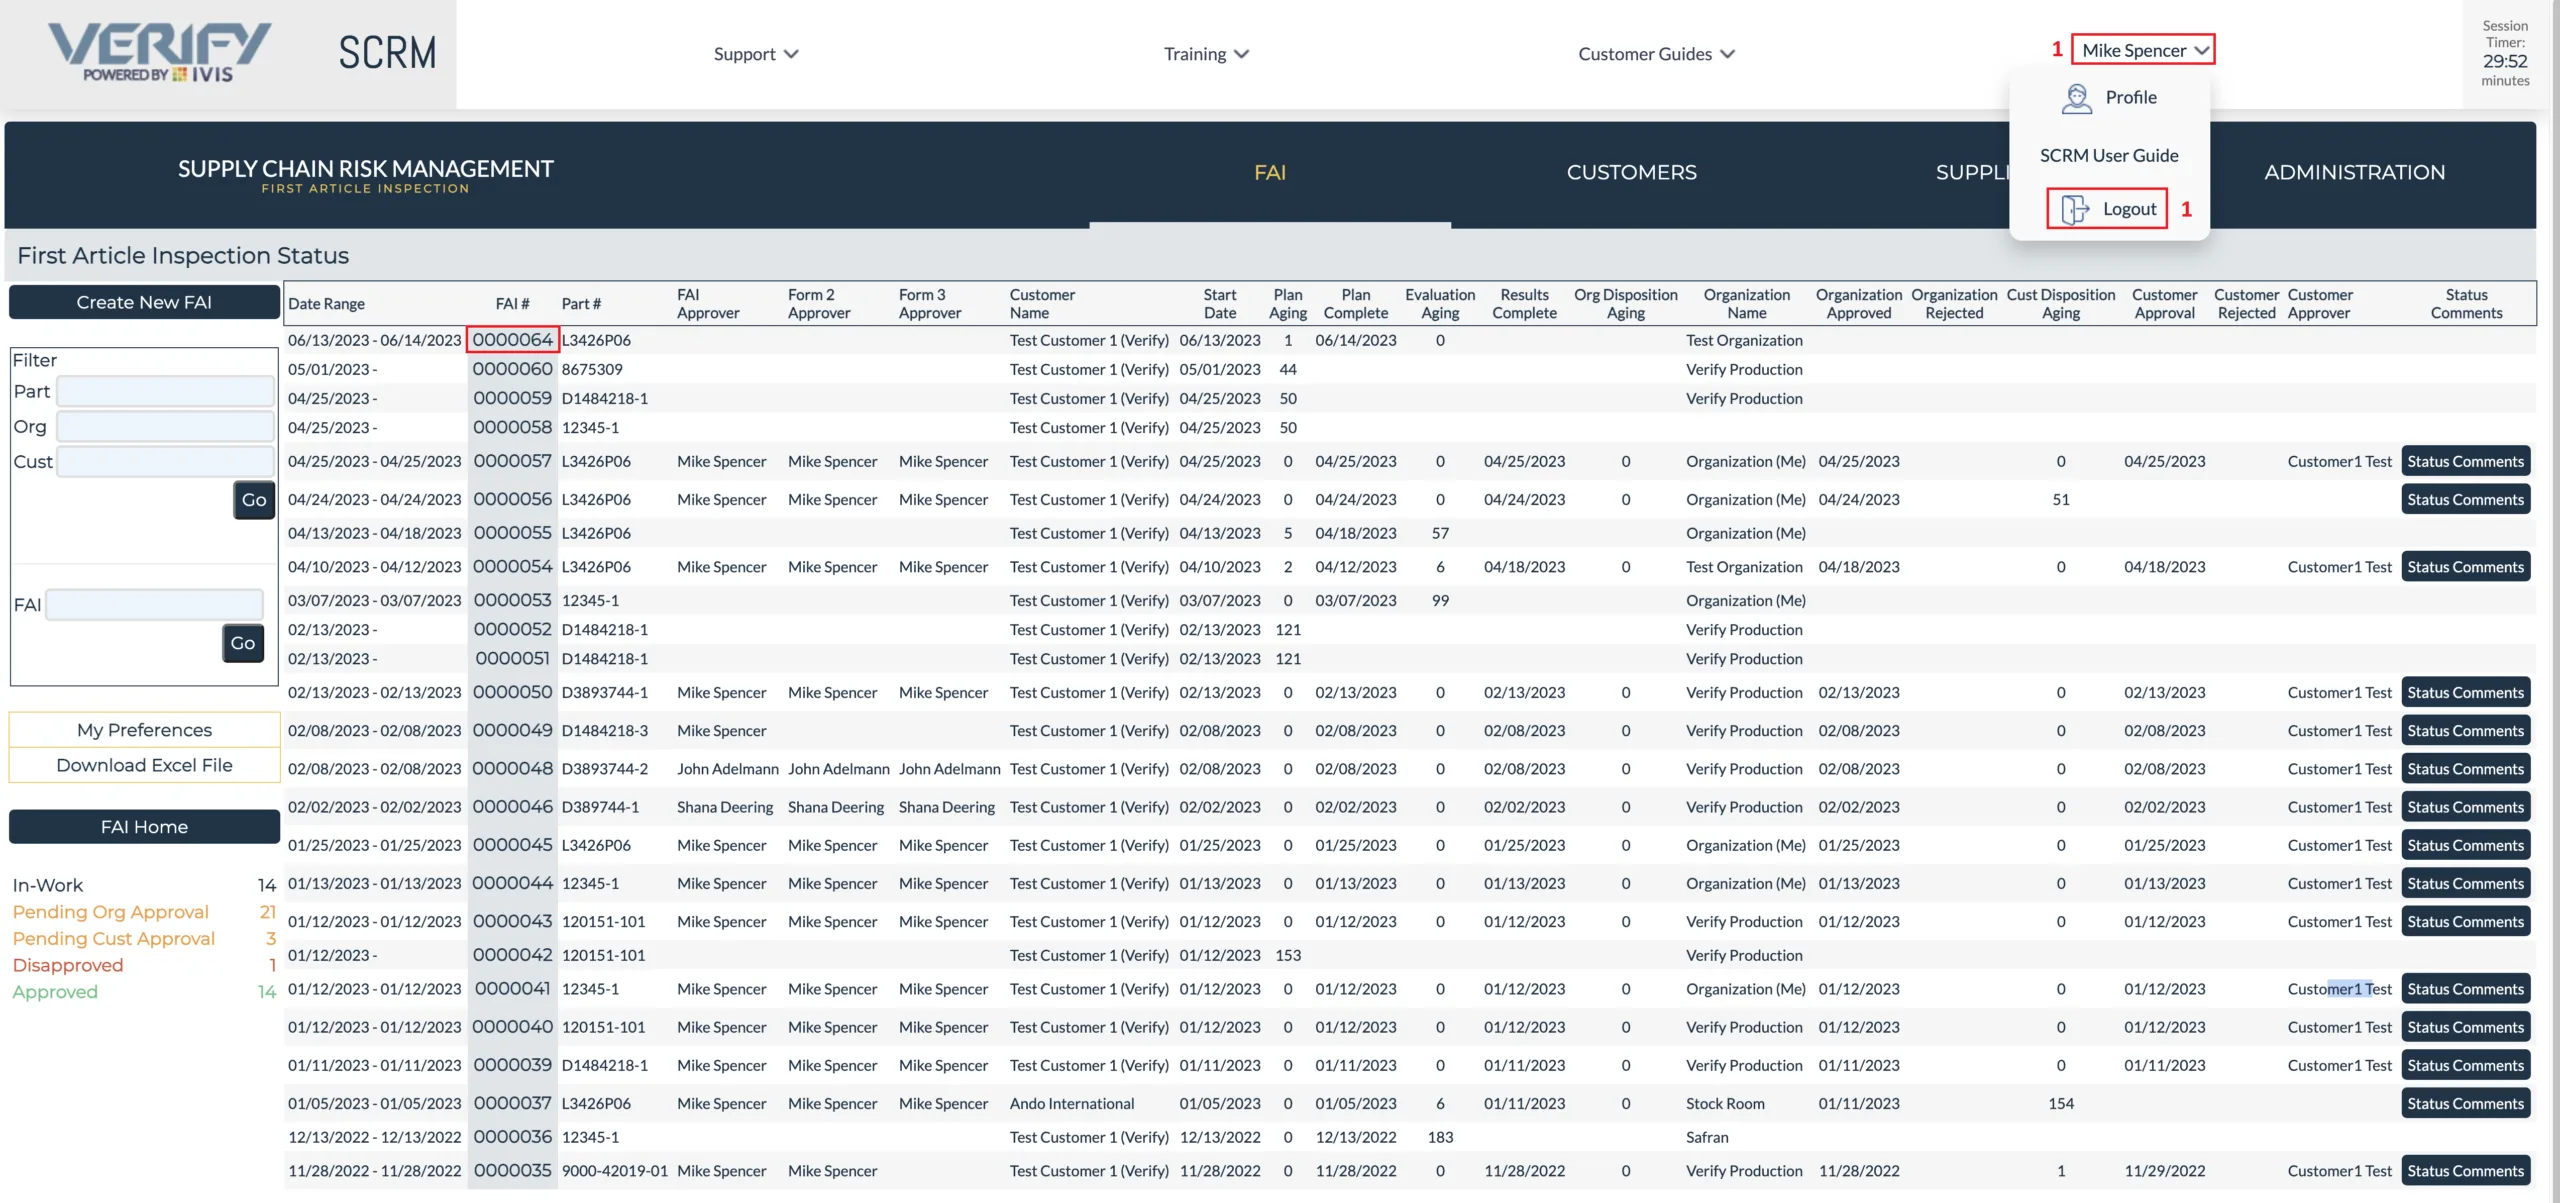
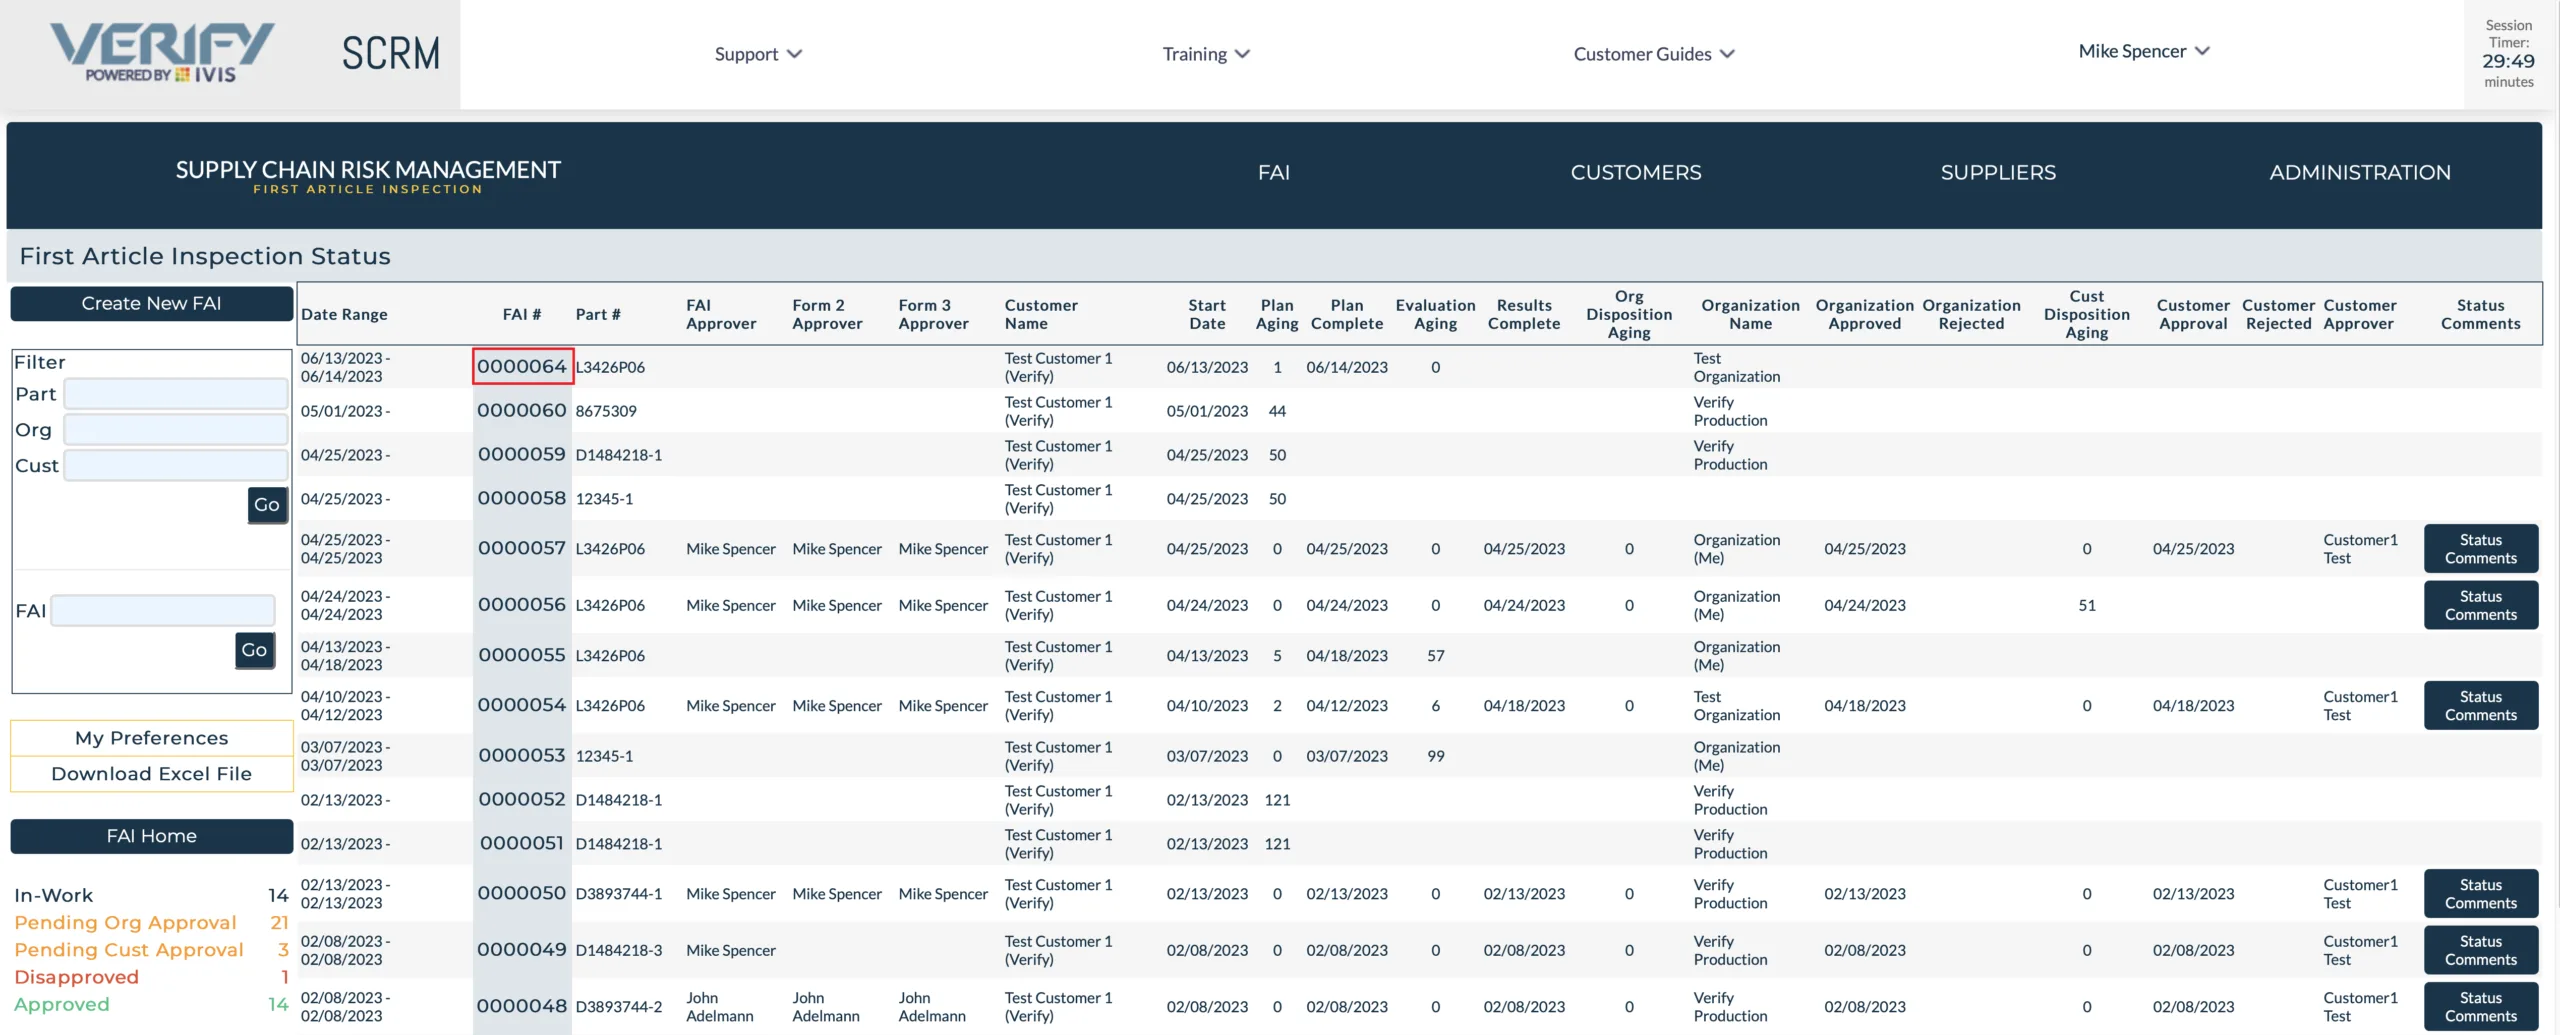
After clicking FAI Status home, you will land on the First Article Inspection Status page. Here you can determine the status of all the FAIs your company and your suppliers have in-work or finished. To upload documents or objective evidence in a First Article Inspection report, left click on the FAI you want to work with. We will use FAI0000064 for this demonstration.
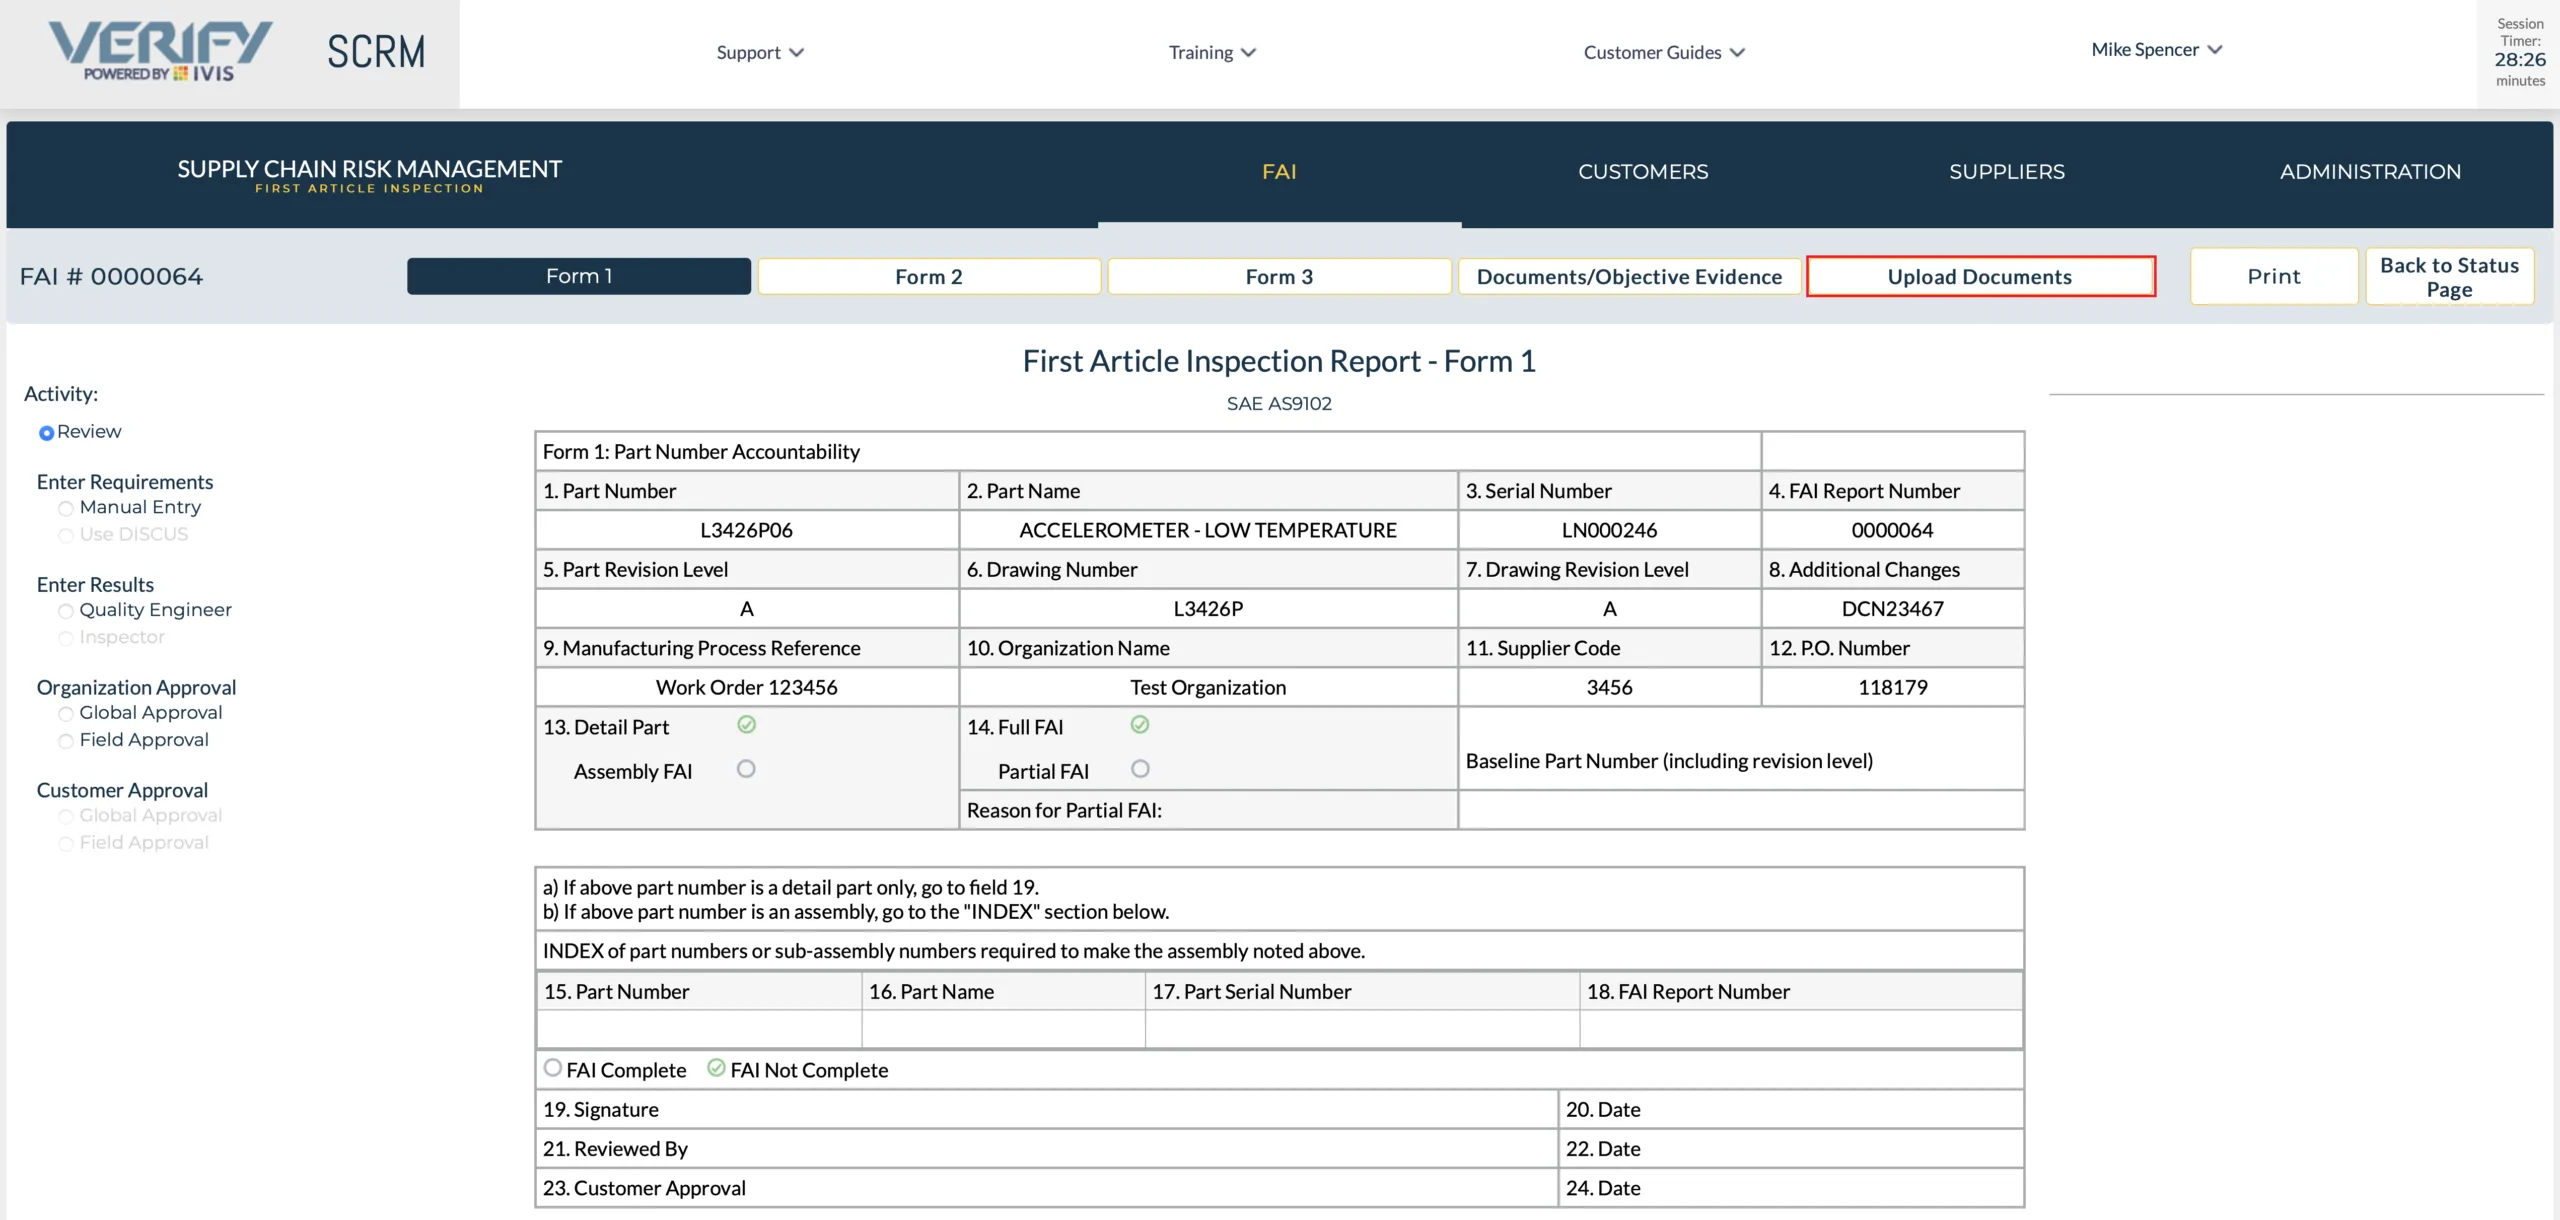
After clicking on the FAI number, on the “FAI Status Page”, the FAI form 1 will be displayed. Left click on the “Upload documents” tab. If you have permission to upload documents, the “Upload Documents” tab will be active. If you do not have permission, the tab will not function.
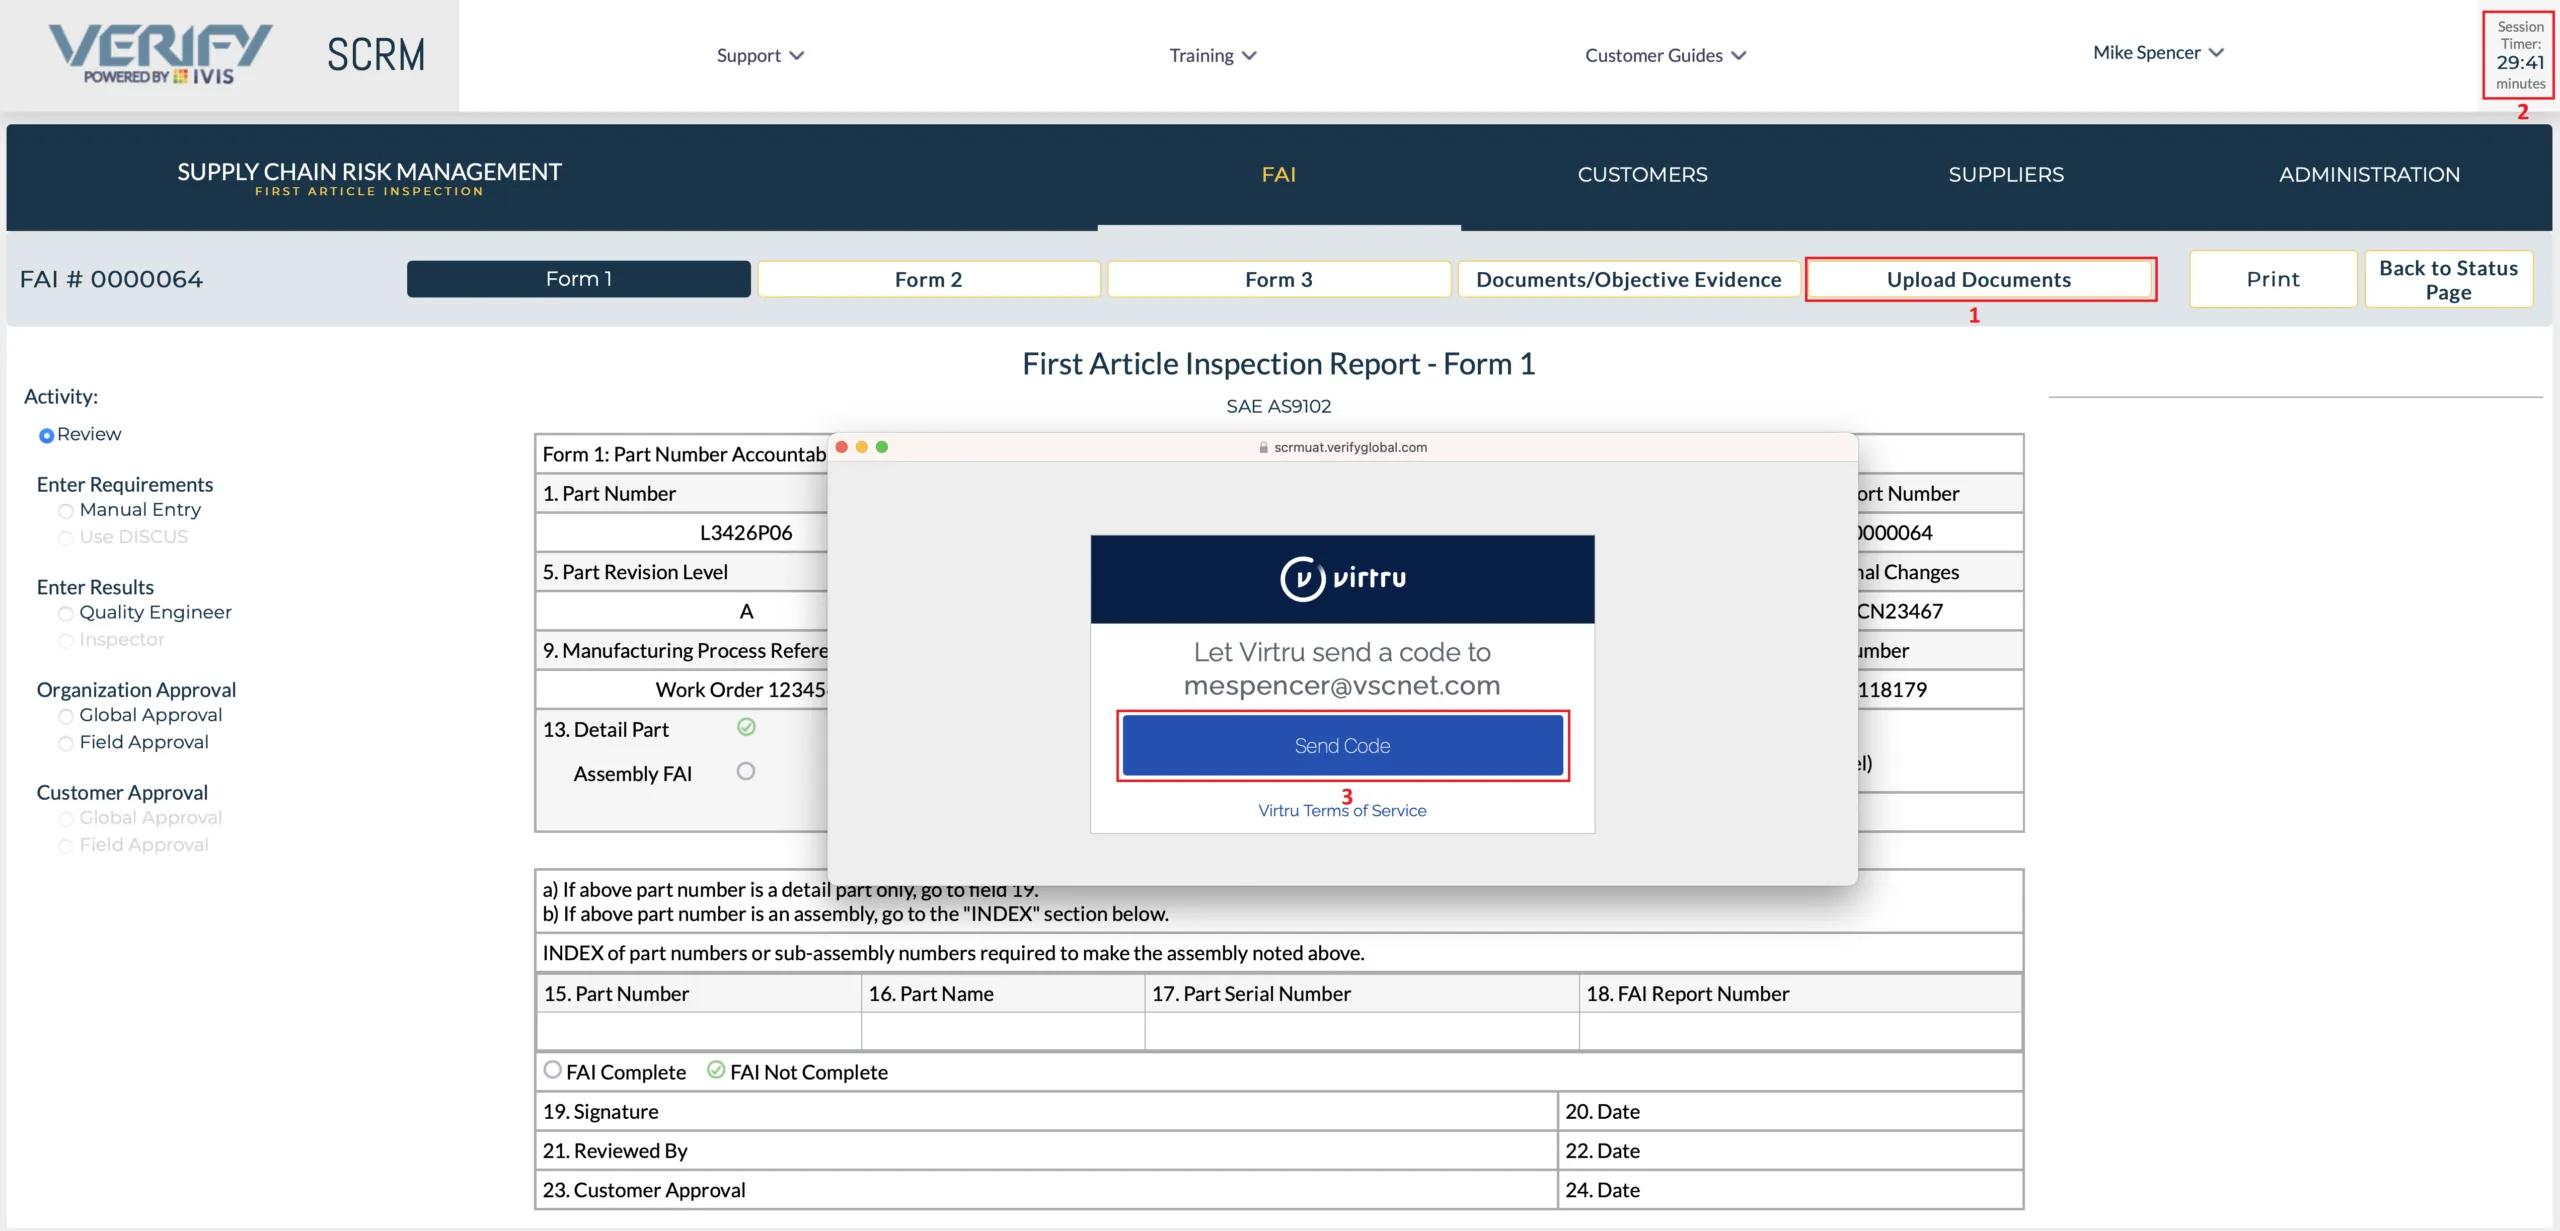
When you select the upload Documents tab (1), the FAI Application will begin a two-factor authentication process. You only need to do this once per session. If you let the timer in the upper right corner run down to zero (2), or you log out of your session, you will need to reauthenticate. The Documents are stored in a FEDRAMP Moderate secure cloud-based storage system. The FAI Application will prompt you to send a code to your email address stored in the system. Click Send Code (3).
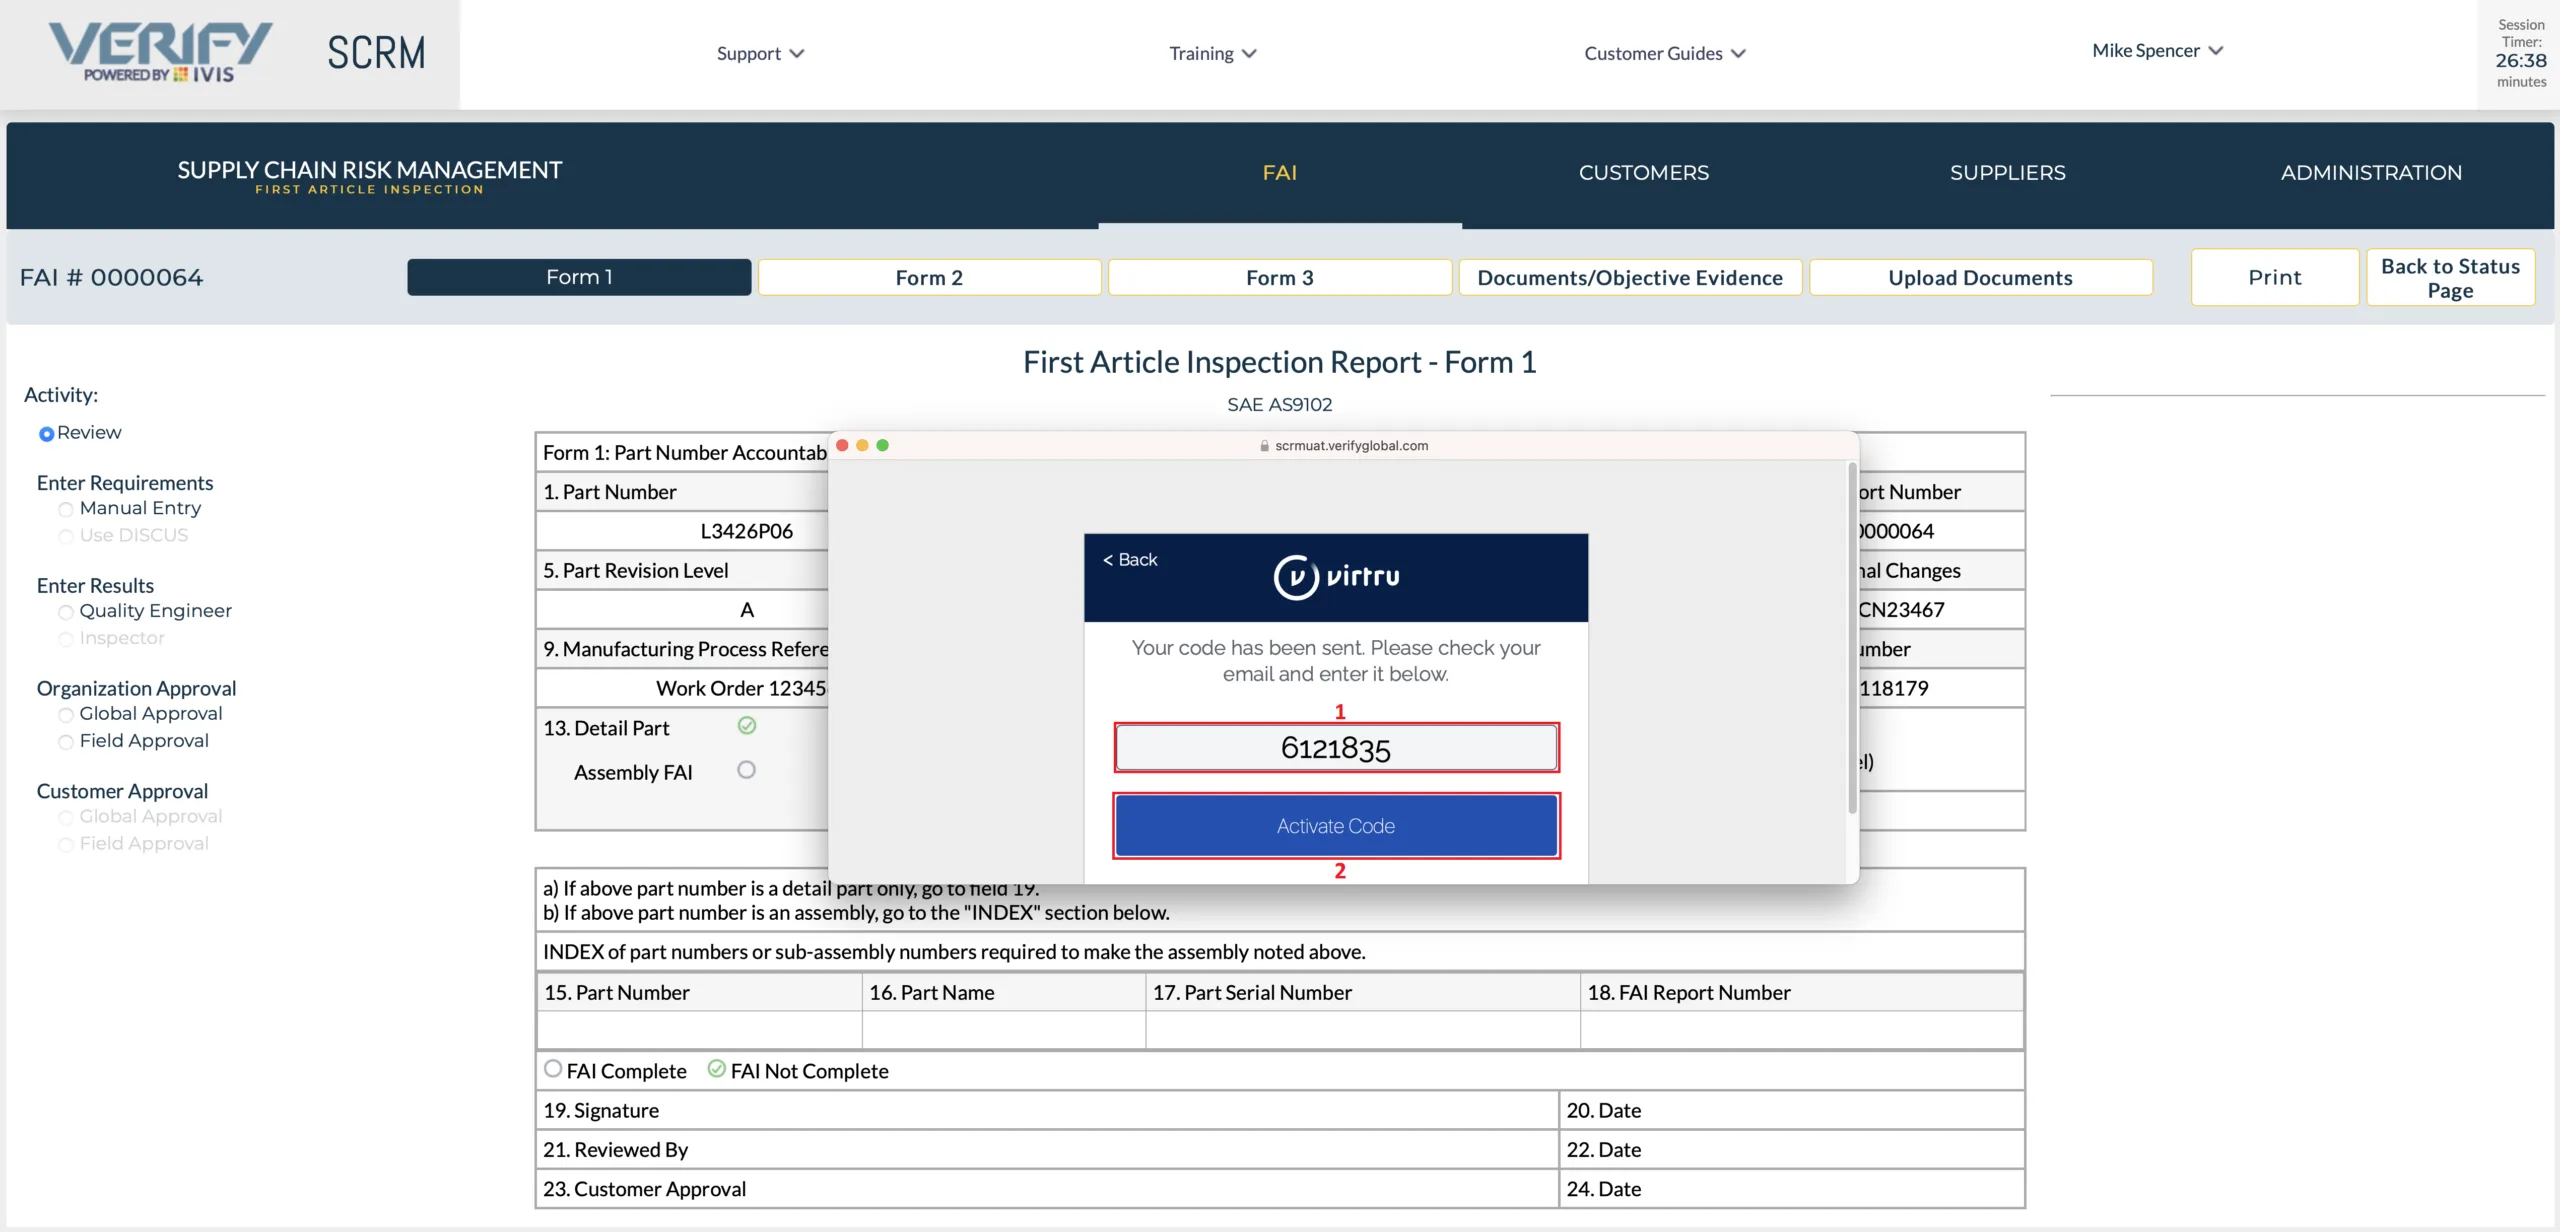
Within a few seconds, you will receive a “Verification Code” in your email. Enter that code into the activation popup box (1). If you copy and paste, be sure to delete any extra spaces that might appear at the end of the code. Click on “Activate code” (2).
Once you click “Activate Code”, the FAI Application will authenticate the user and display the document upload popup box.
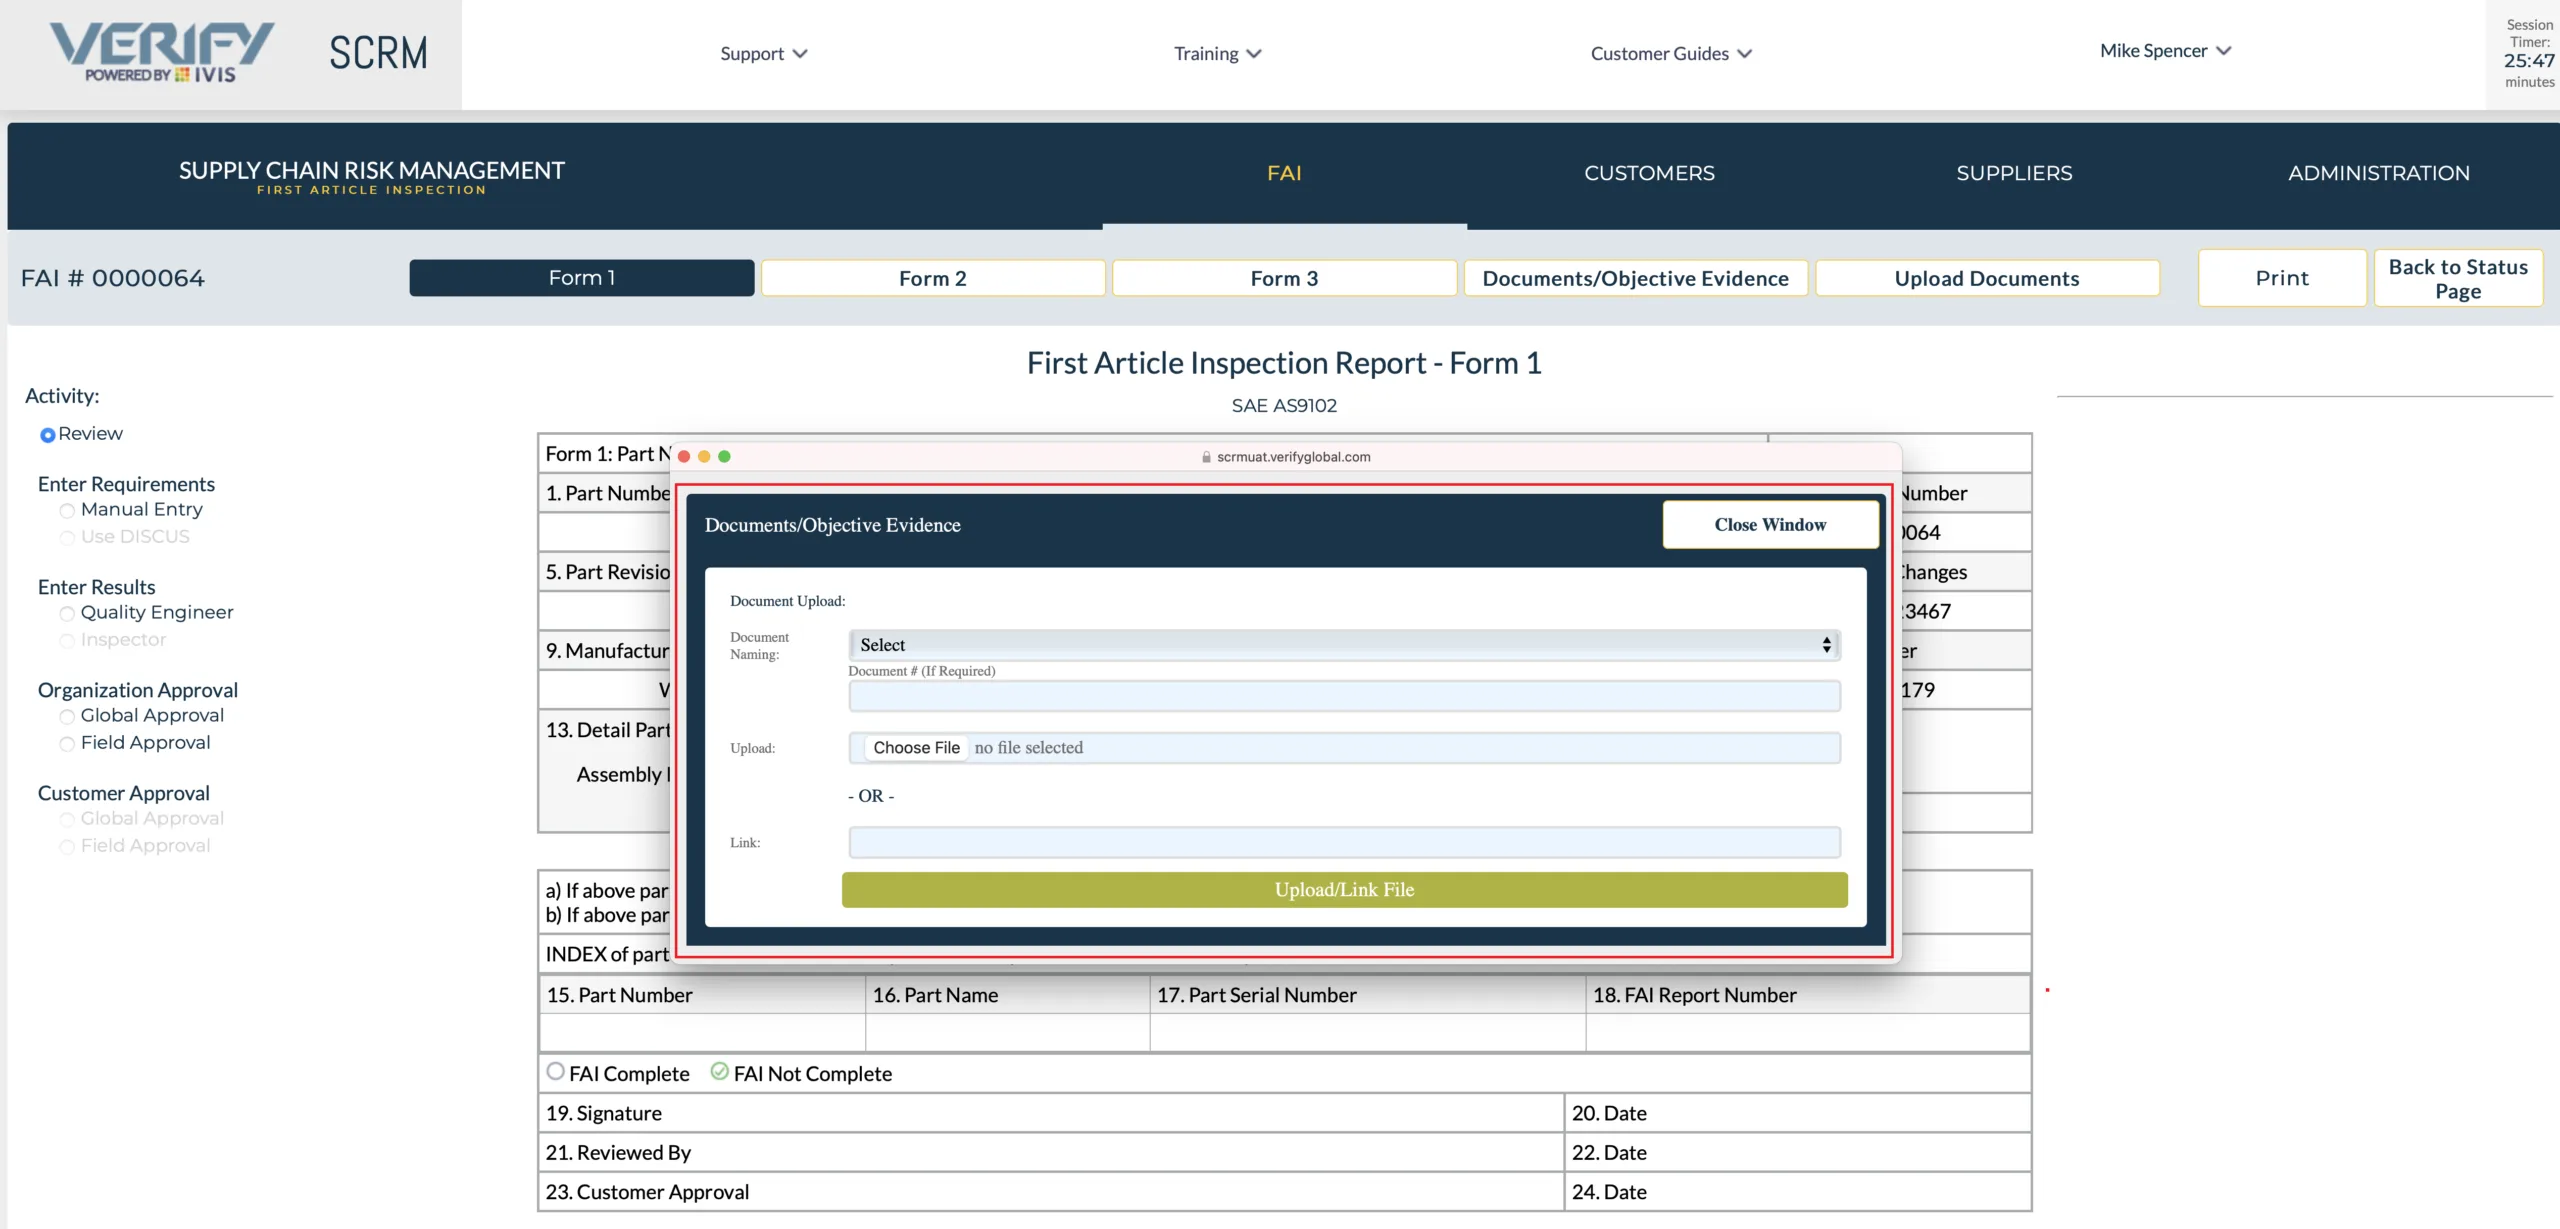
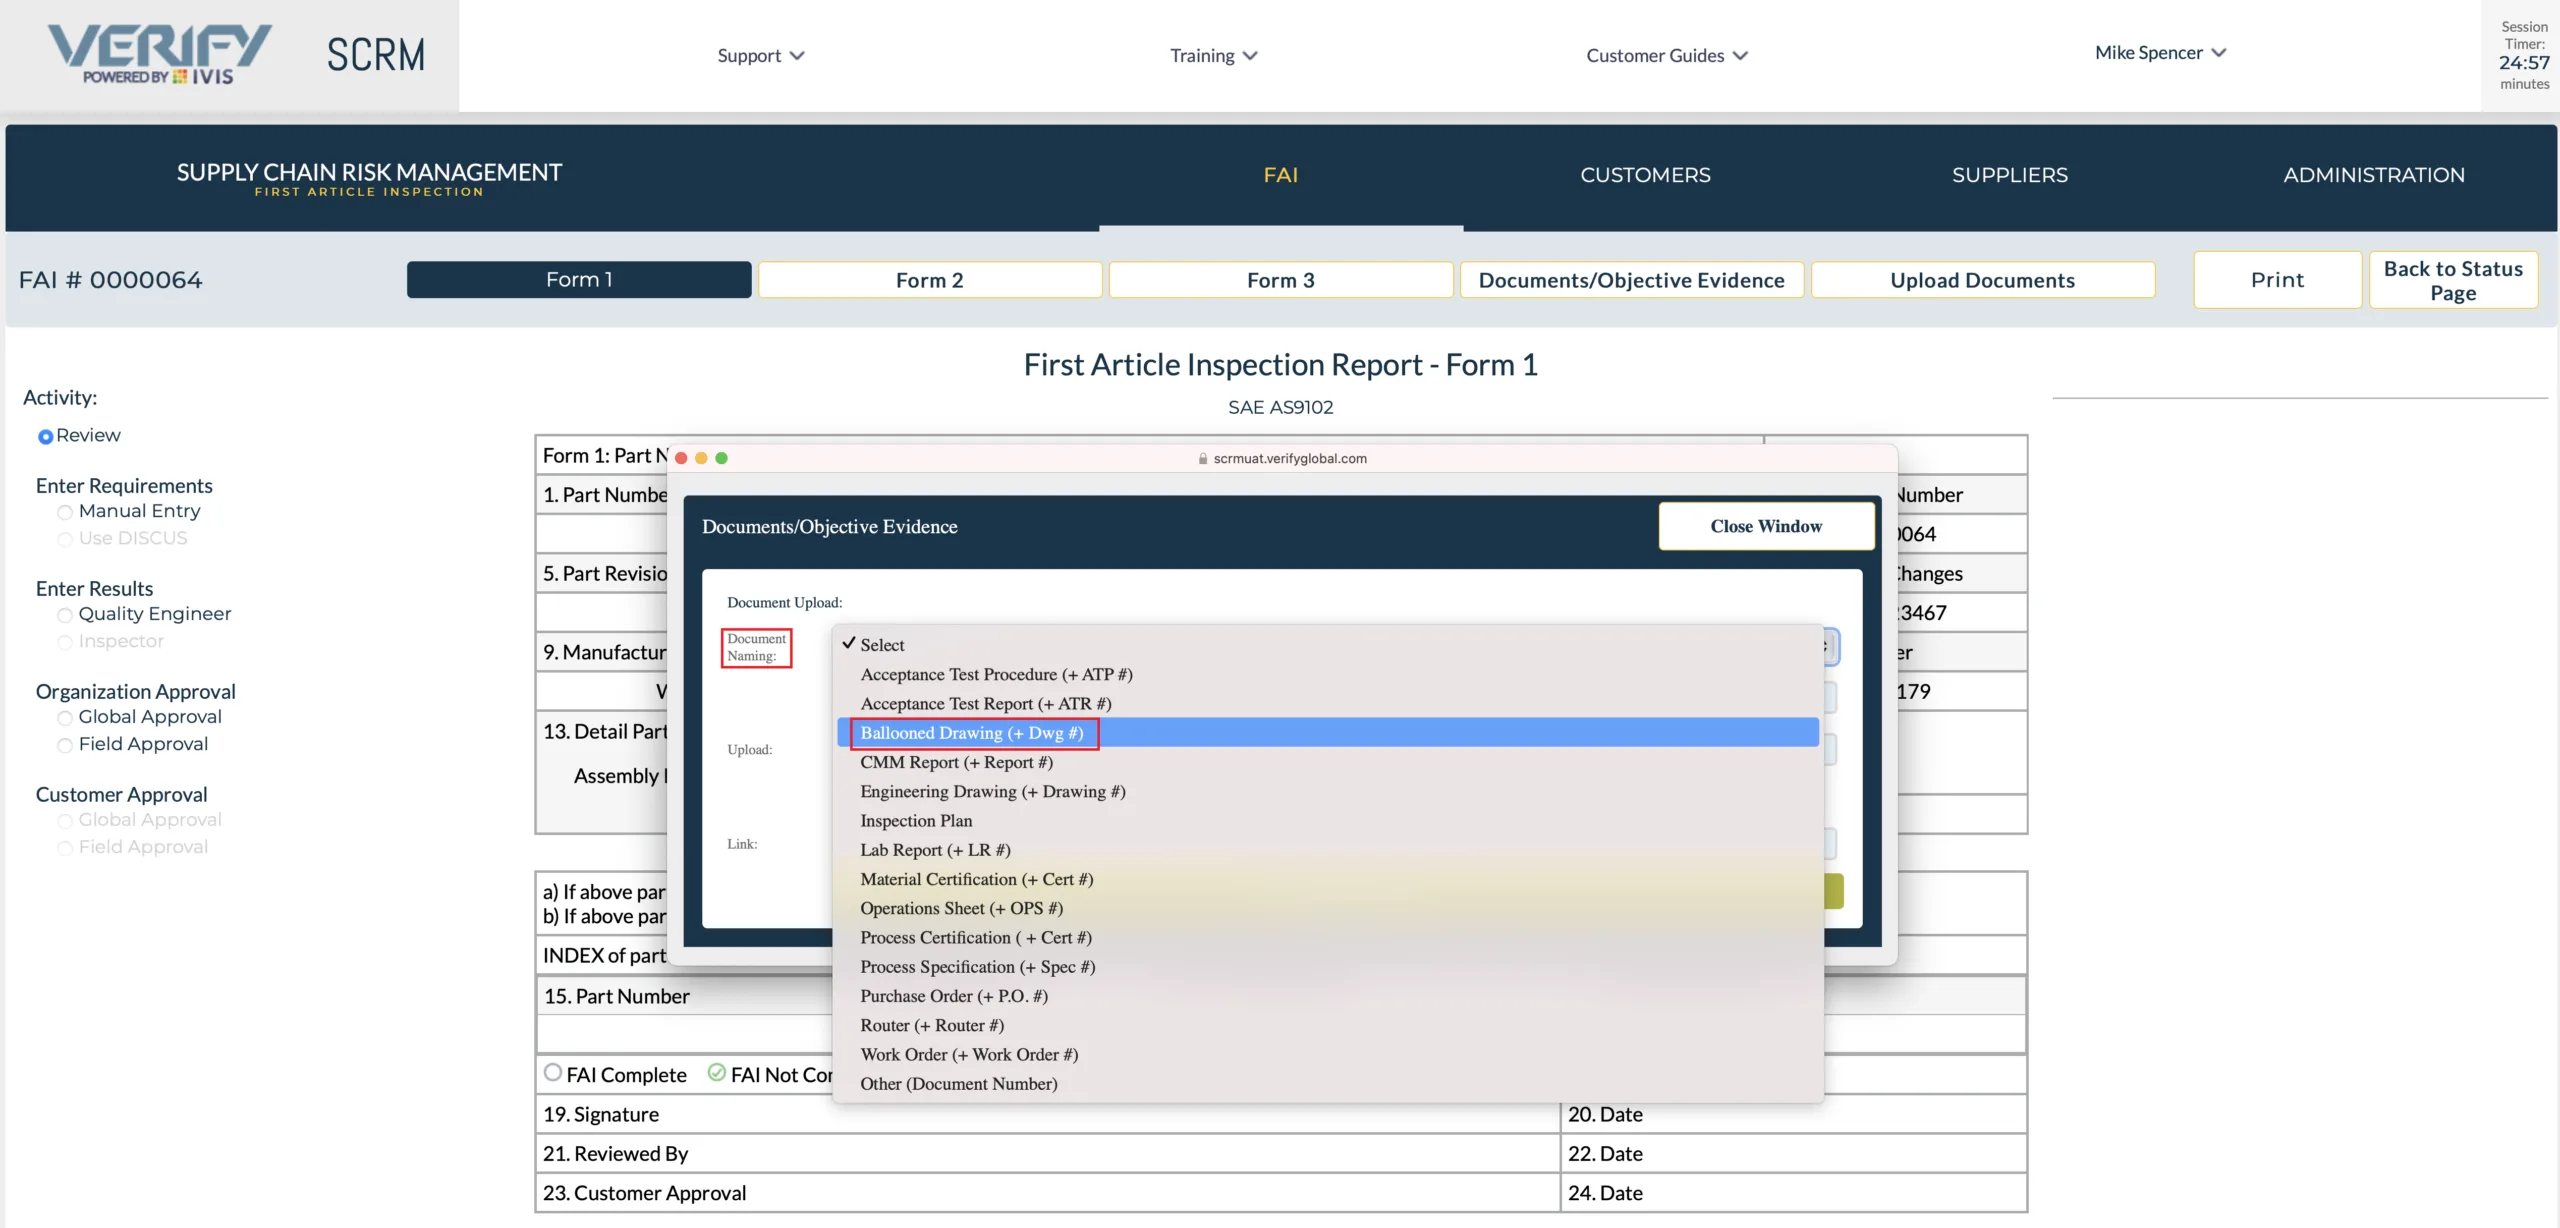
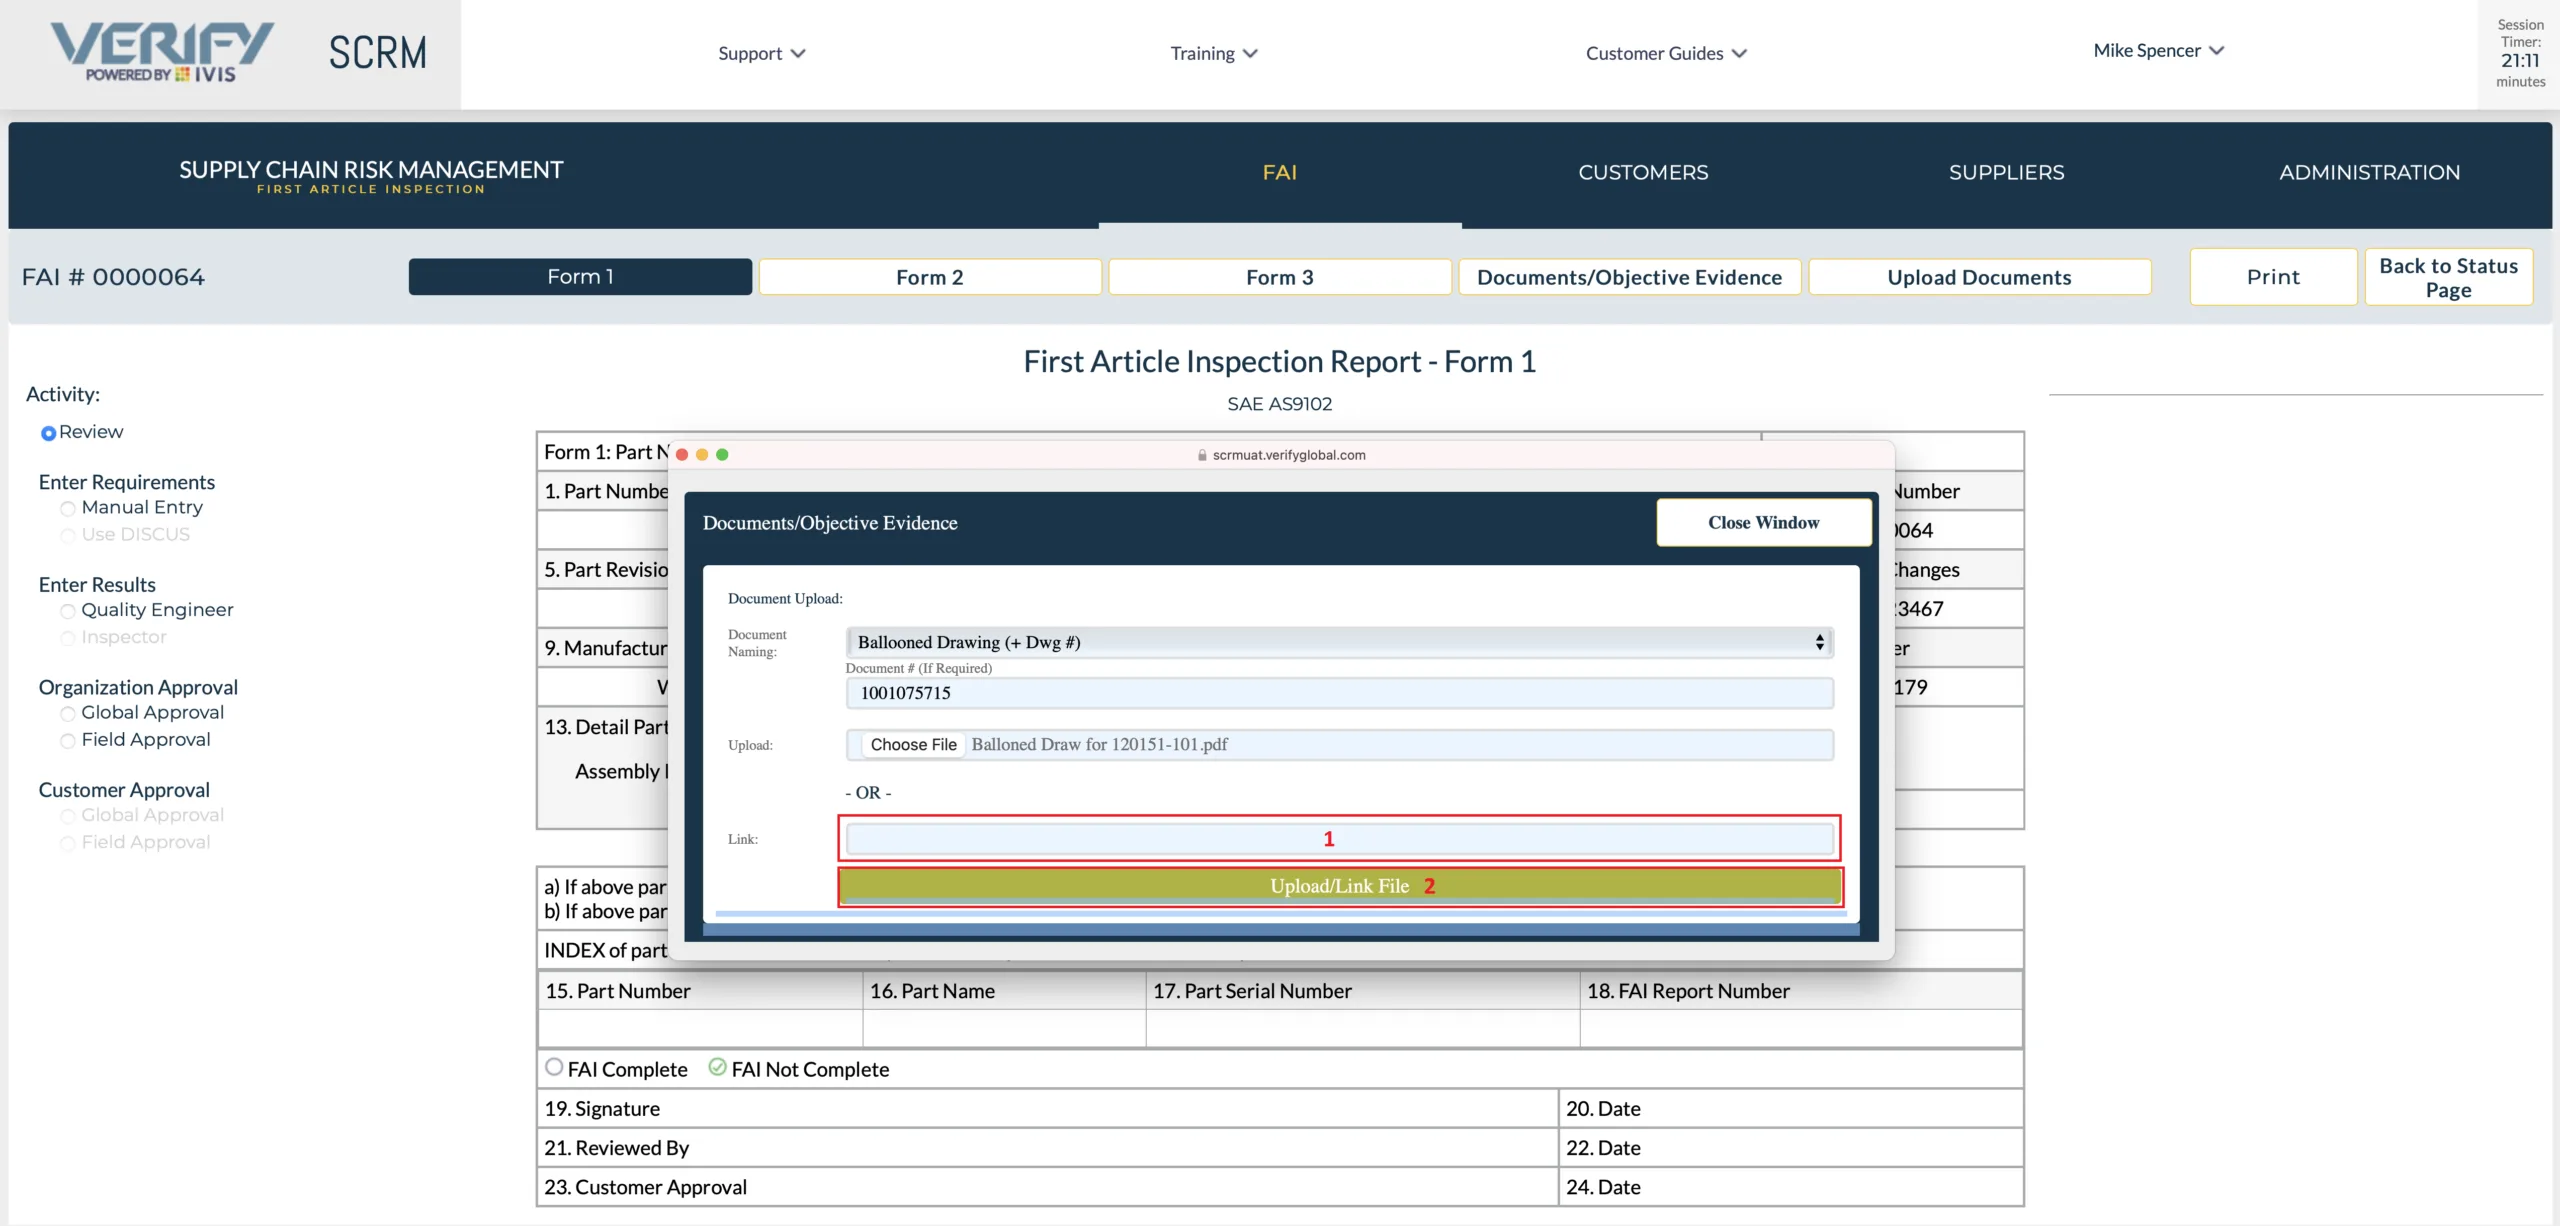
Select a document Name for the type of Document you are uploading.
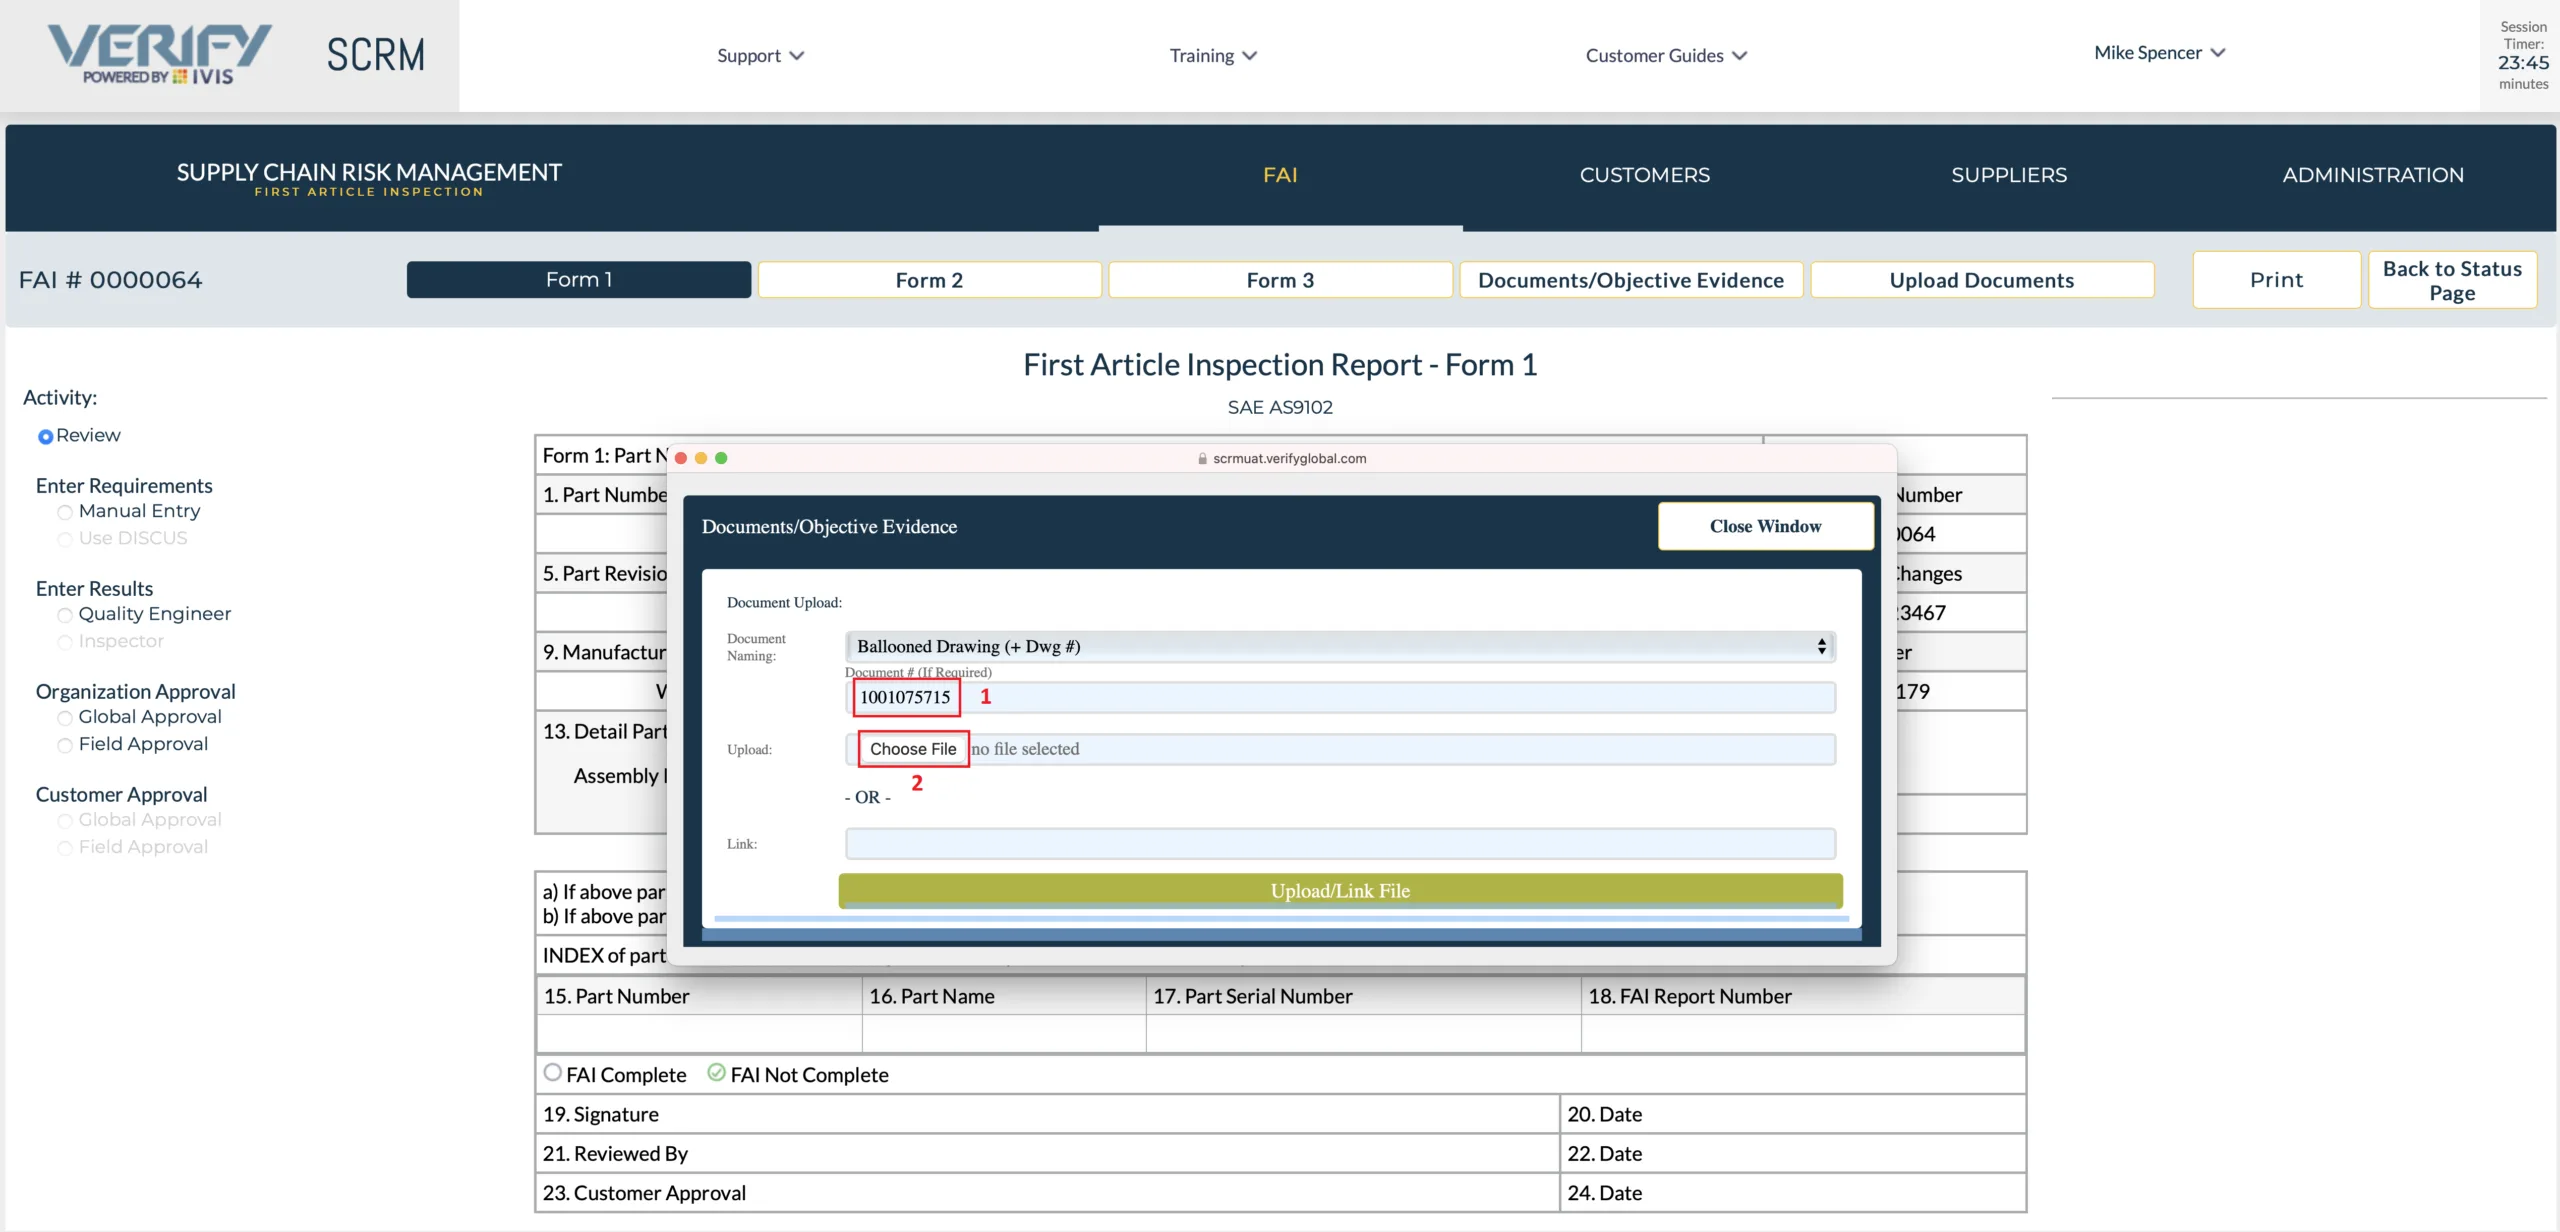
Enter a document Number (1)…….then select “chose file” (2).
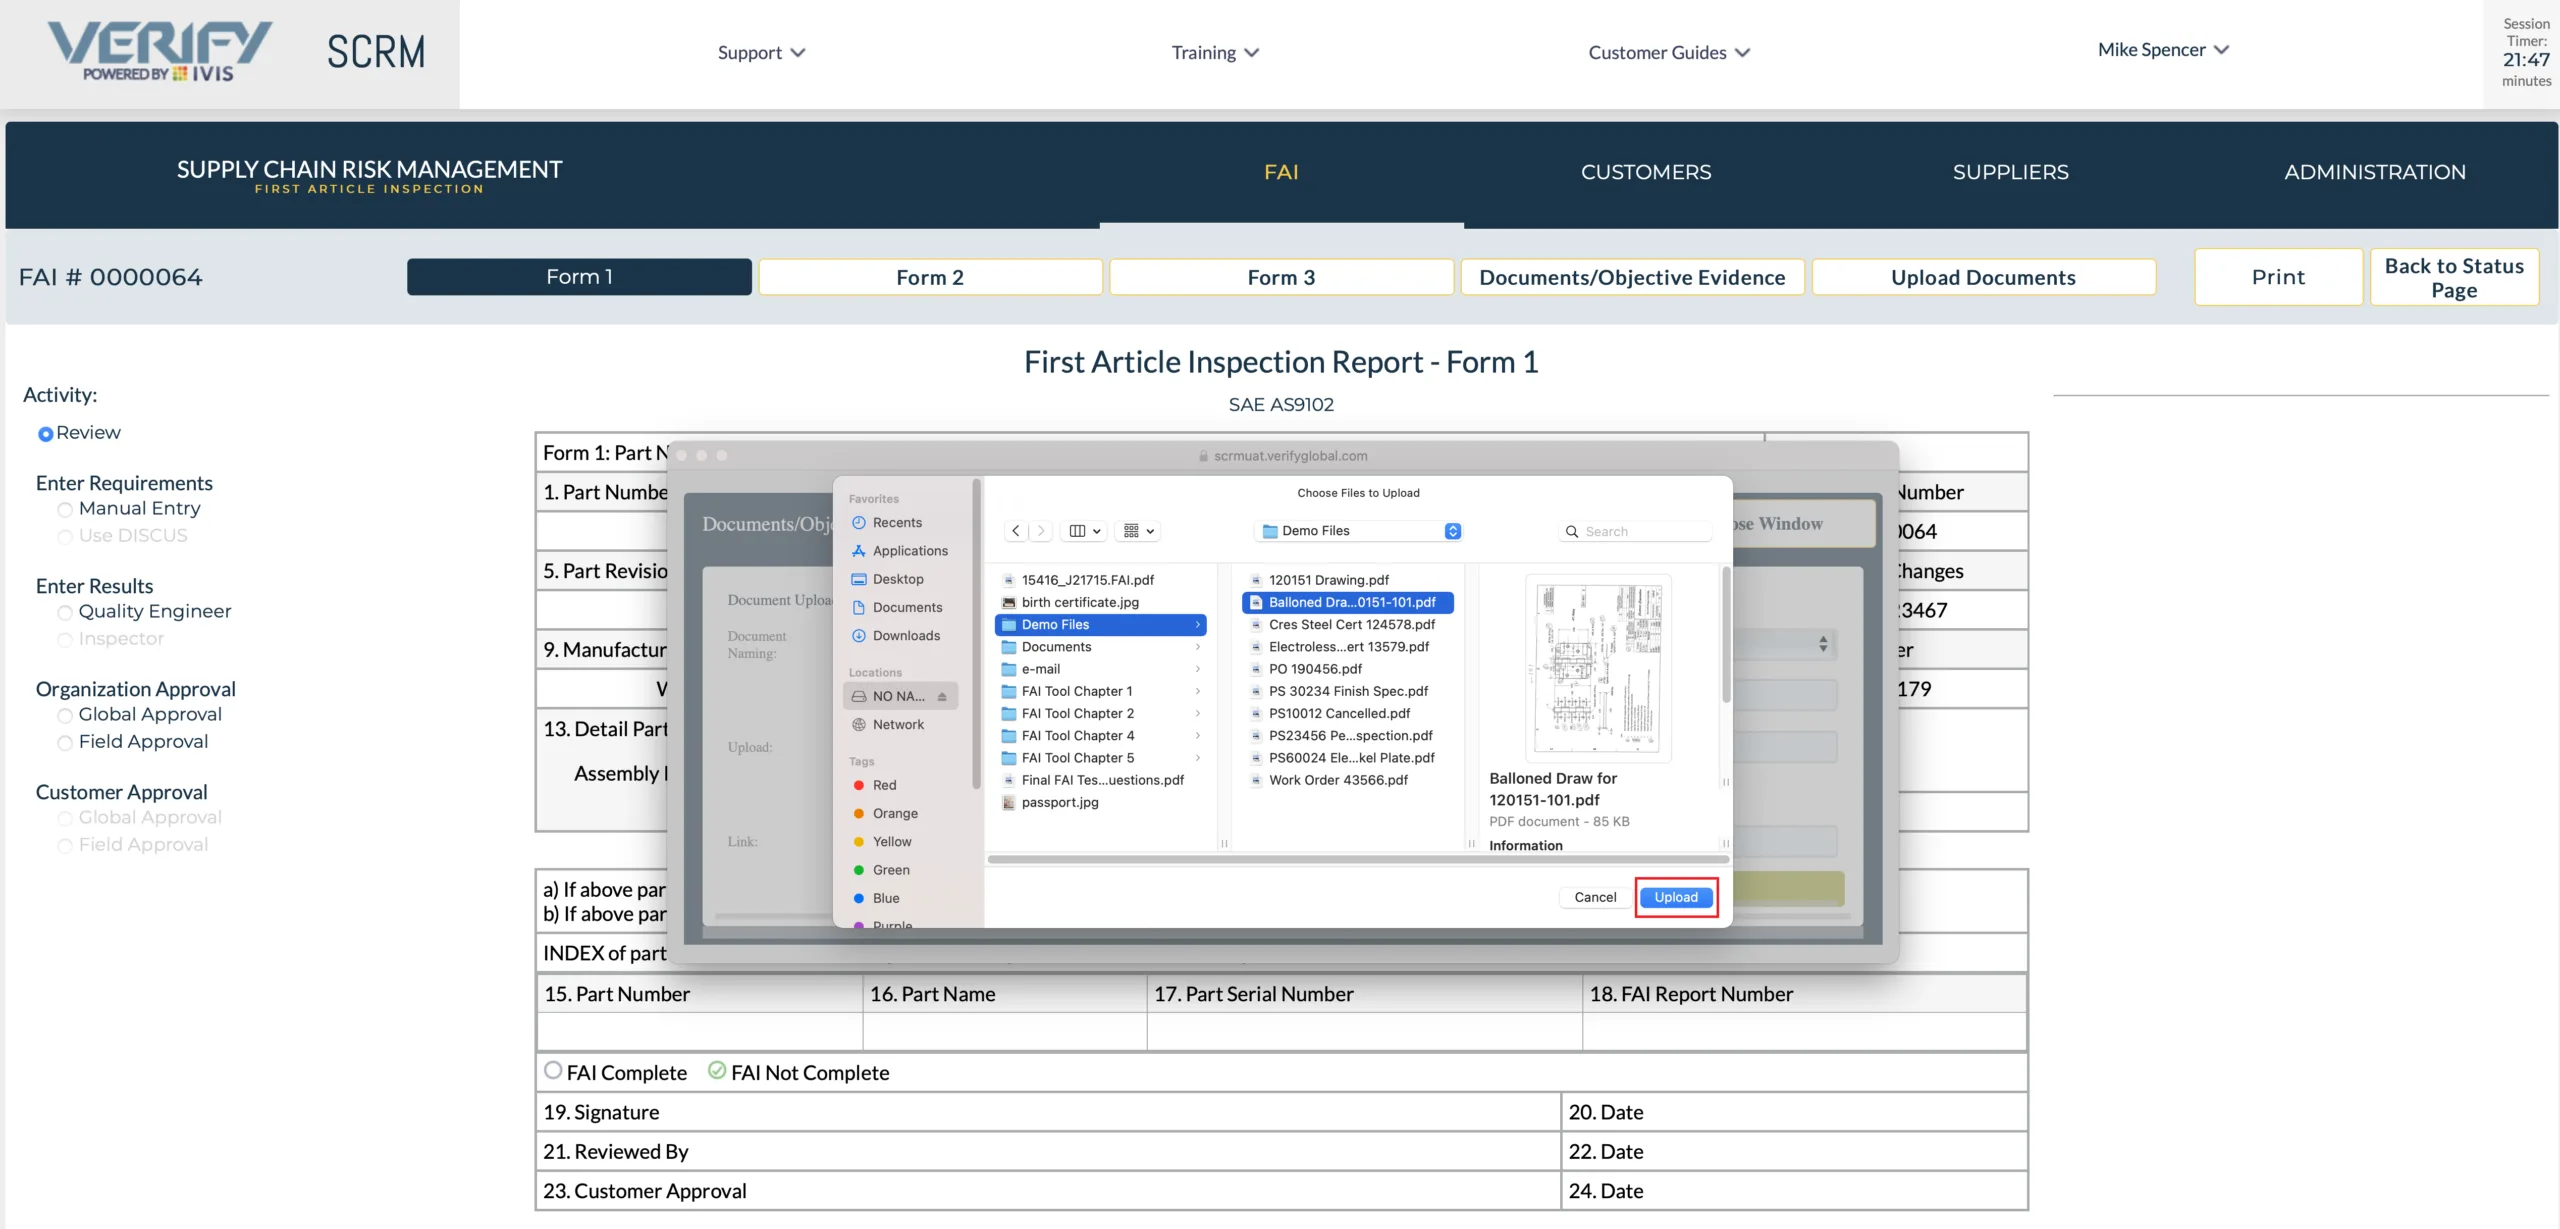
The FAI Application will allow the user to choose any file the user’s computer has access to. Select a file and click “open” or “upload”.
The FAI Application now has all the information it needs to identify and upload the Document/Objective Evidence. Alternatively, a URL or web address (1) can be entered if this is desired. Click on “Upload/Link File” (2) to complete the document upload into the Secure File server. The user will receive positive visual feedback that the document has uploaded. At this point you can upload another document or to exit the upload feature, click “Close Window”.
To confirm or retrieve your document, click on the “Documents/Objective Evidence Tab” (1). The resulting pop-up box will display the document the user has uploaded to this FAI. When we Click on the document we just uploaded (2), two-factor authentication takes place in order to read the document.

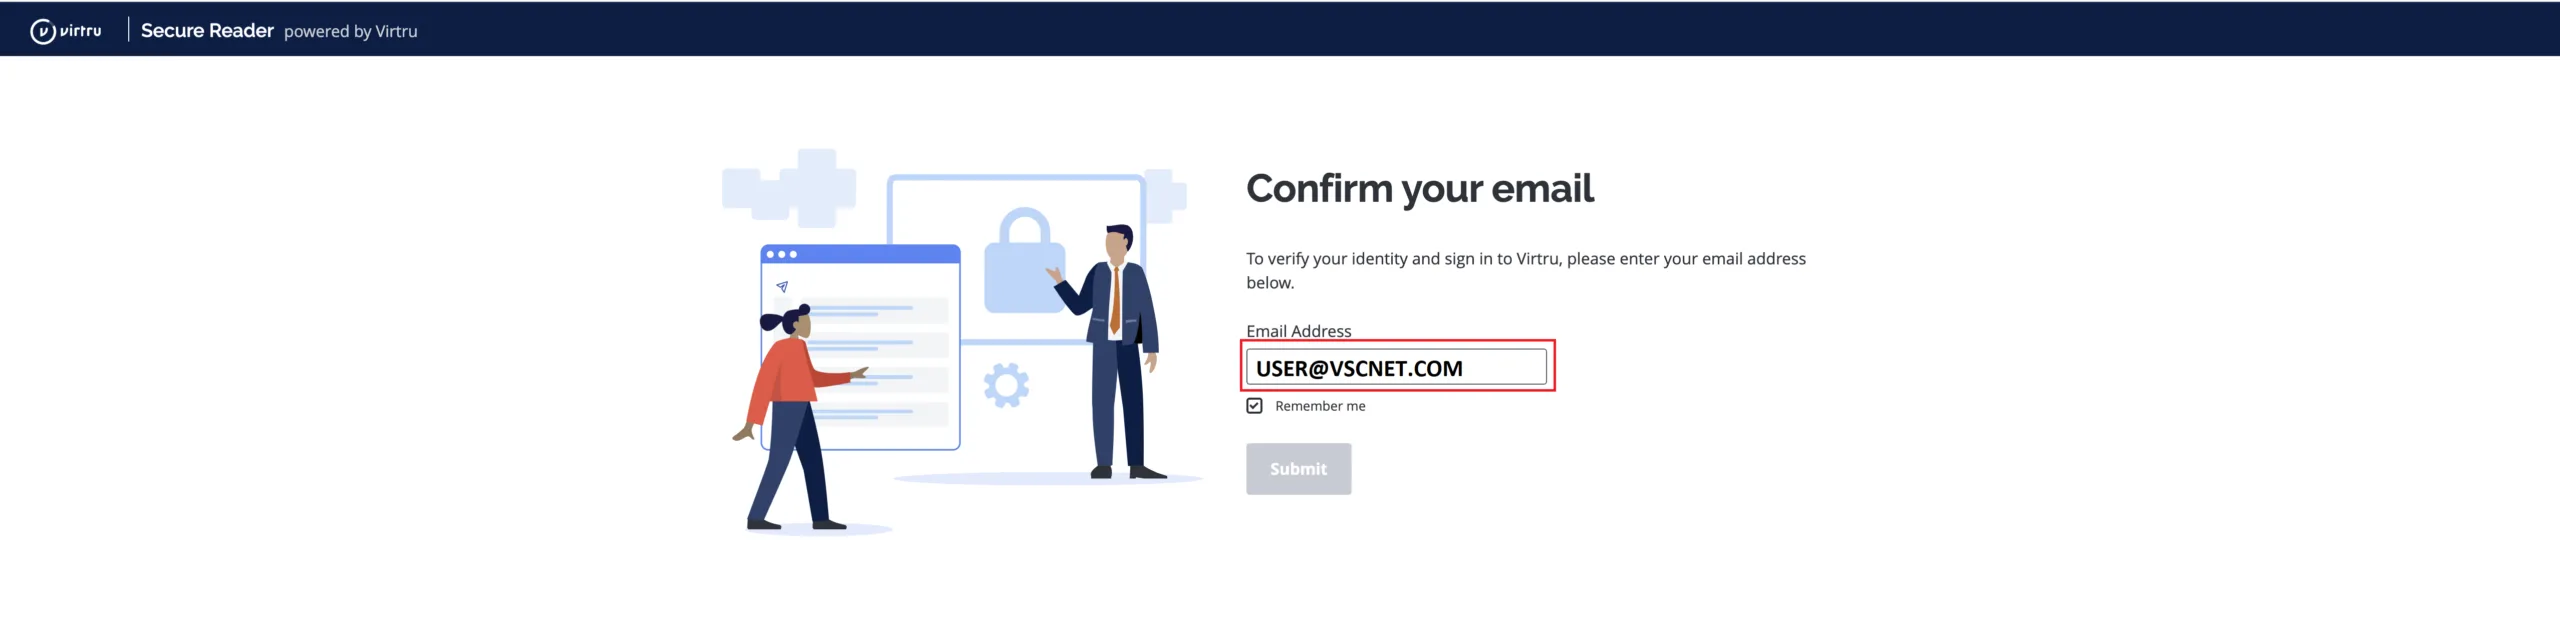
The user will be asked to confirm their email address….we enter the email address that is associated with the user in the FAI System and click submit.
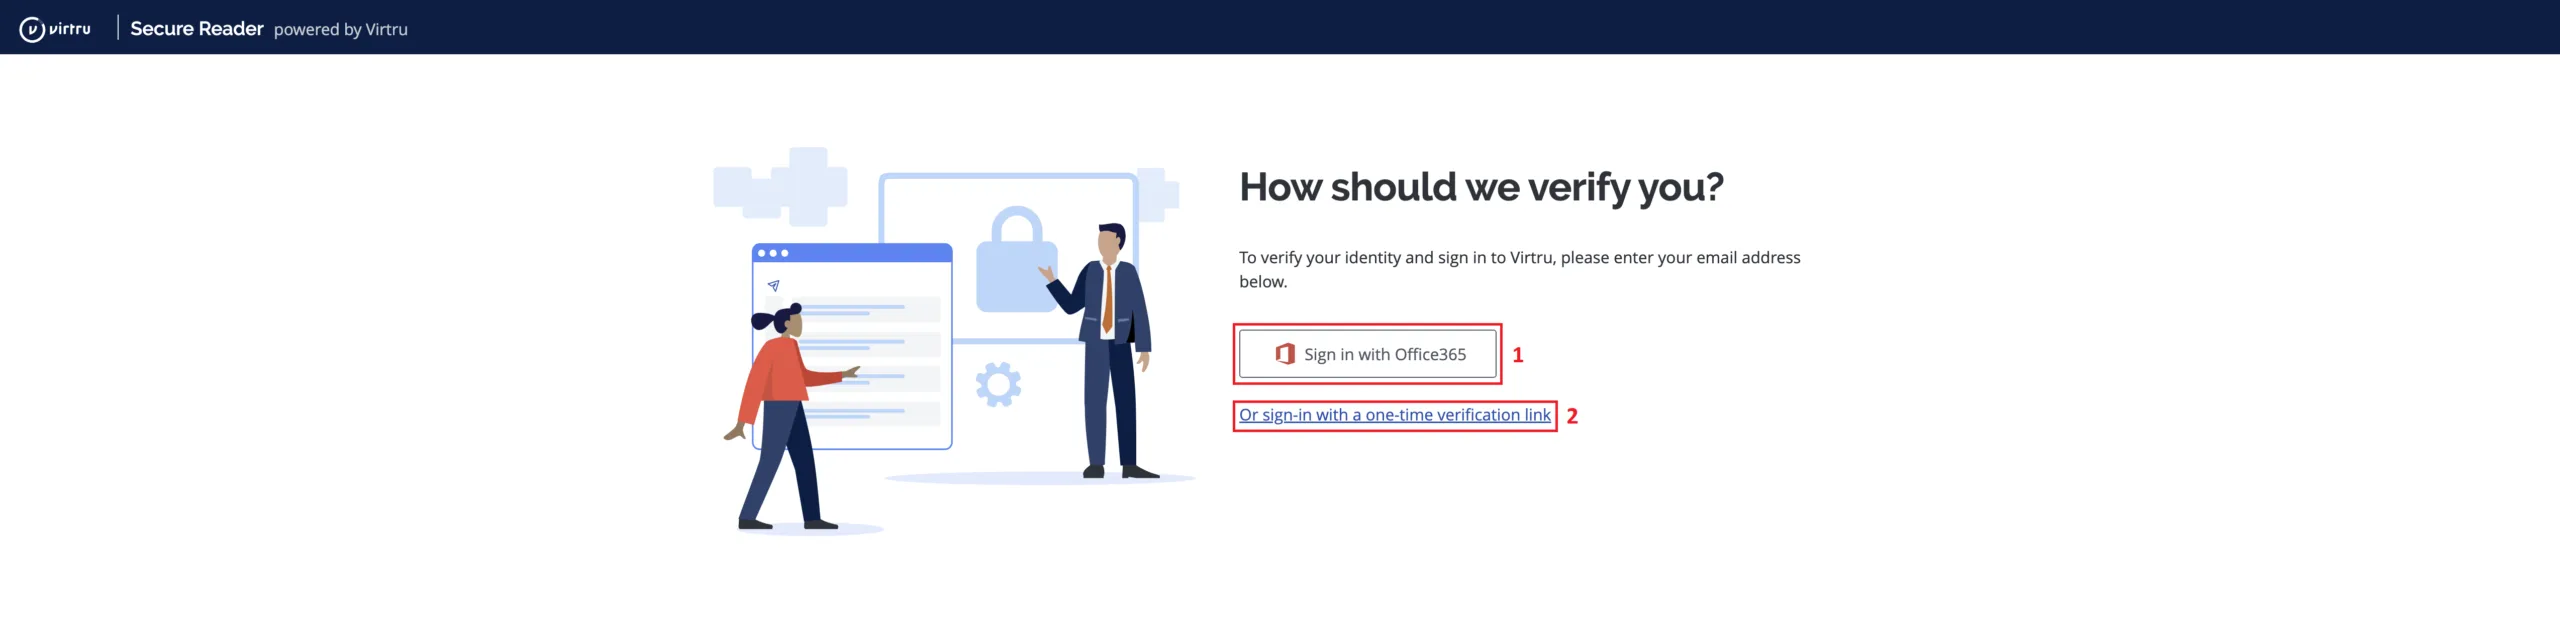
After clicking “Submit”, the FAI Application will ask the user how they want to be verified. If the user has Office365 installed on their computer, select “Sign in with Office365” (1) and follow the prompts. If the user is not using Office365, select the “One time verification link” (2). If you are not sure if you are using Office365, select the one-time verification link.
The FAI Application will email to the user a “One Time Verification Link usable for the entire session. Click on the “Verify Me” Link (1).
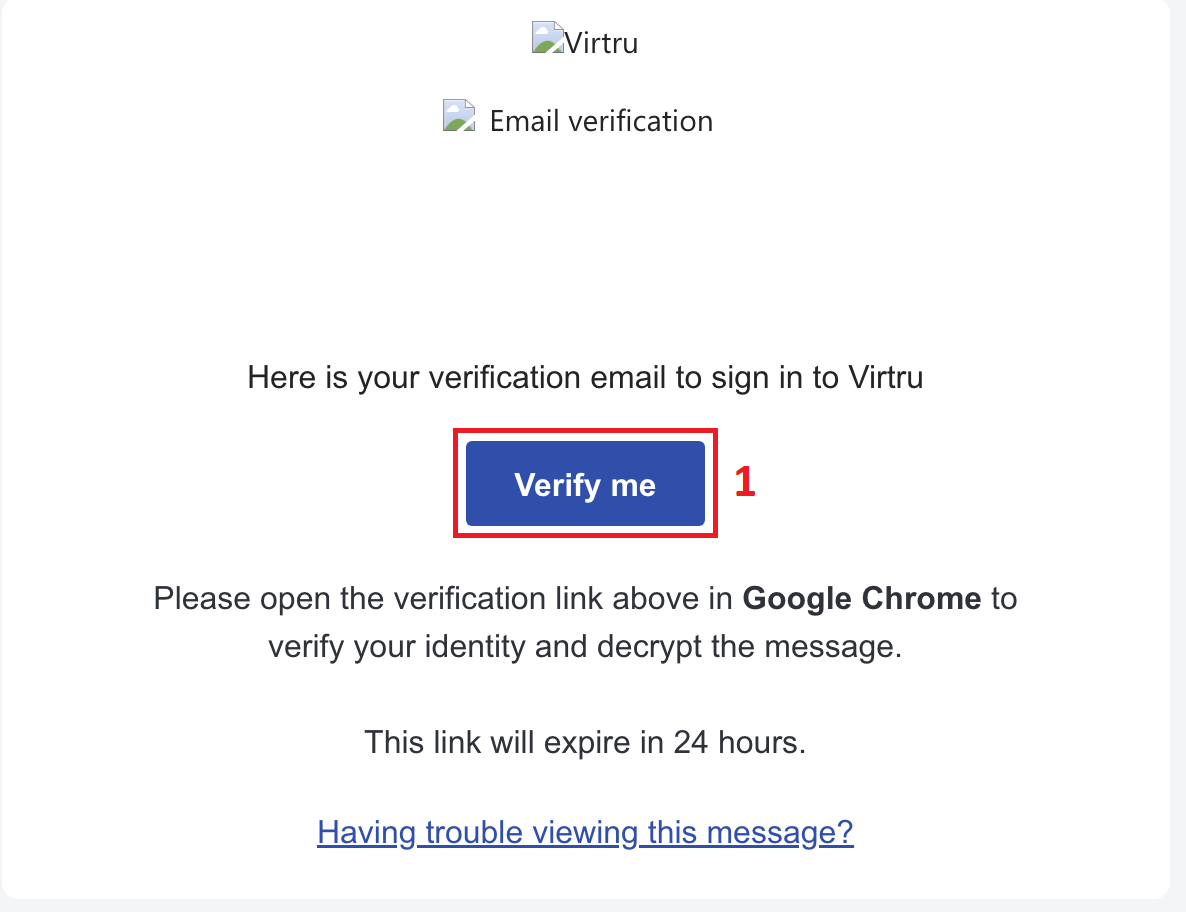
Once the user has selected the “Verify Me” Link, the FAI Application will open the document in another tab within a secure reader. The document cannot be downloaded, edited or saved from the secure reader.
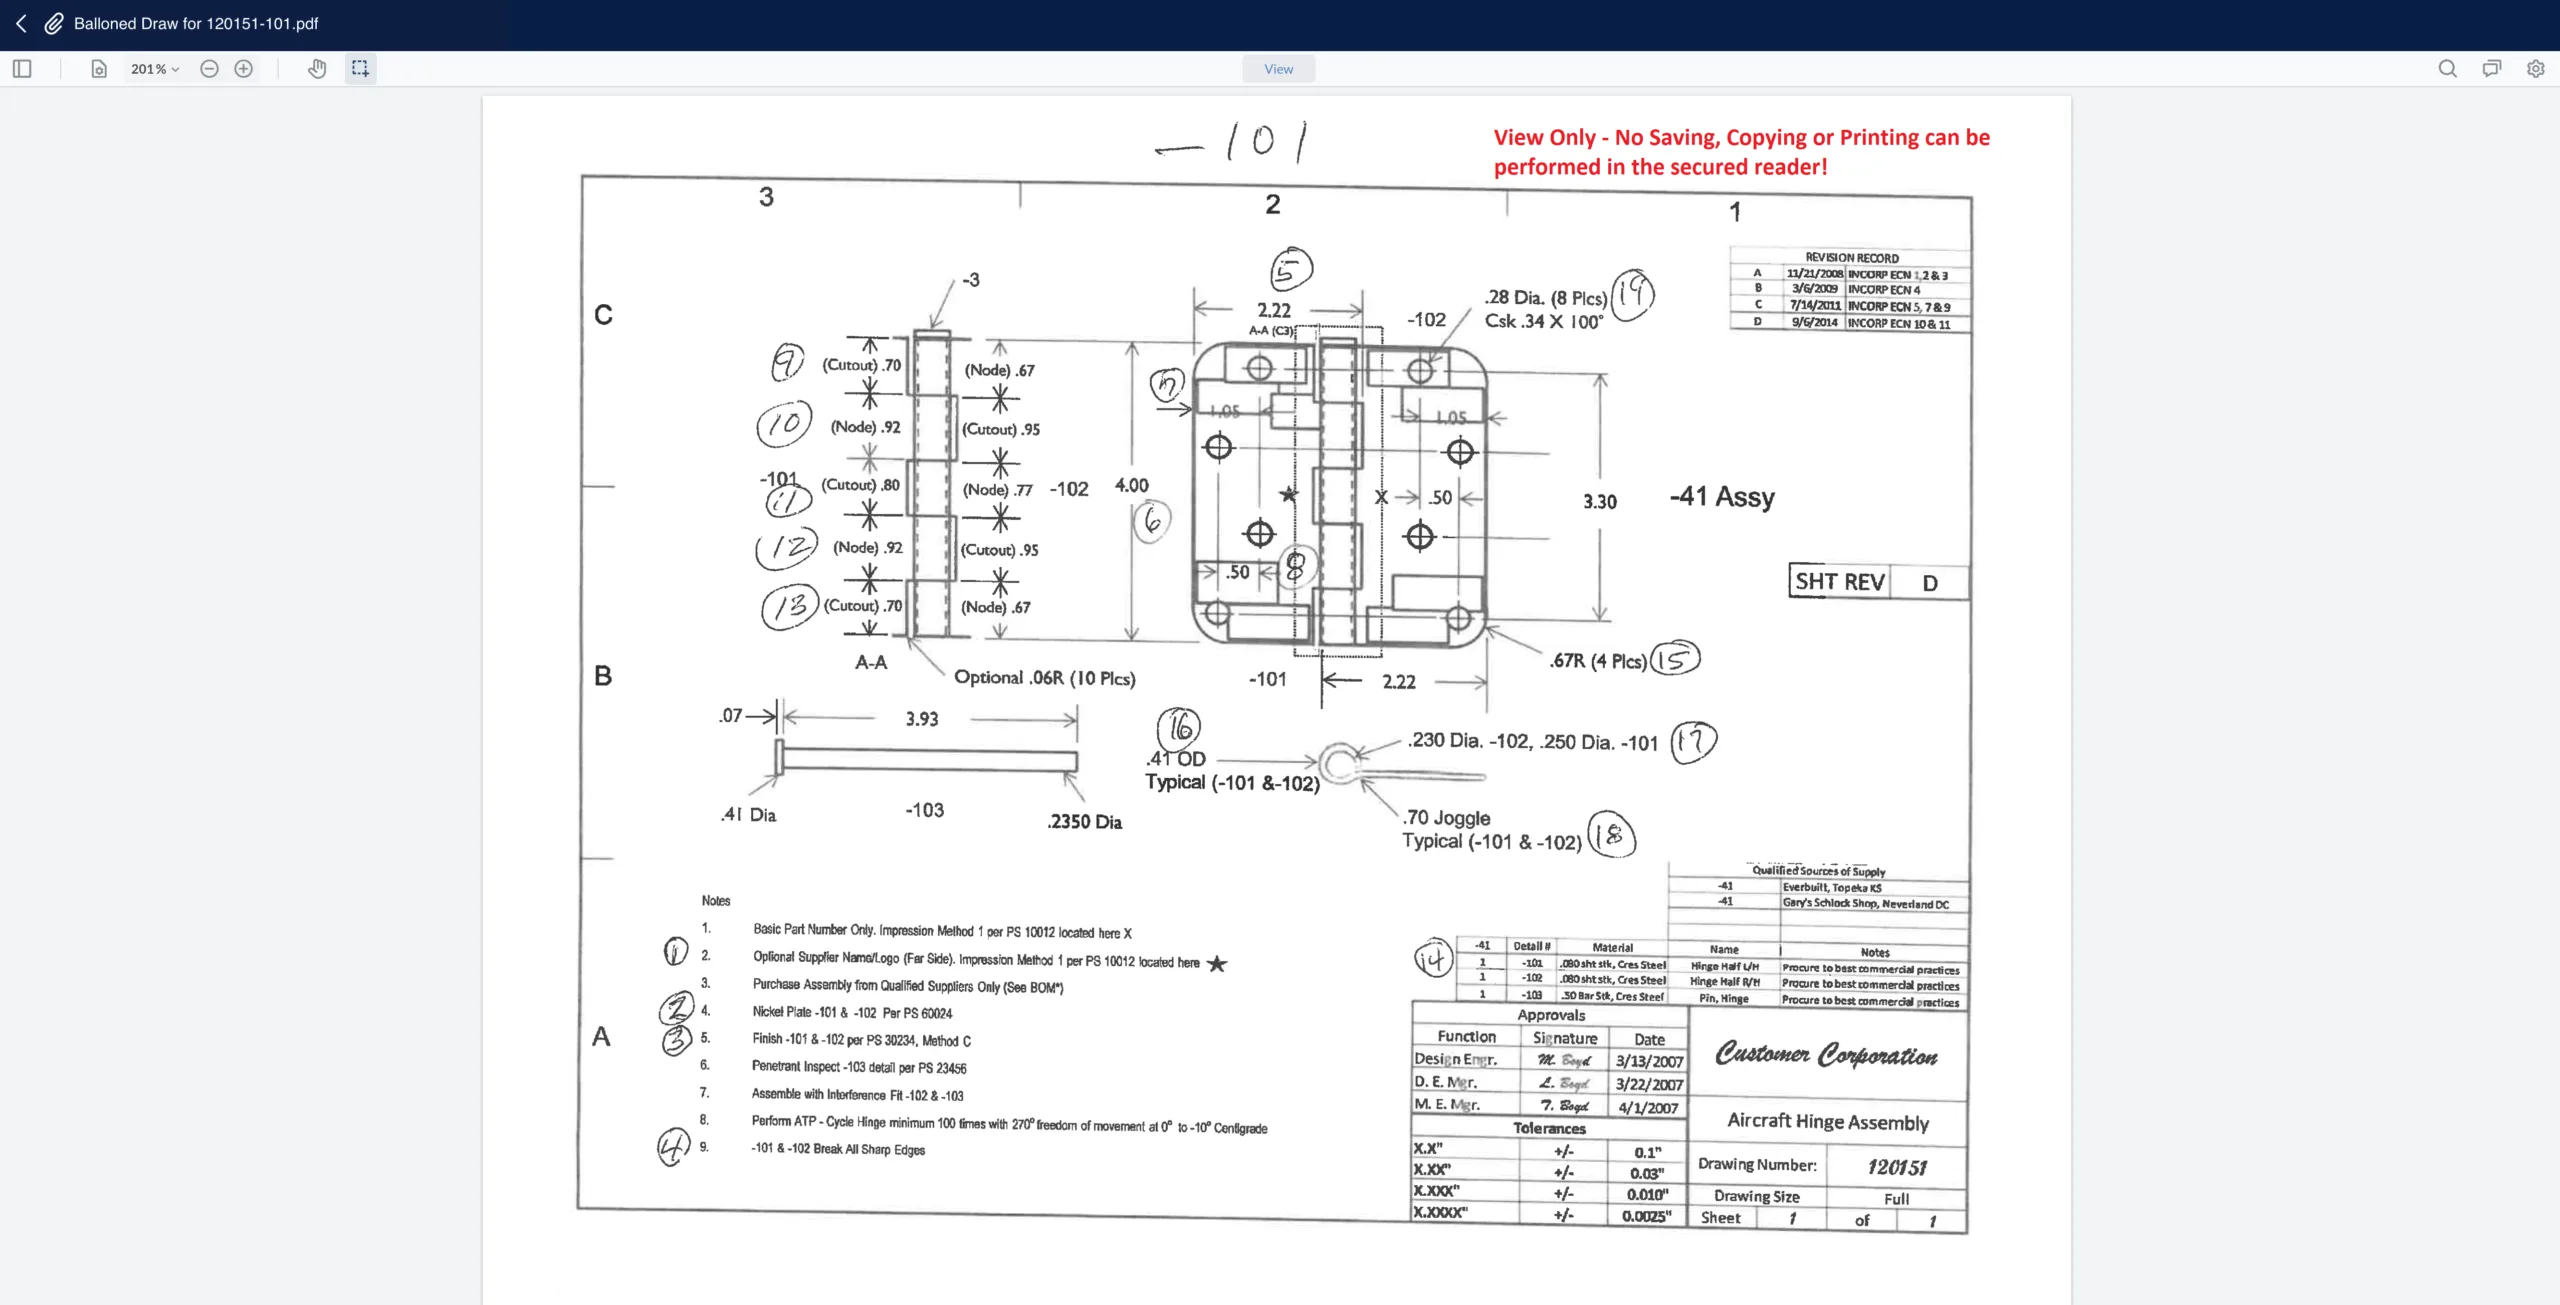
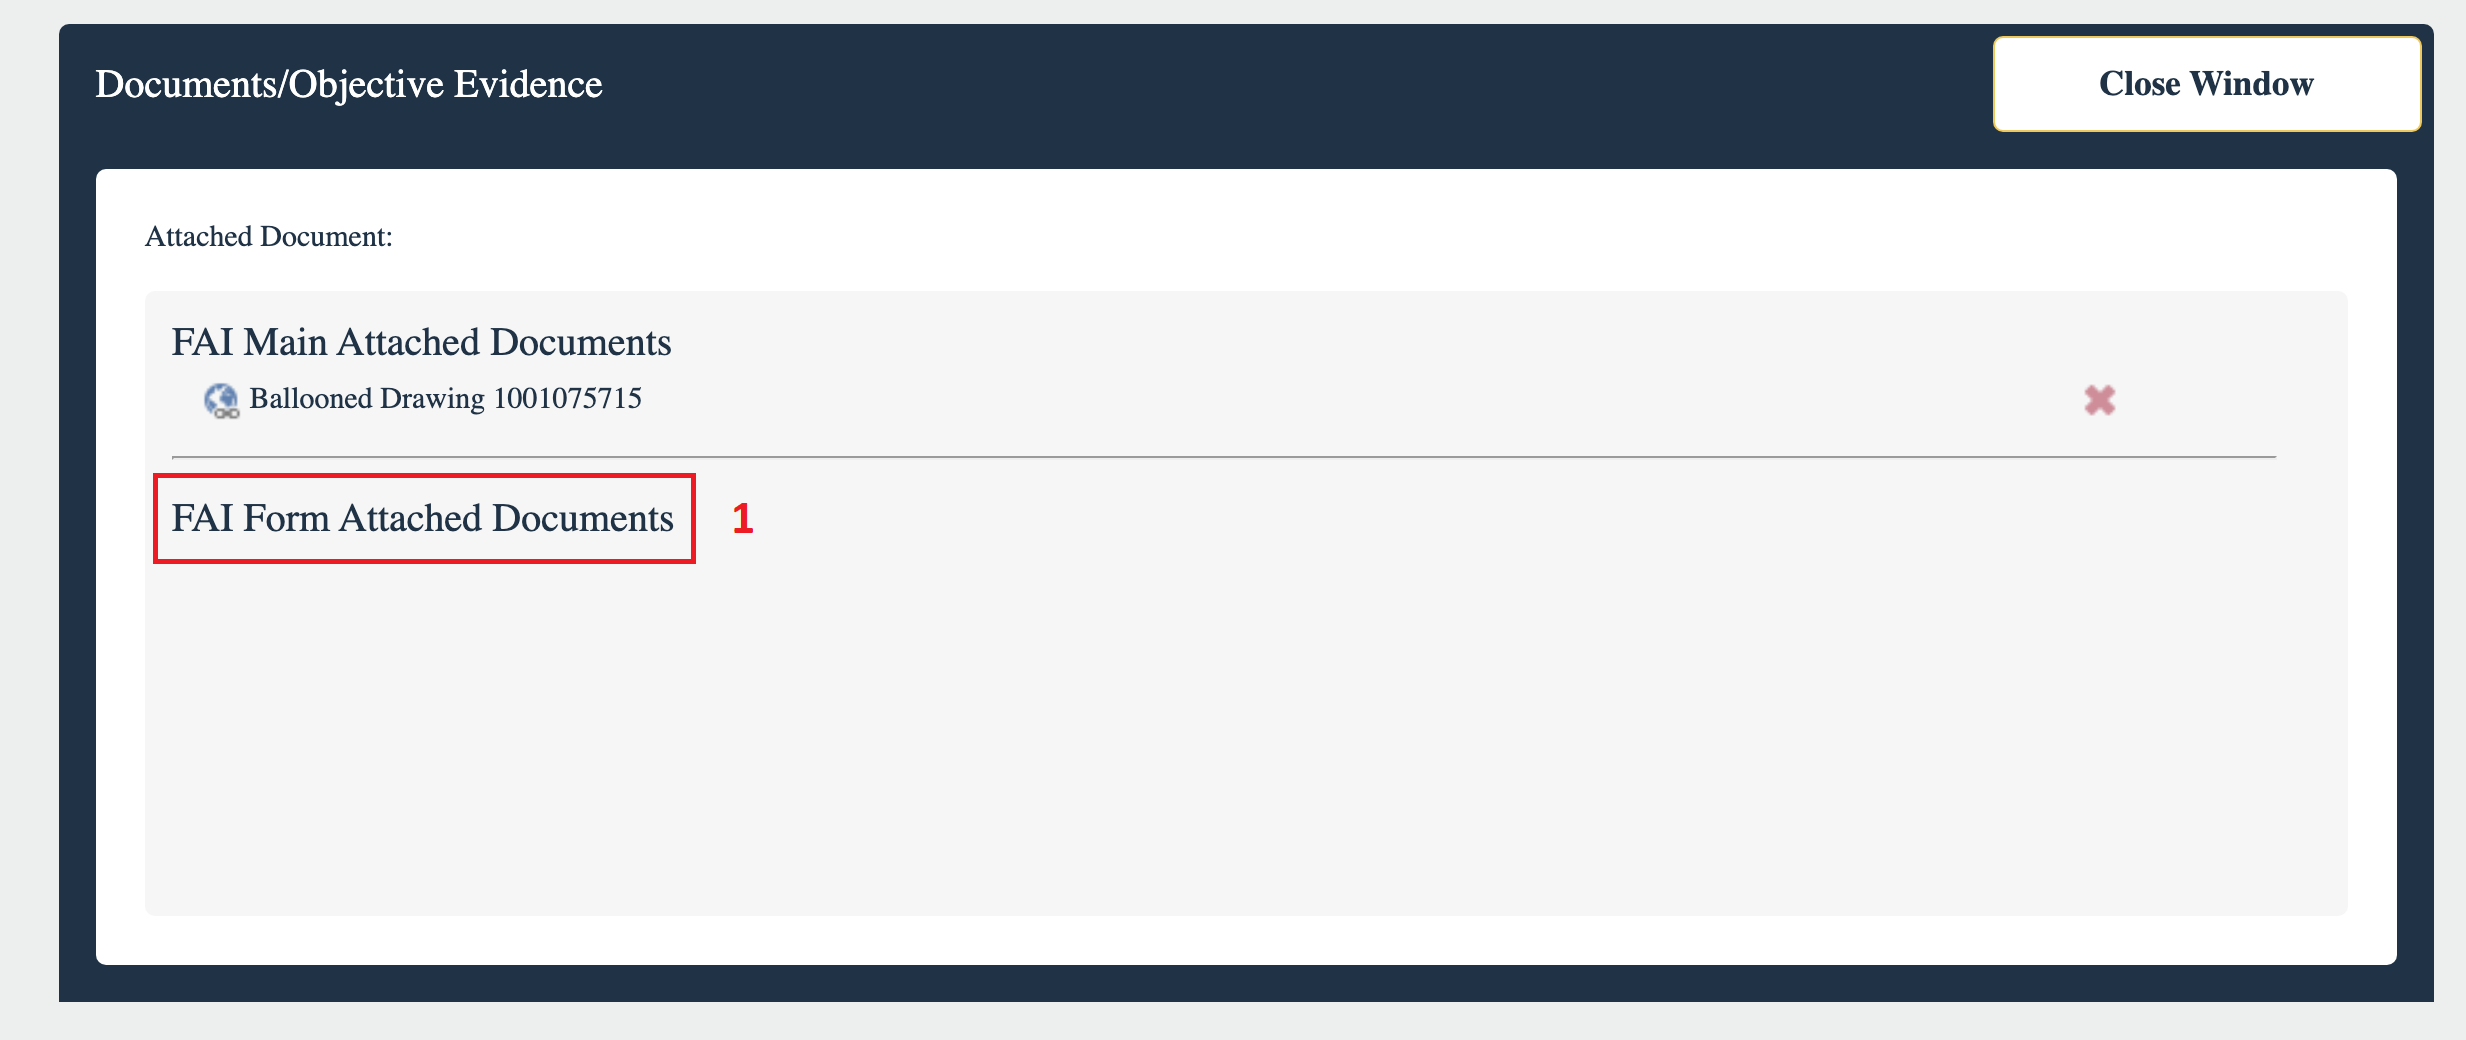
Notice the Documents/Objective Evidence Popup box is organized into two sections, the FAI “Main” Attached Documents and below that, the FAI “Form” Attached Documents (1). The document we uploaded earlier was via the “Documents/Objective Evidence” tab, but you can also upload or attach a document to a specific FAI Form and Field Number. To do so look for the “Paperclip Icon” in fields suitable for document uploads.
Click on the paperclip icon (1) within a particular field and the document upload process begins as before. This time however, we move straight to the upload popup box without further authentication since we are working within the same FAI session.
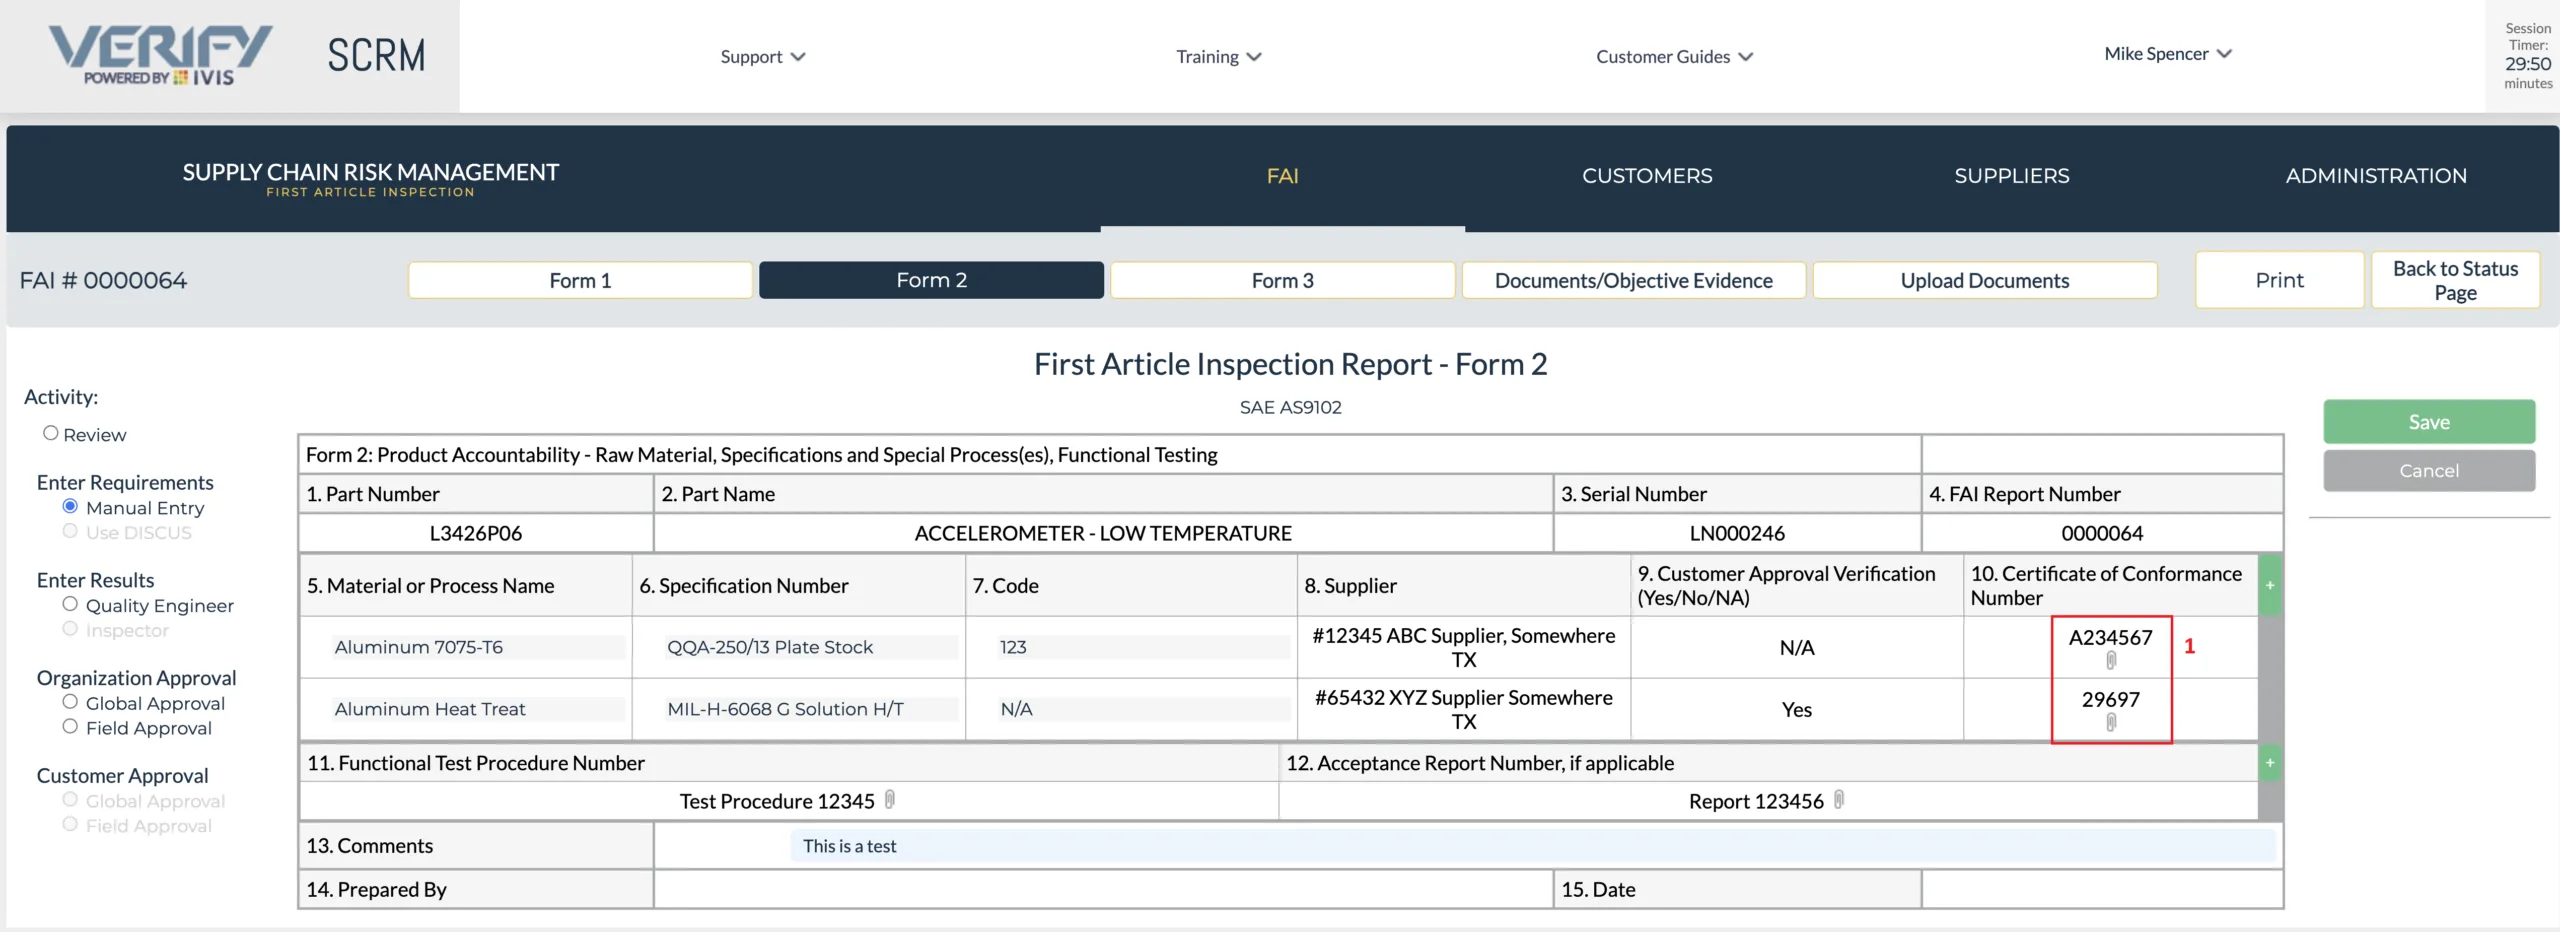
Once the user has uploaded/attached the document to a specific field, the icon in that field changes to a “Document” icon (1) indicating there is an attachment association with that field. If you want to view that document, click on the document icon (1), or you can click on the Documents/Objective Evidence Tab (2).

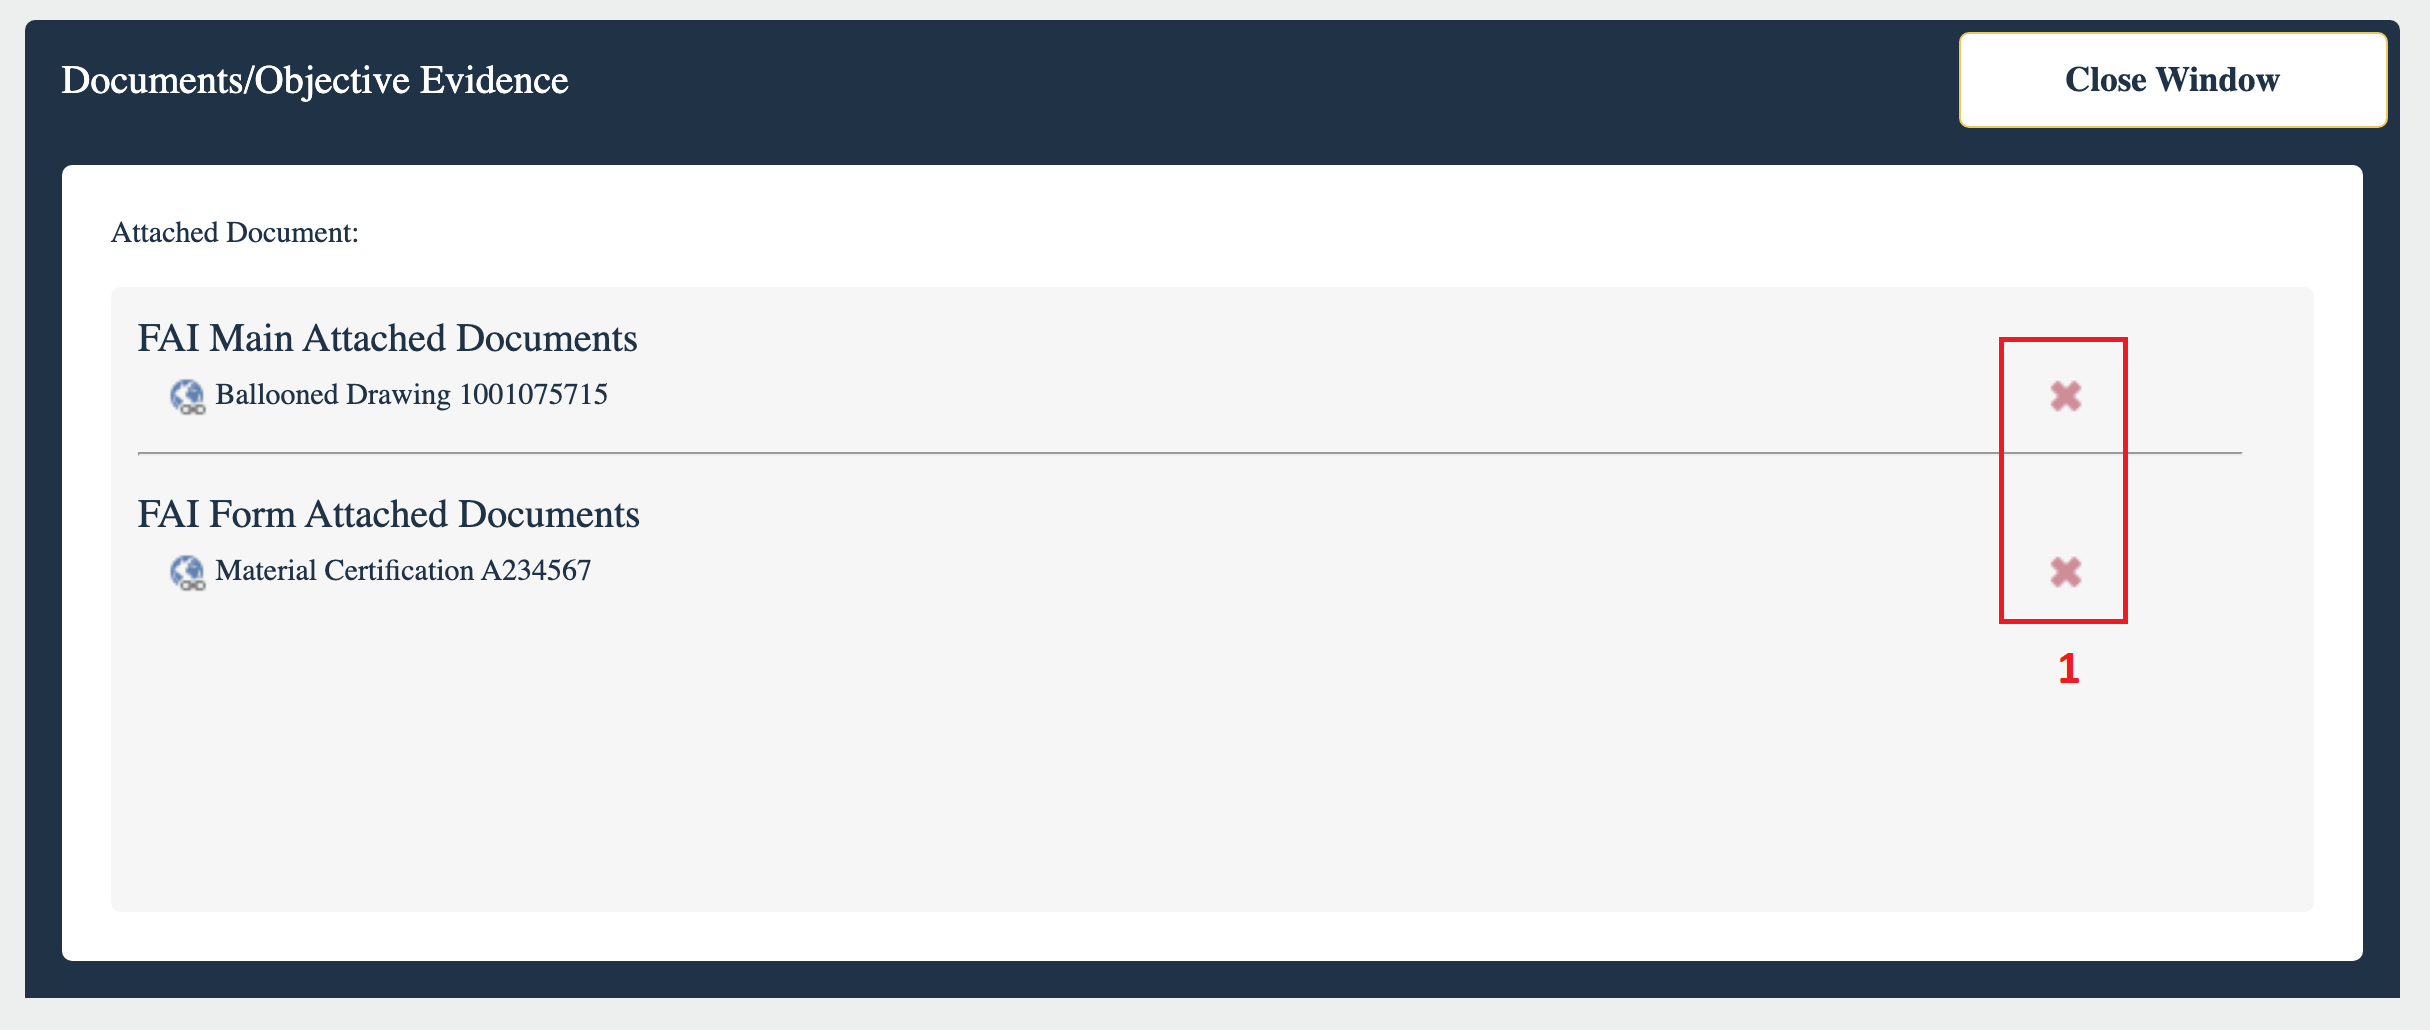
The Documents/Objective Evidence Tab popup box now displays both areas where documents can be uploaded, the main tab uploads and the form field uploads. If you are the document owner (the user that uploaded the document), you can delete the document from the FAI by clicking on the Red X (1), if you are not the document owner, the Red X will not be available. To leave this FAI, click on the “Back to Status Page” button (2).
From the status page, you can work on other FAIs, navigate back to the FAI menu or you can left click on the FAI number you were working on and return to that FAI. To logout, click on the drop-down arrow under your name (1) and select logout.