
To begin, login to SCRM with your user name and password. Your user name is your email address and your initial password is assigned by the system. Before you can access SCRM, you will receive an email from the system with your login credentials. If you forget your password, you can click on the RESET PASSWORD link on the login page to get a new password.

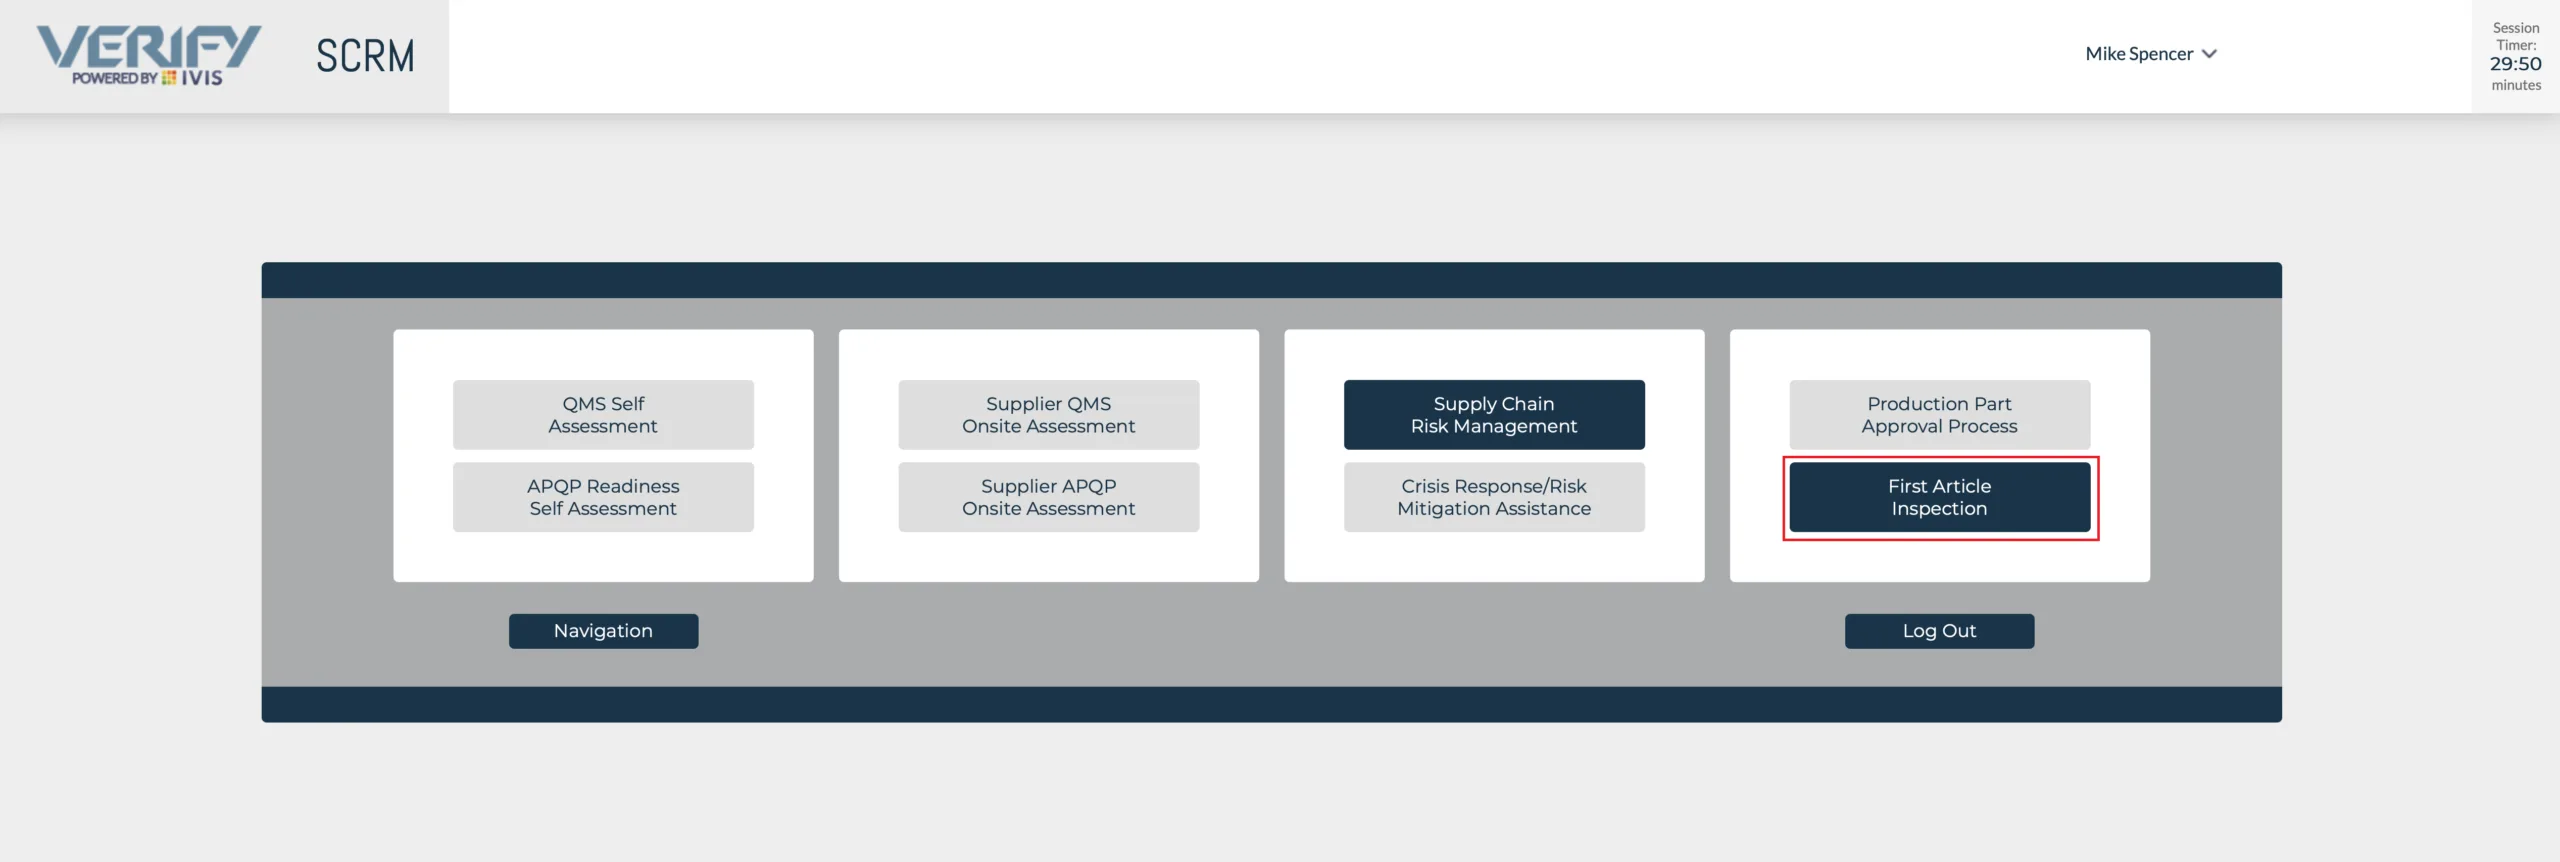
After login, every user will arrive on their landing page. The landing page consists of the various modules contained within the Supply Chain Risk Management Application. Only those applications that you have permission to access will be active, those that are not will be grayed out. For this tutorial, we want to access the First Article Inspection Application. To do so, we left click on the button titled “First Article Inspection”.
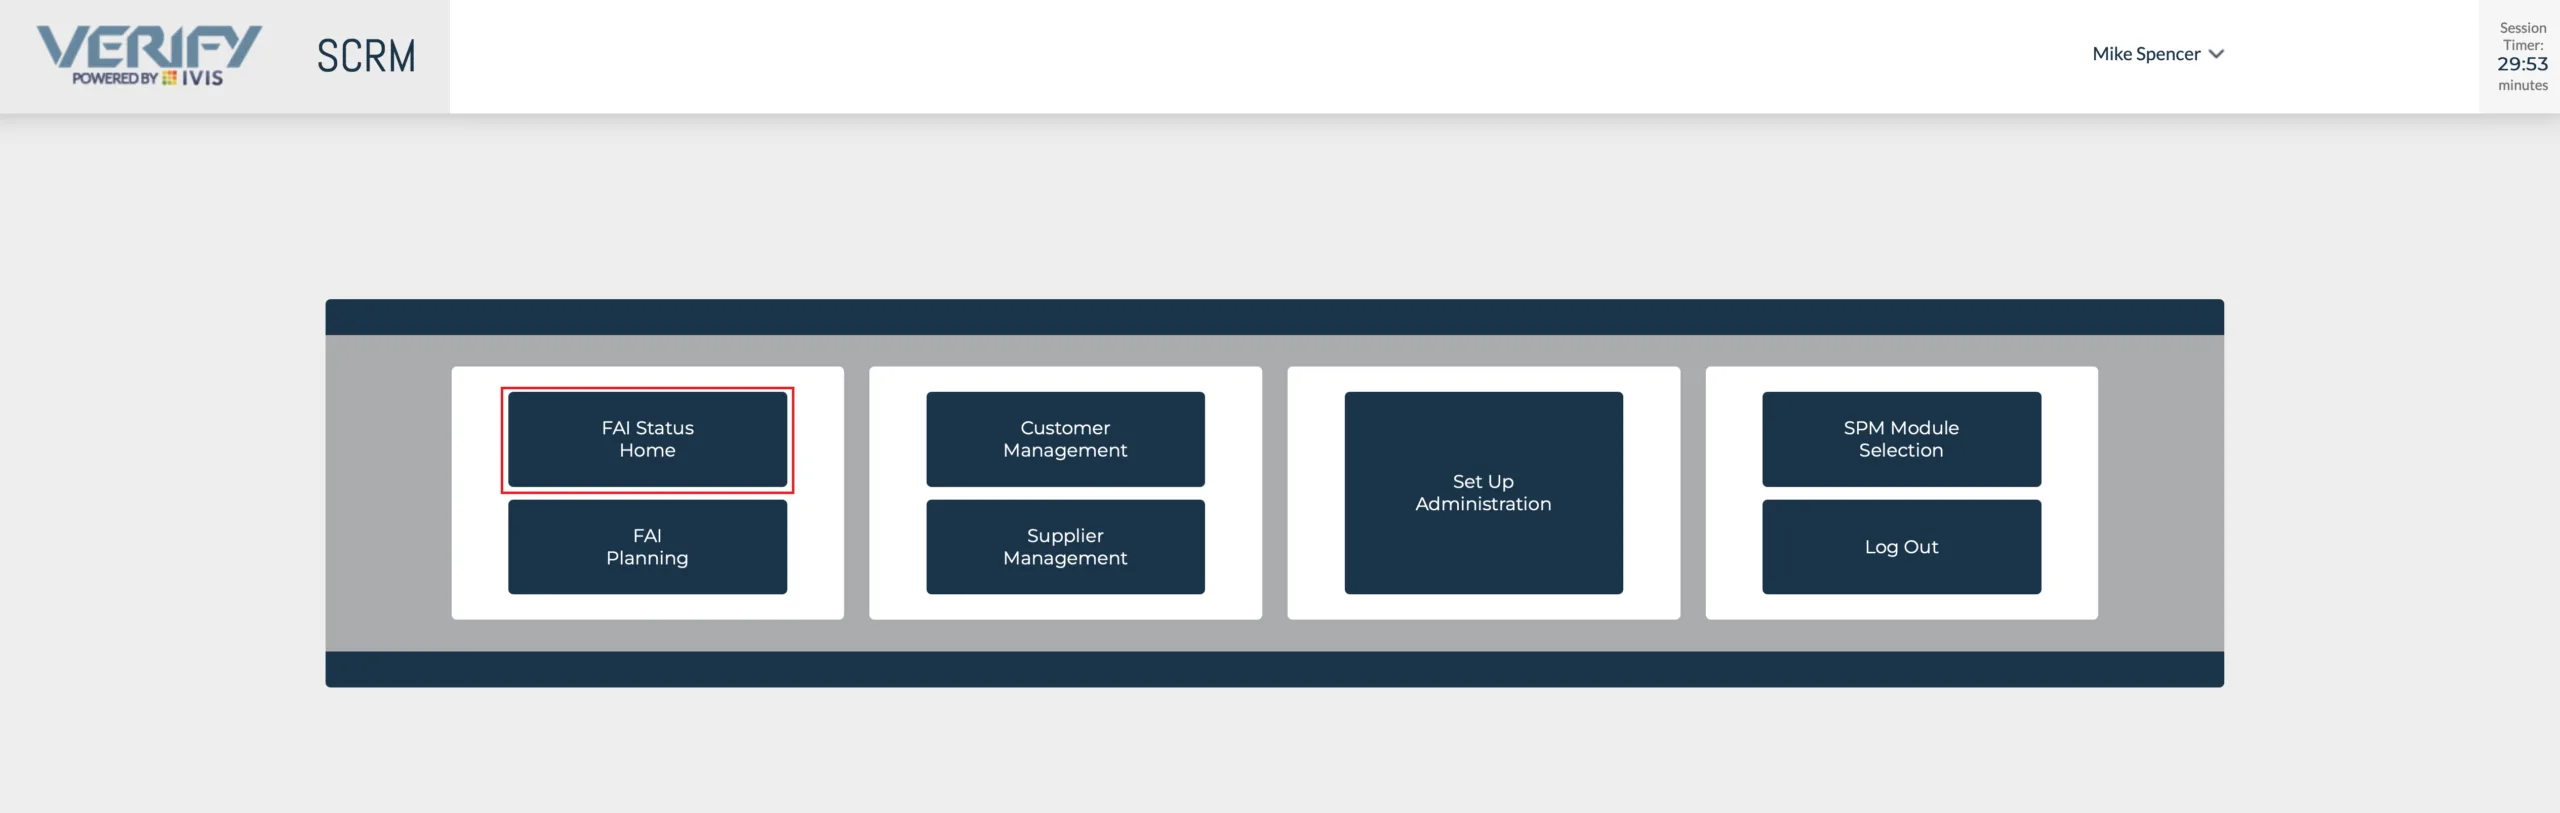
As in the prior menu, only those items you have permission to access will be active. There are several sub menus and actions you can access in the FAI menu. You can “Log Out”, Return to the previous menu, access; “Setup Administration”, Supplier Management”, “Customer Management”, “FAI Planning” and the “FAI Status Home”. For the purposes of this user guide, we’ll access FAIs by left clicking on the button “FAI Status home”.
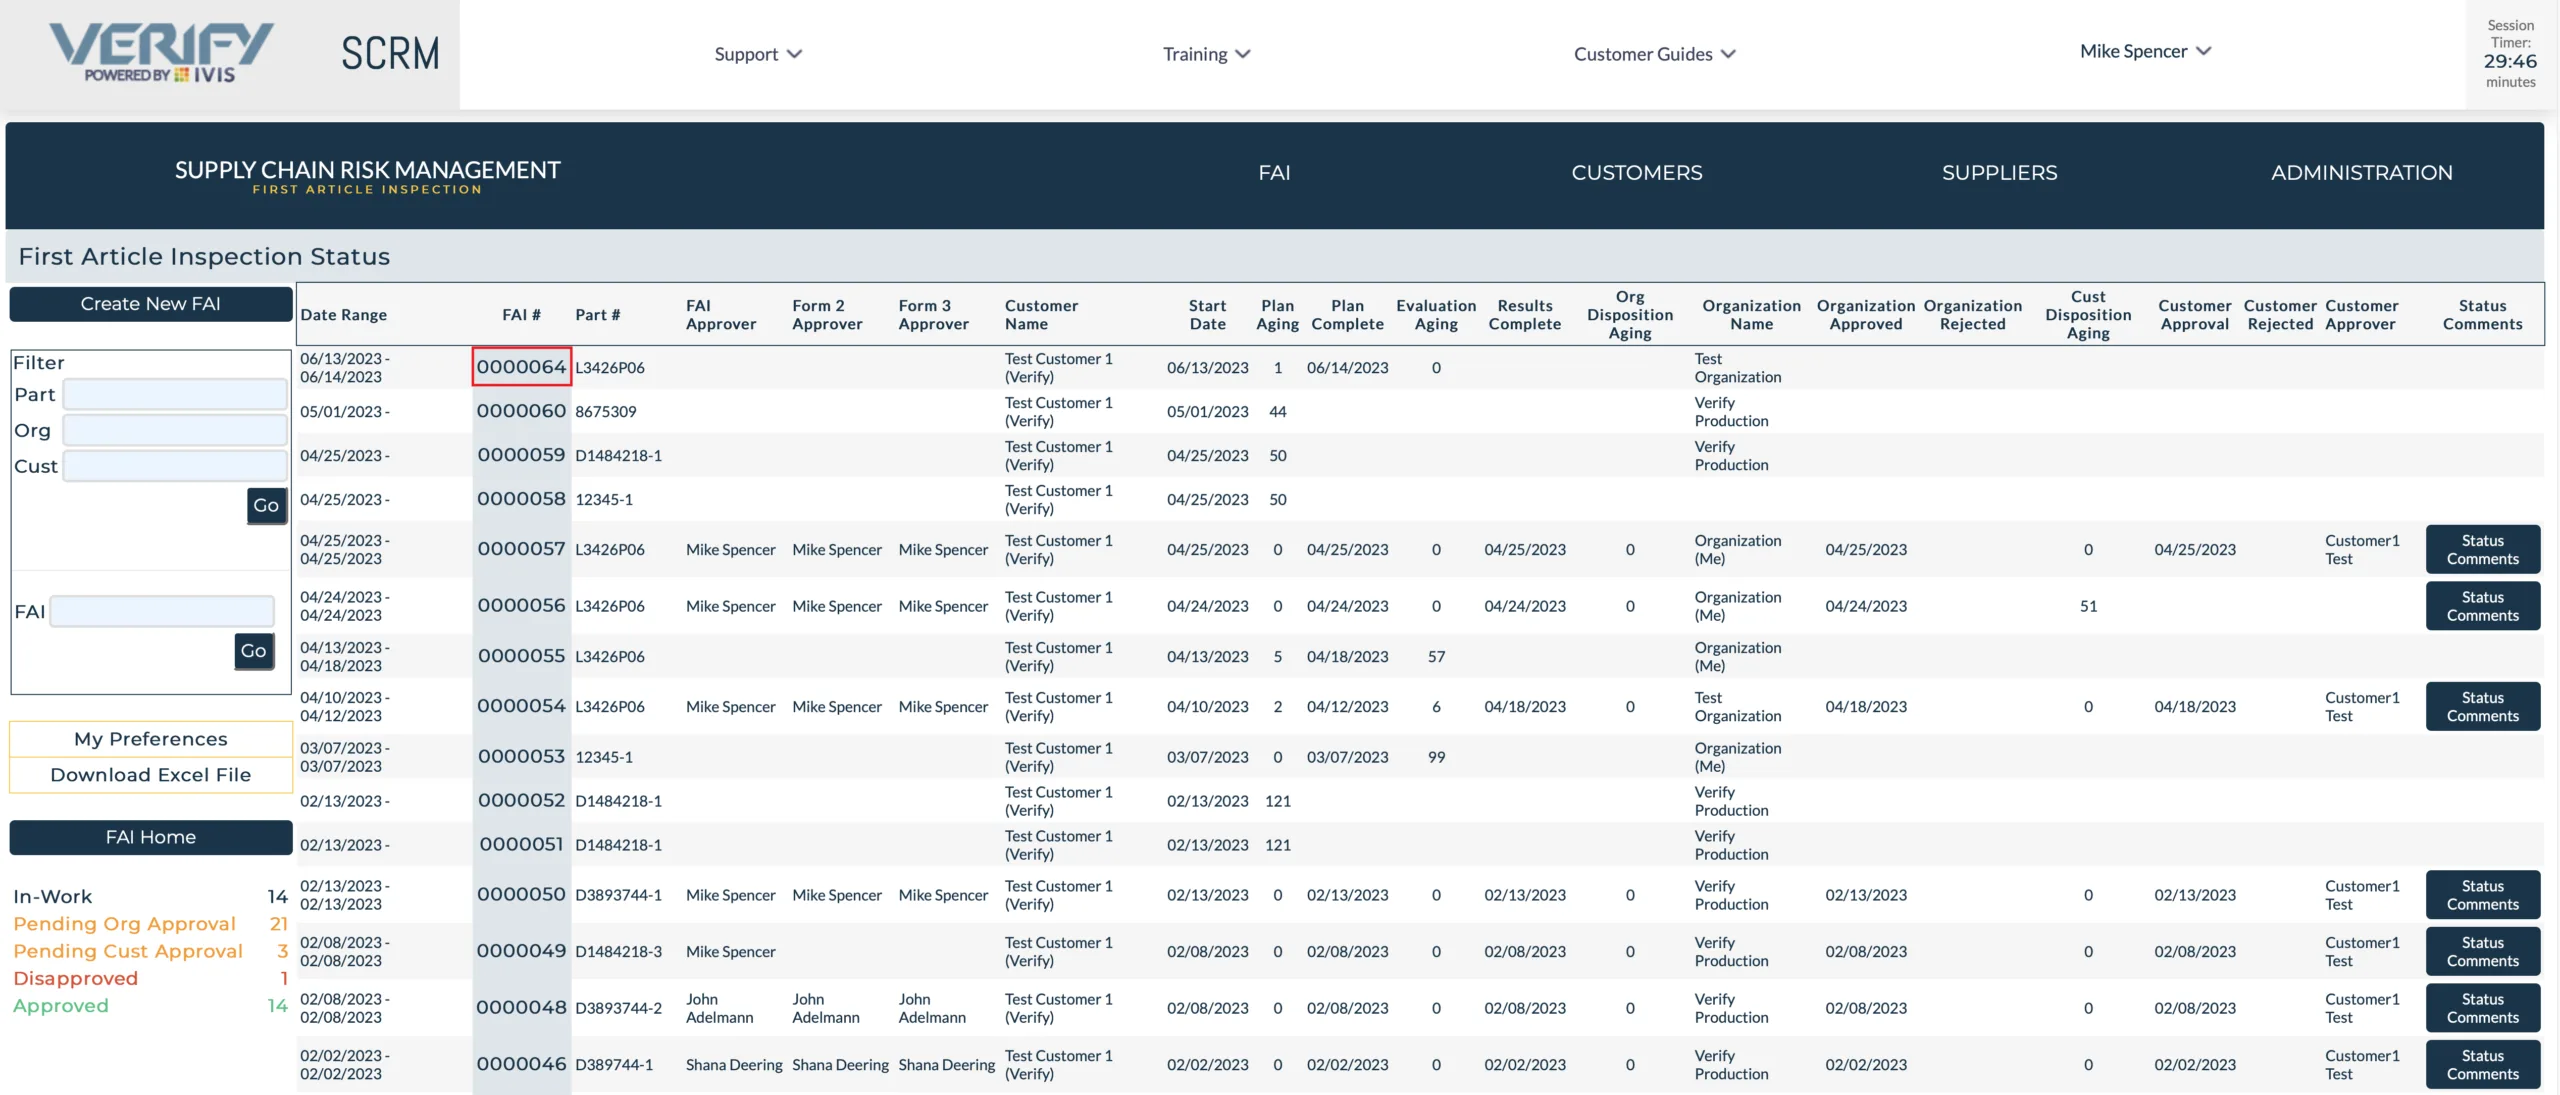
Create a New FAI or select an FAI you want to work on. For our purposes we’ll select FAI # 64.
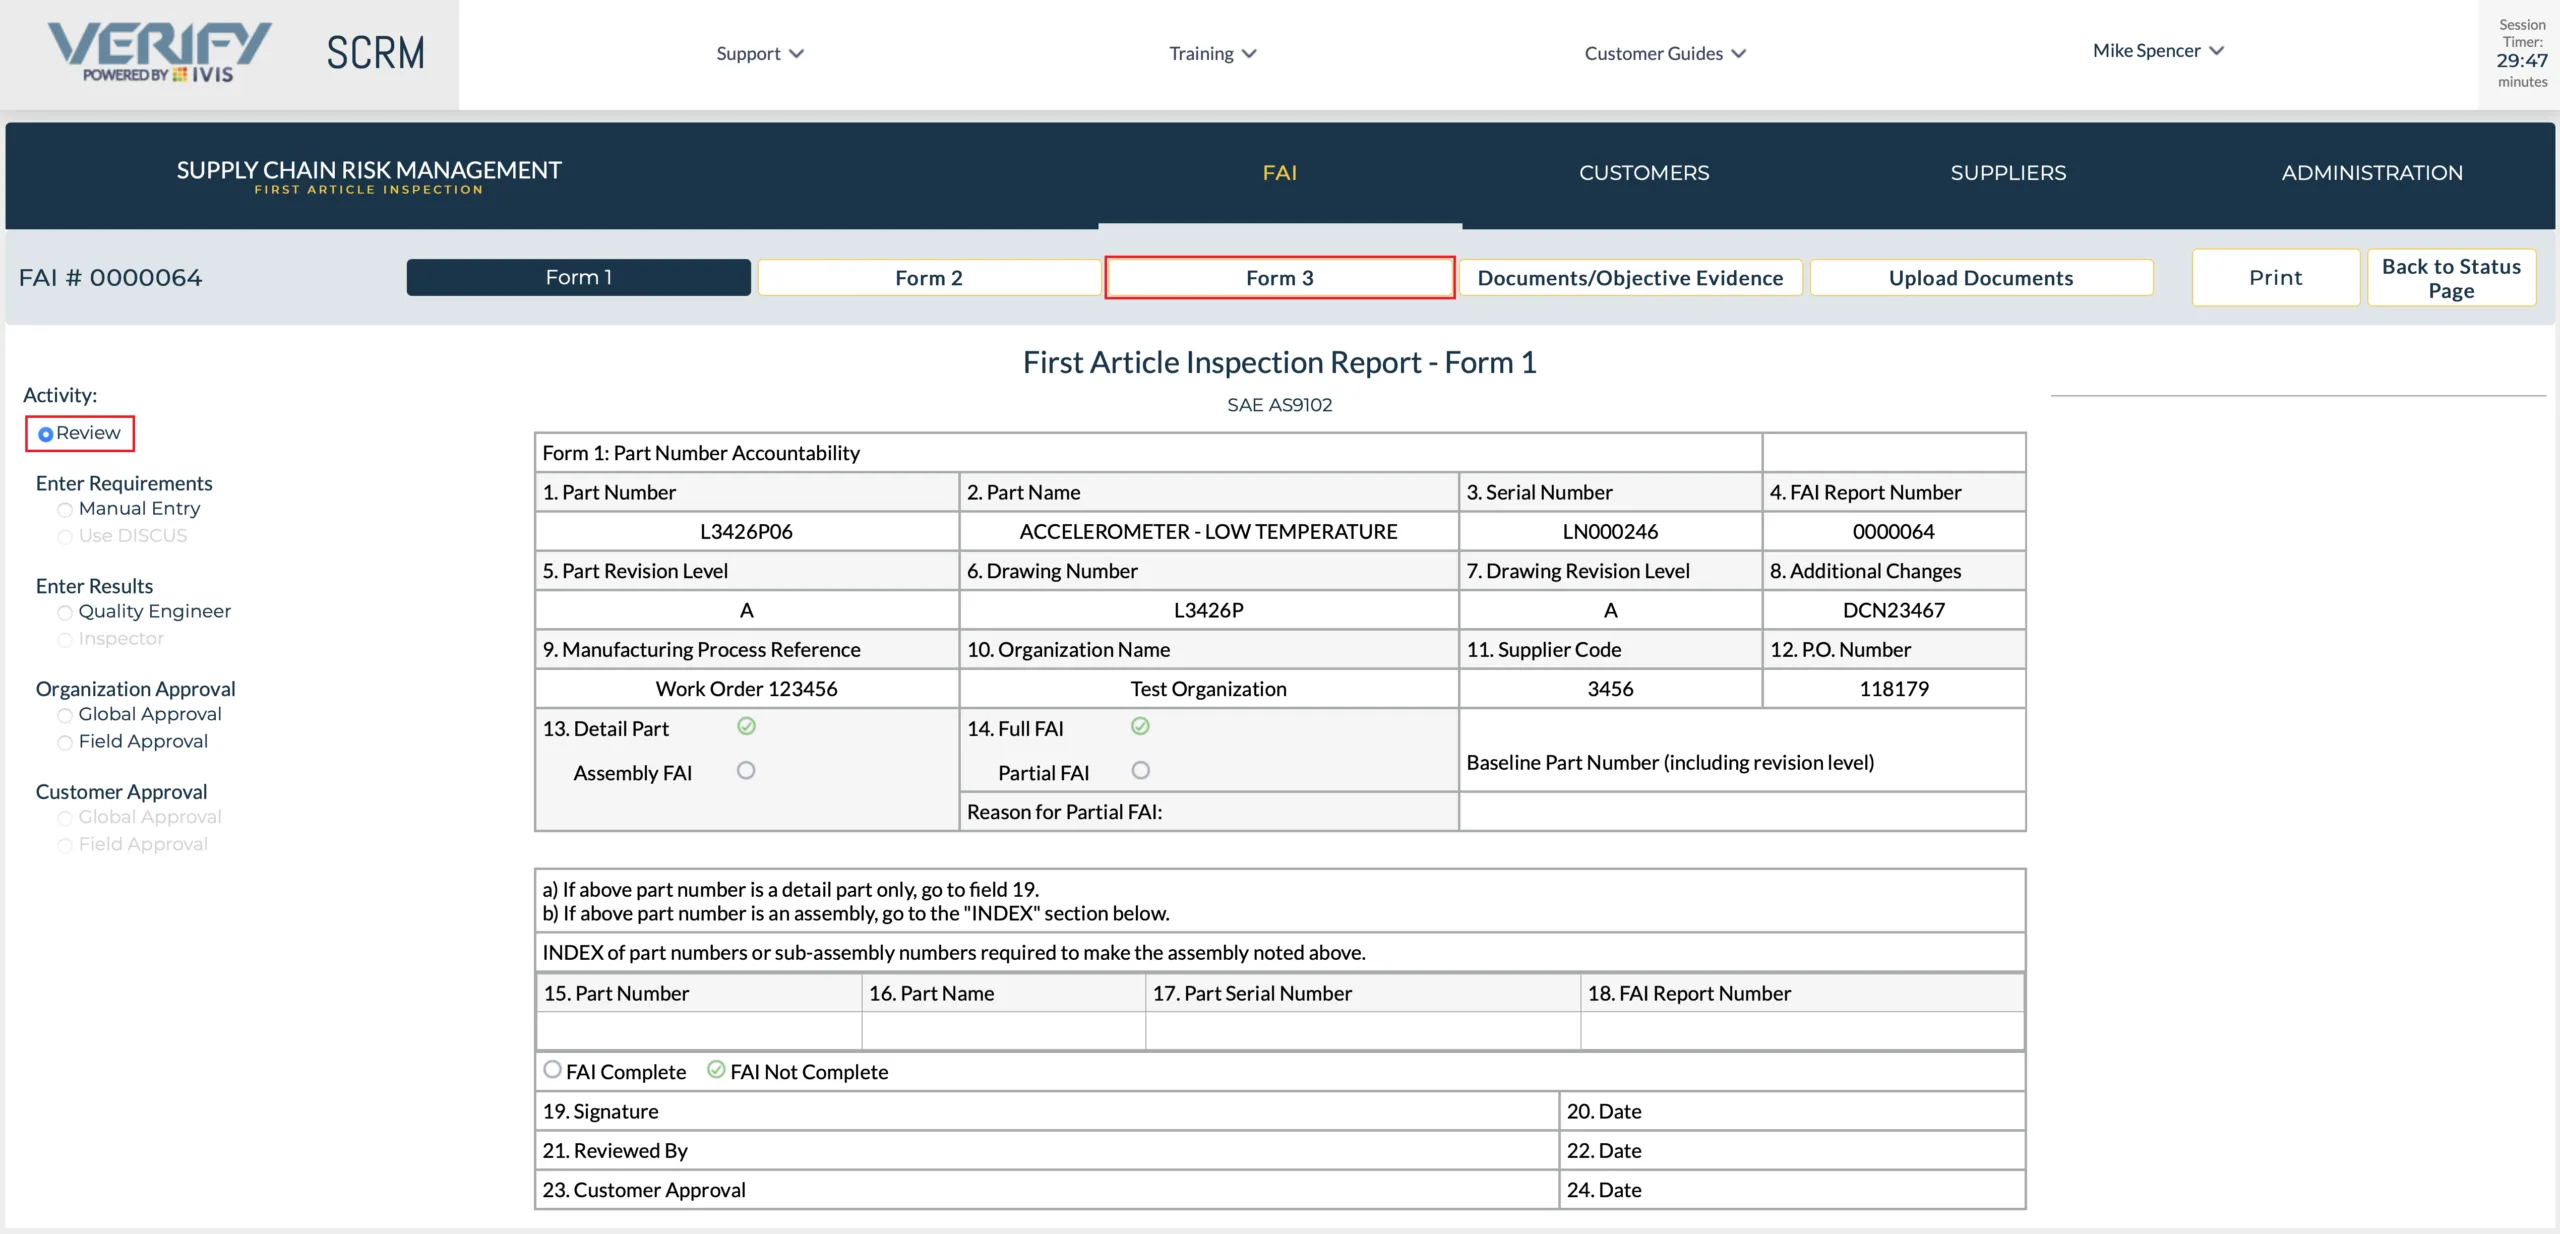
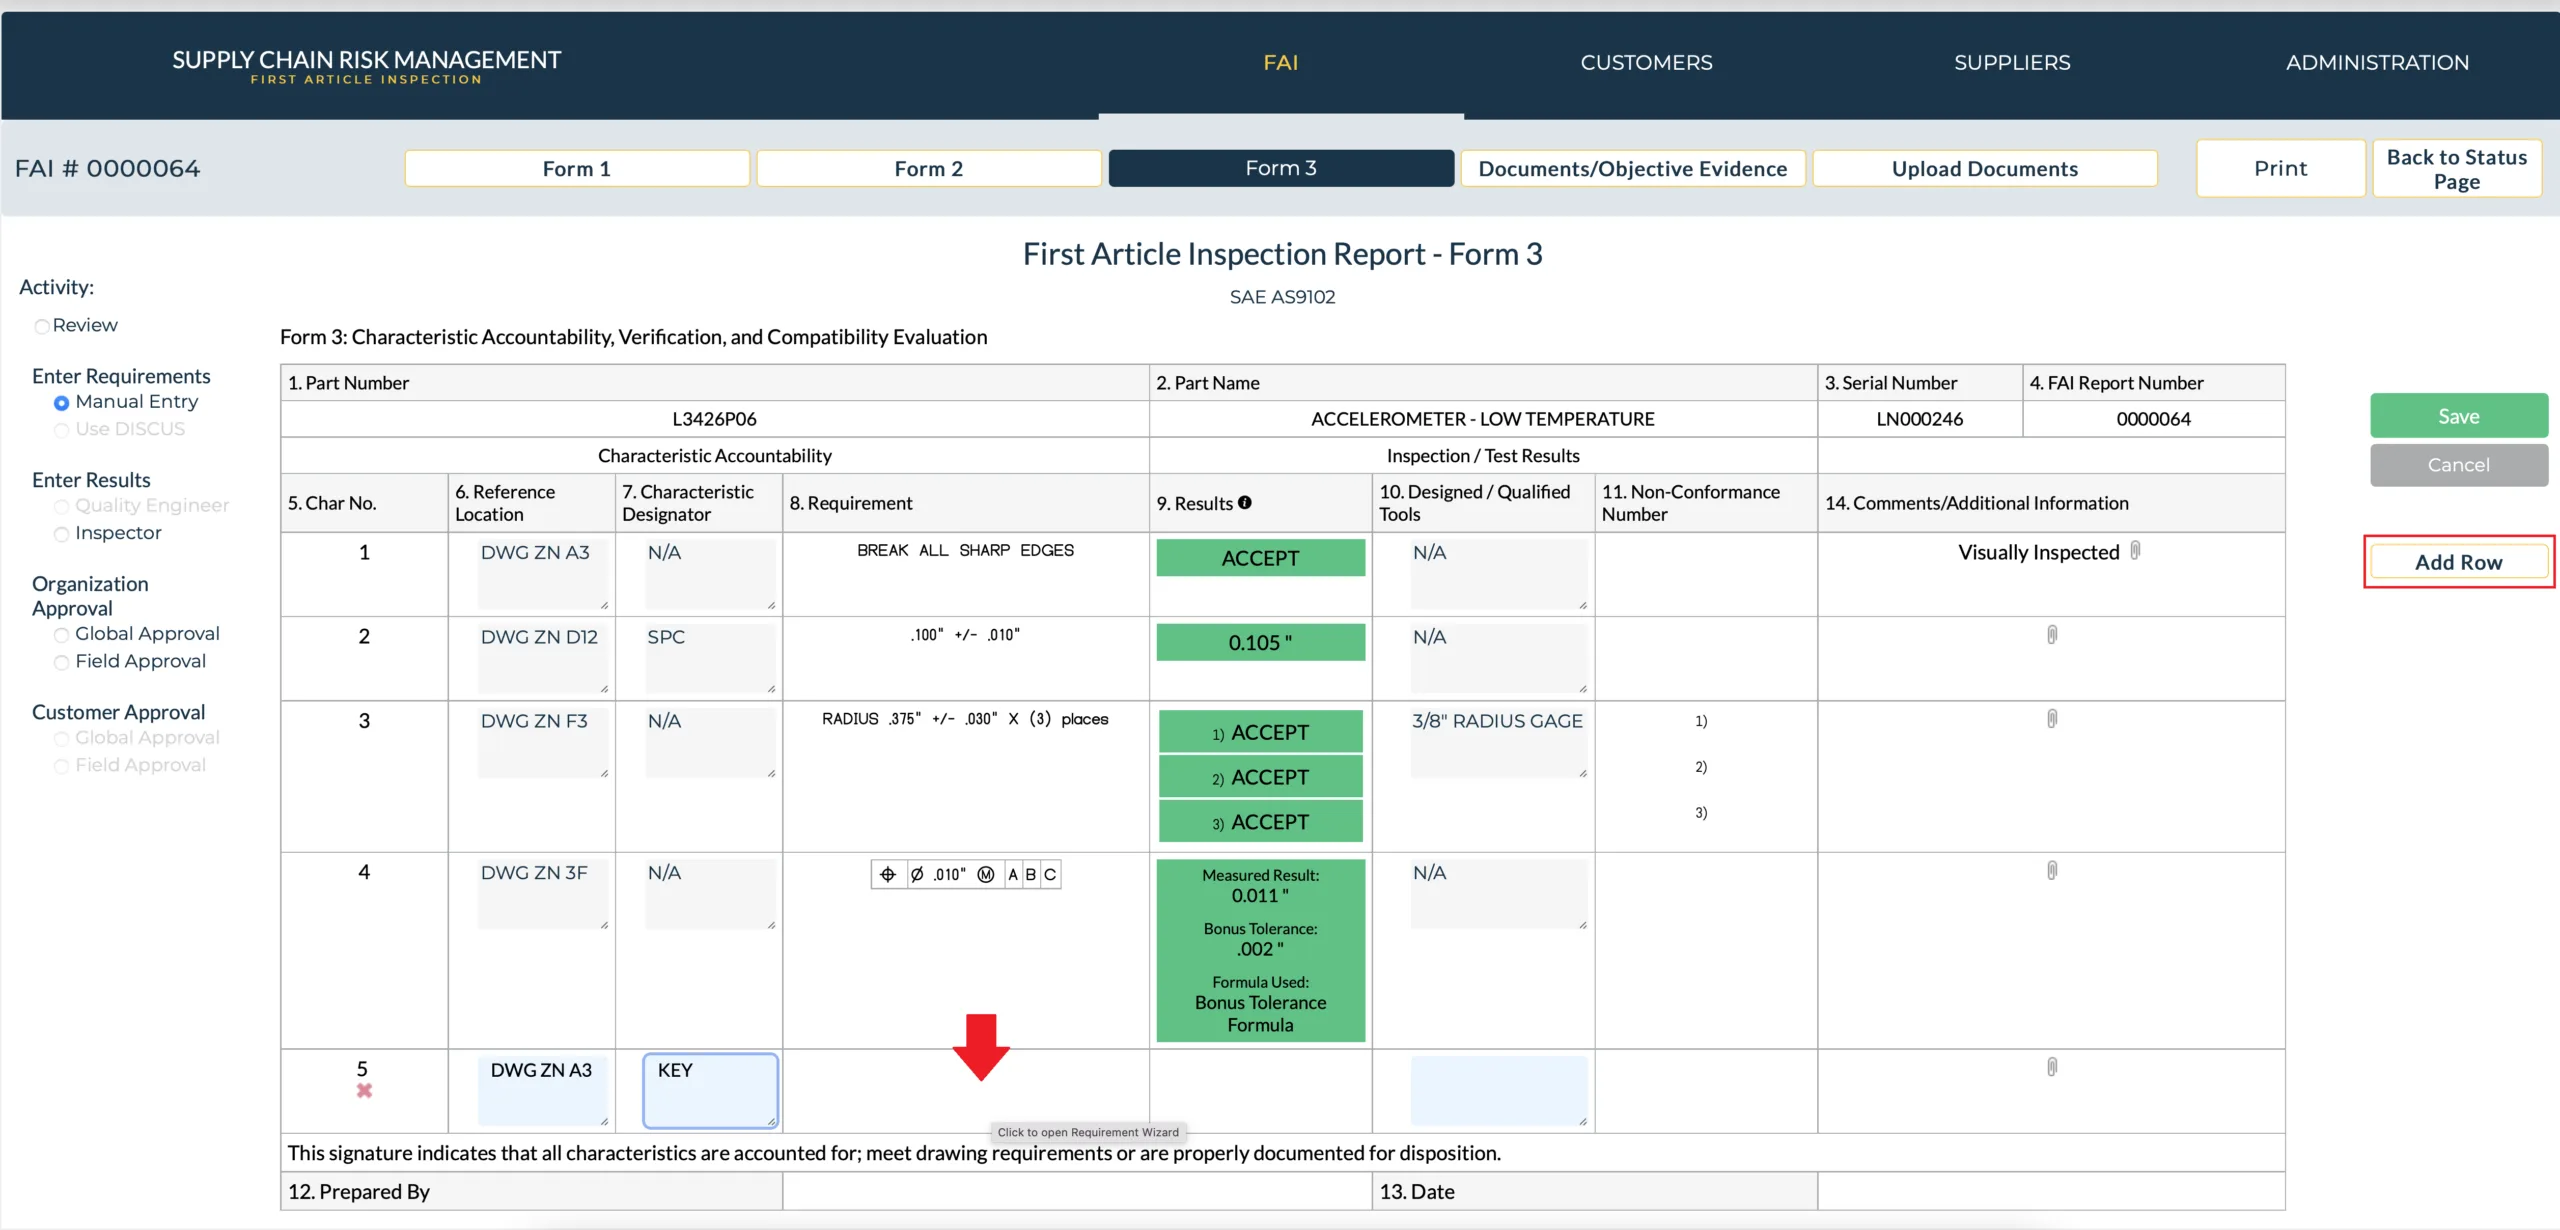
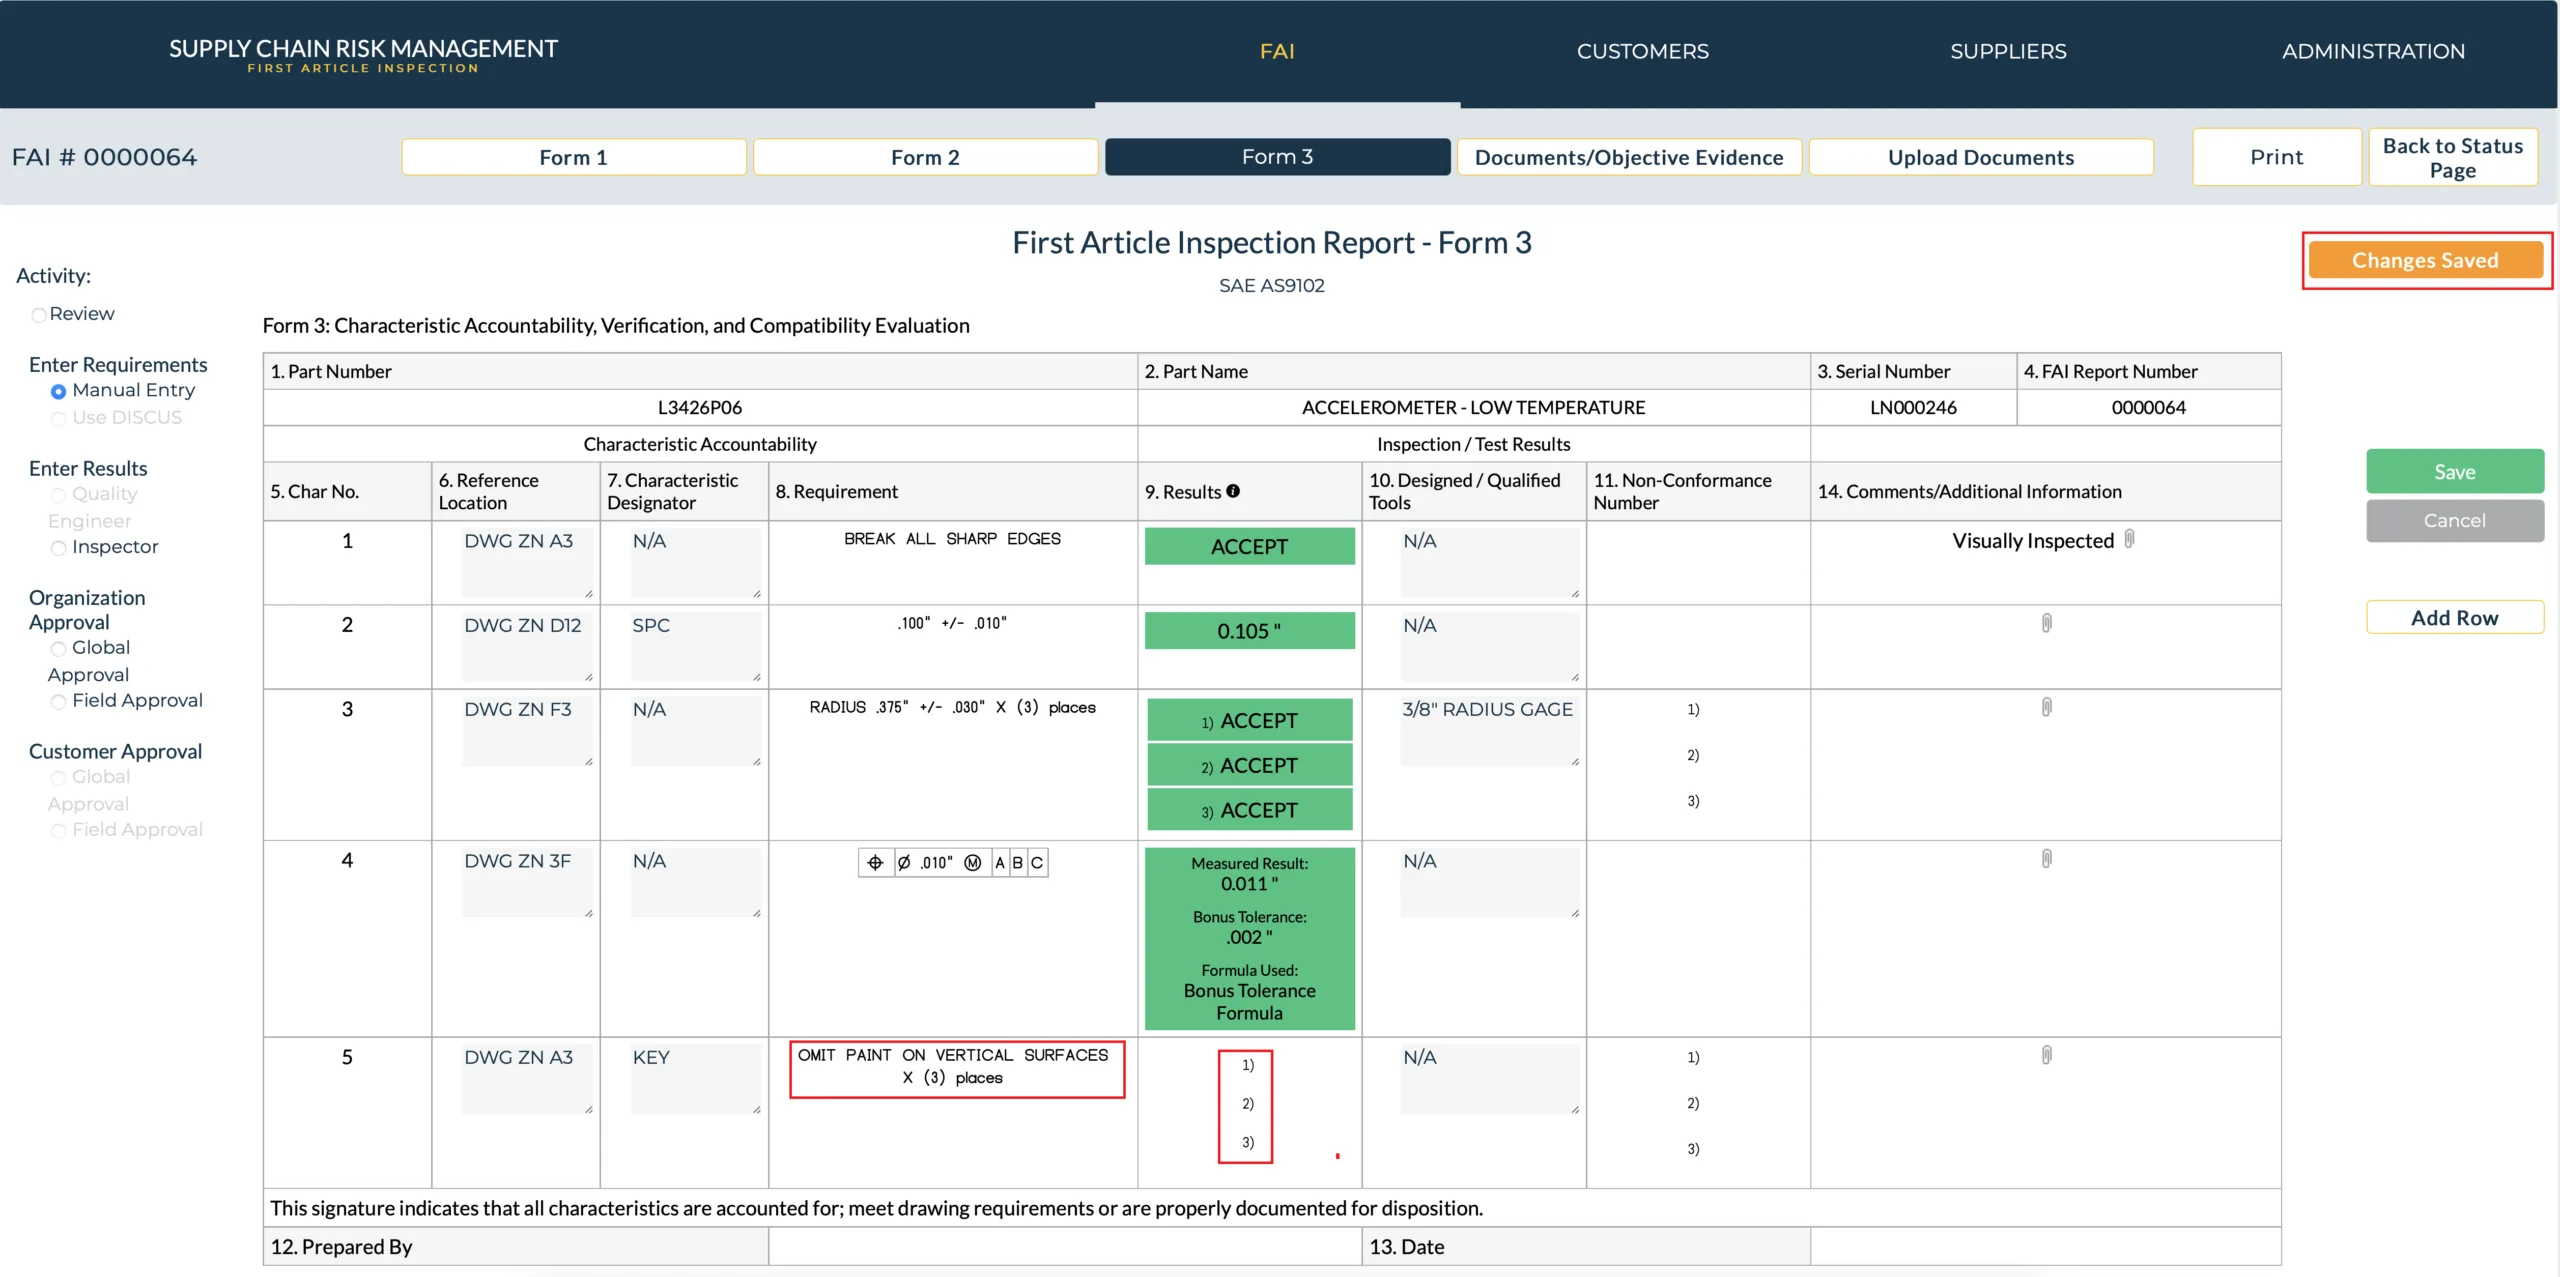
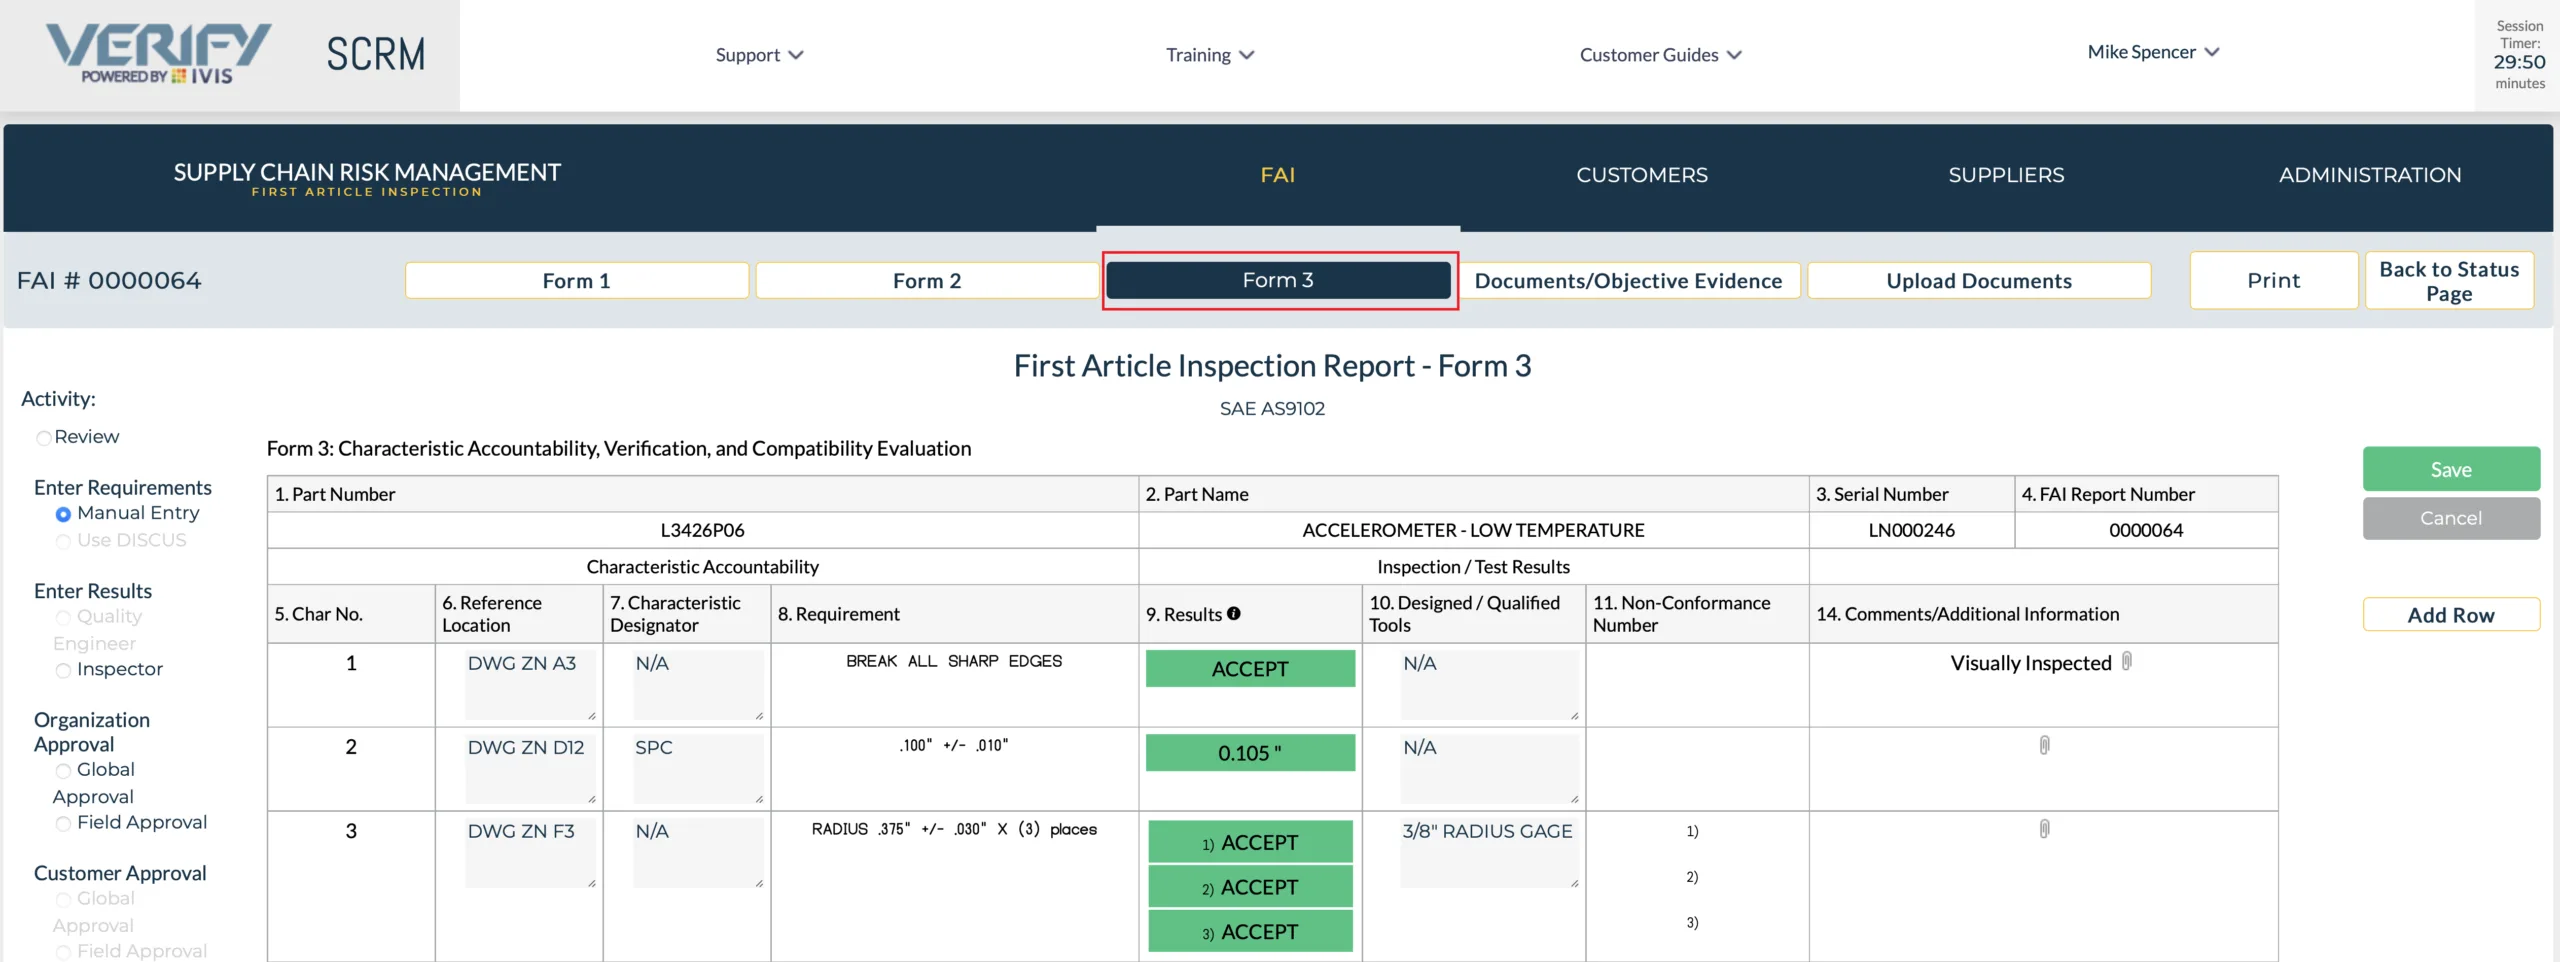
After opening the FAI report, the default activity in the left Margin will be “Review” Mode. No changes or entries can be made in “Review” Mode. Navigate to form 3 by left clicking on the Form 3 navigation tab.
On form 3, in the left margin under “Enter Requirements”, select “manual entry”. Only users with “Quality Engineering” permissions will be able to select this radio button. If the user does not have permission to enter requirements, this selection will be grayed out and will not function.

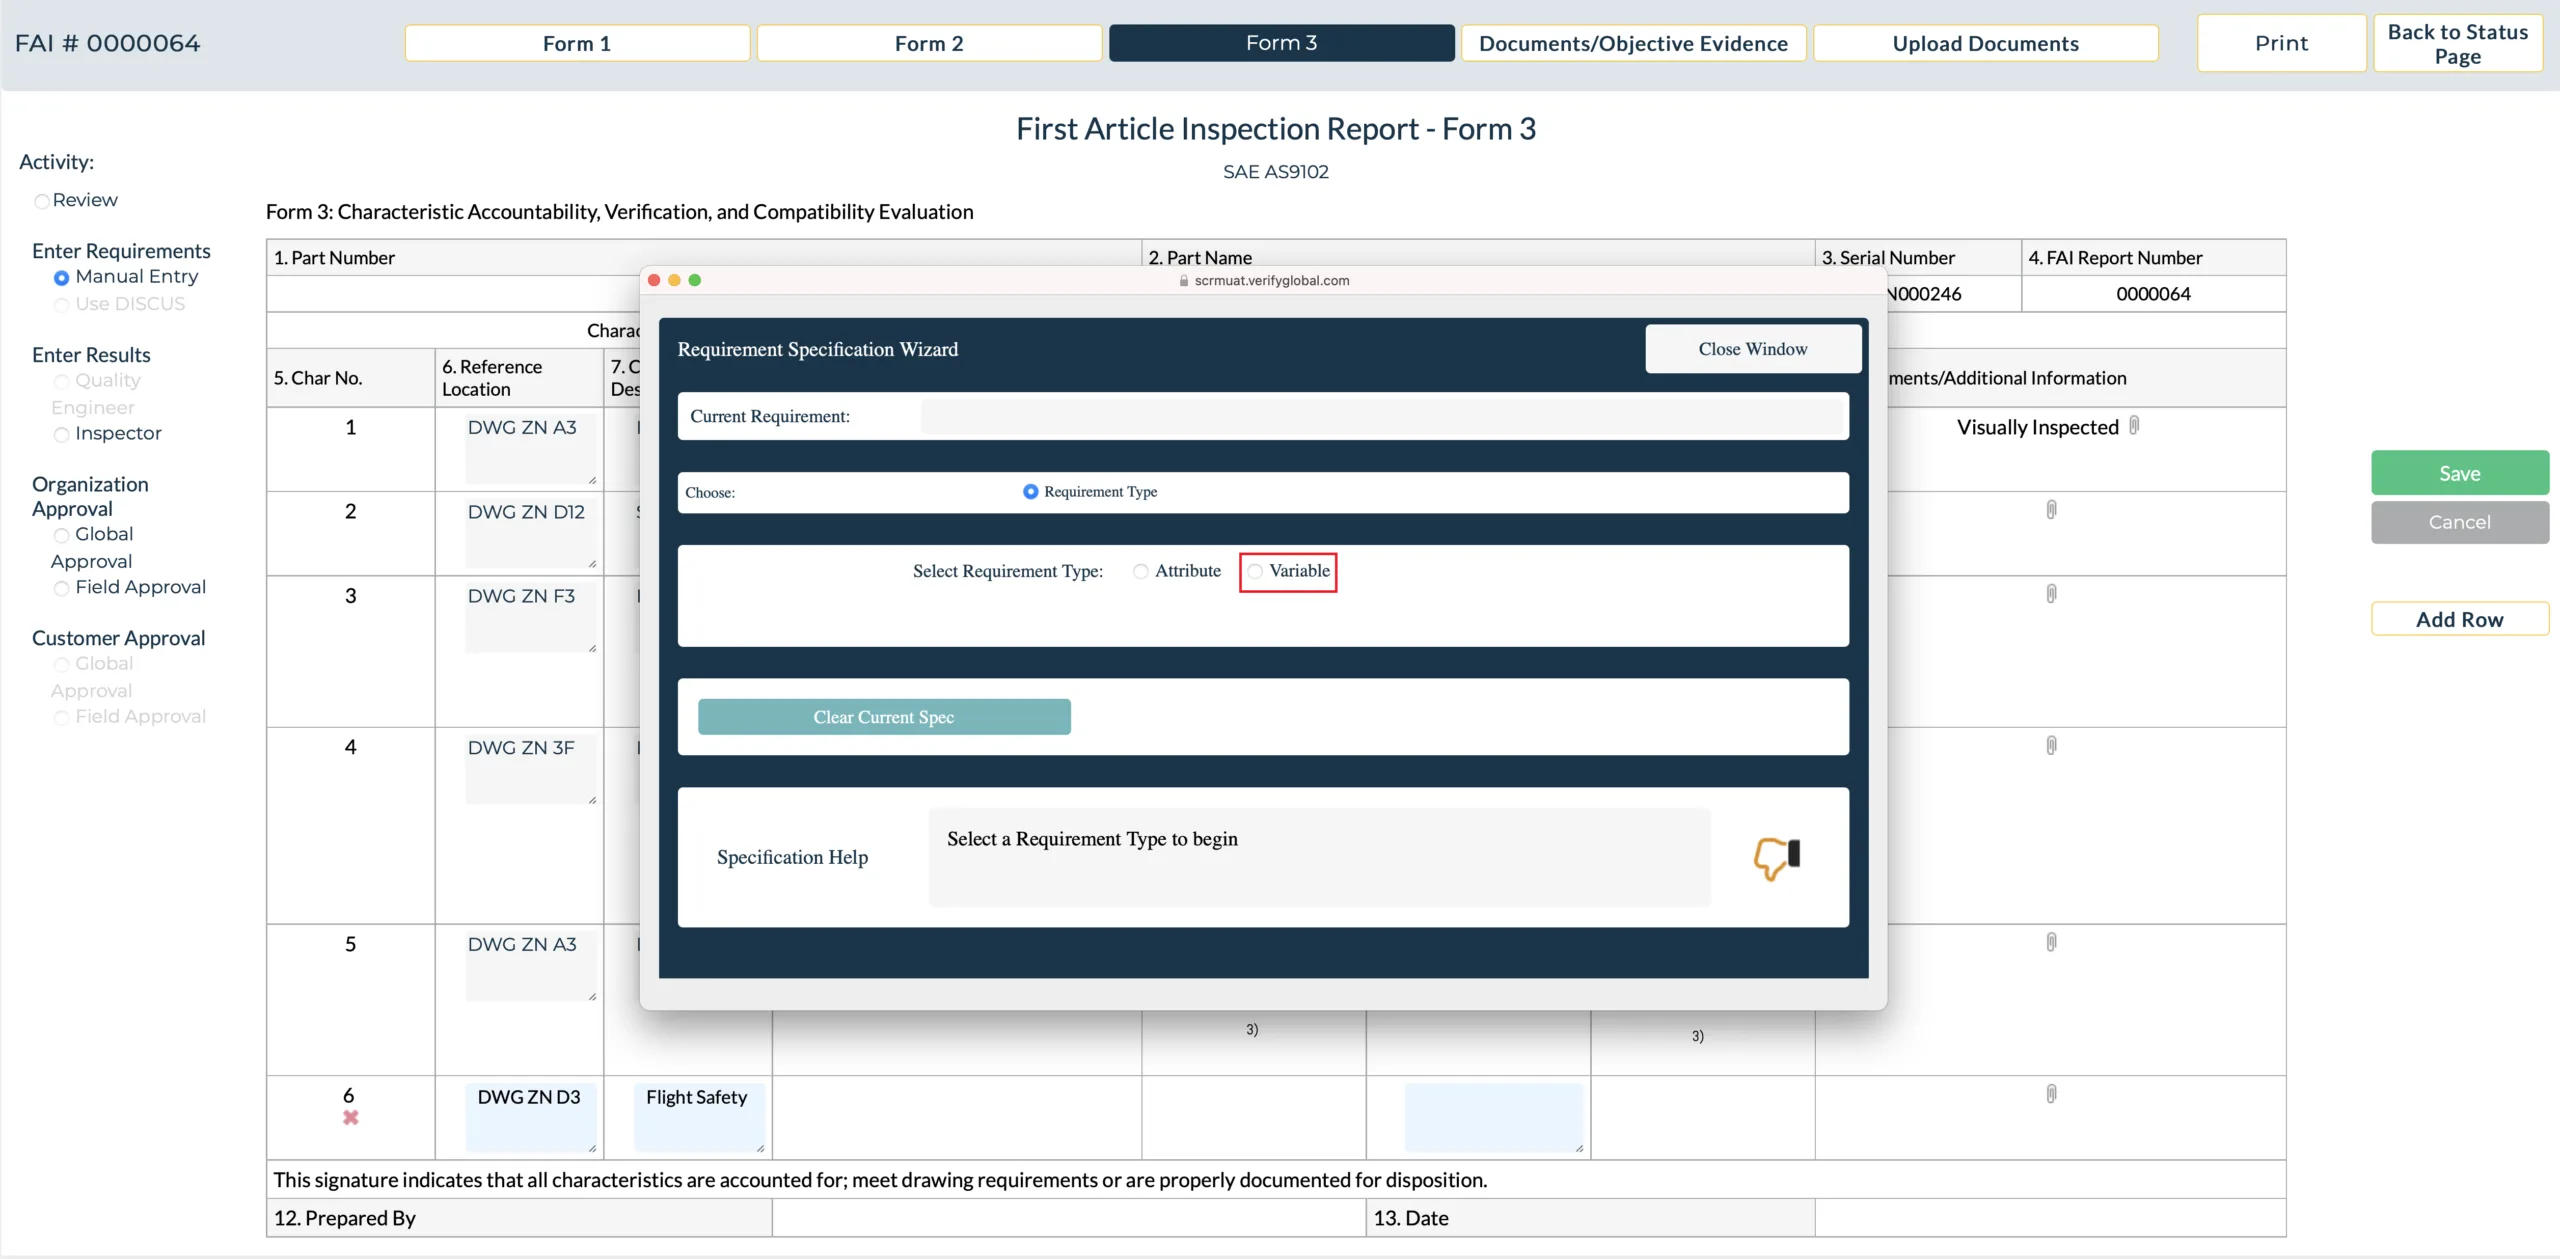
After selecting “Manual Entry”, select “Add Row” to create a new characteristic. Enter the Reference location of the characteristic in field 6 and the characteristic designator, if any, in field 7. To use the “Requirements Wizard”, left click in Field 8 “Requirement”.
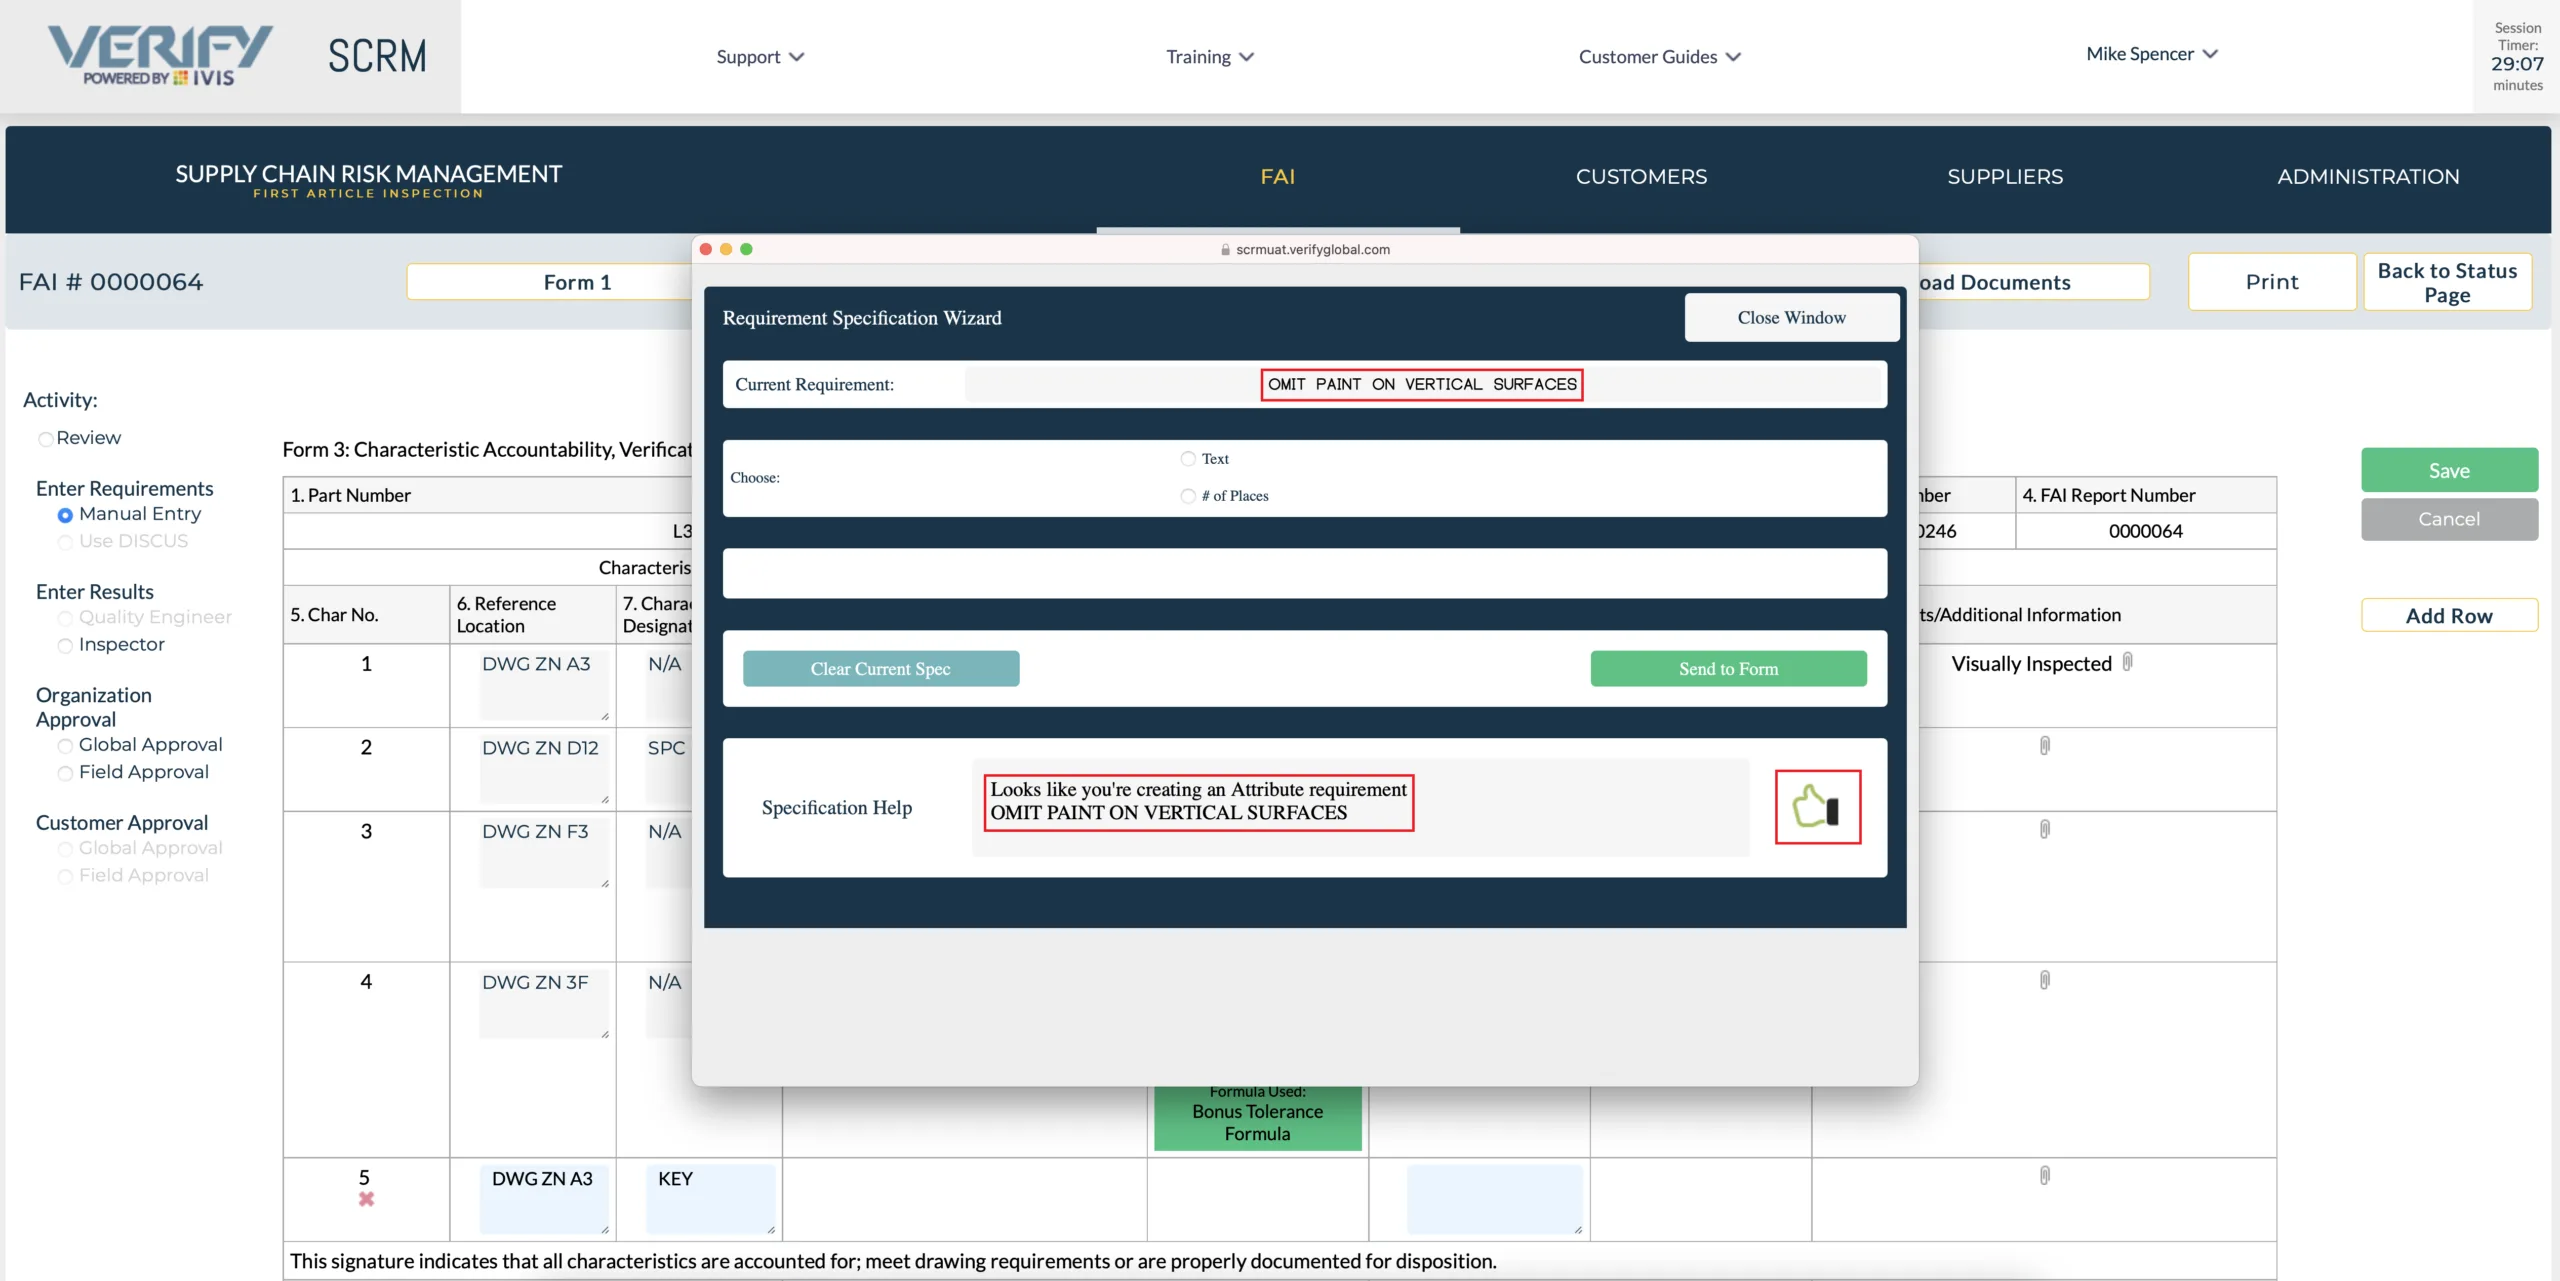
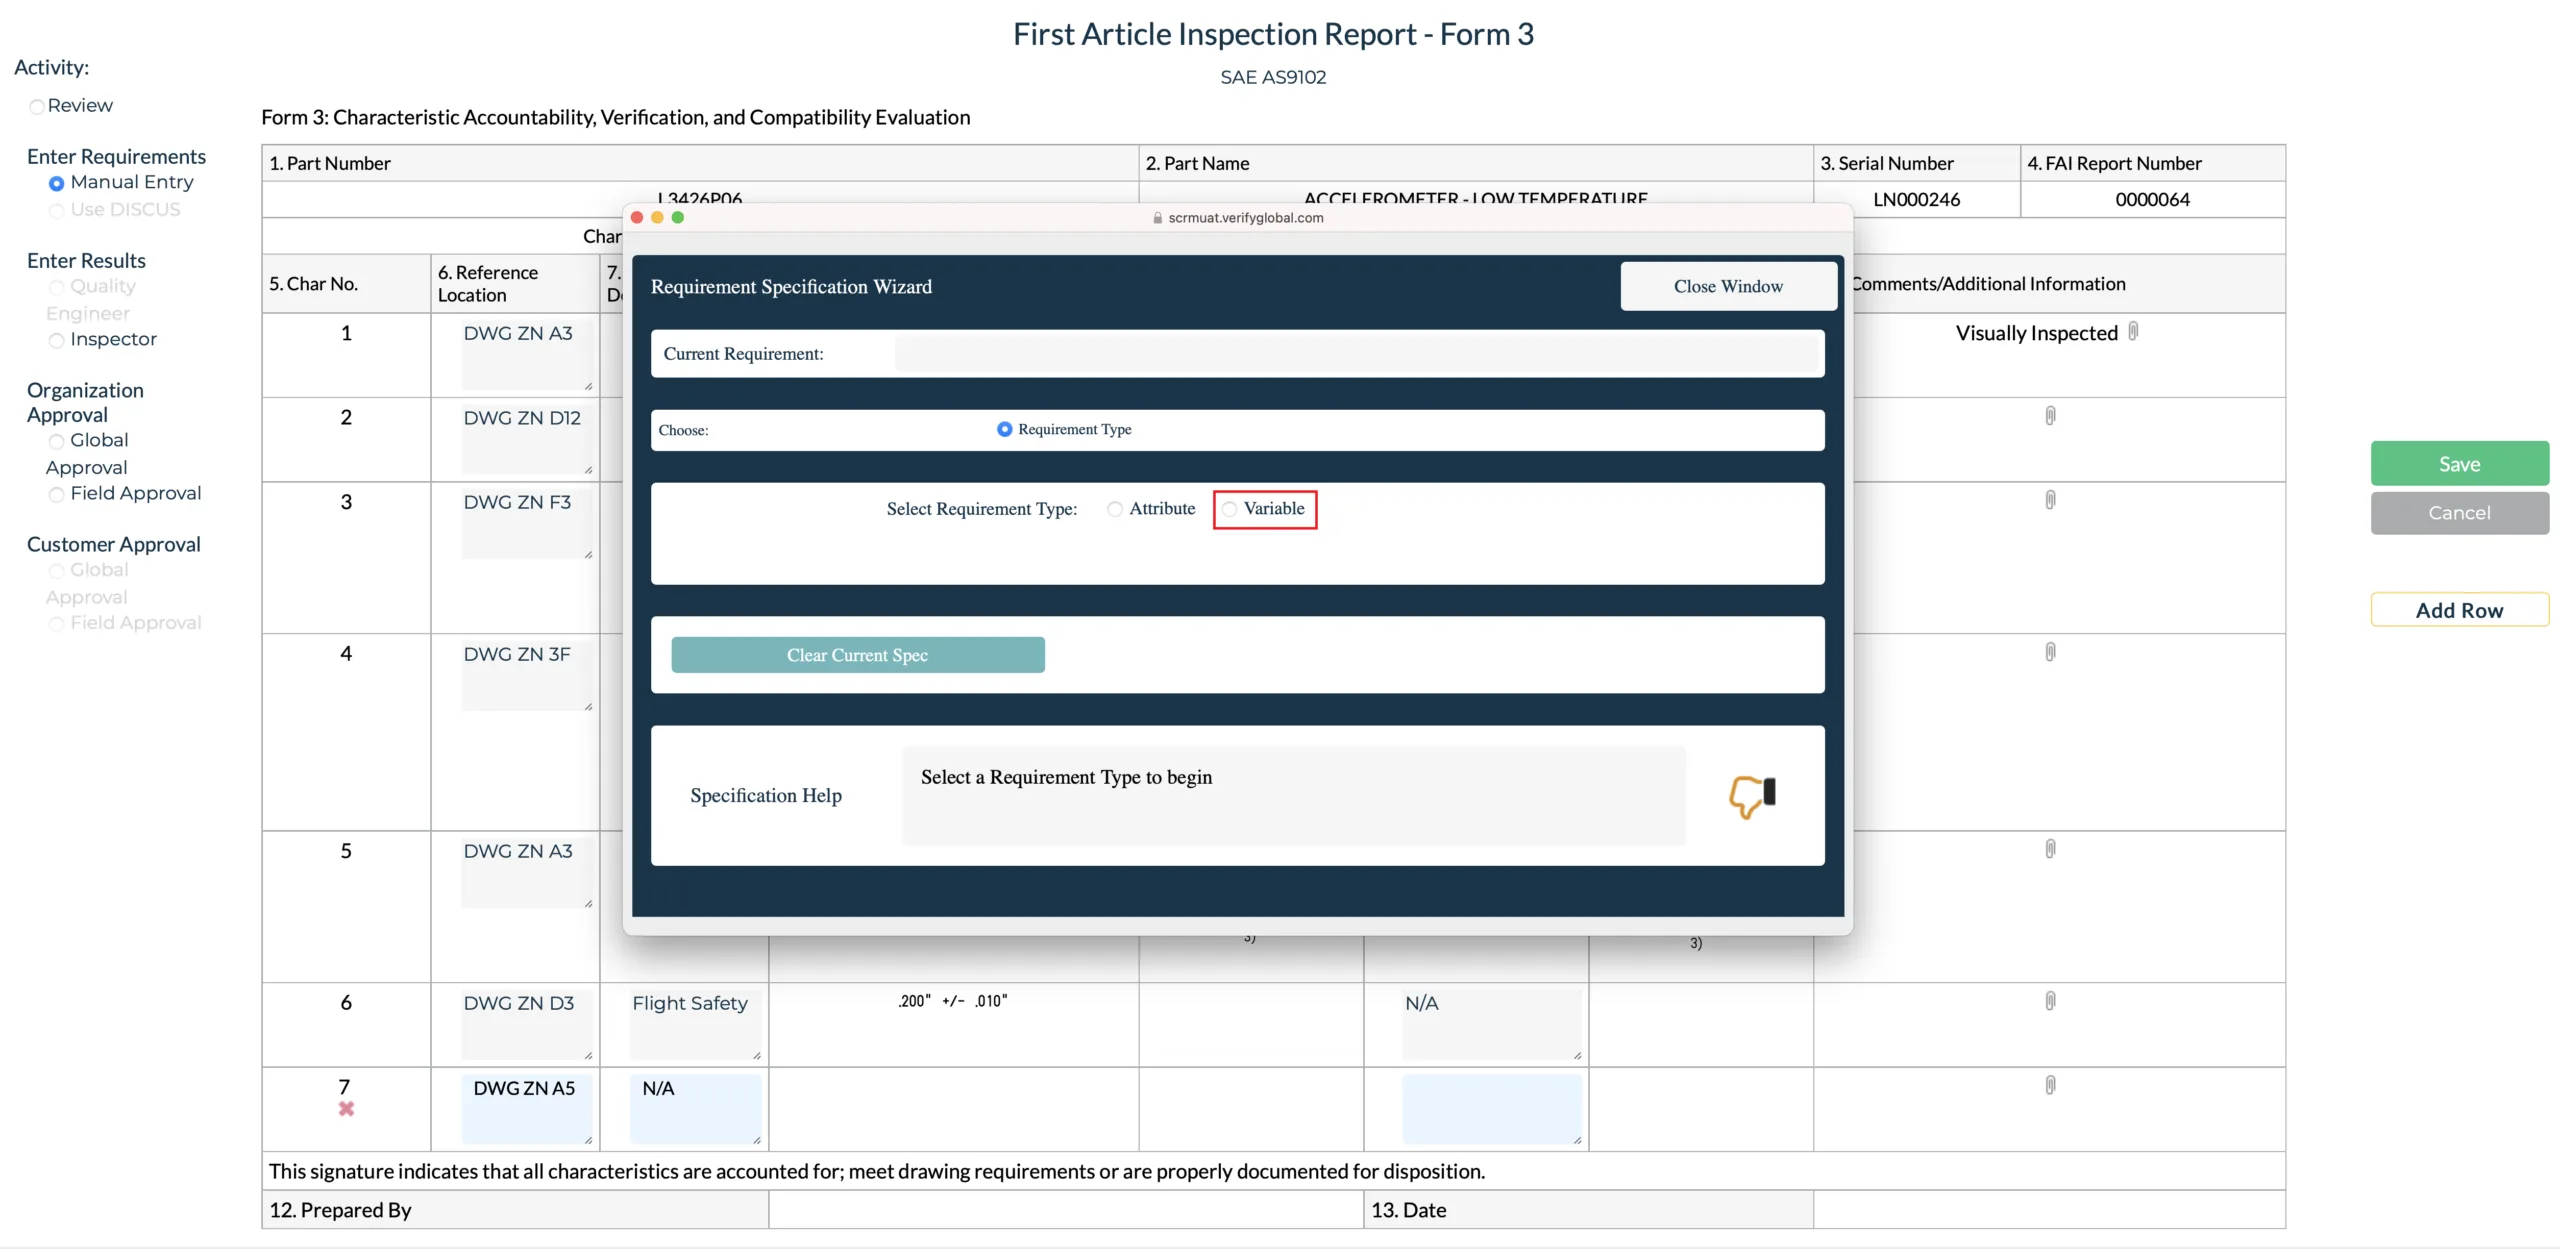
The “Requirements Wizard“ pop-up box displays. The user needs to determine if they want to enter an “Attribute” or a “Variable” requirement. For our first example we’ll chose an “Attribute” requirement by selecting the Attribute radio button. The “Help” frame at the bottom of the “pop-up” box, will prompt the user for the next action.
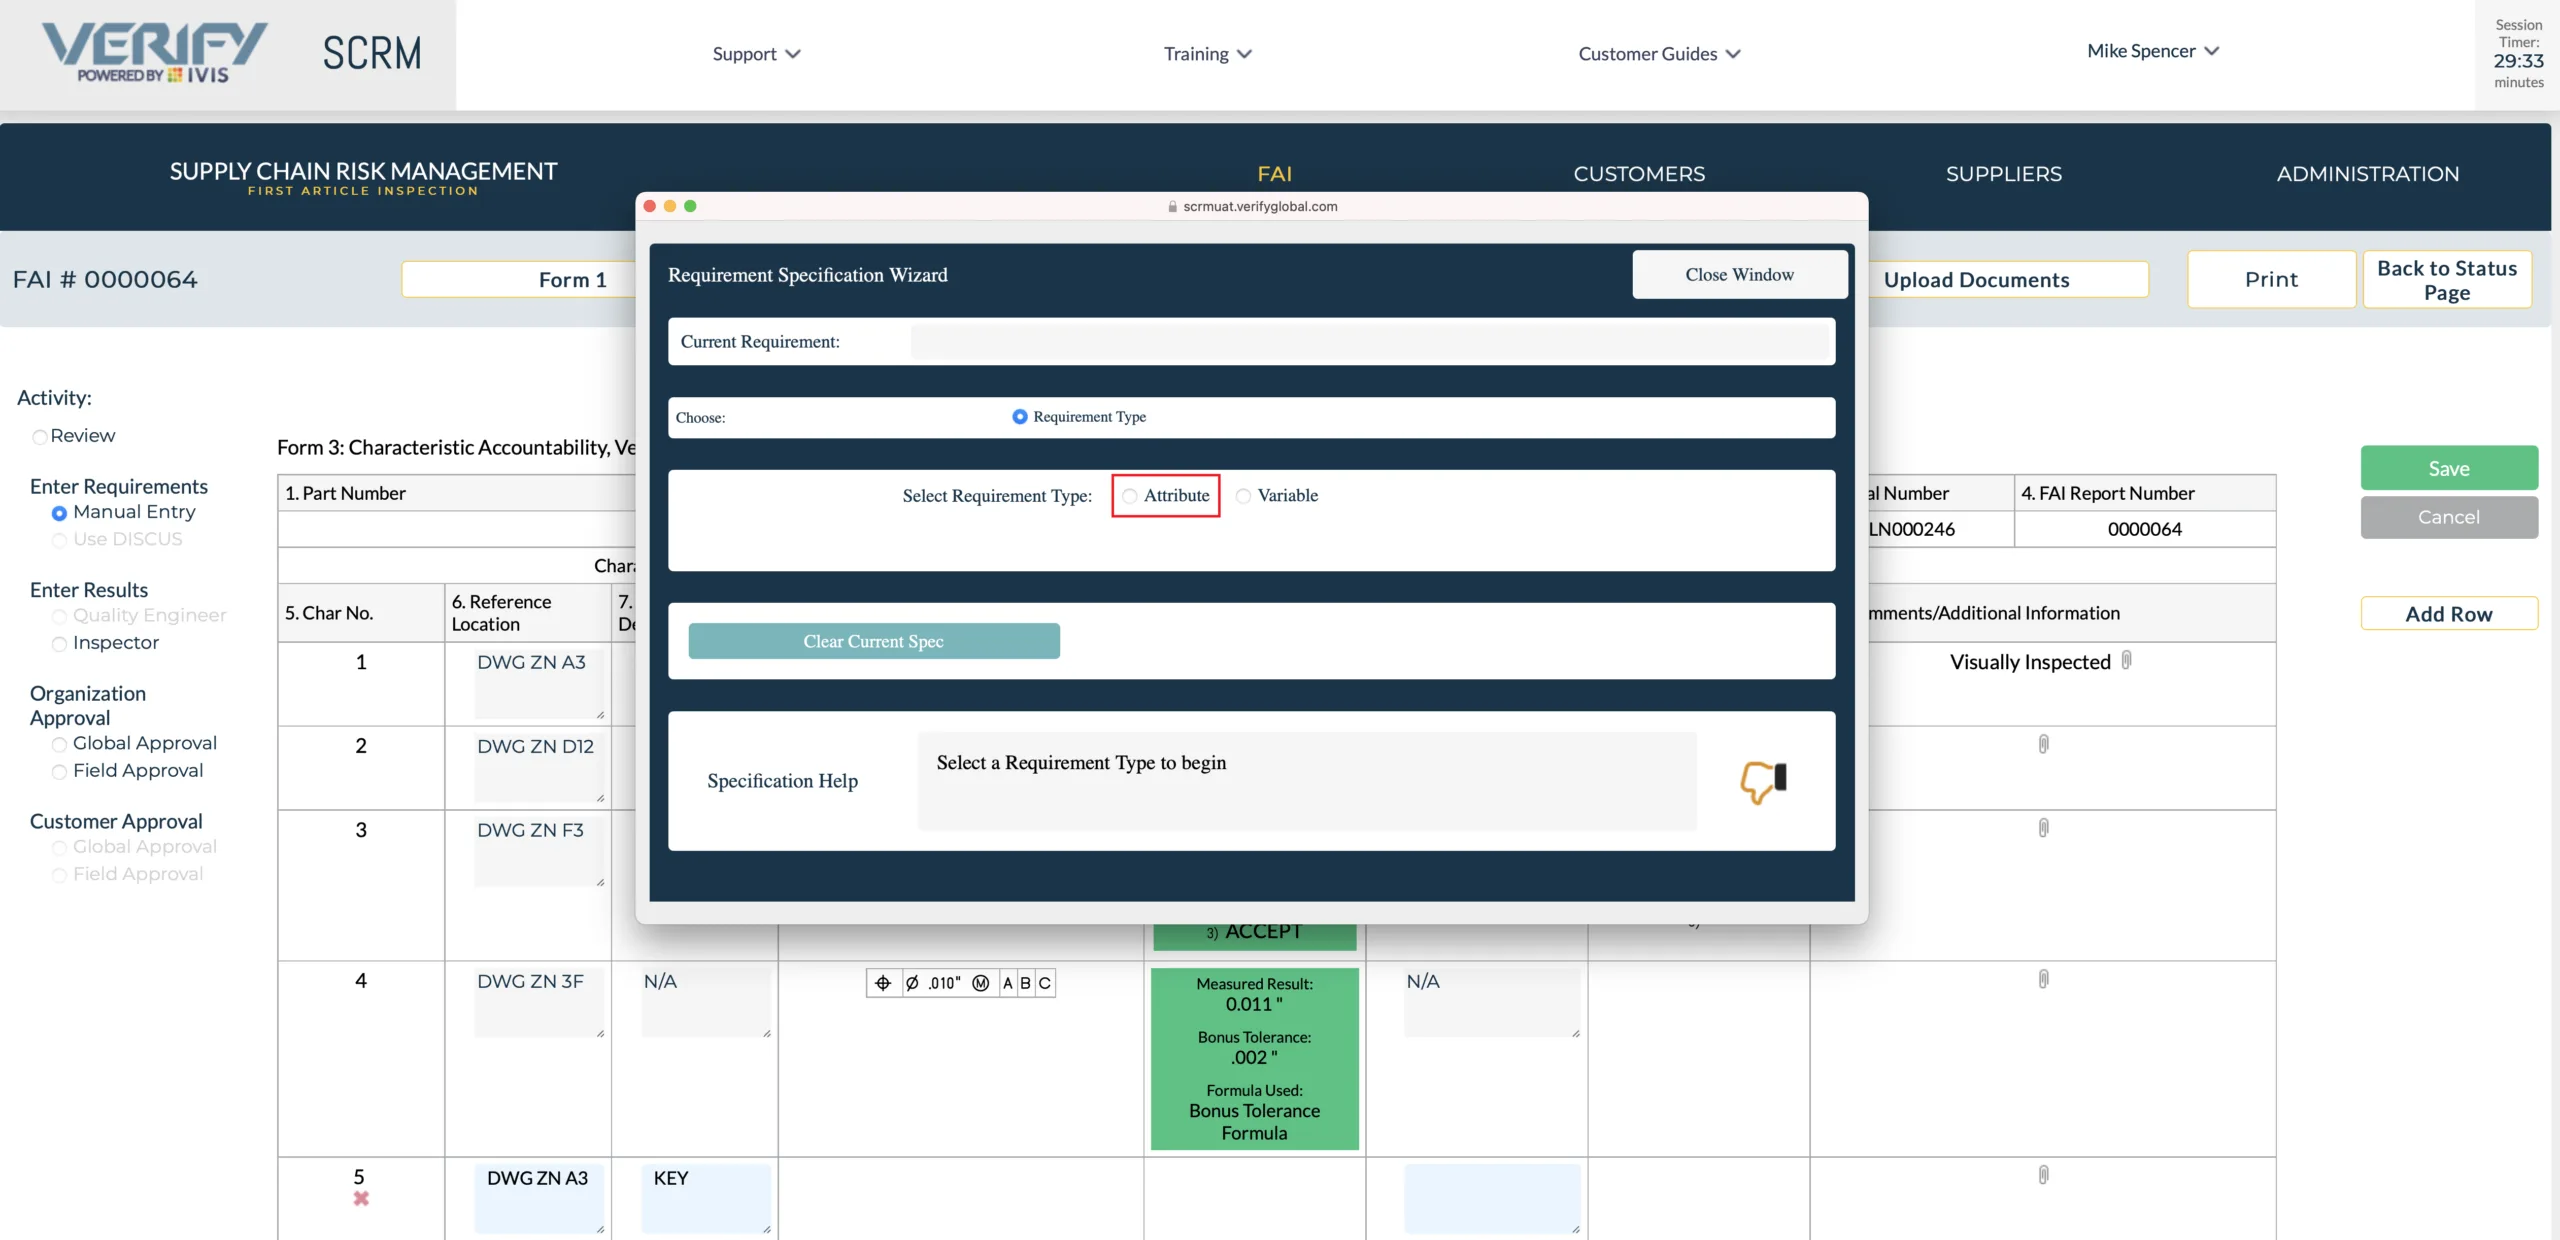
The “Requirements Wizard” pop-up box displays the next action and prompts the user to make a “Text Entry” for an Attribute Requirement. The user then selects the “Text” radio button.
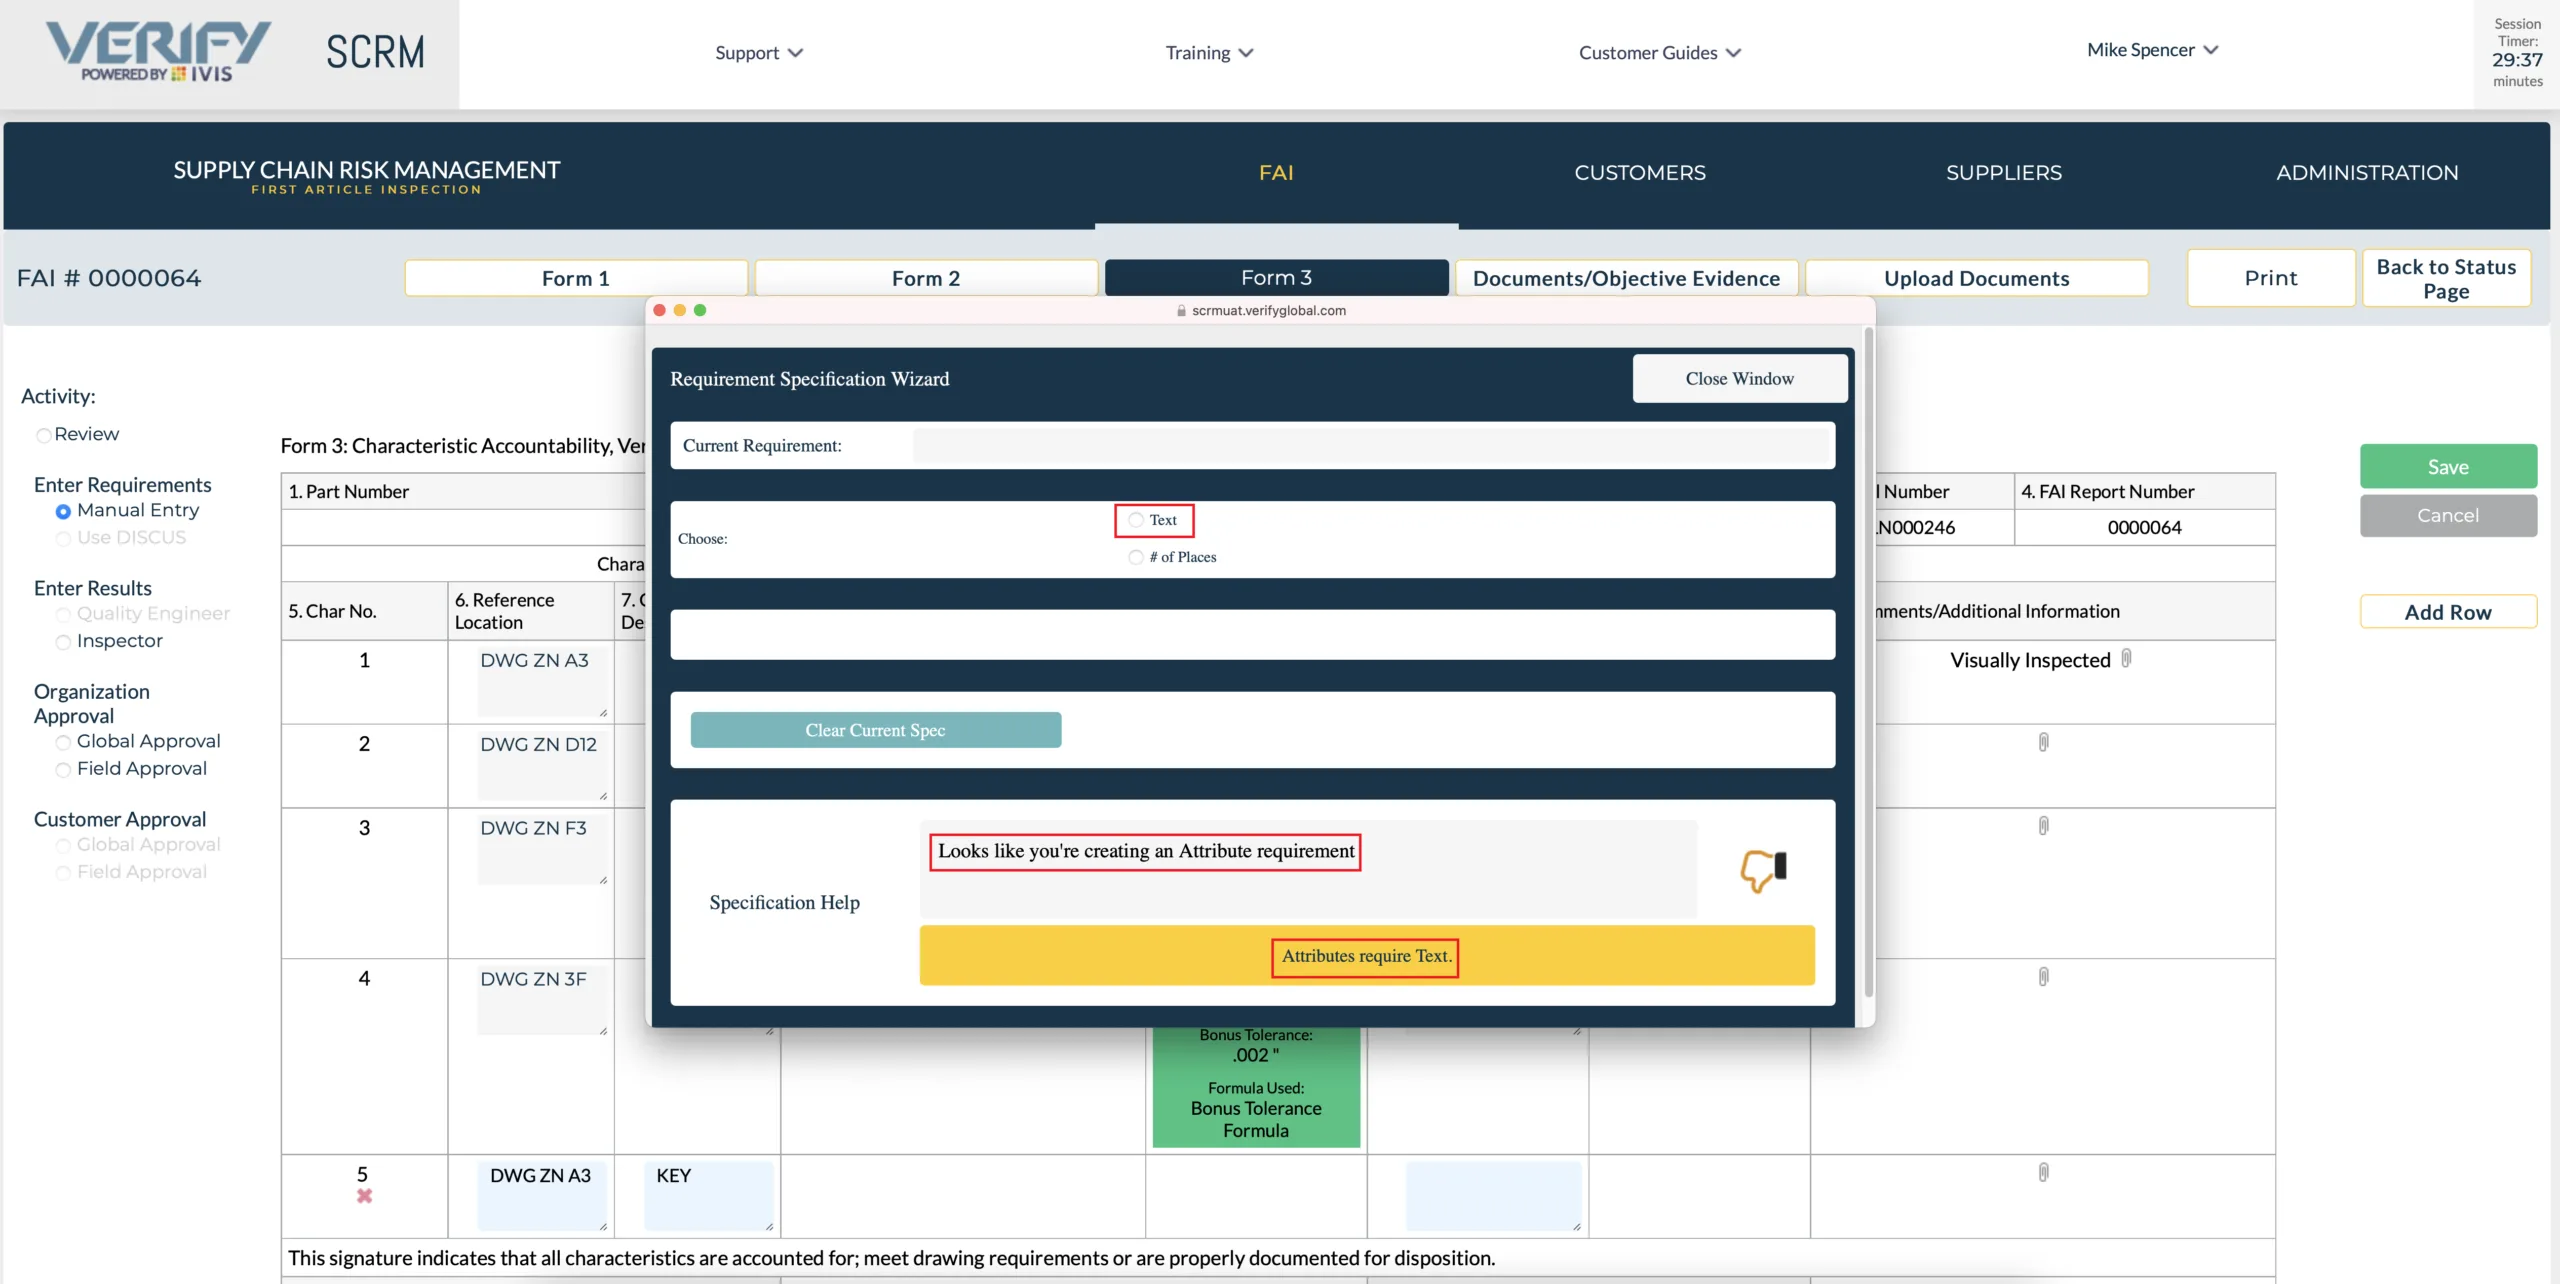
In the “Requirements Wizard” pop-up box enter the attribute text requirement as “OMIT PAINT ON VERTICAL SURFACES” and then click on the button “Add to Spec”.
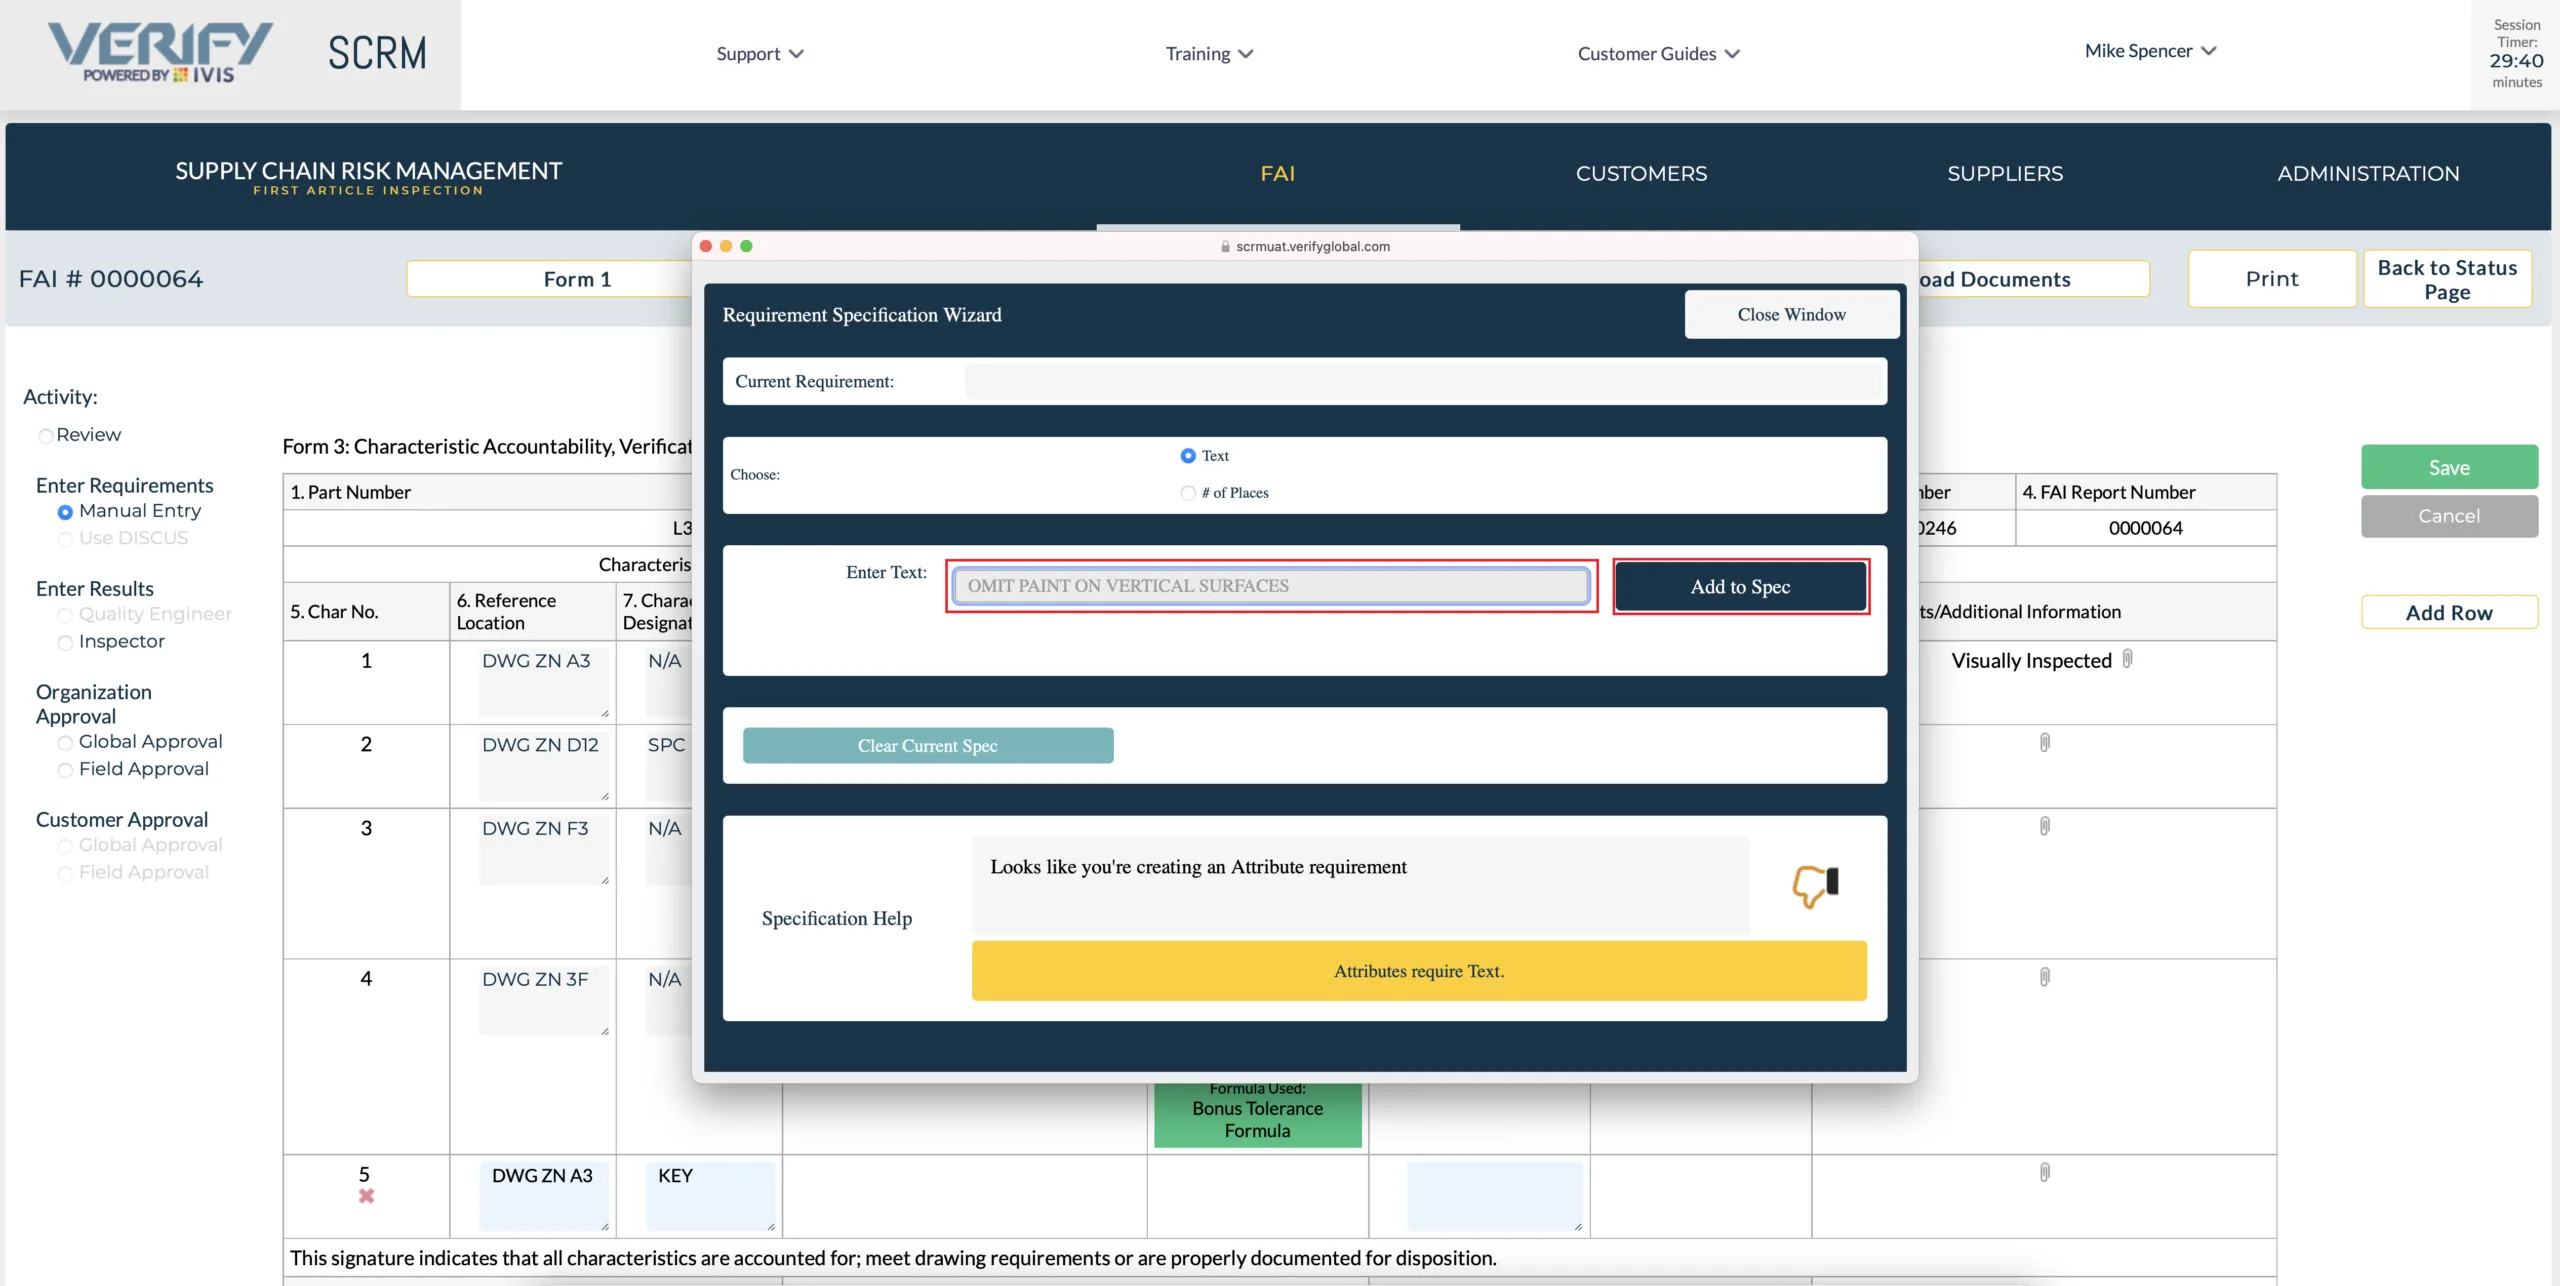
After clicking on Add to Spec, the Wizard displays the finished attribute requirement and in the help box display, a green “Thumbs Up” indication that this is a valid requirement.
As is, the requirement is ready to send to form 3, however you may determine the requirement applies to multiple places. If that is the case, before you send the requirement to form 3, click on the Radio button “Number of Places”.
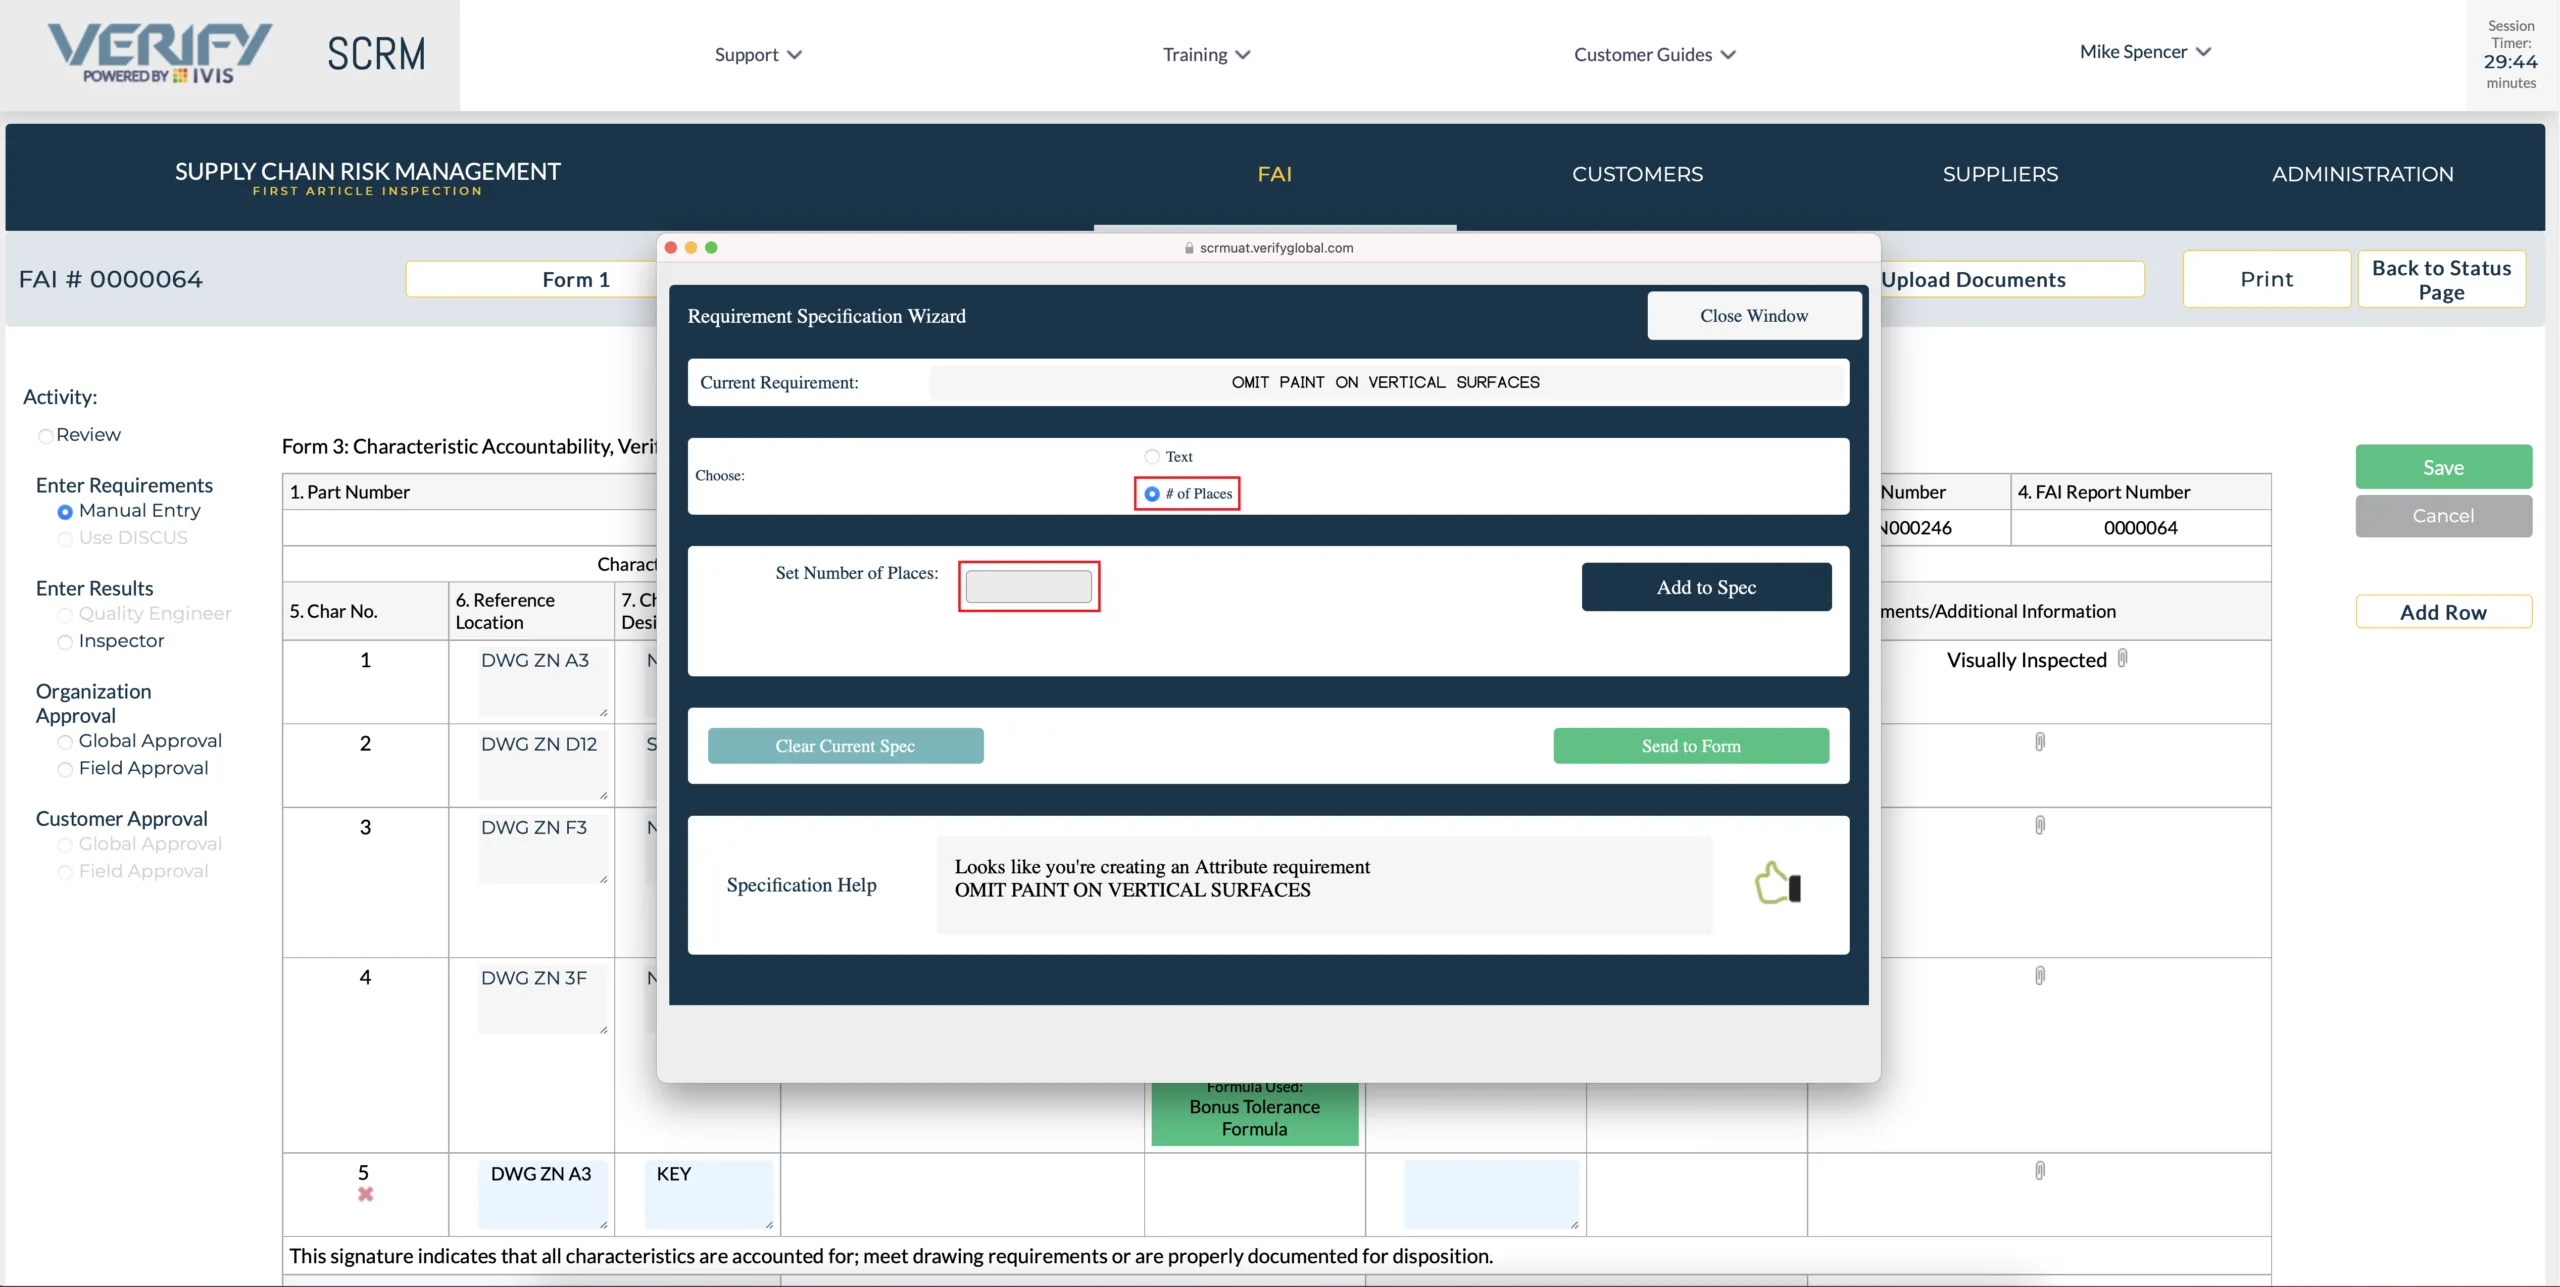
Enter the number of places in the text box, and then click on “Add to Spec”
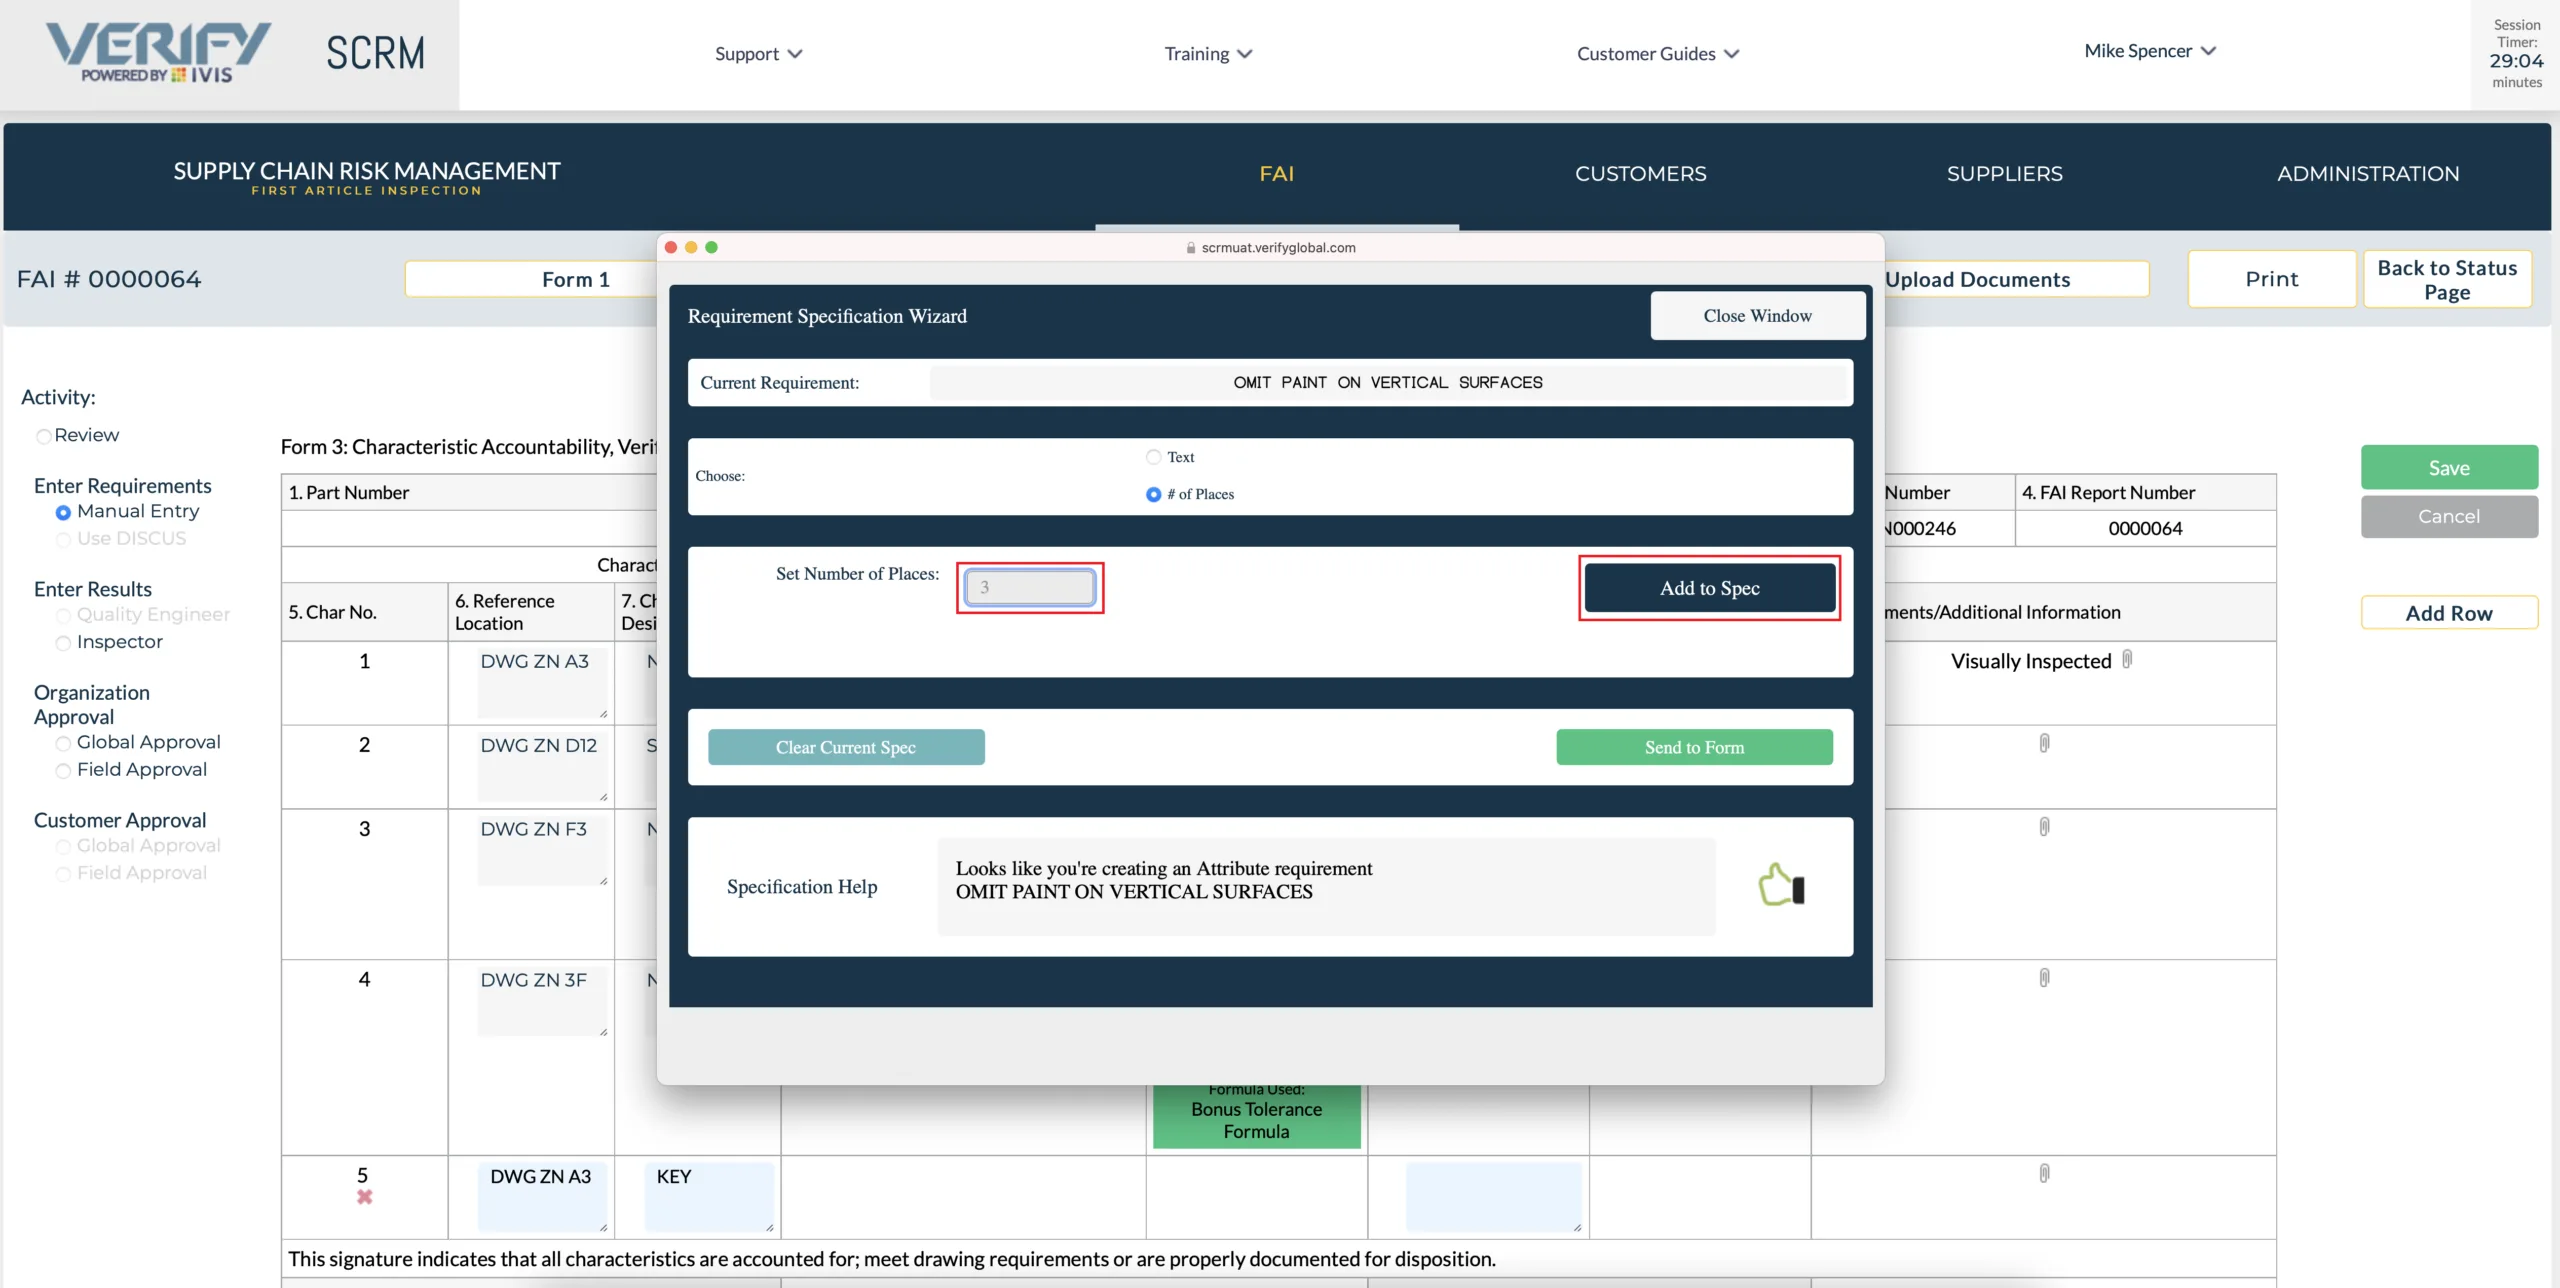
In the first box of the Wizard, it will now display the requirement as it will appear on form 3 of the FAI, and the “Help Box” still displays a thumbs up, indicating a valid requirement. Next click “Send to Form”.
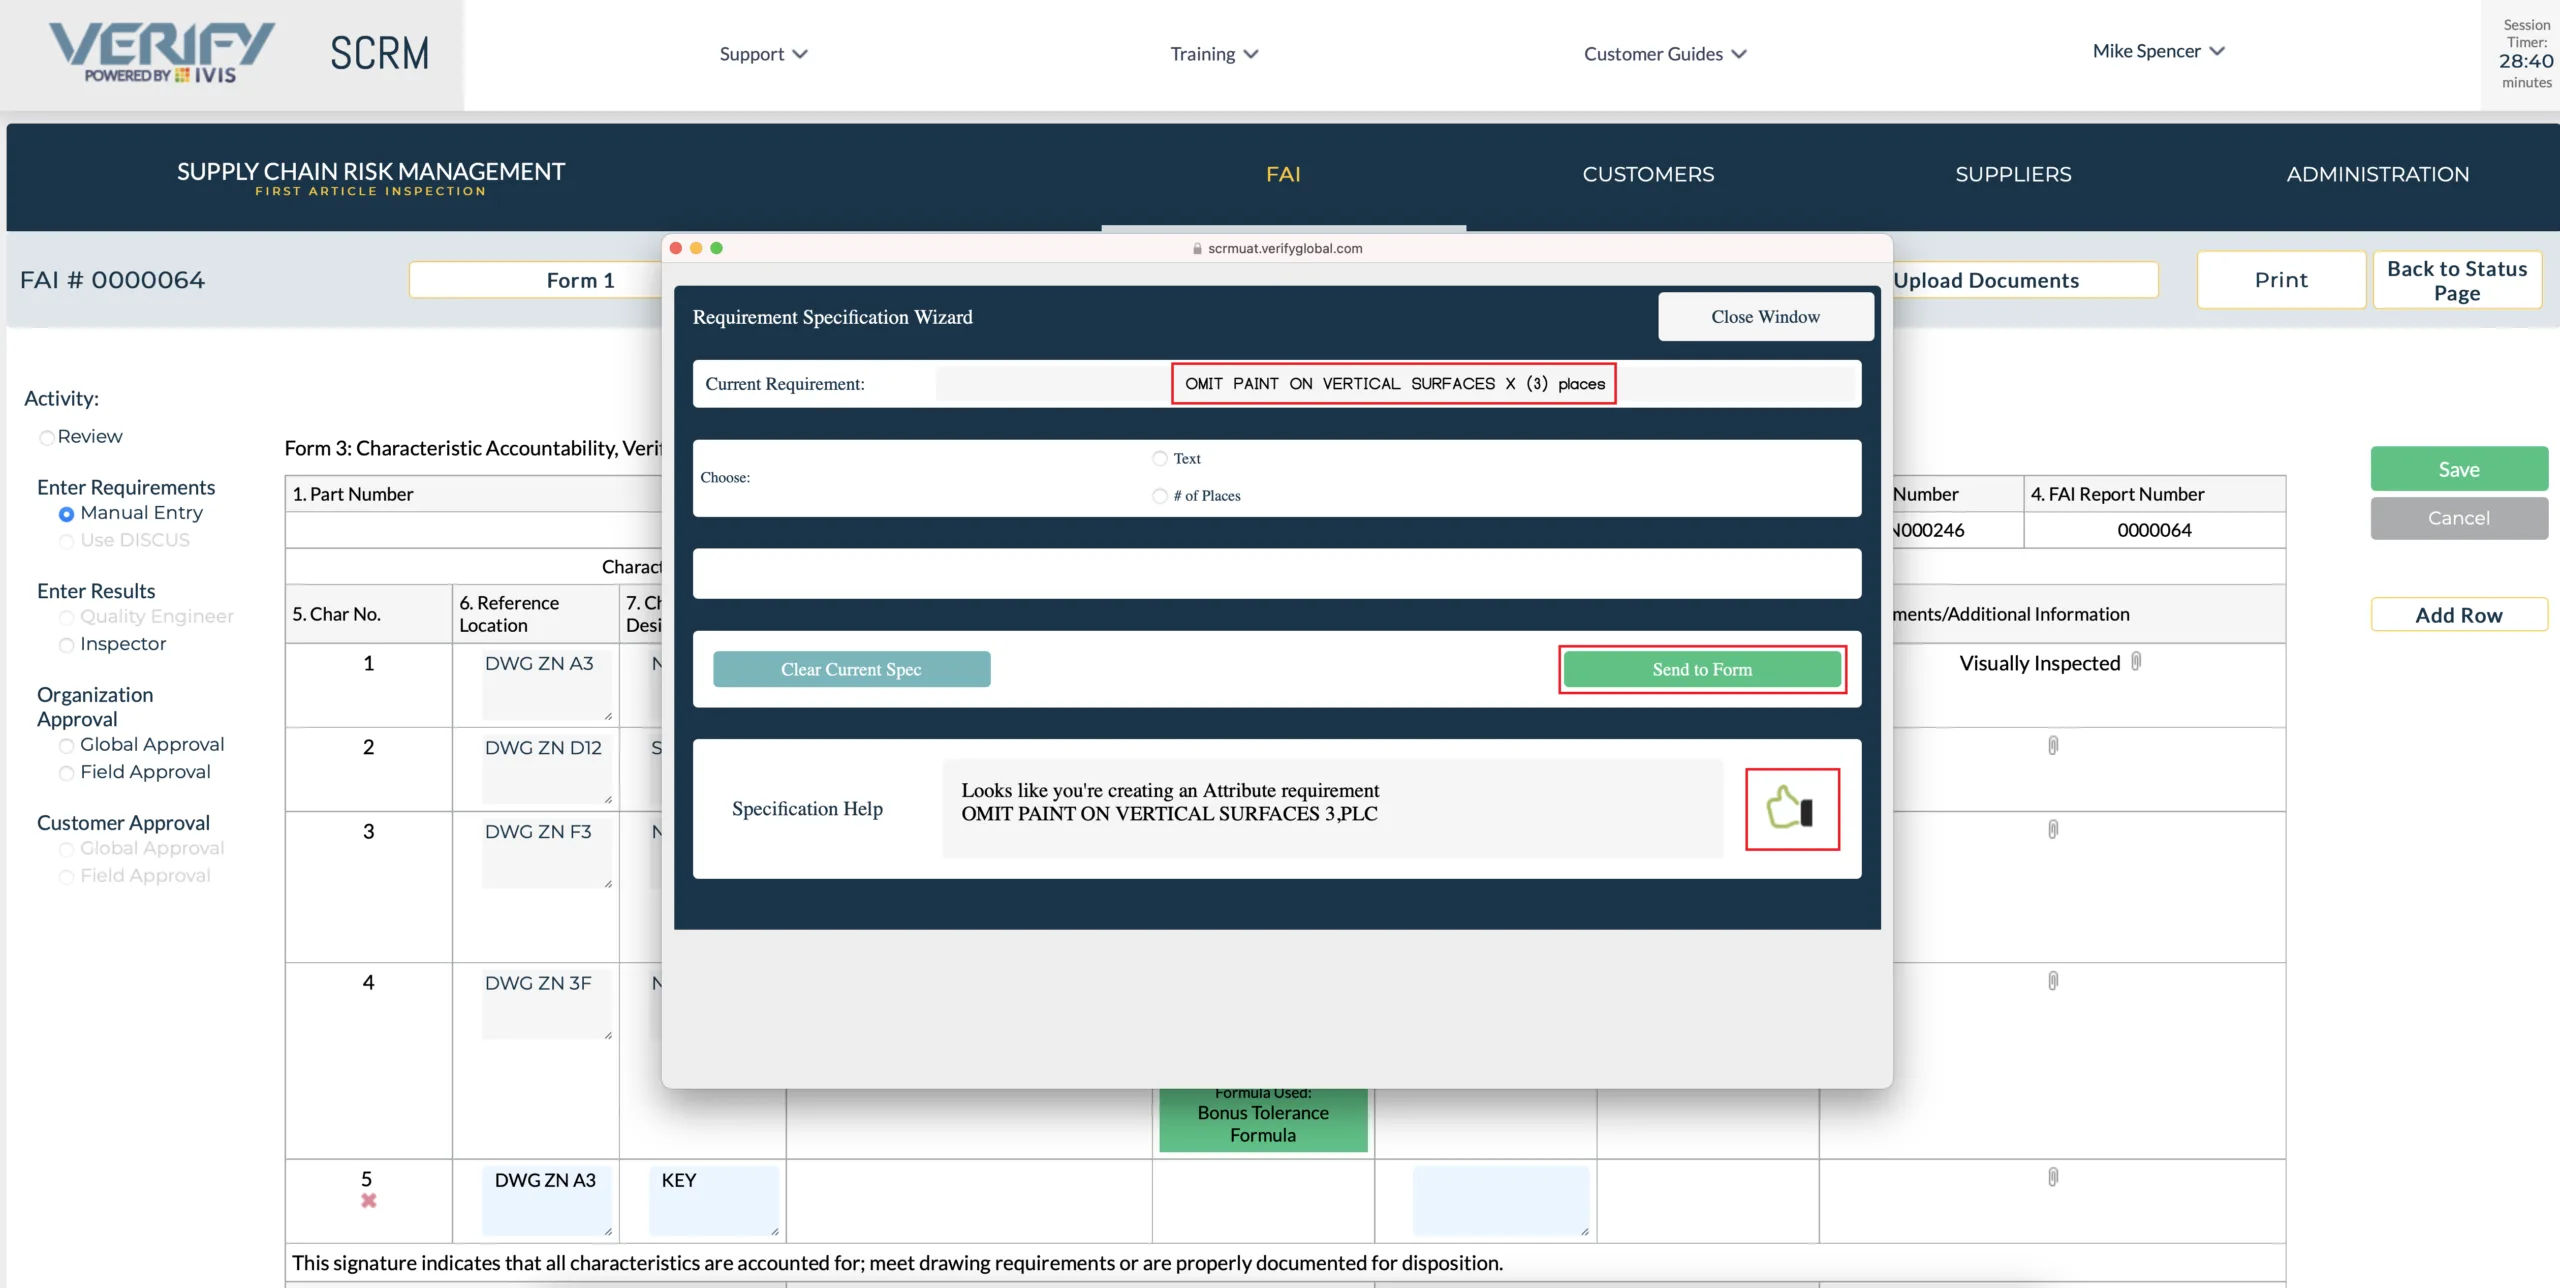
The Wizard updates form three in field 8 with the new requirement, the number of places in the requirement and provides for the same number of results. The FAI application also provides visual feedback your entries have been saved.
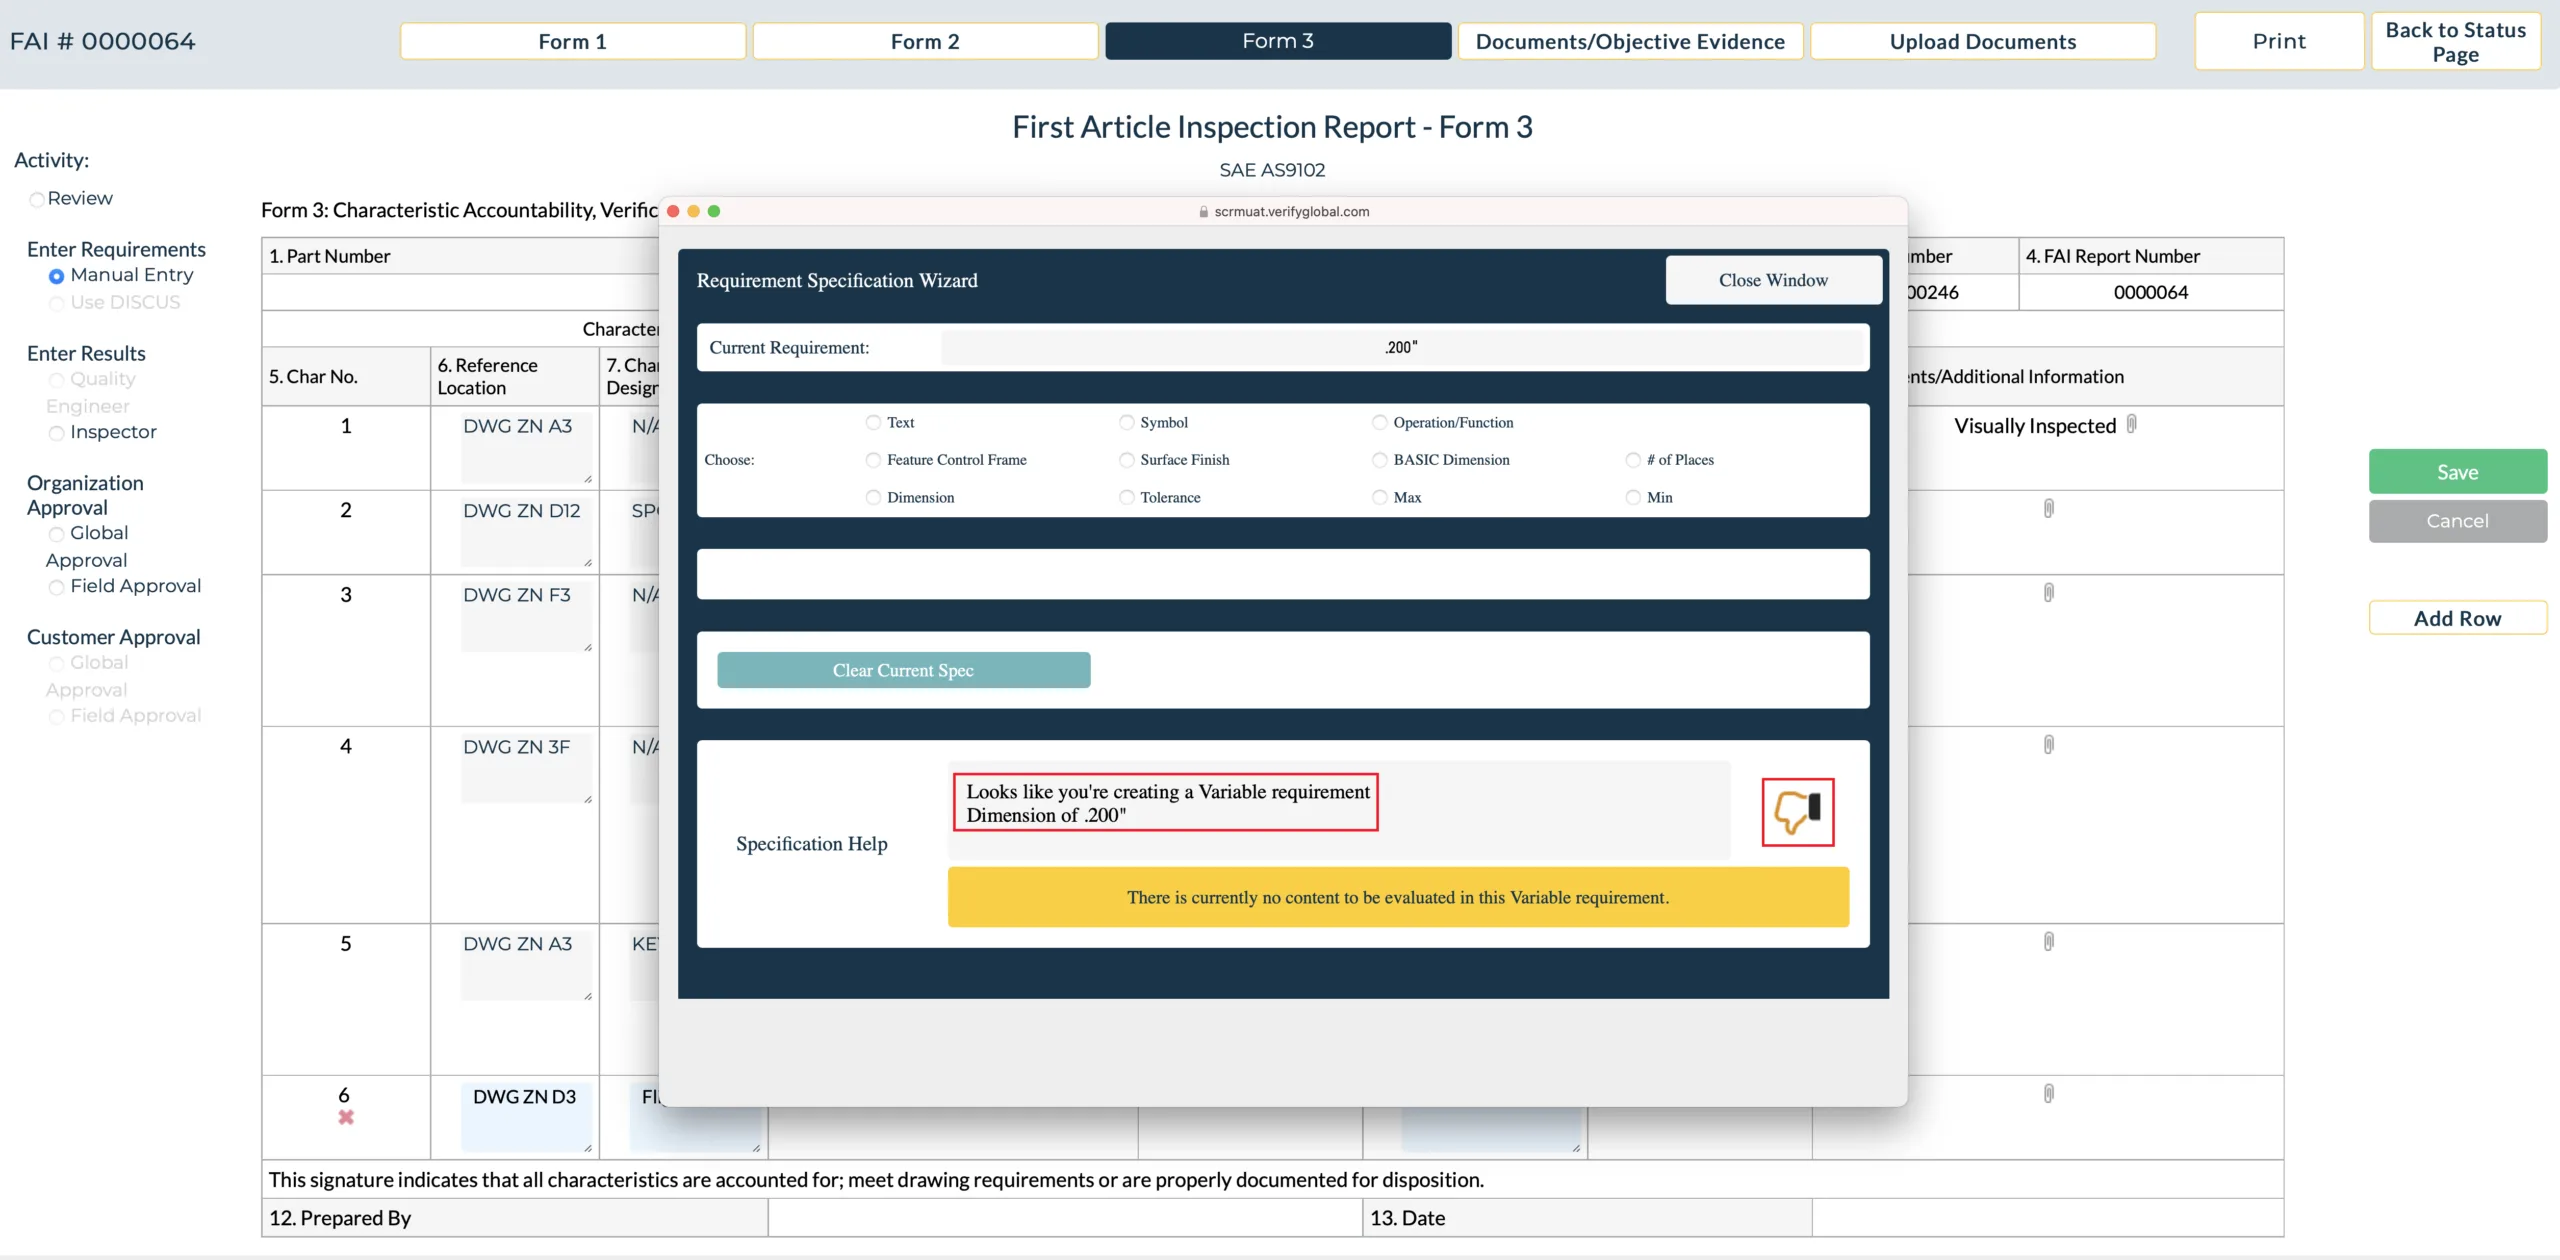
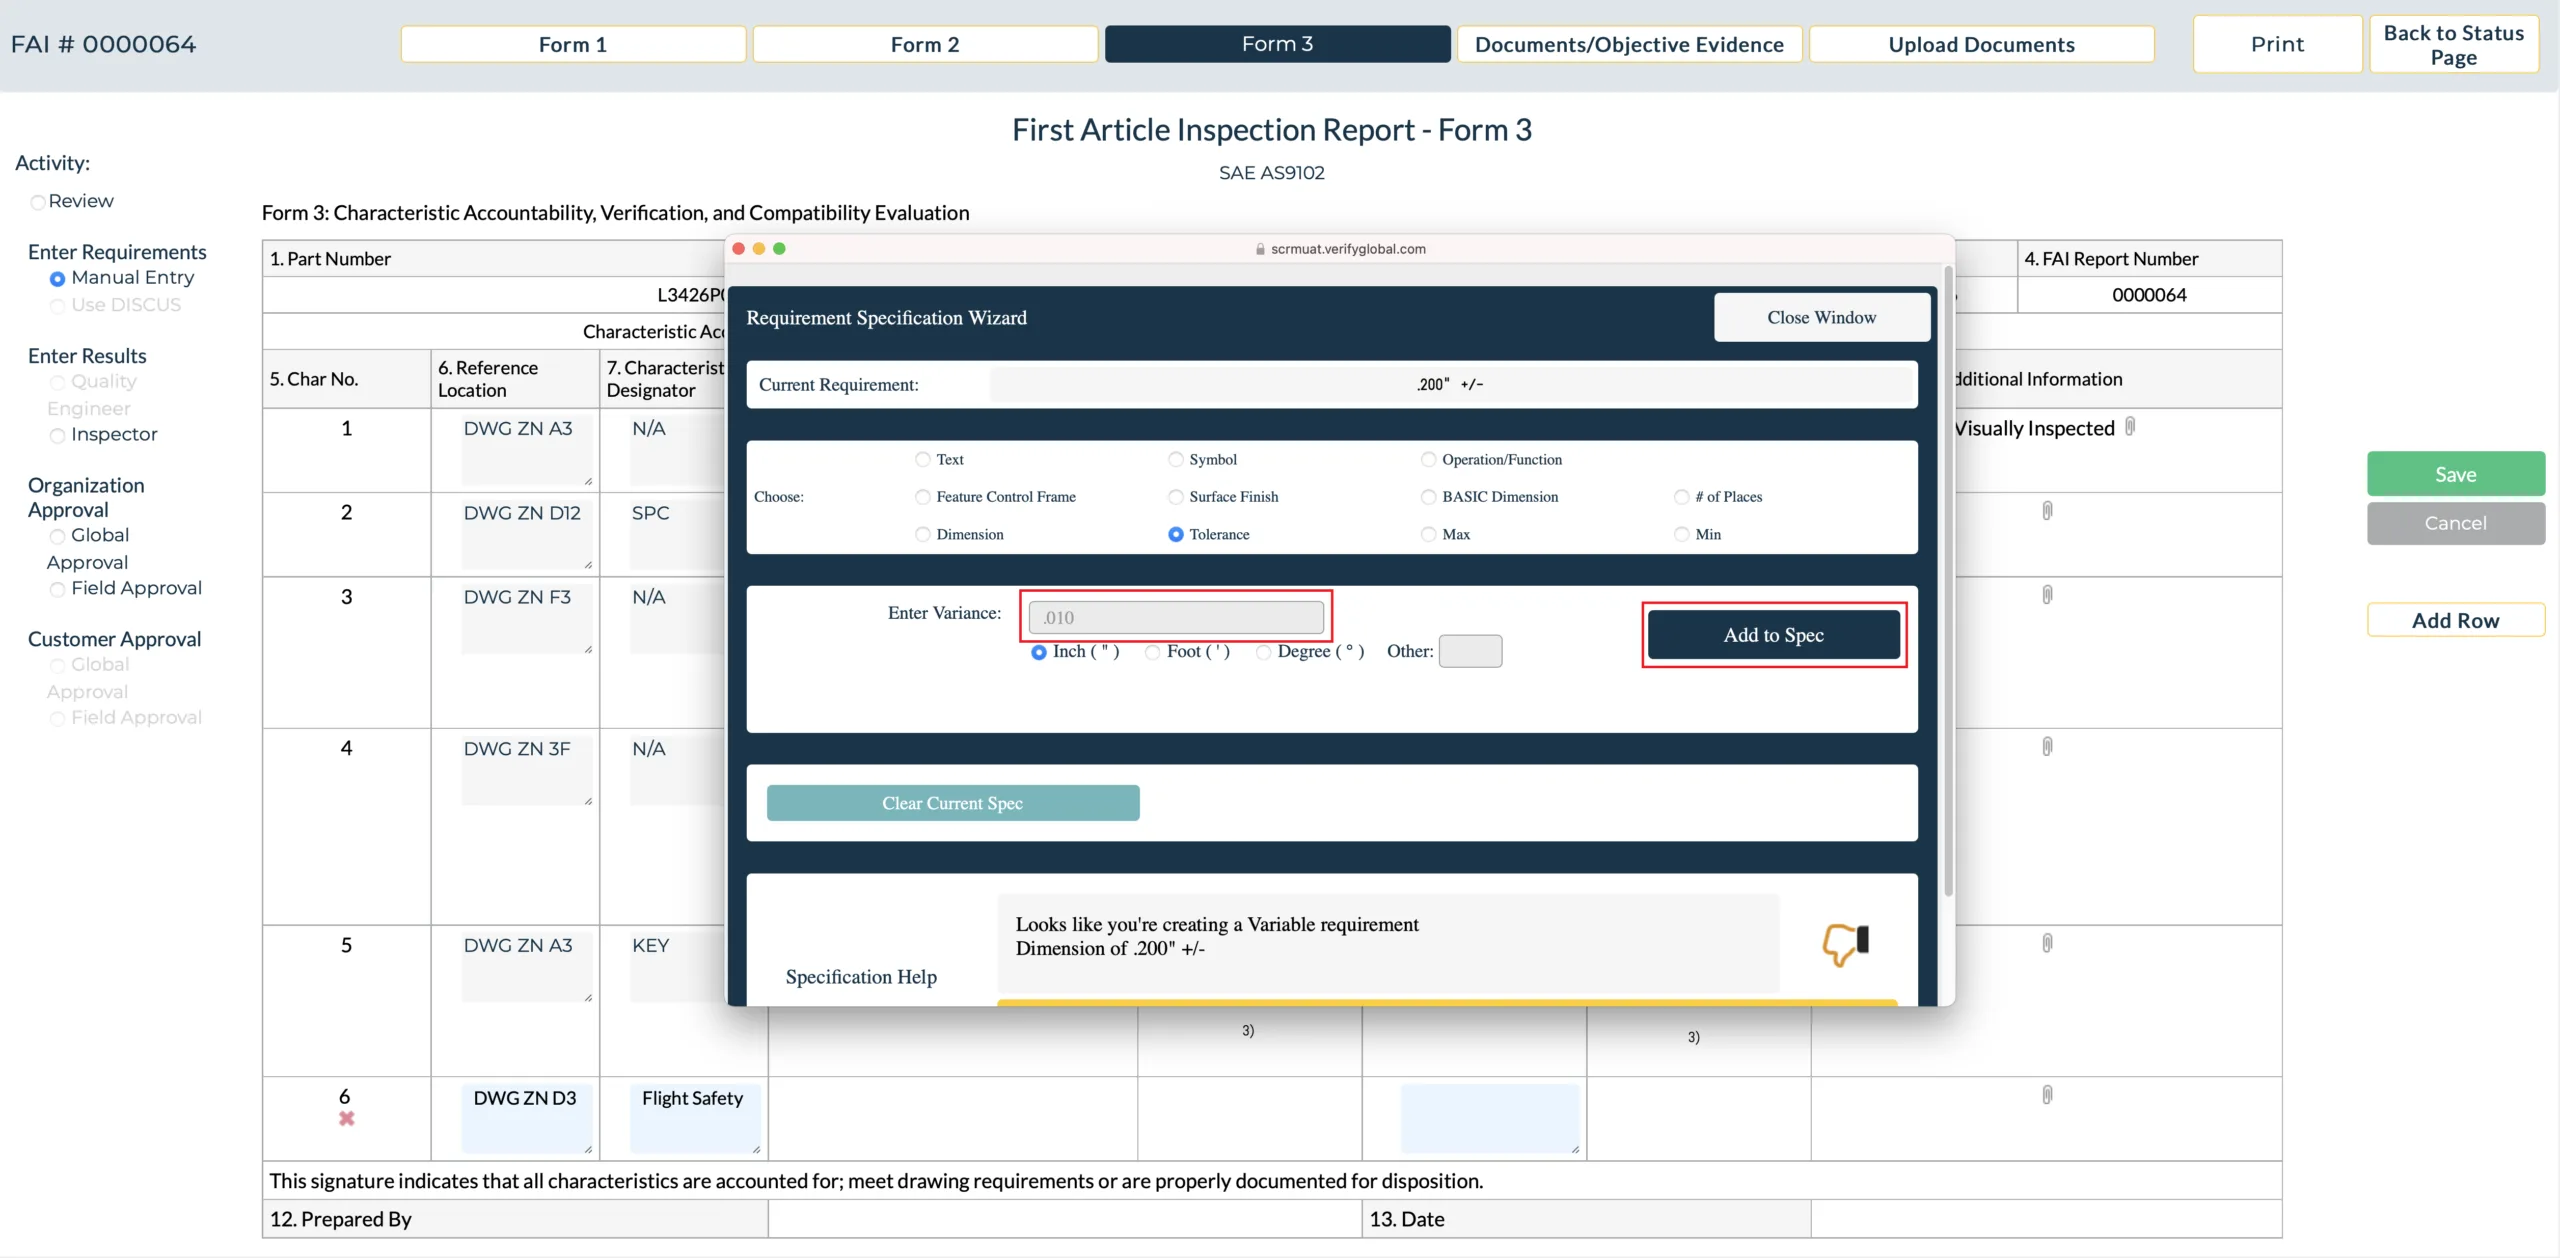
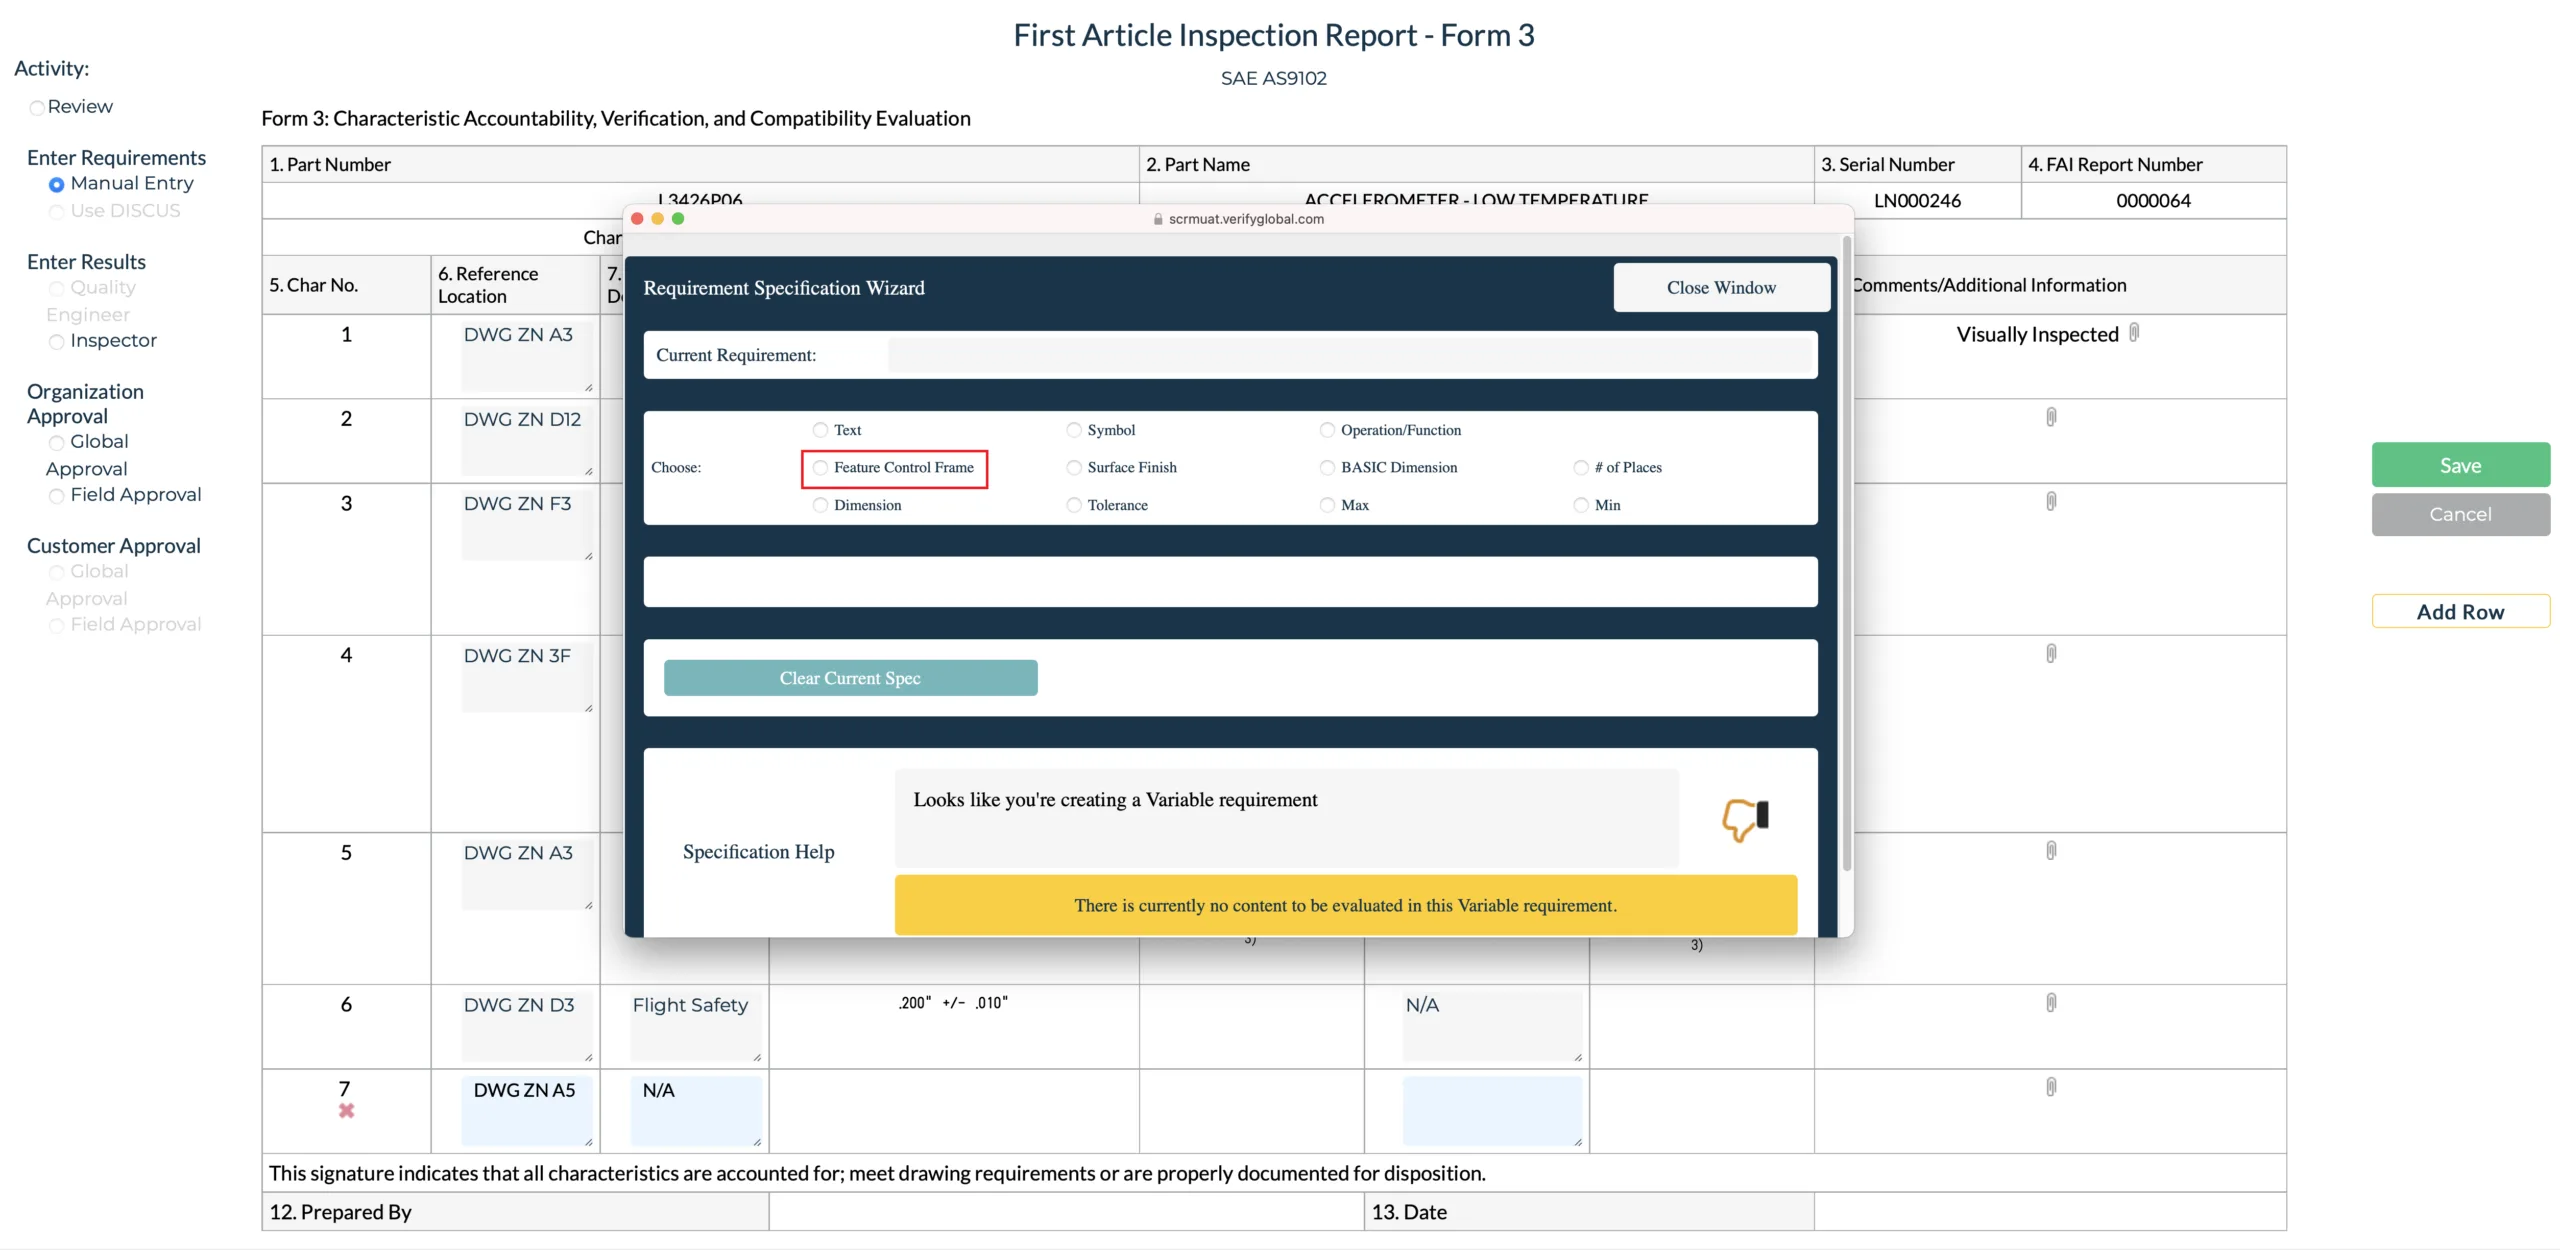
For our next example we’ll create a Variable Requirement. The Wizard Prompts the User to select the type of requirement. We will select “Variable” for this demonstration.
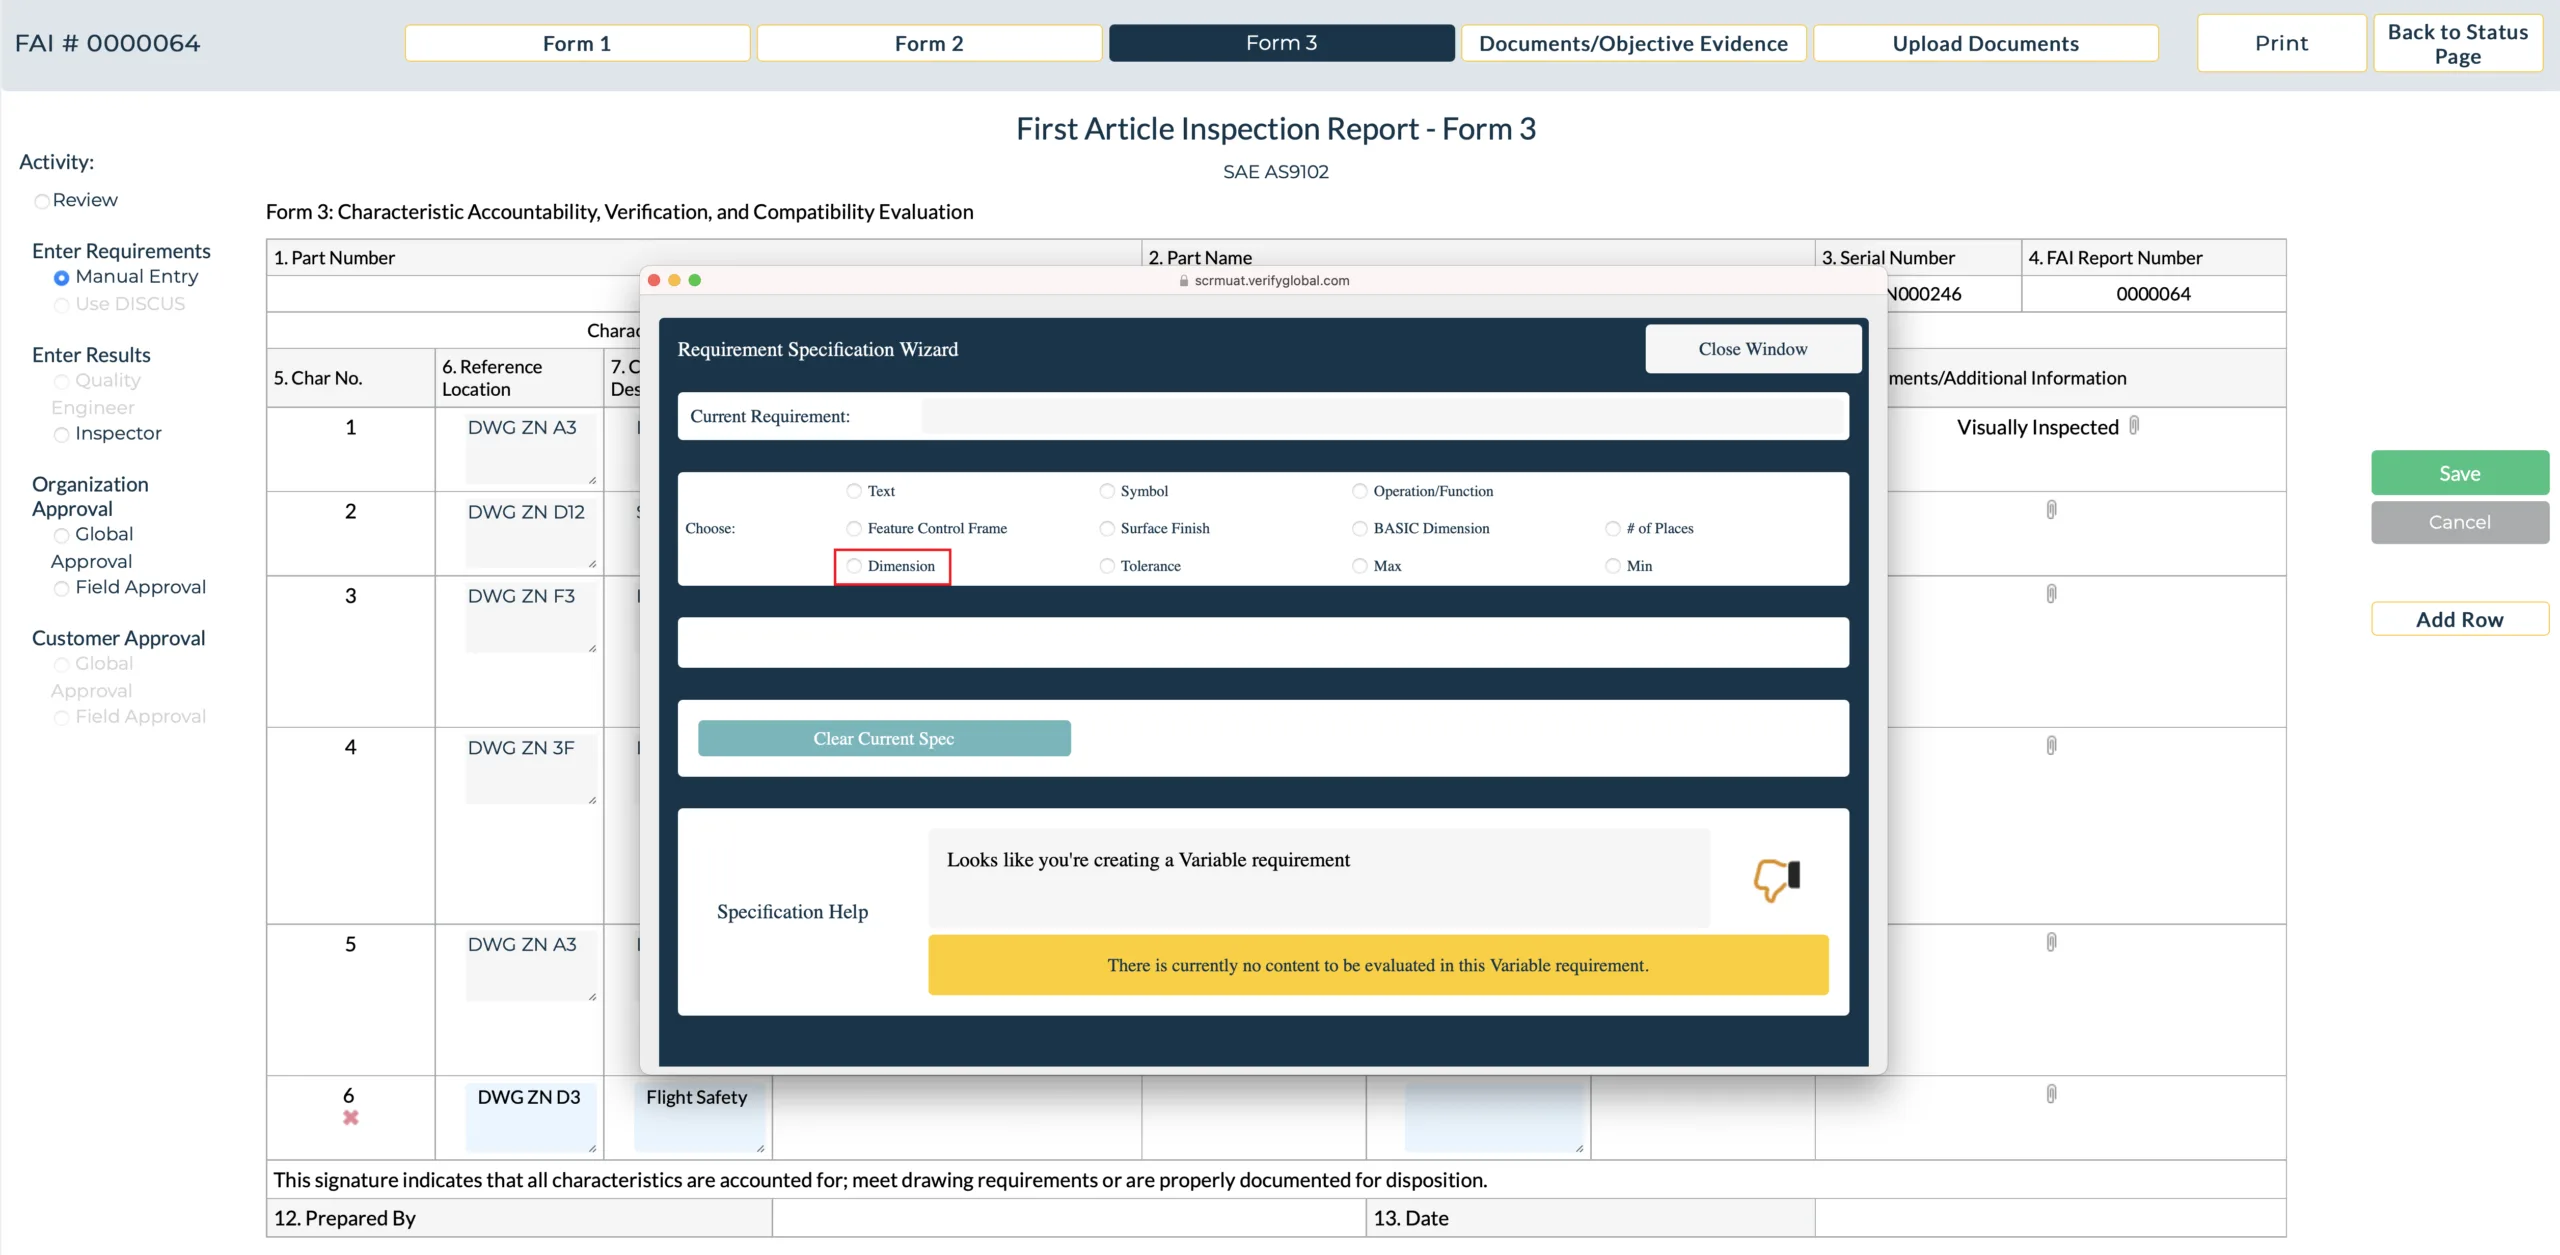
After selecting “Variable”, some decisions need to be made. First select “Dimension”.
We’ll enter a nominal dimension of “two hundred thousandths”, then select the unit of measure, “inches”. Select “add to spec”.
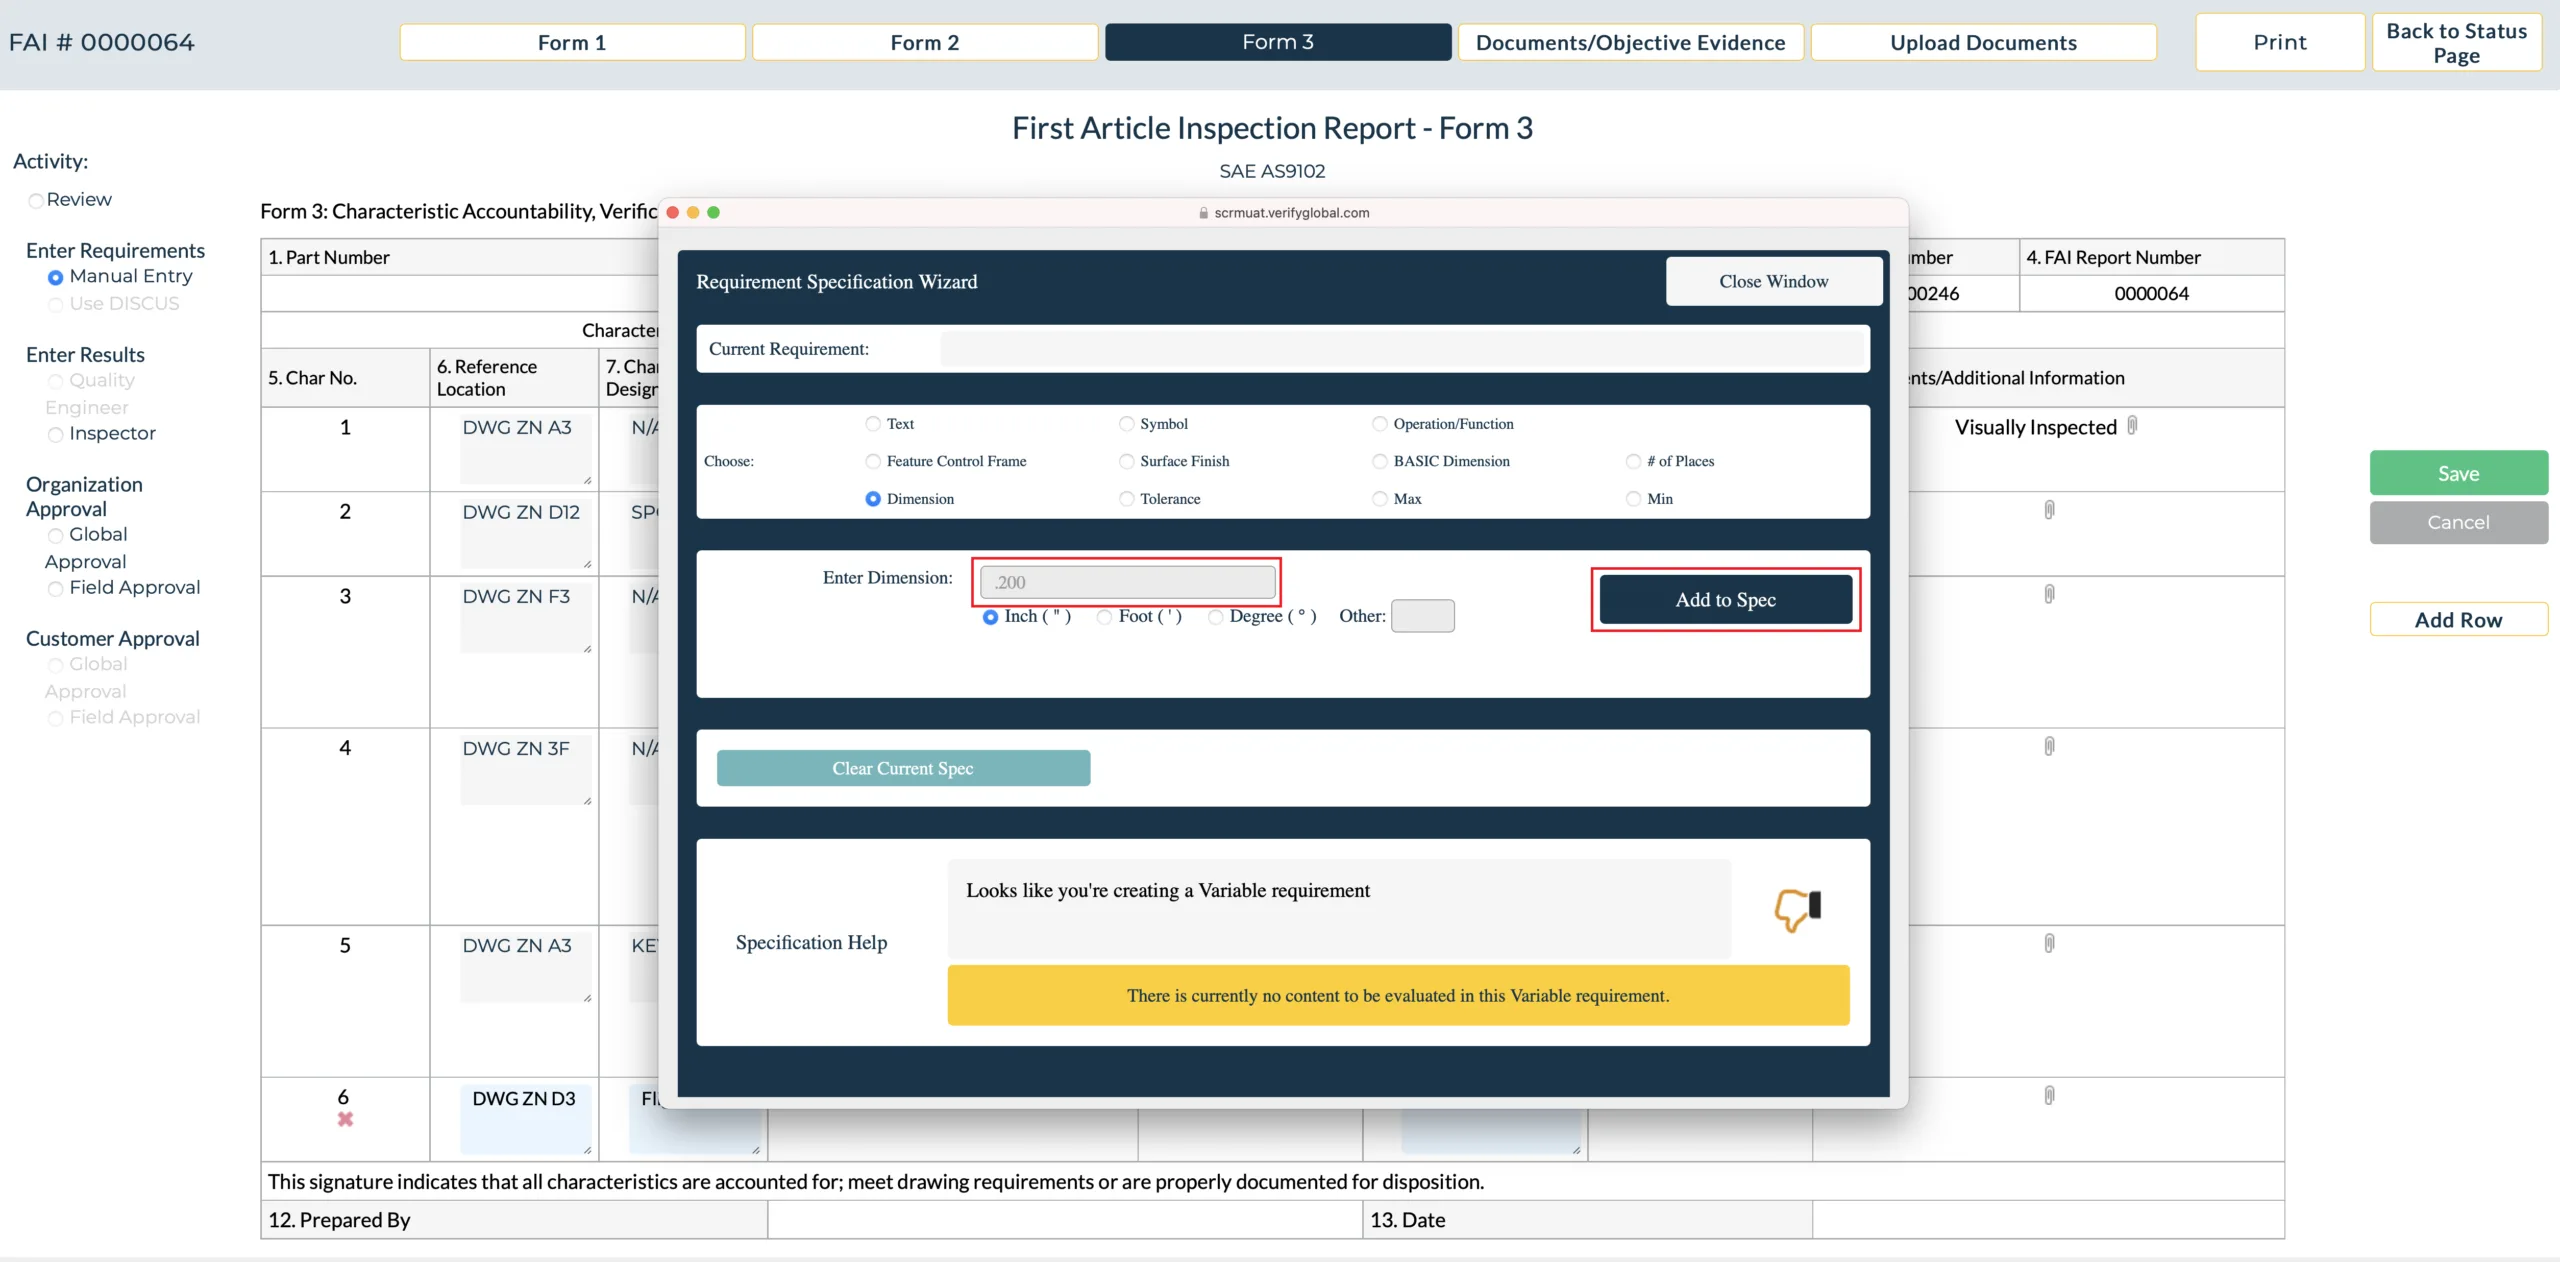
The Wizard adds the one hundred thousandths of an inch to the spec, but the spec is not complete since there is a “Thumbs Down” Indicator. Additional information is required.
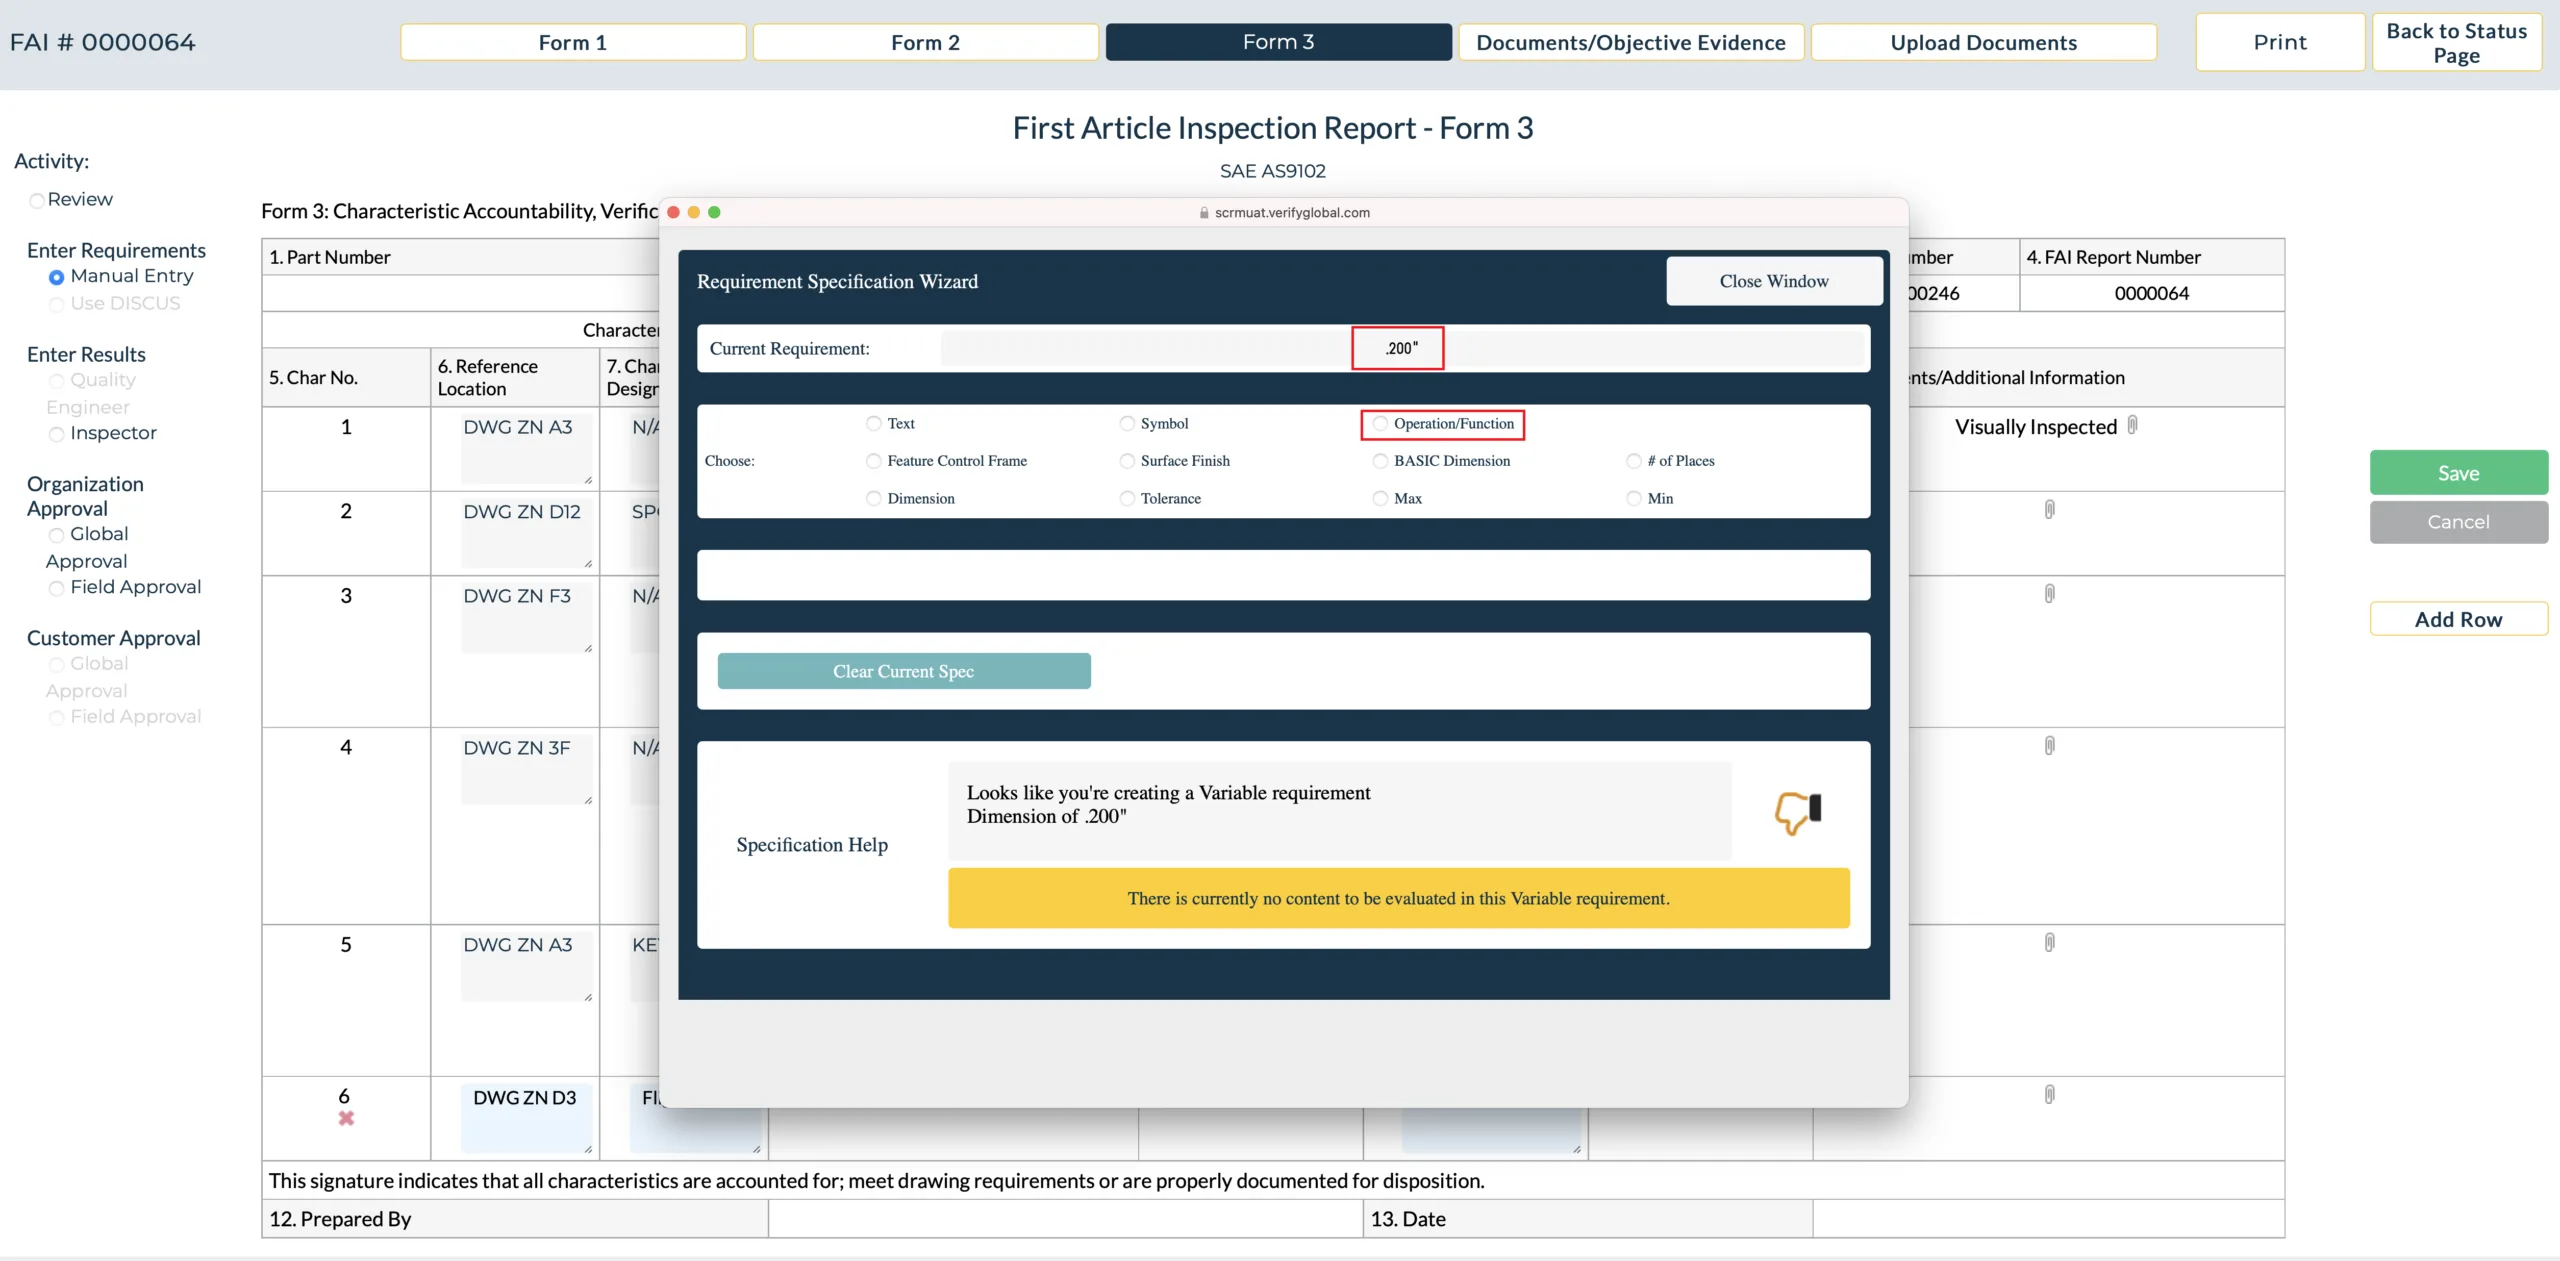
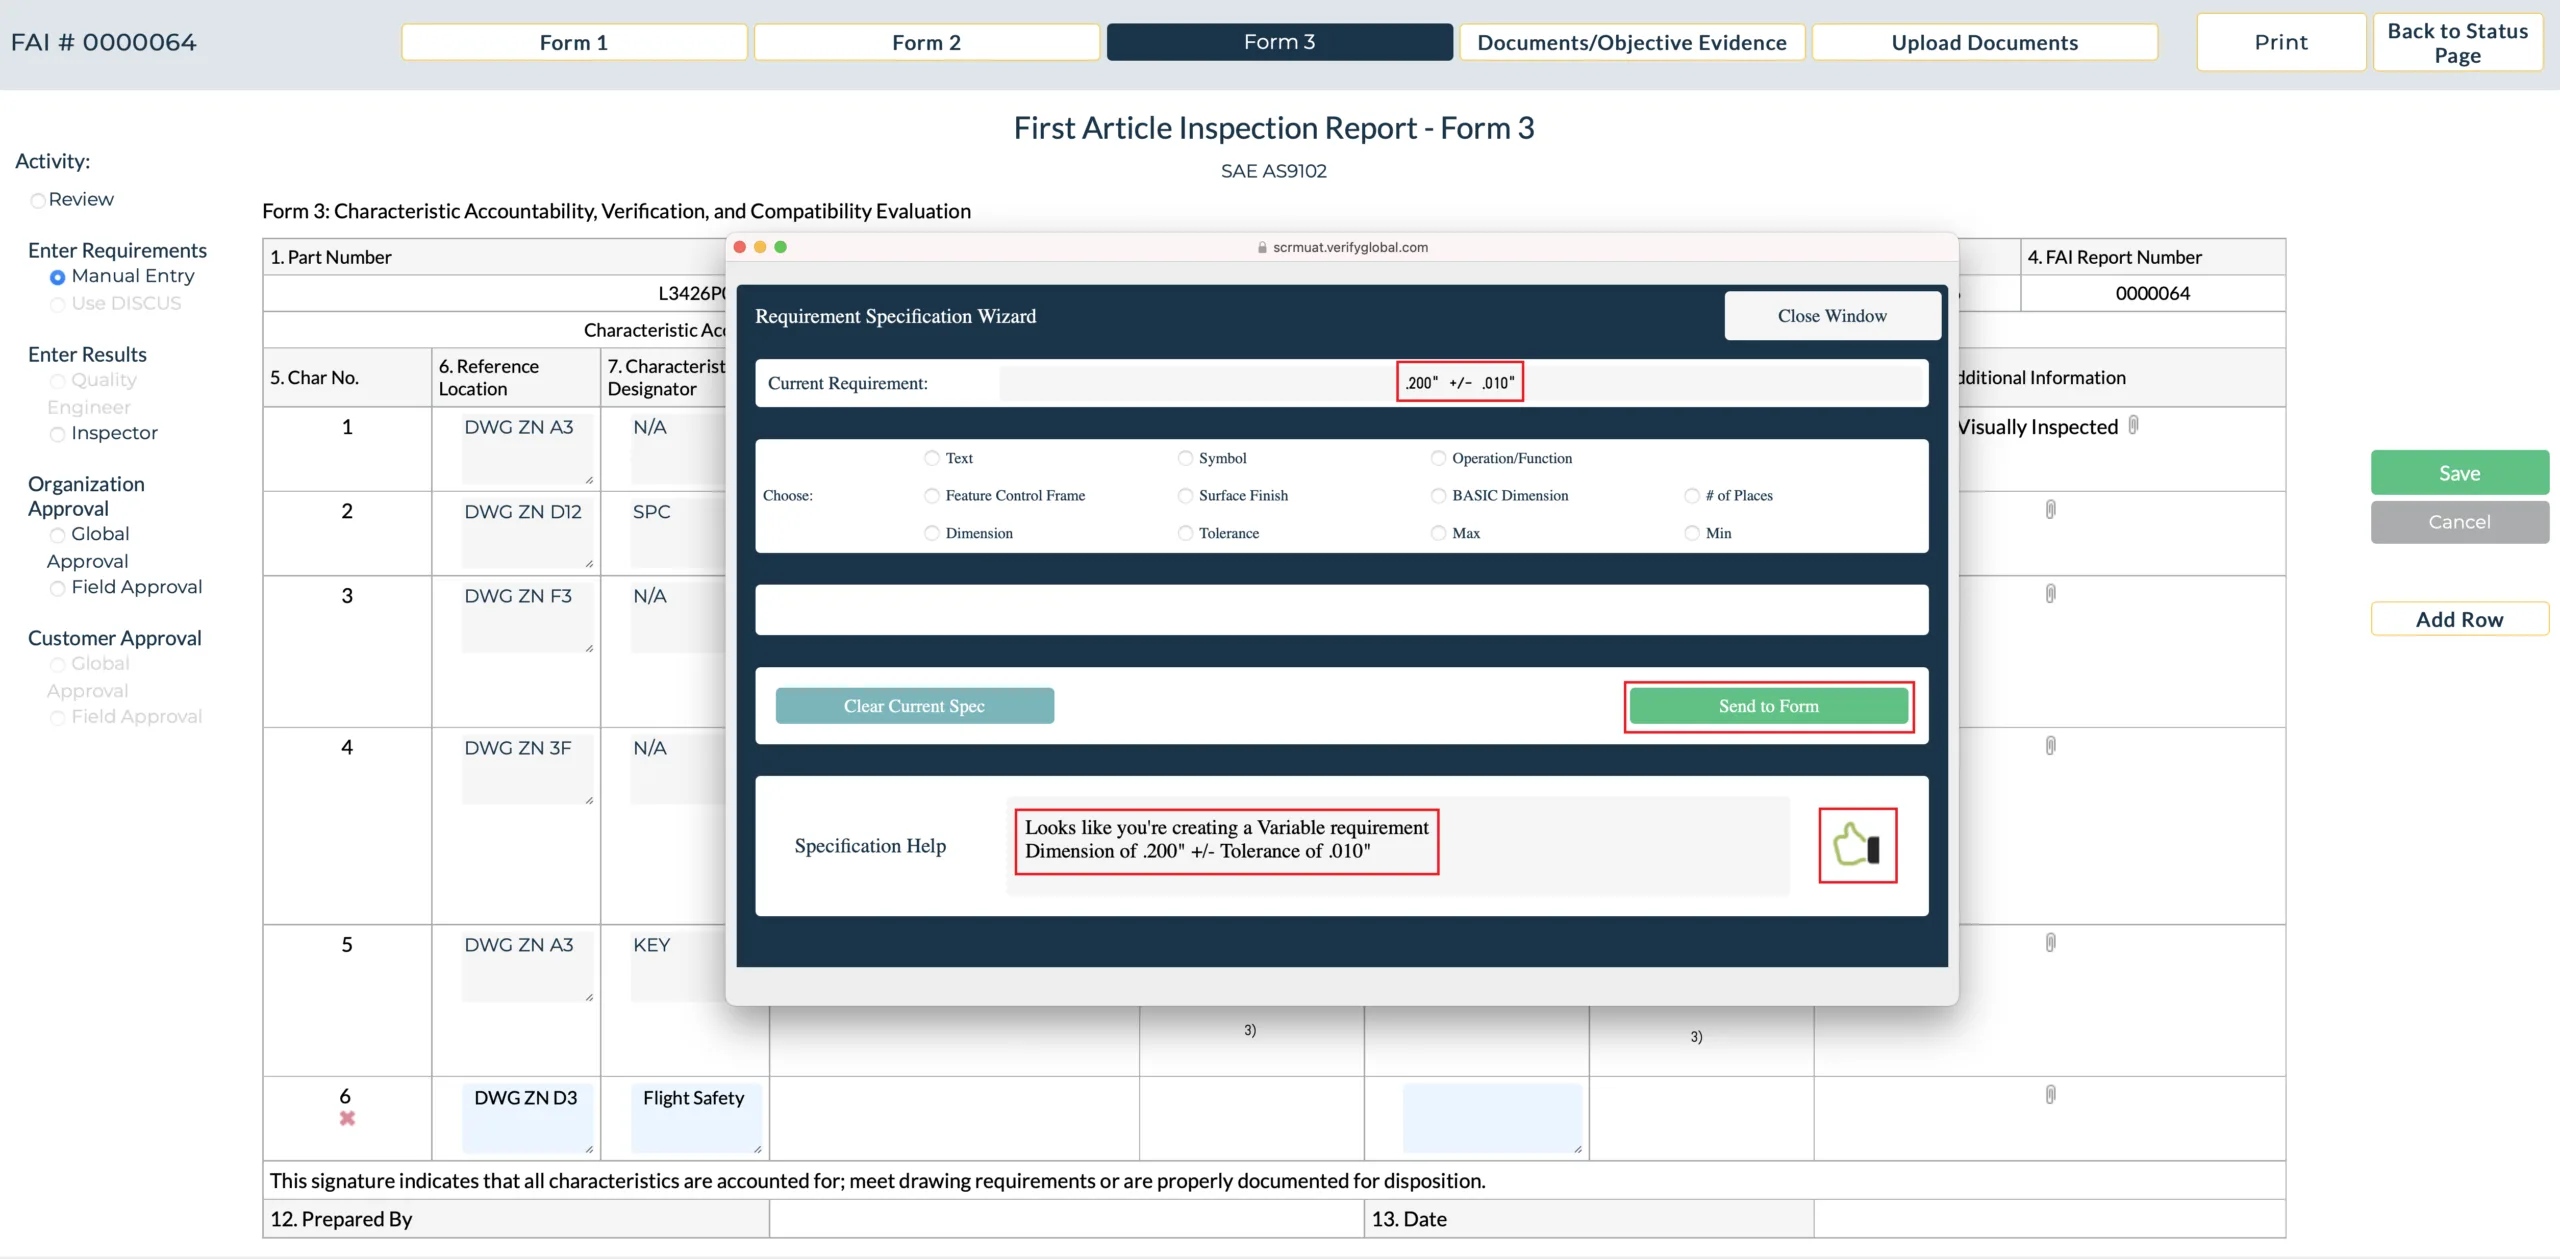
The current requirement, as it will be entered on form 3, is displayed in the first box of the Wizard. Next select “Operation/Function”
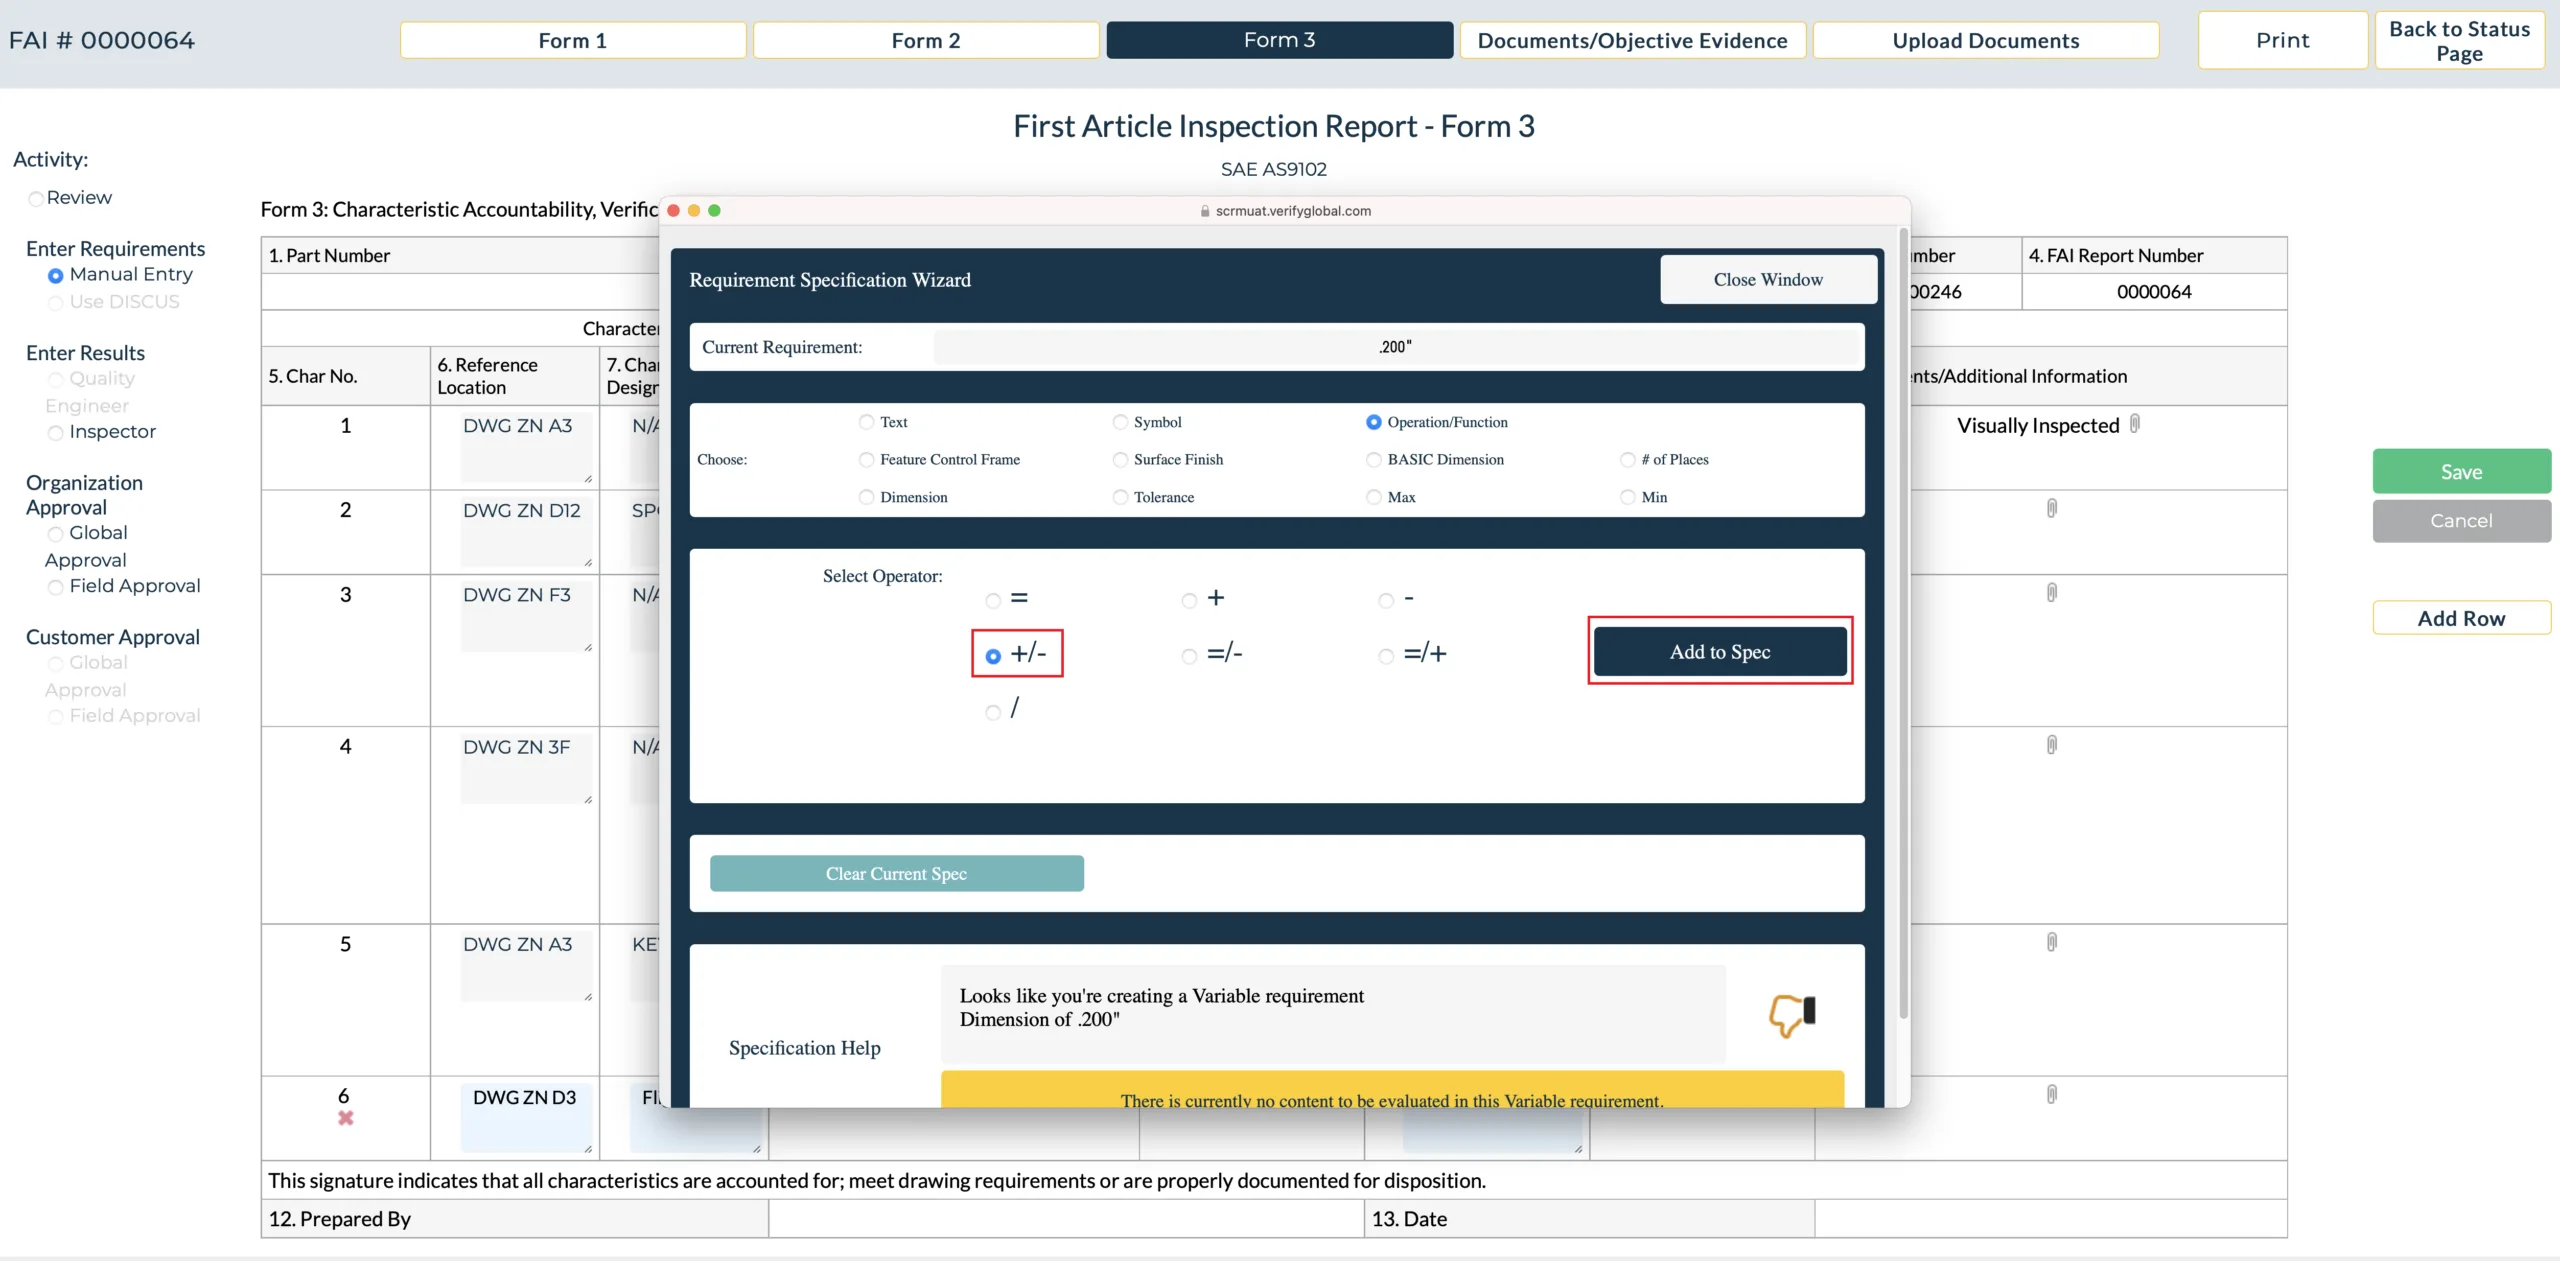
A list of symbols is displayed. These symbols bound the tolerance. For our example, we will choose the “Plus or Minus” symbol, and then click on “Add to Spec”.
Next, we will add the tolerance by clicking the tolerance radio button.
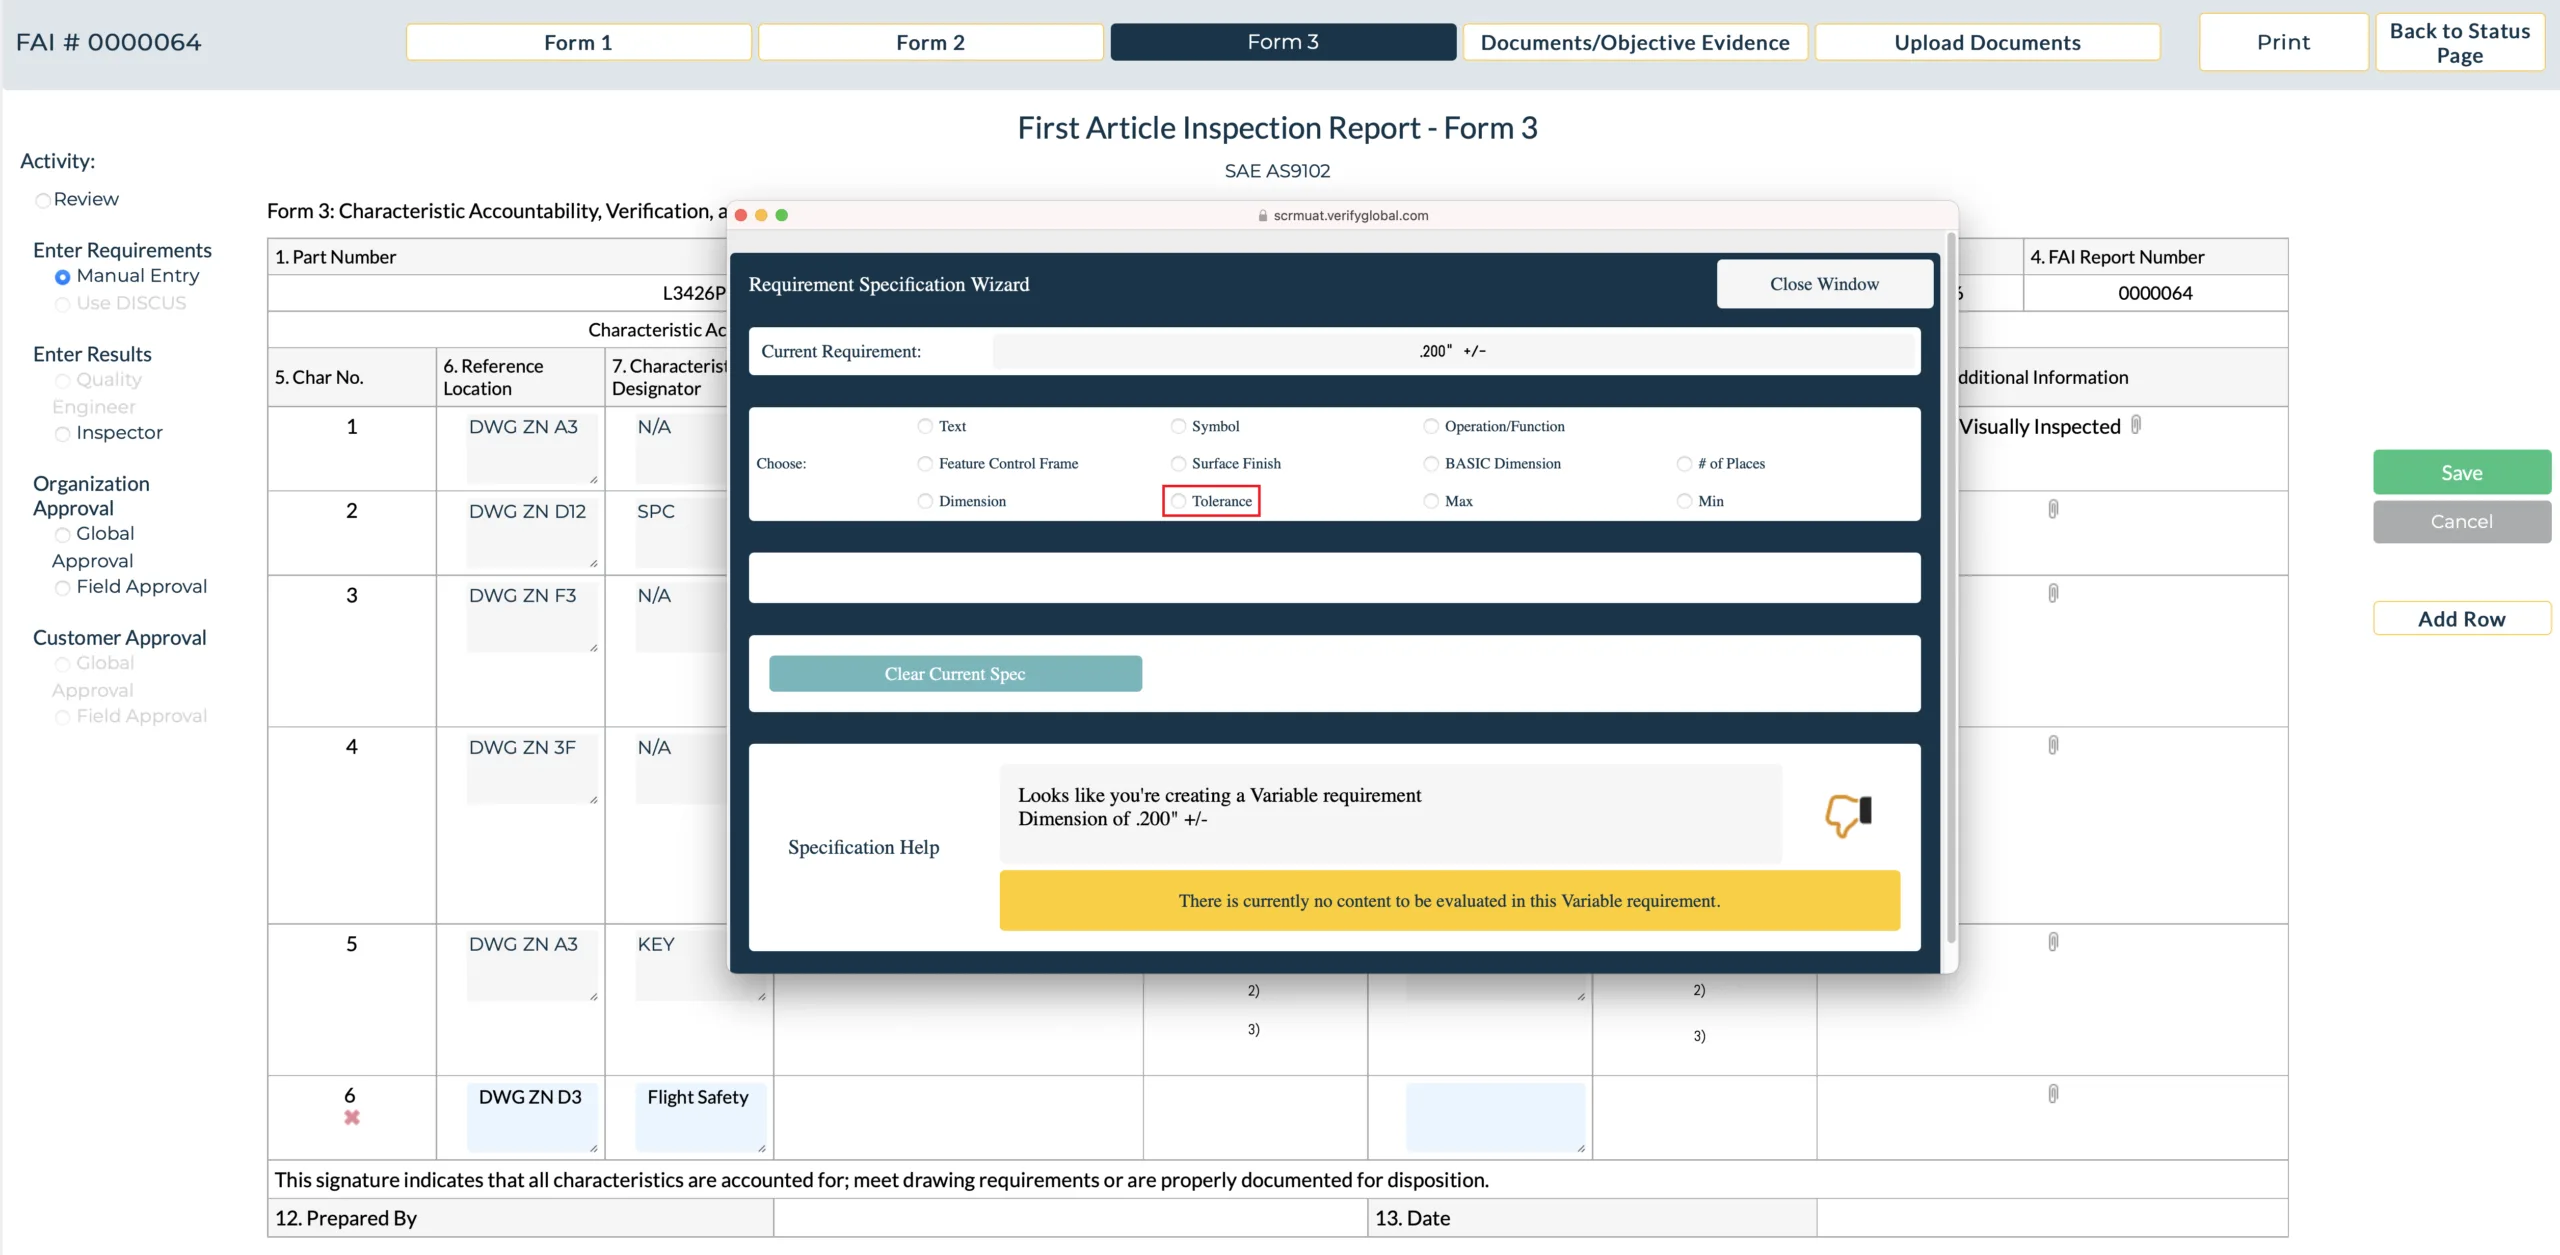
Then enter the tolerance, select the unit of measure (inches) and click on “Add to Spec”.
We now have a completed variable requirement of “one hundred thousandths plus or minus ten thousandths of an inch”. The Wizard displays the current version of the requirement in the top box, and in the help box, displays a “Thumbs Up” indicating the requirement is valid. Click on the “Send to form” button to send the requirement to form 3.
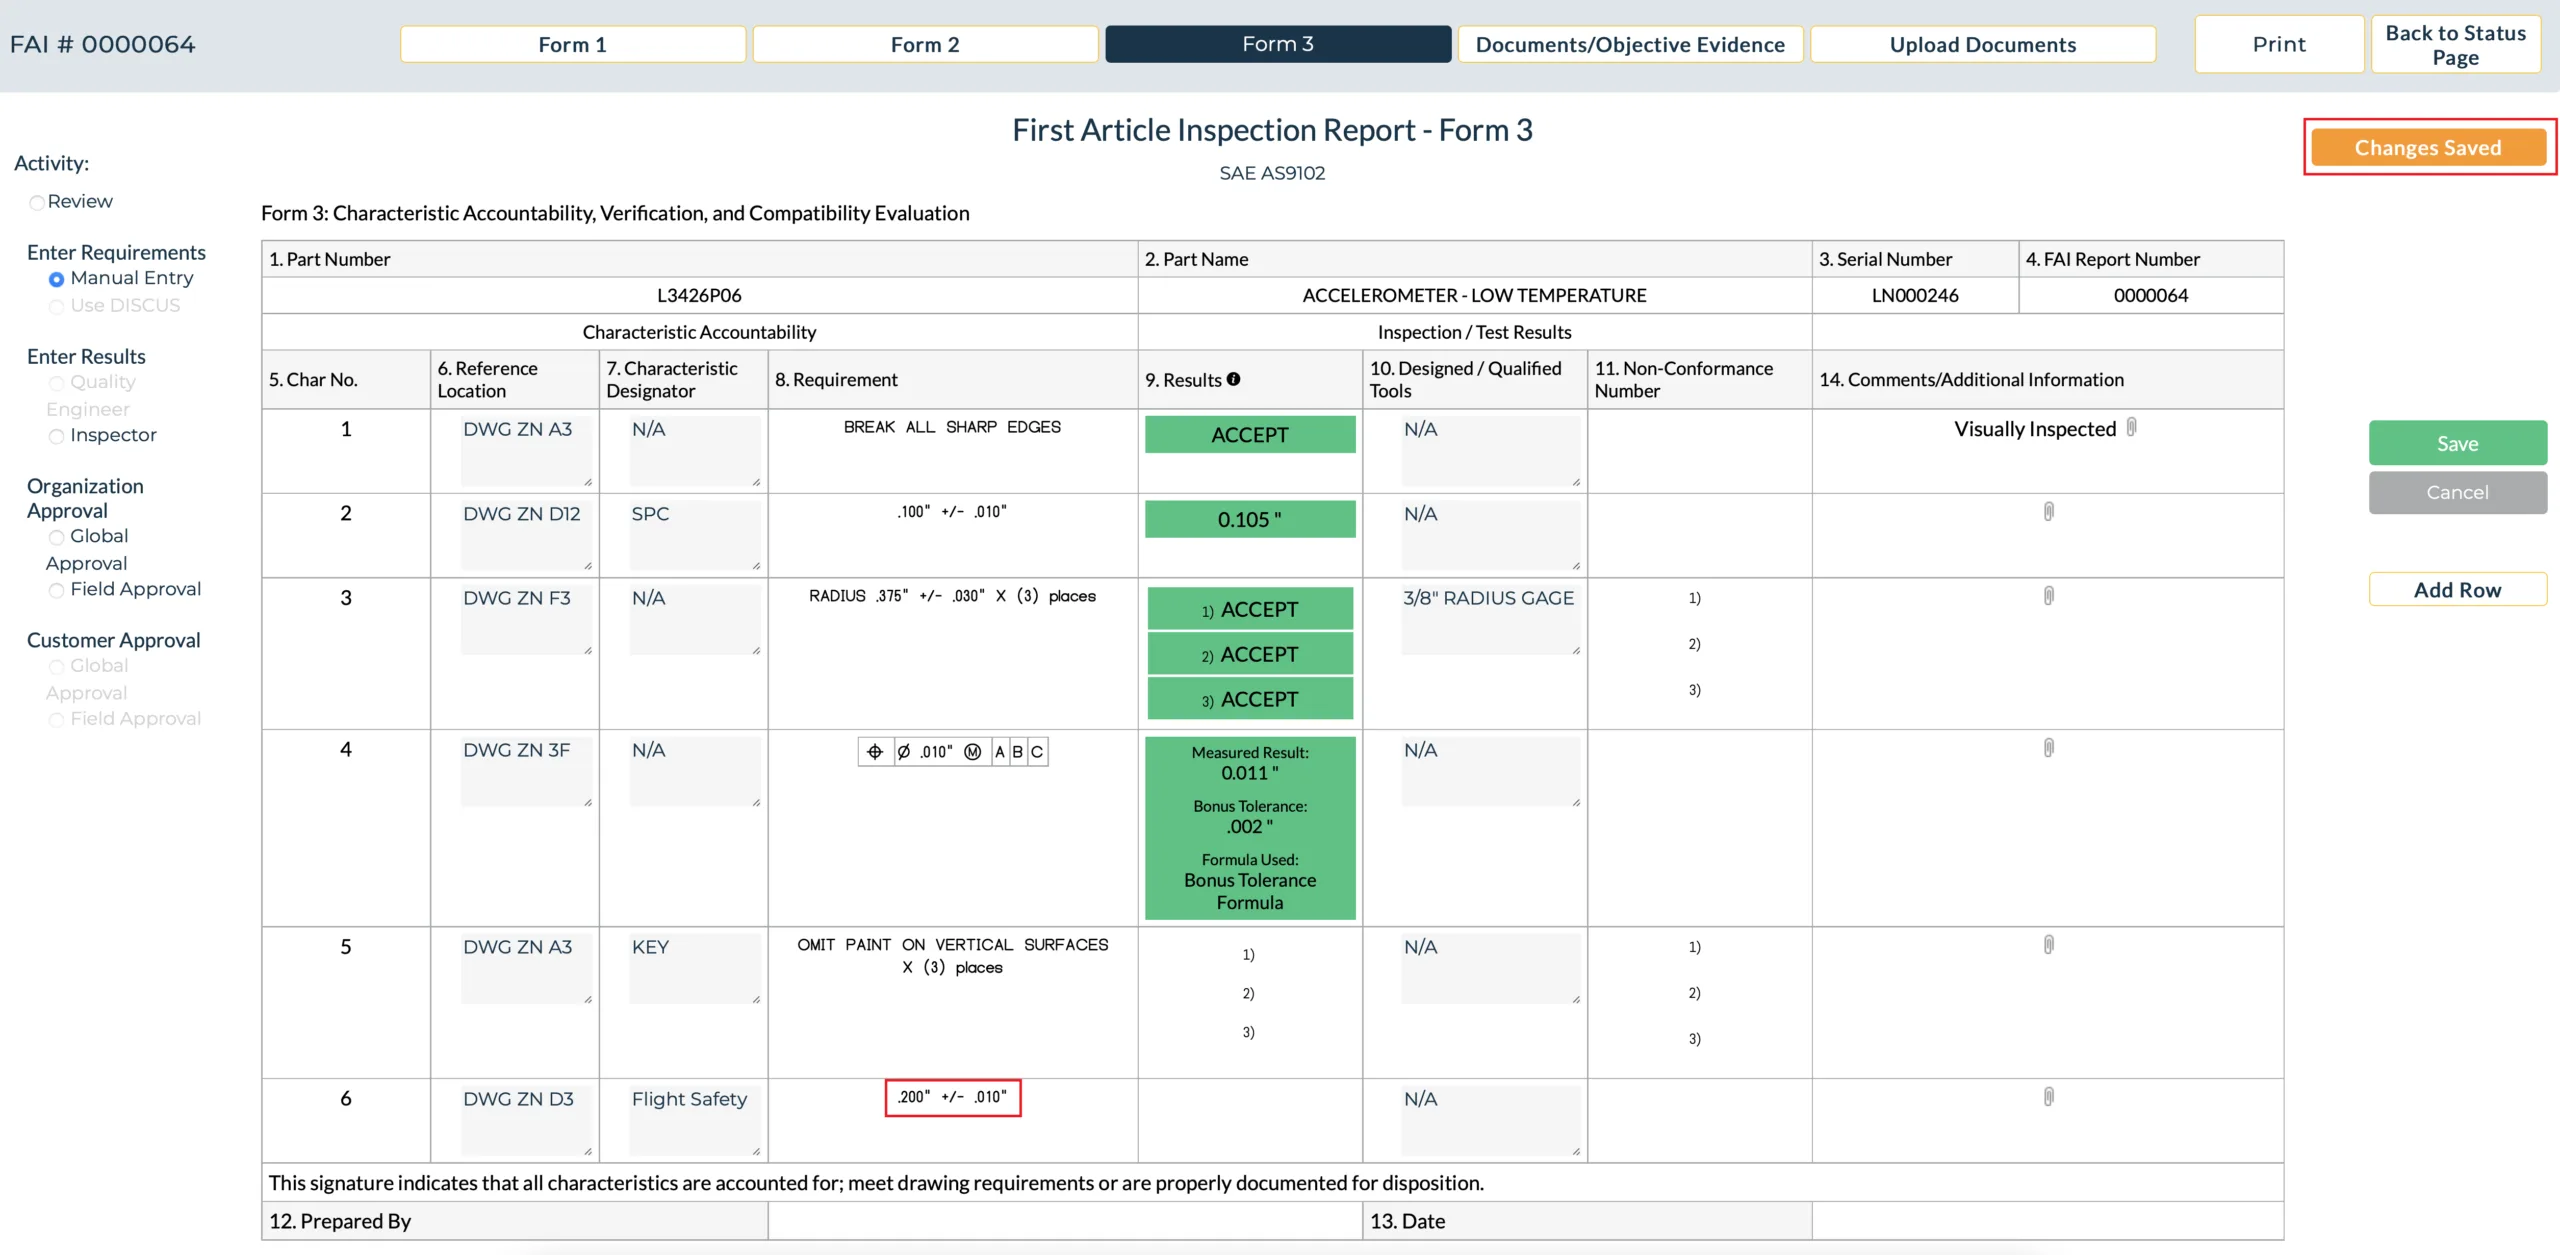
The new requirement now displays on form 3, in field 8 and the FAI application displays the visual feedback that your additions/changes have been saved.
The next example we will explore is how to create a GD&T feature control frame in the Requirements wizard. First select Variable Requirement.
Then select “Feature Control Frame”.
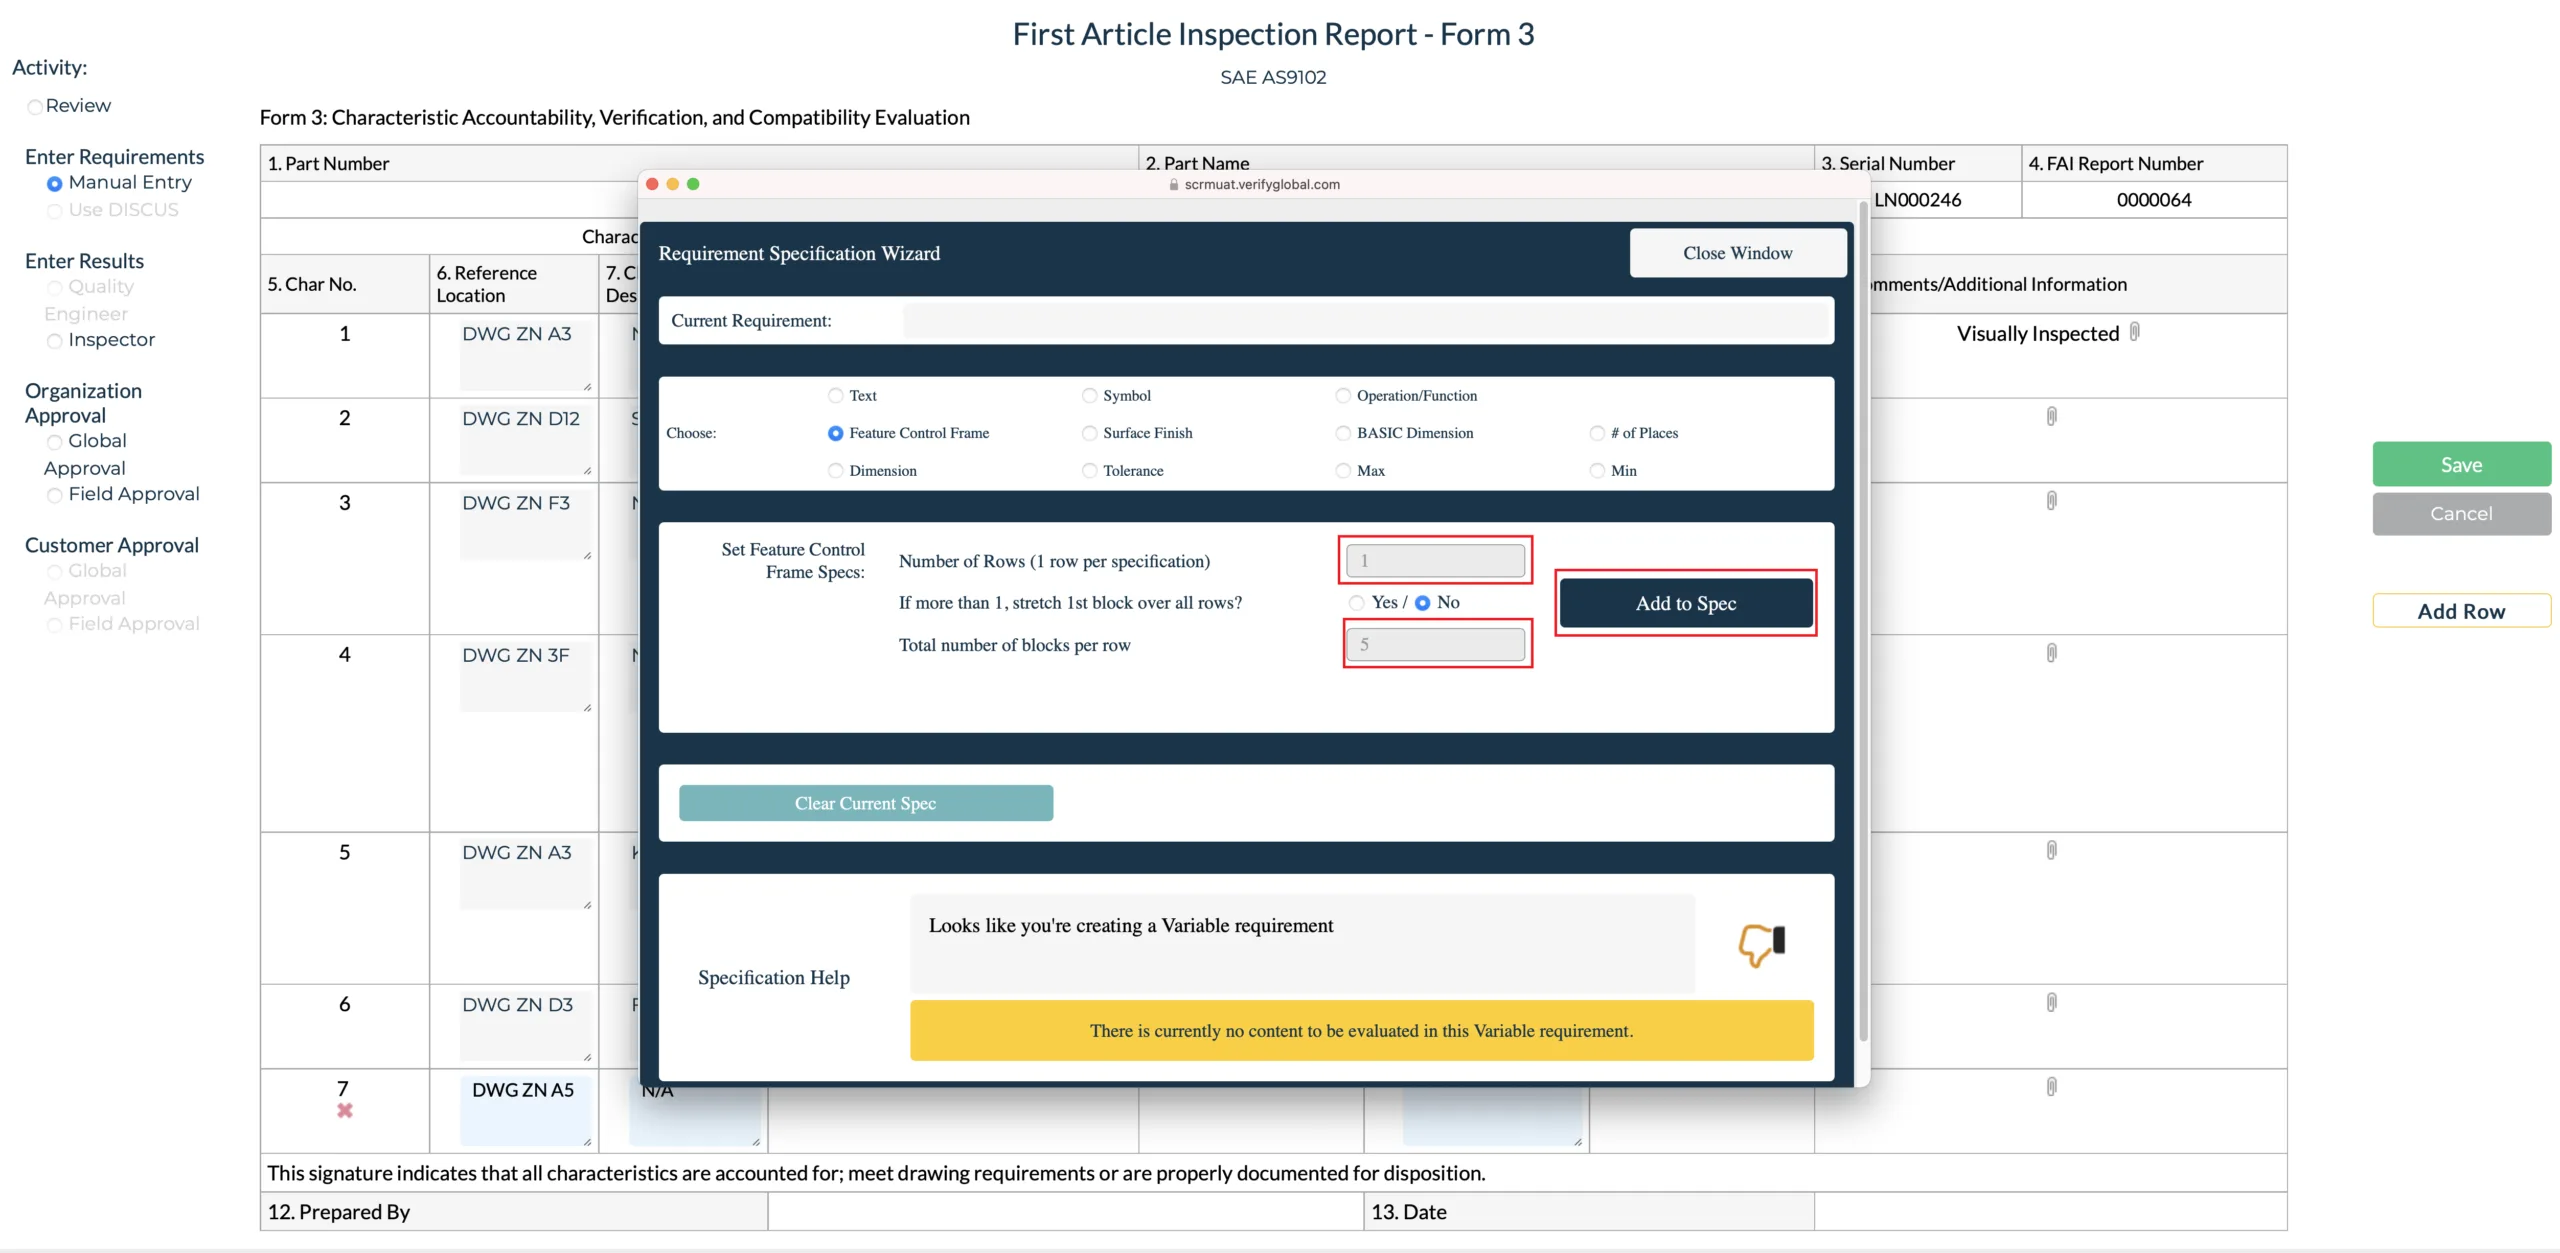
Next, we enter the number of Rows in the feature control frame, and the number of blocks per row. Select “Add to Spec”.
Select Block 1/1 (Row 1, Block 1) and select the Symbol Radio Button.
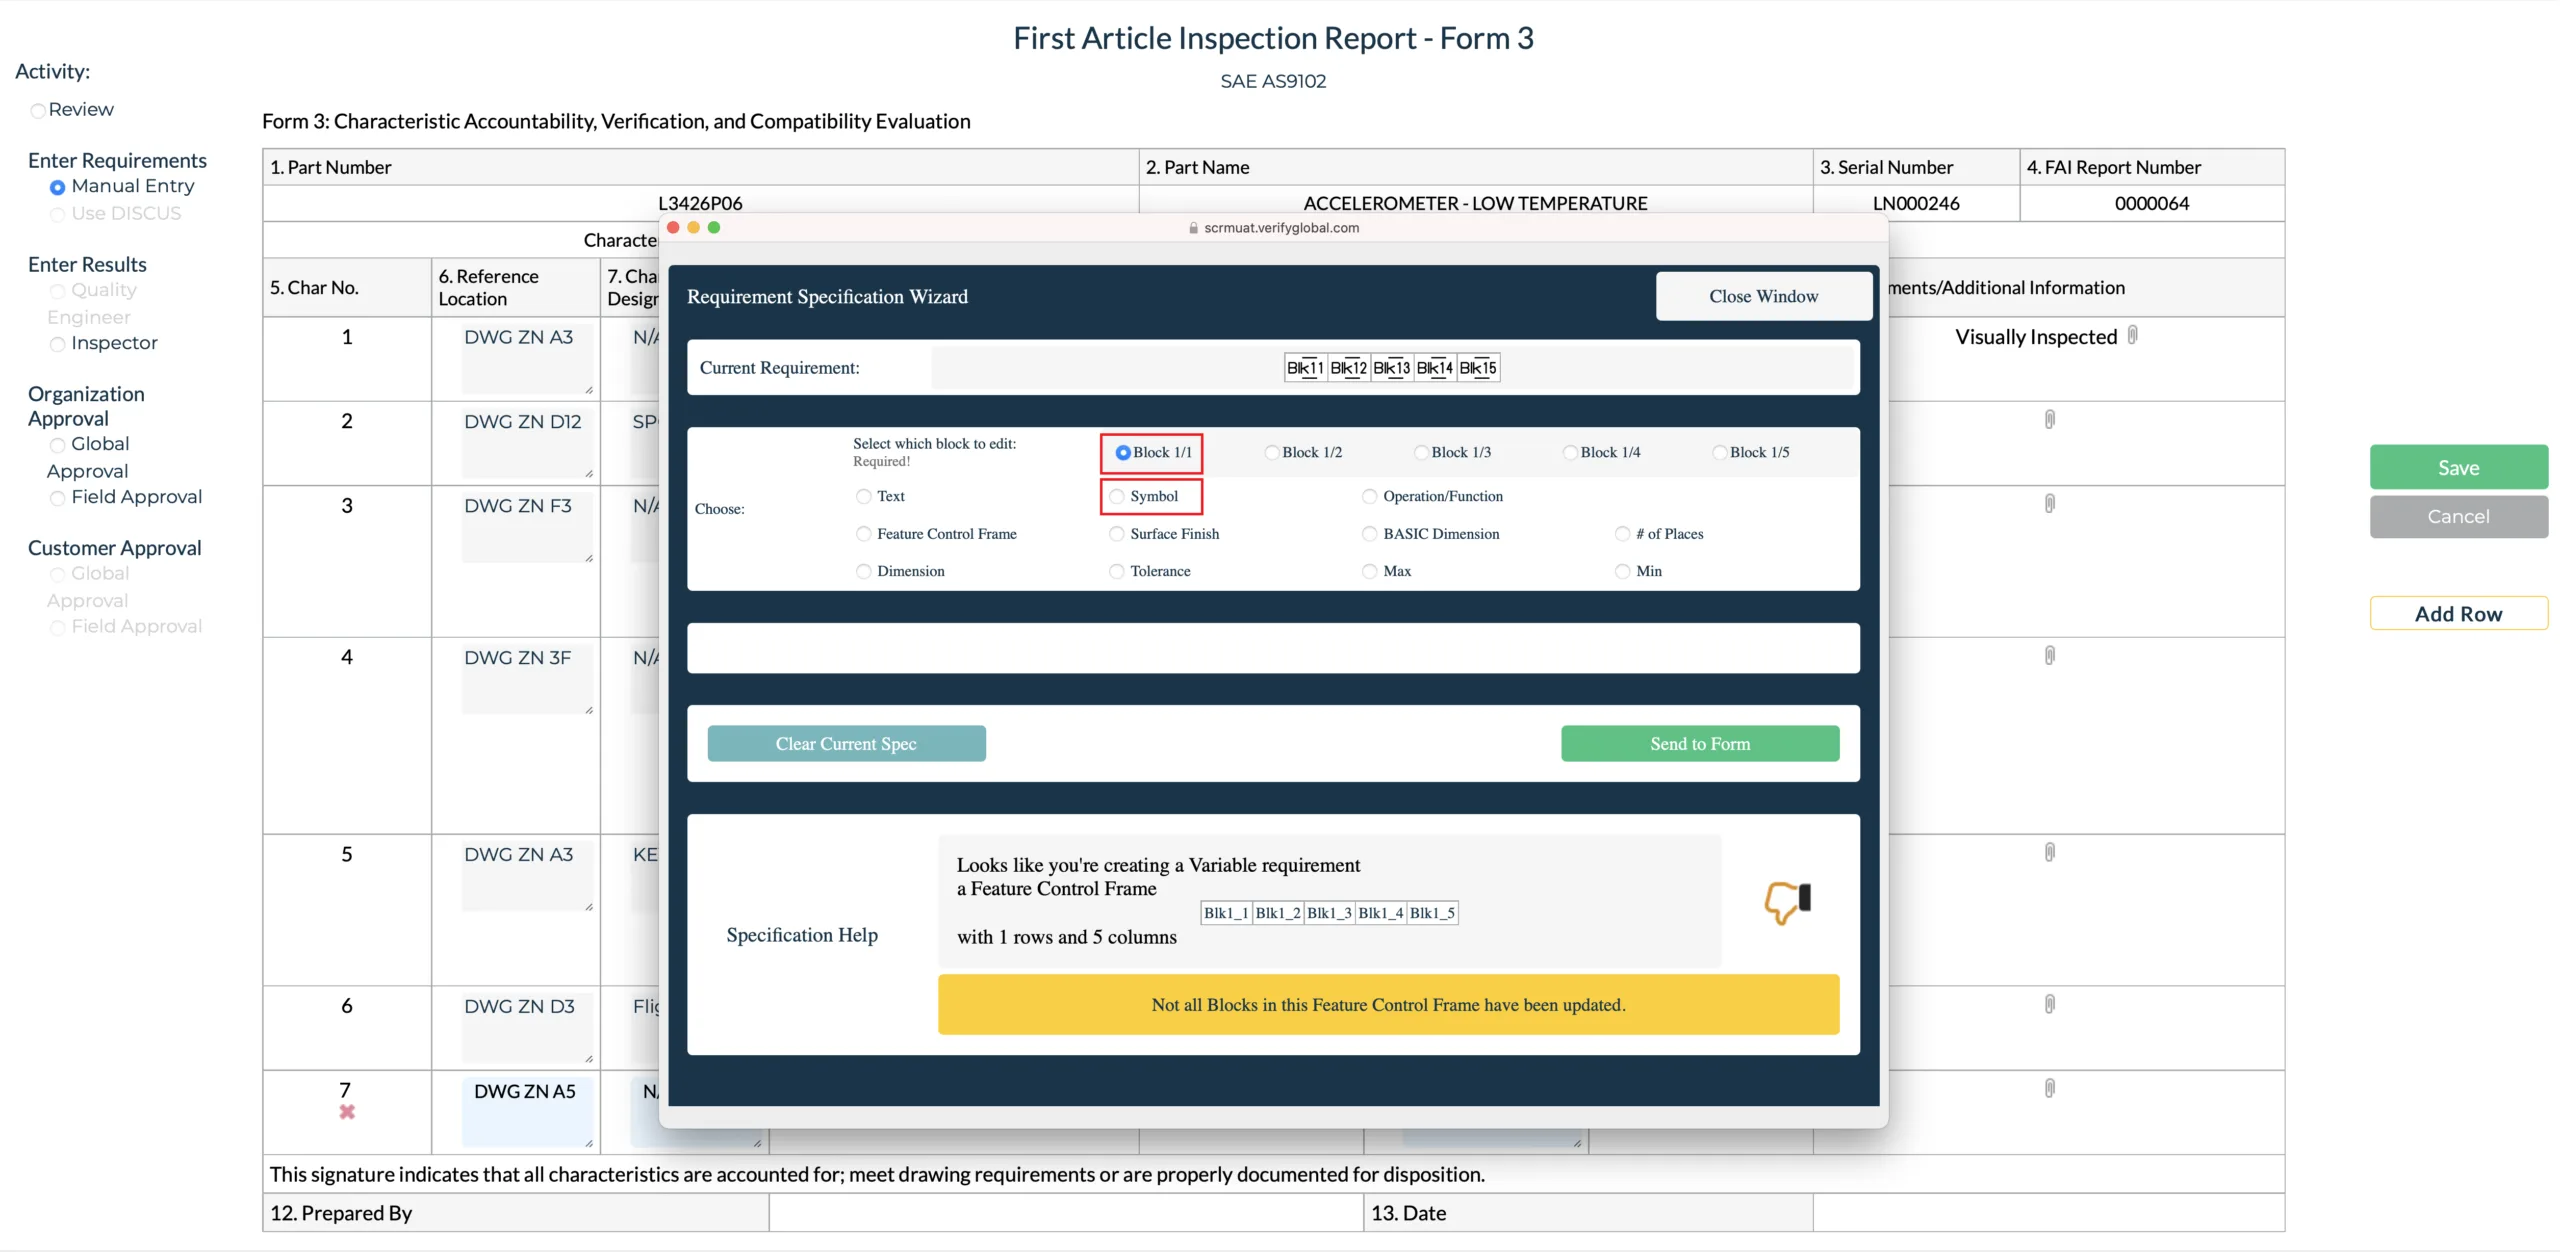
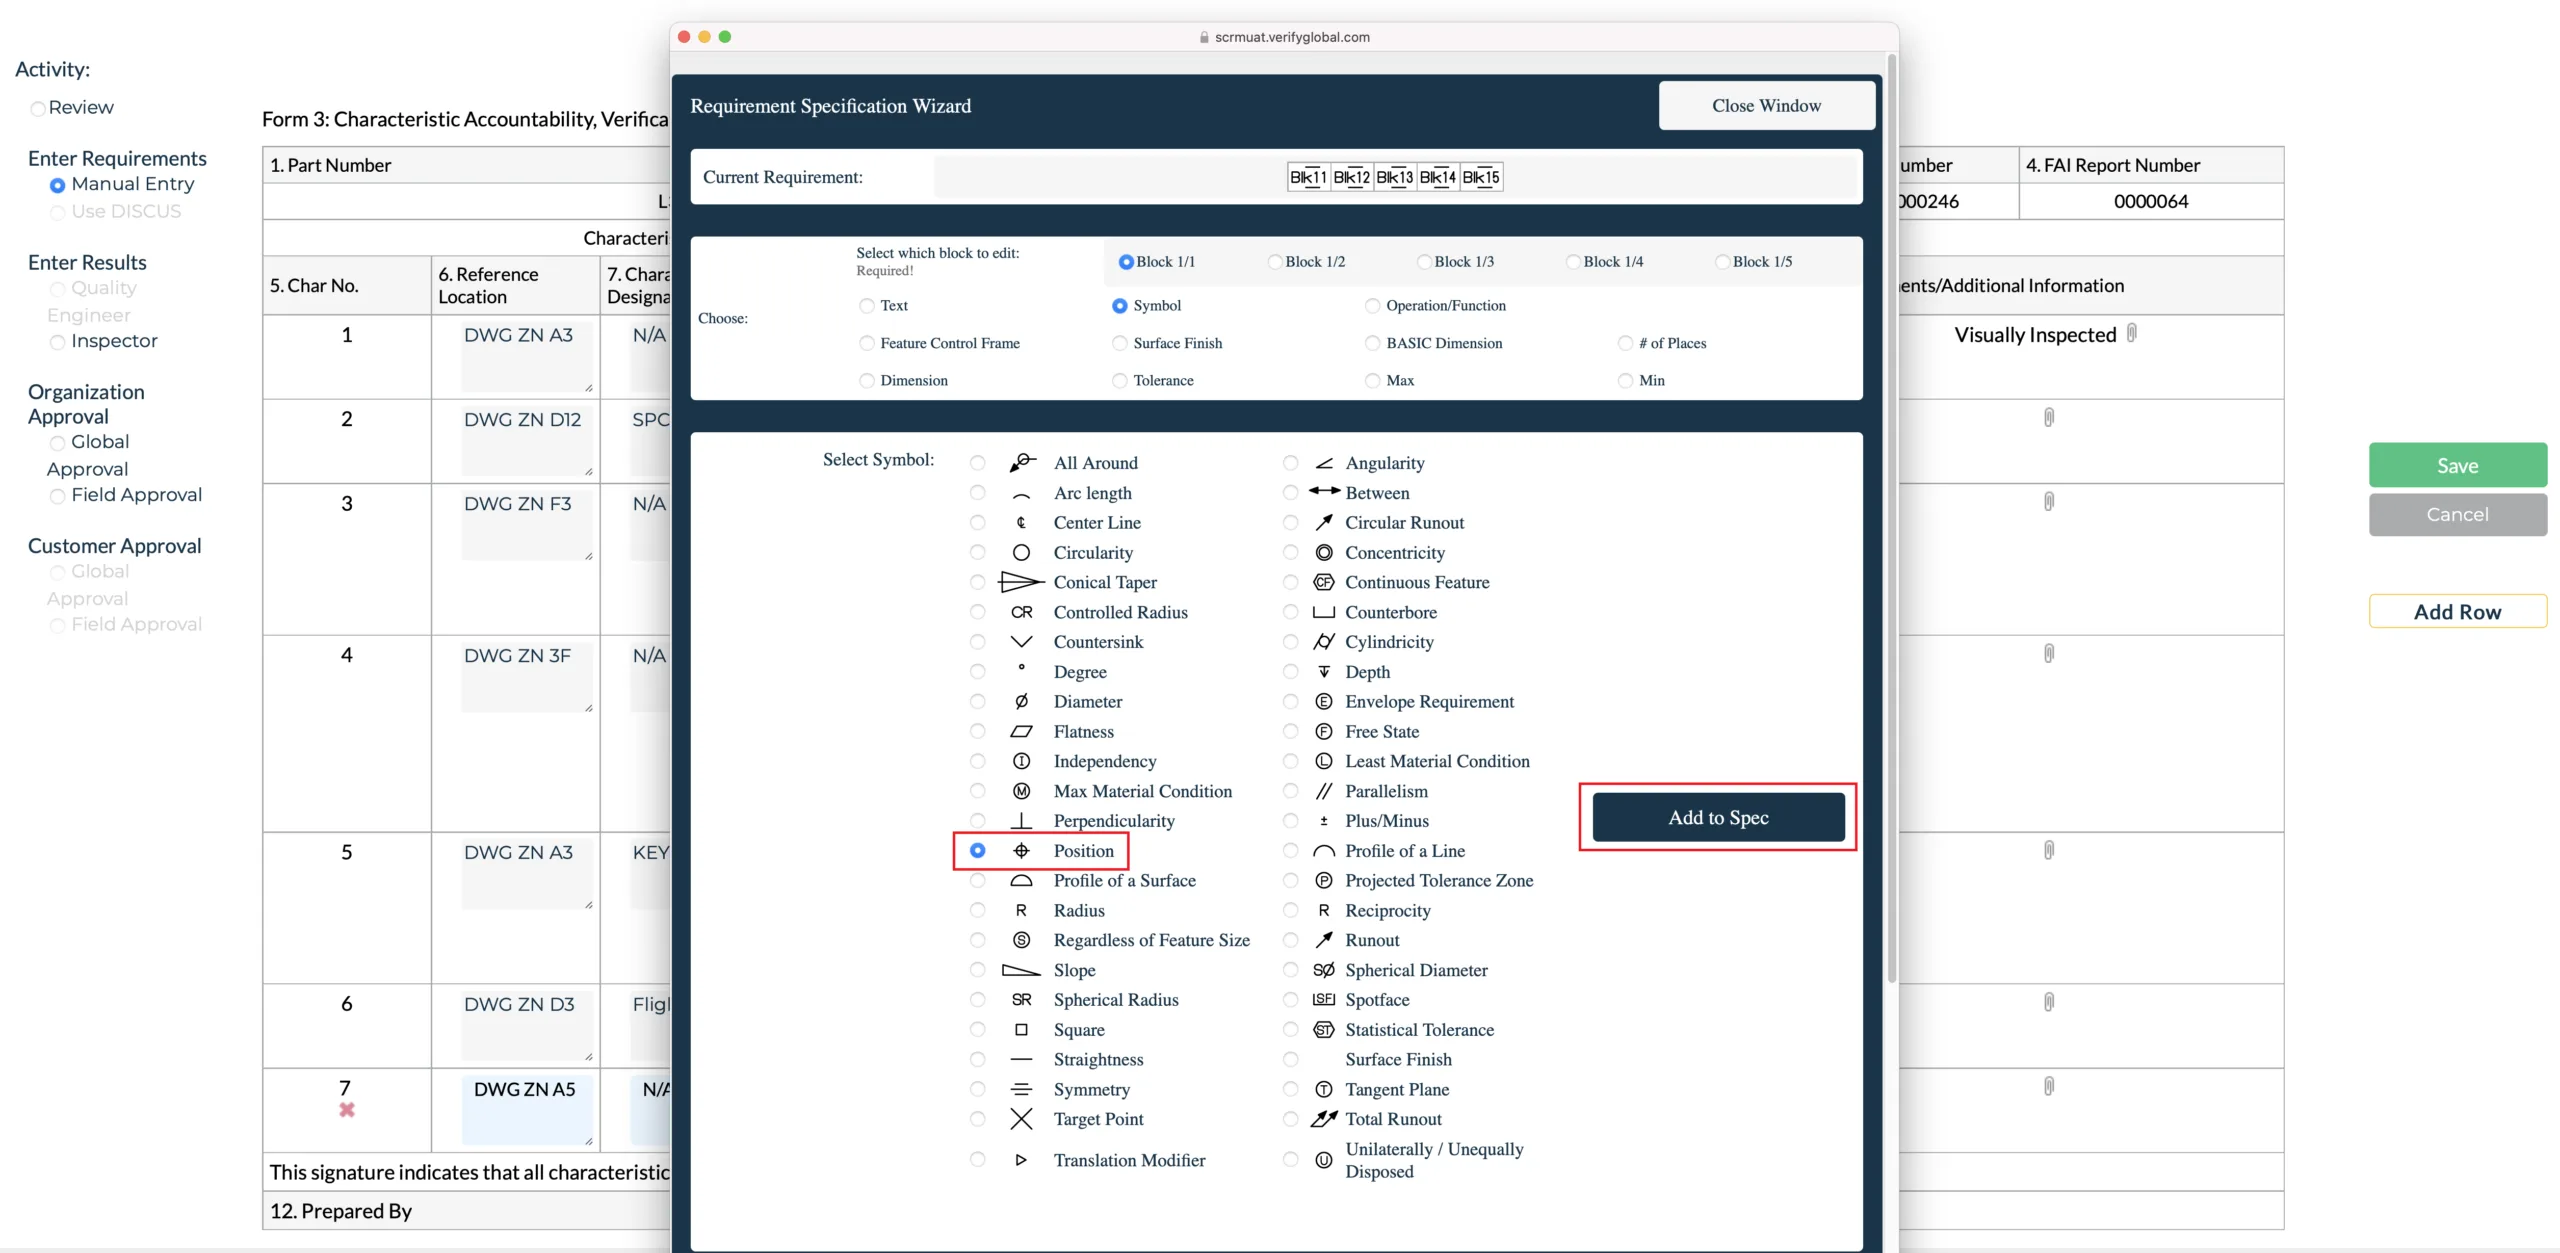
Next select the GD&T symbol that will go in block 1. In our example we will select “Position”. Click “Add to Spec”.
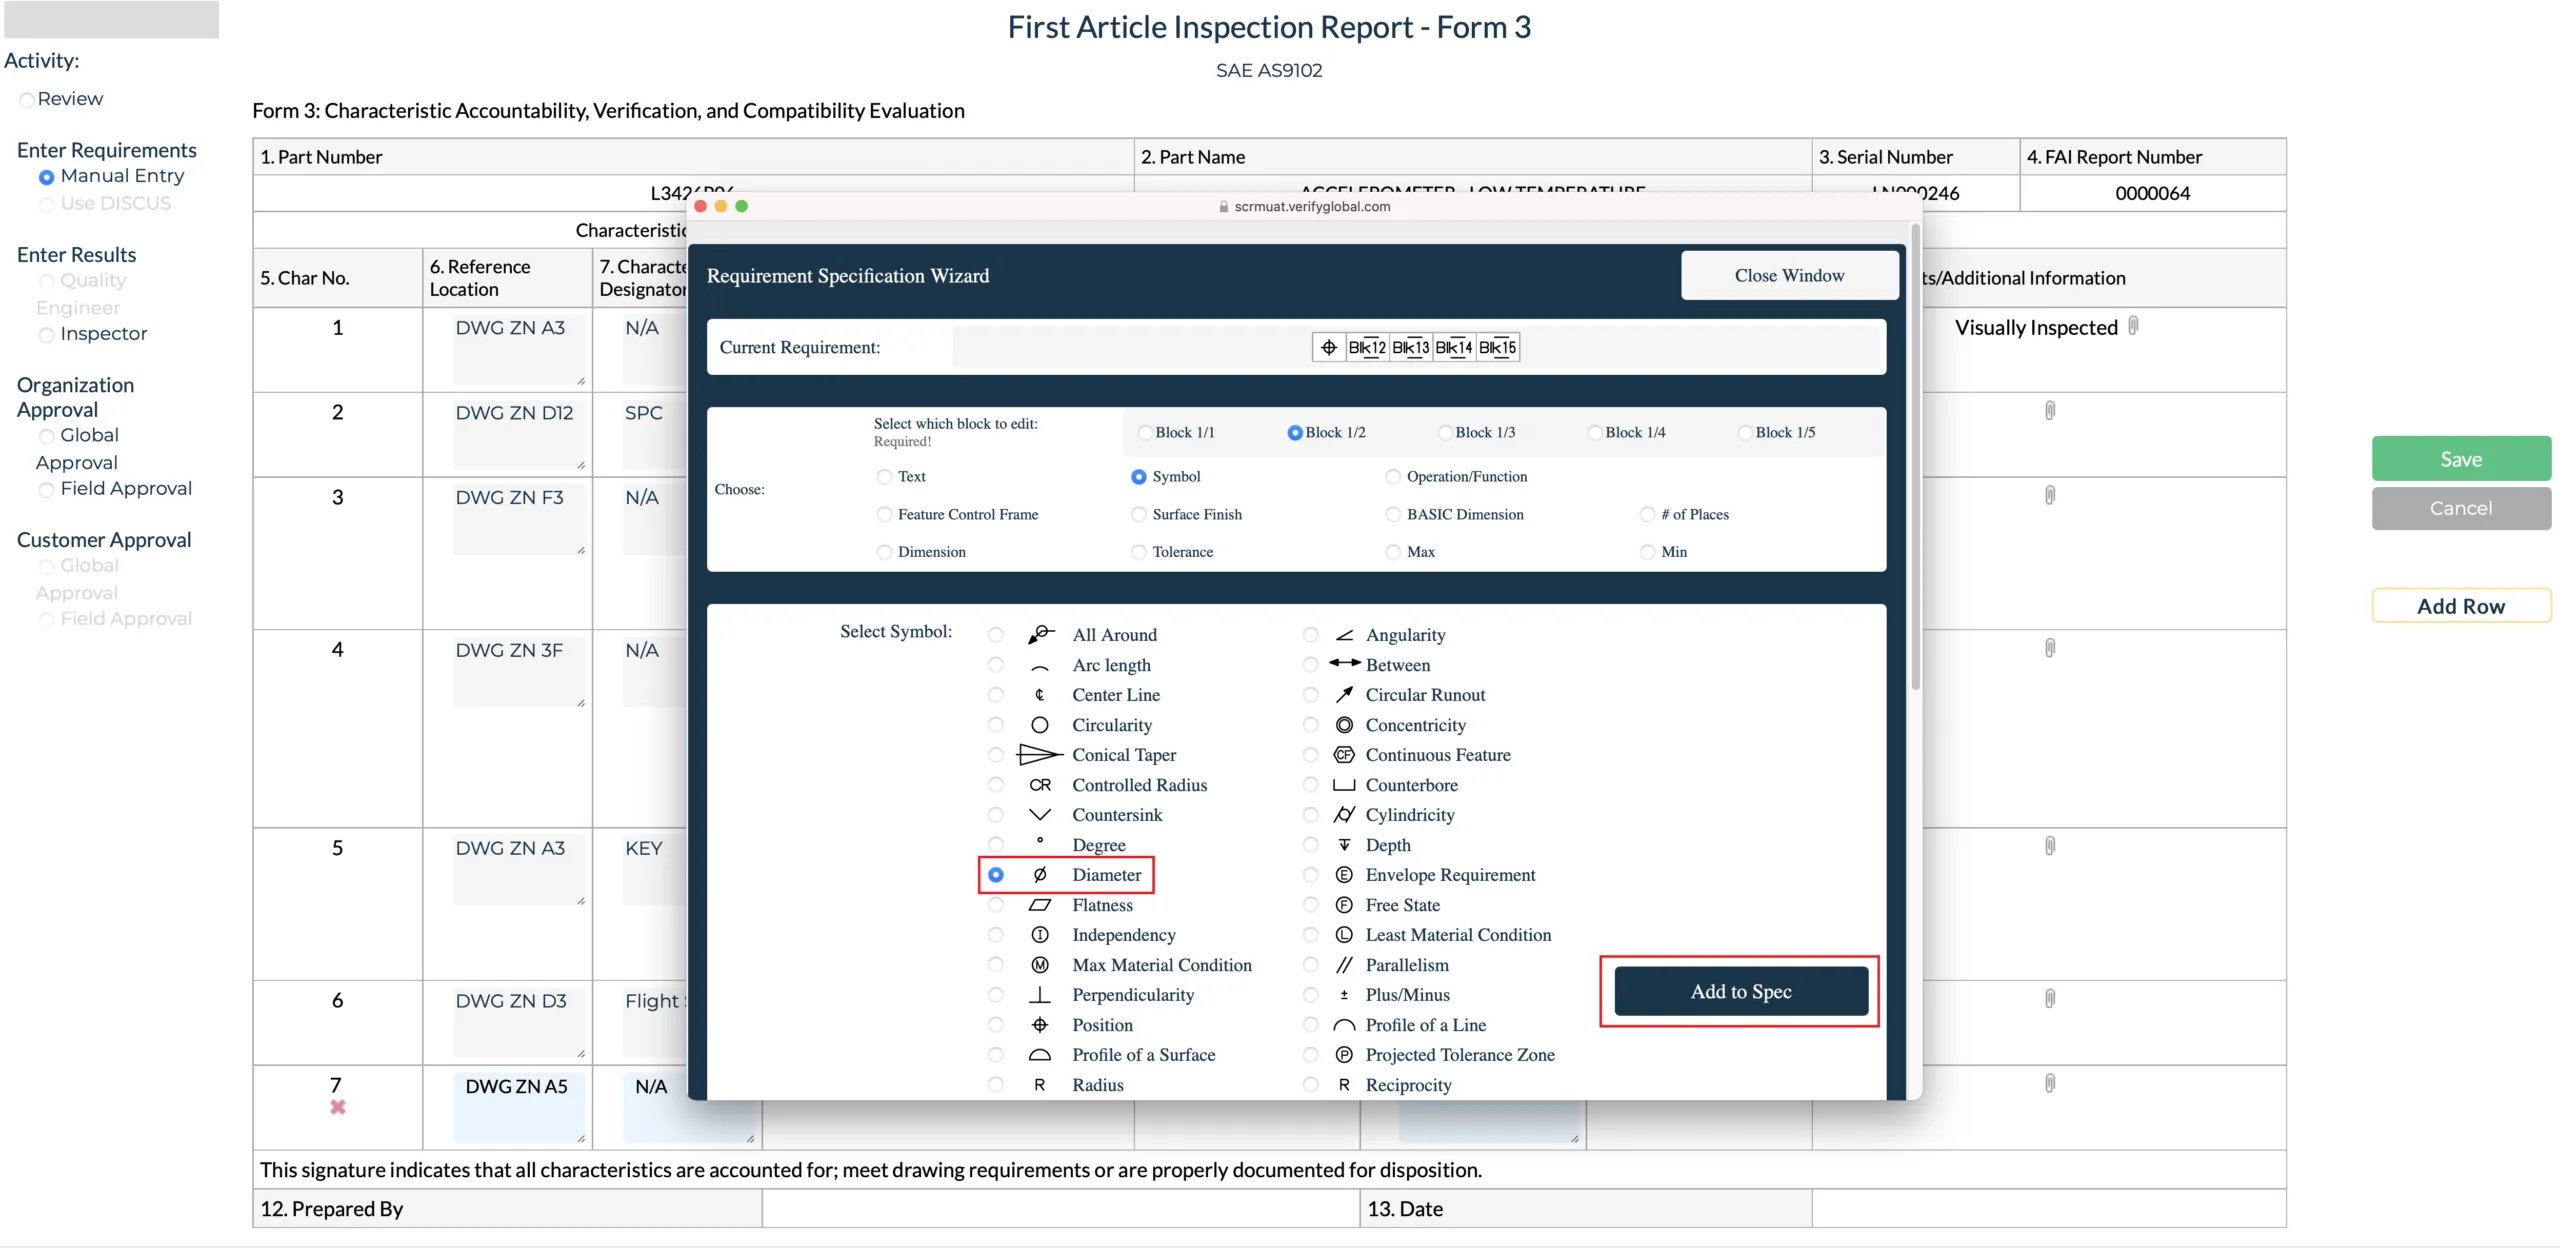
Next select radio button “Block 1/2” (Row 1, block 2), and “Symbol”.
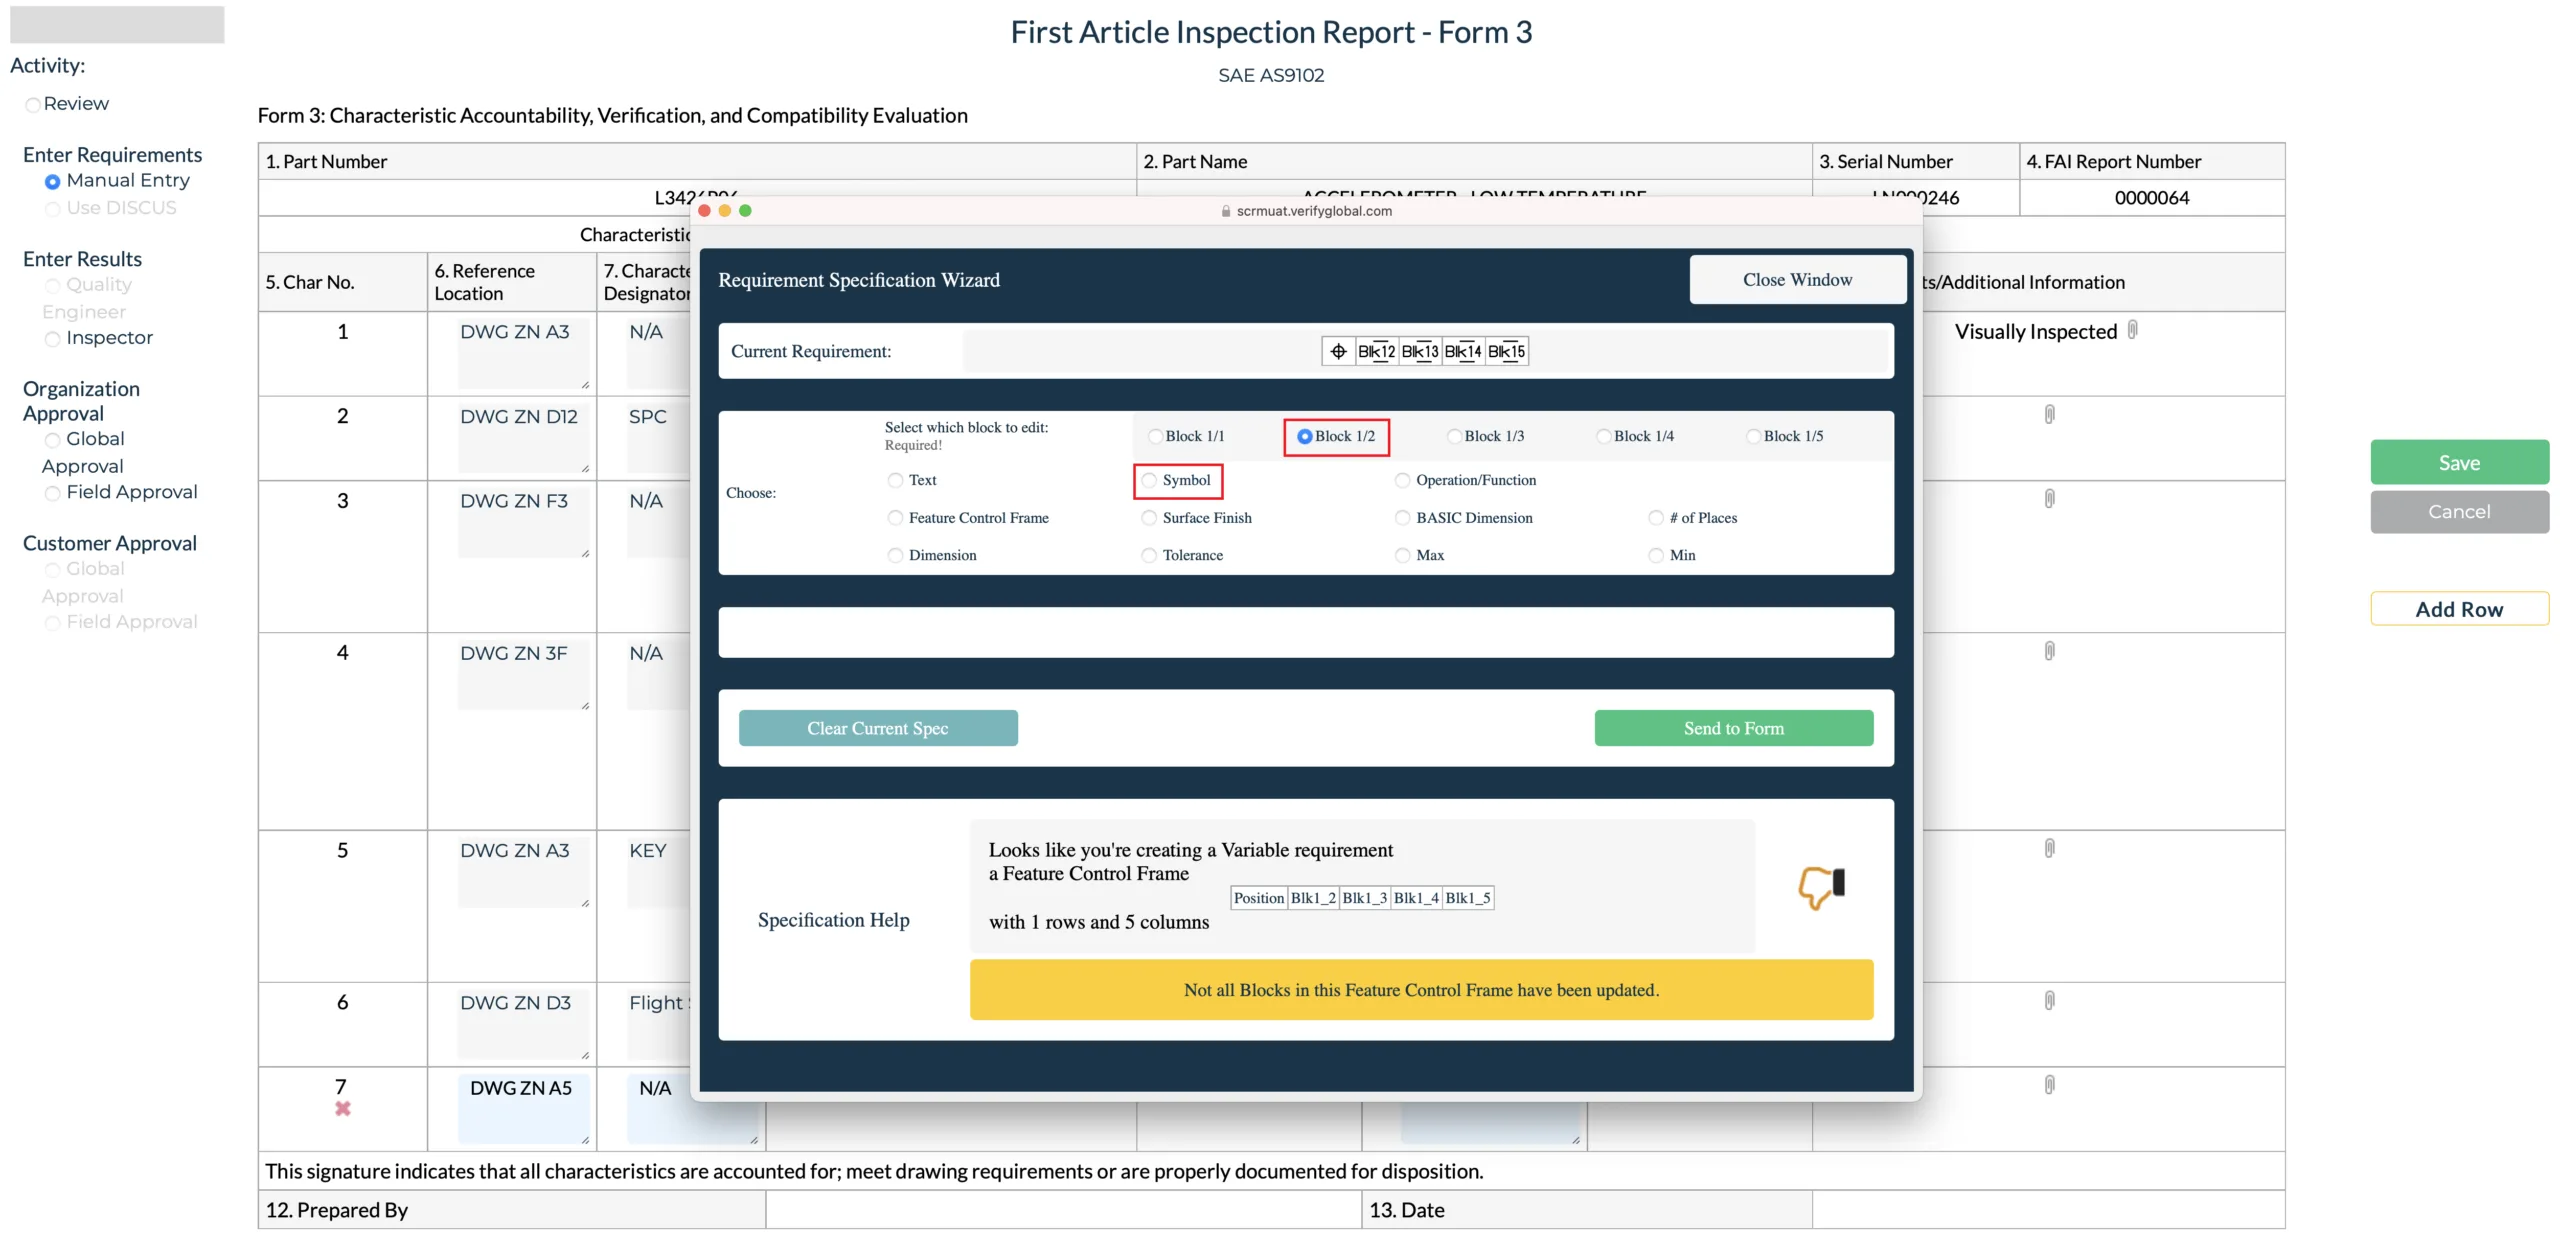
The GD&T Symbol list appears. Select the “Diameter” Radio Button and click on “Add to Spec.”
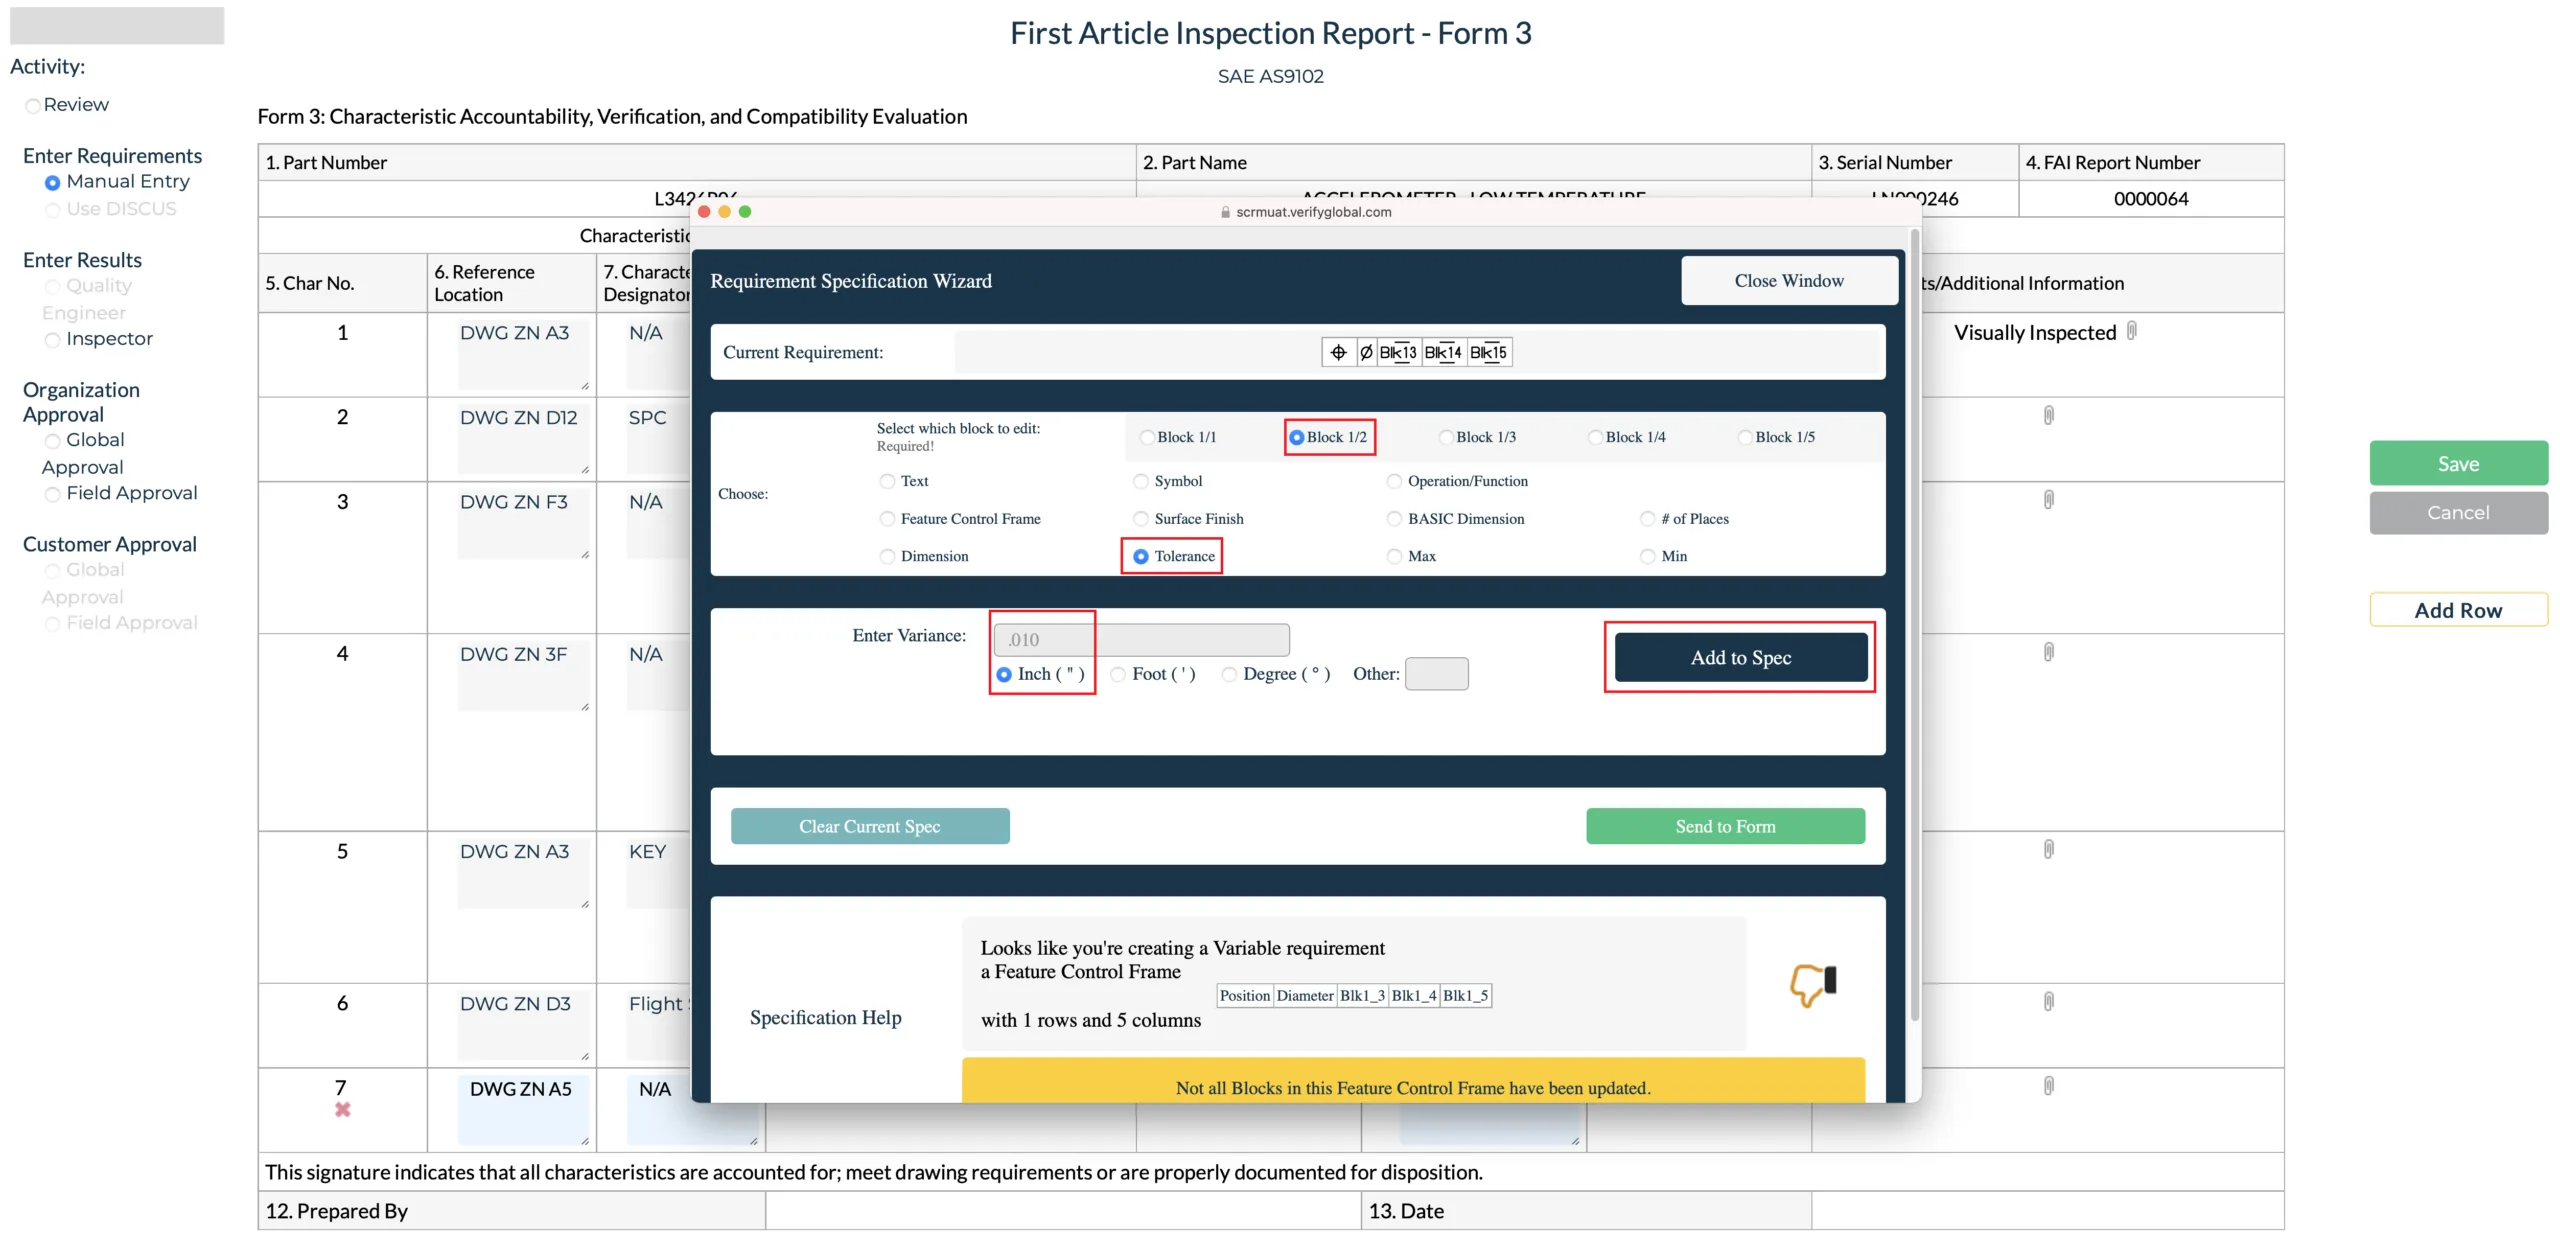
The next step is to select block 1/2 (Row 1, Block 2) and the Tolerance Radio button. Enter the Tolerance in the entry field, along with the unit of measure (Inches). Click on “Add to Spec”.
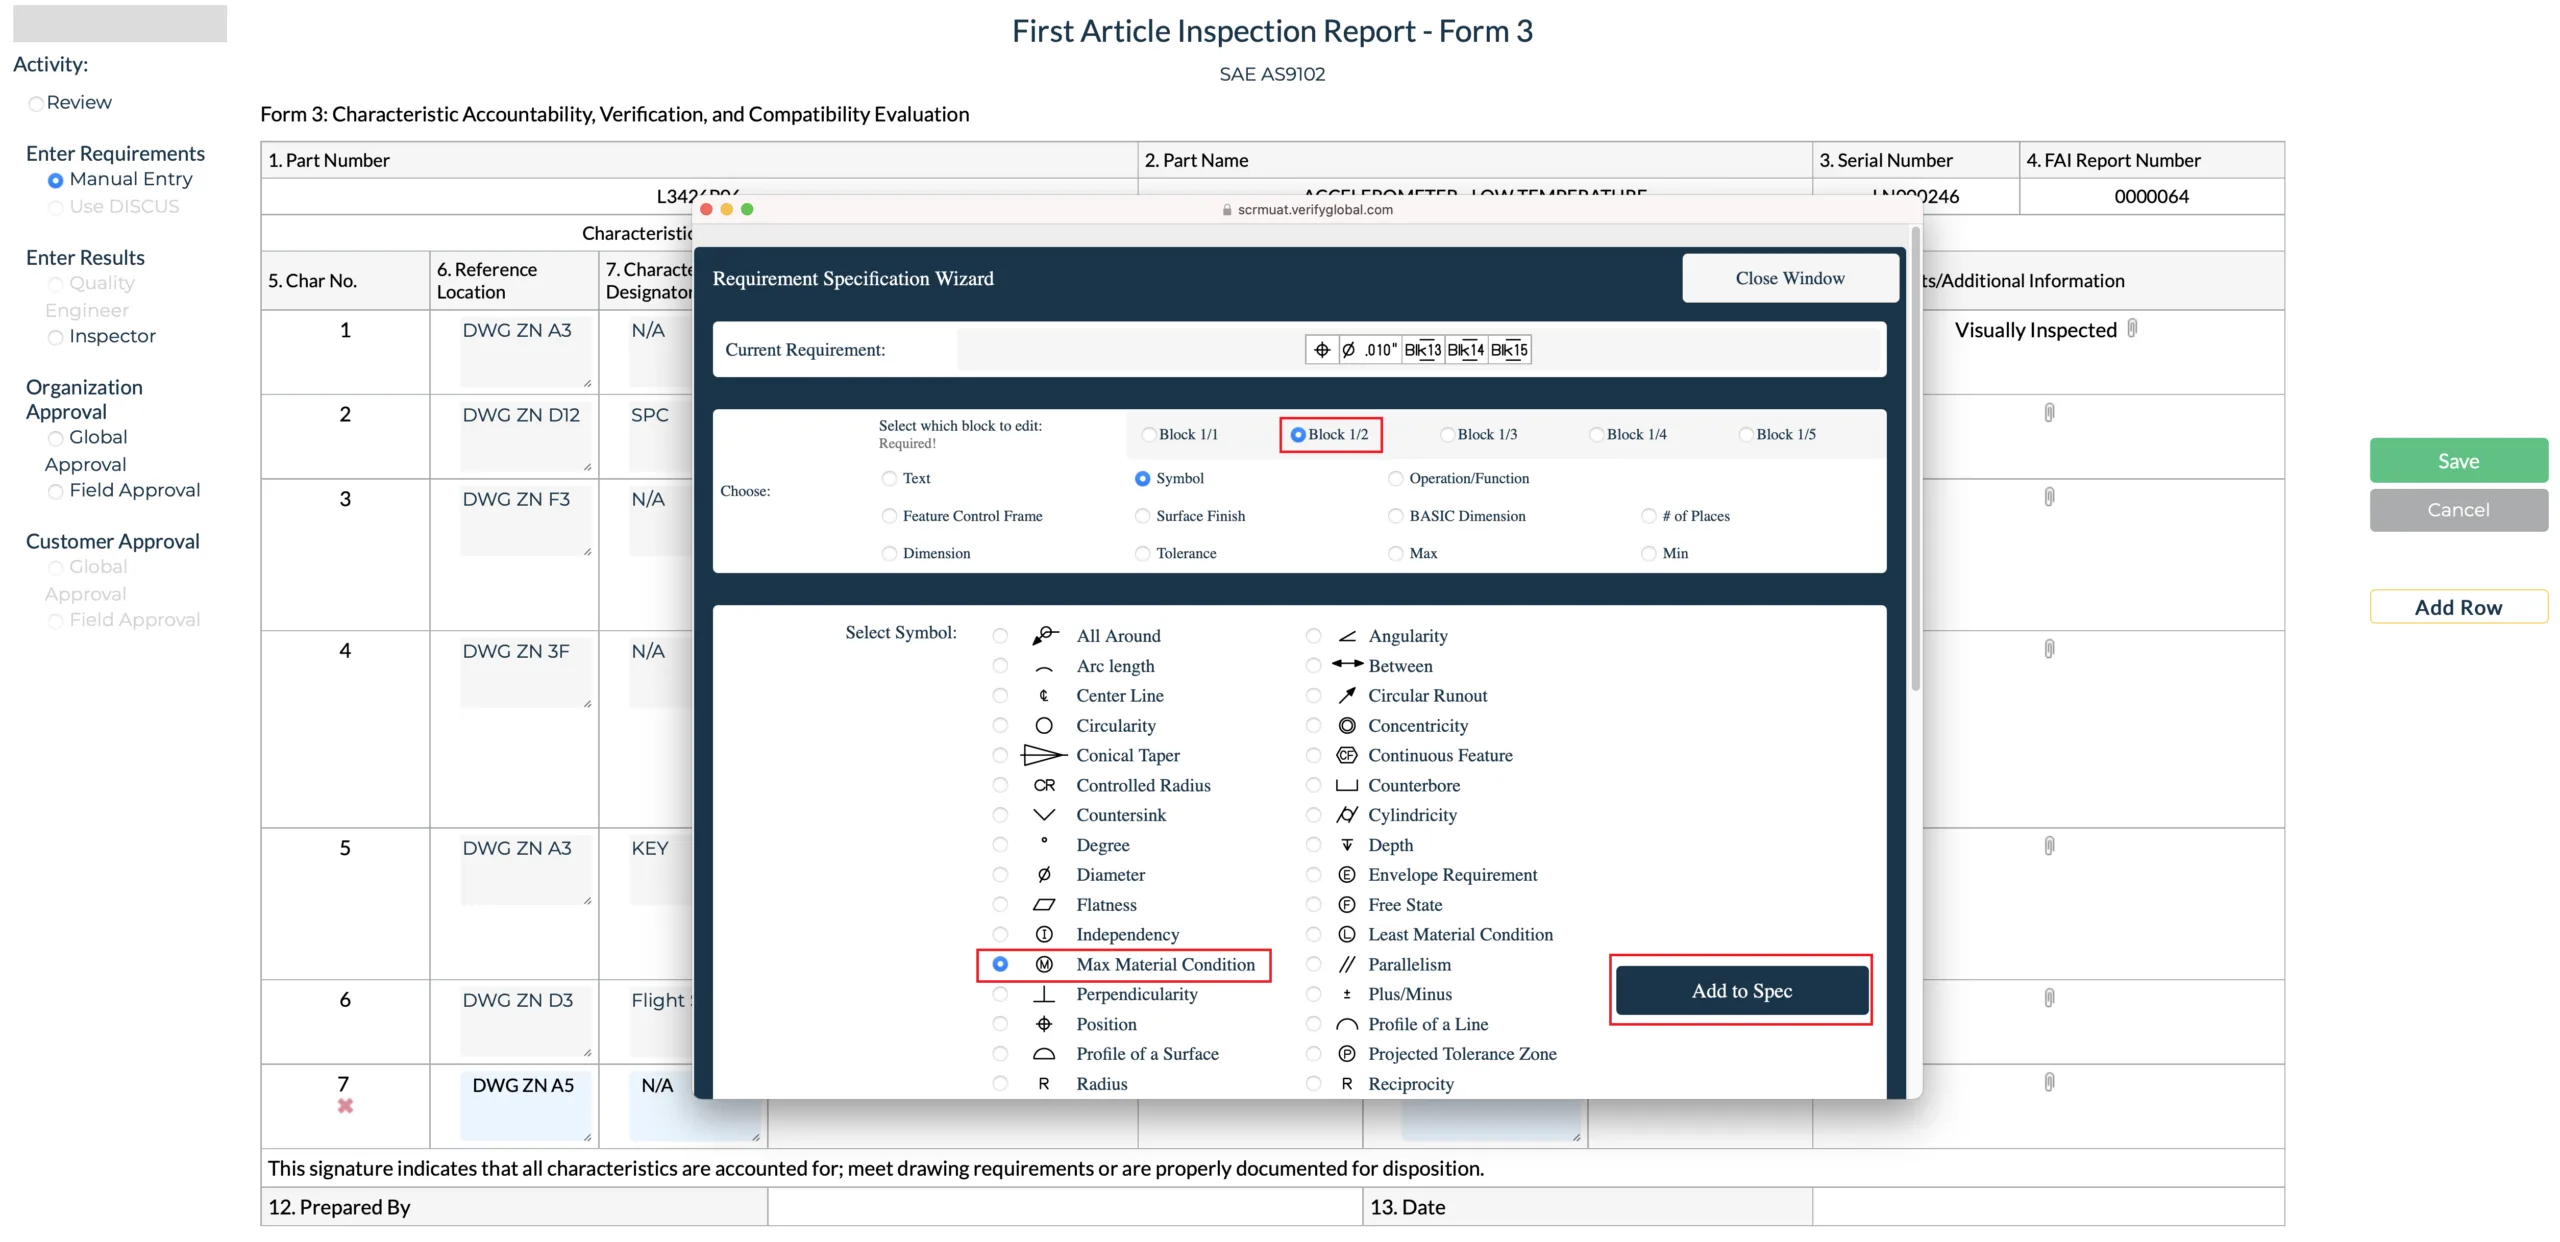
Select Block 1/2, Symbol, and the Radio button for “Maximum Material Condition”, click “Add to Spec.
To Create DATUM references, select Block 1/3, “Text” and enter a capital “A”, for DATUM A. Click on “Add to Spec”.
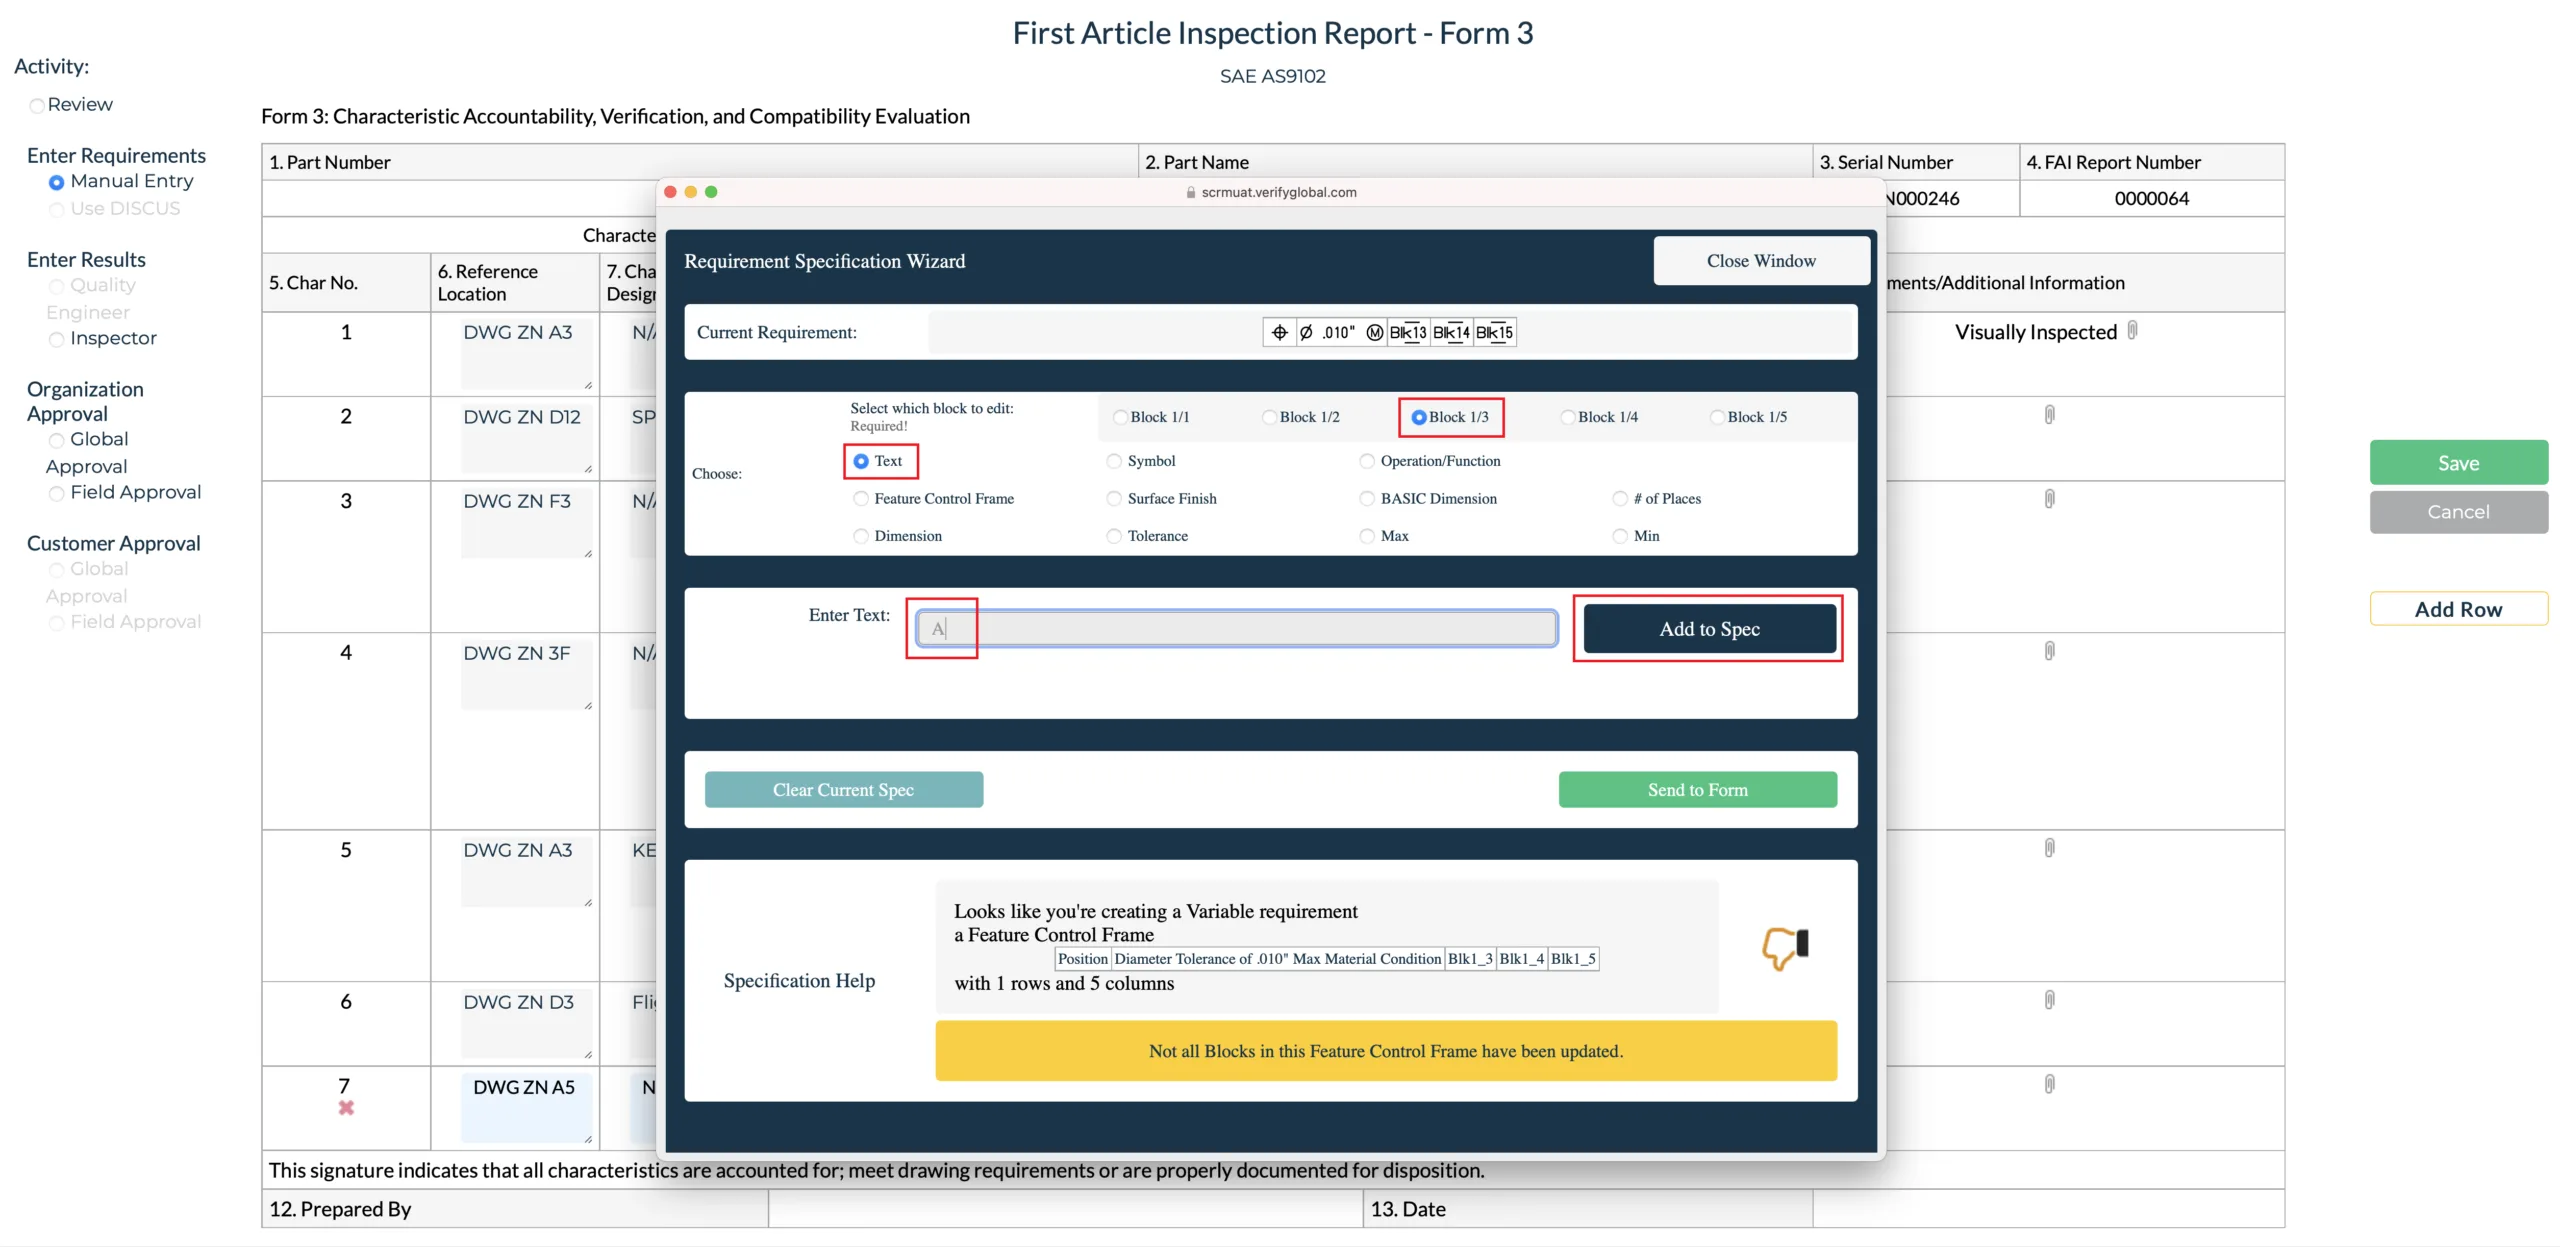
To Create DATUM “B”, select Block 1/4, “Text” and enter a capital “B”. Click on “Add to Spec”.

To Create DATUM “C”, select Block 1/5, “Text” and enter a capital “C”. Click on “Add to Spec”.

The completed requirement shows up in the first block of the Wizard, as it will appear on form 3 of the FAI. The help feature gives a green “Thumbs Up” indicating the requirement spec is valid. If you are happy with the requirement as displayed in the Wizard, click the “Send to Form” button.
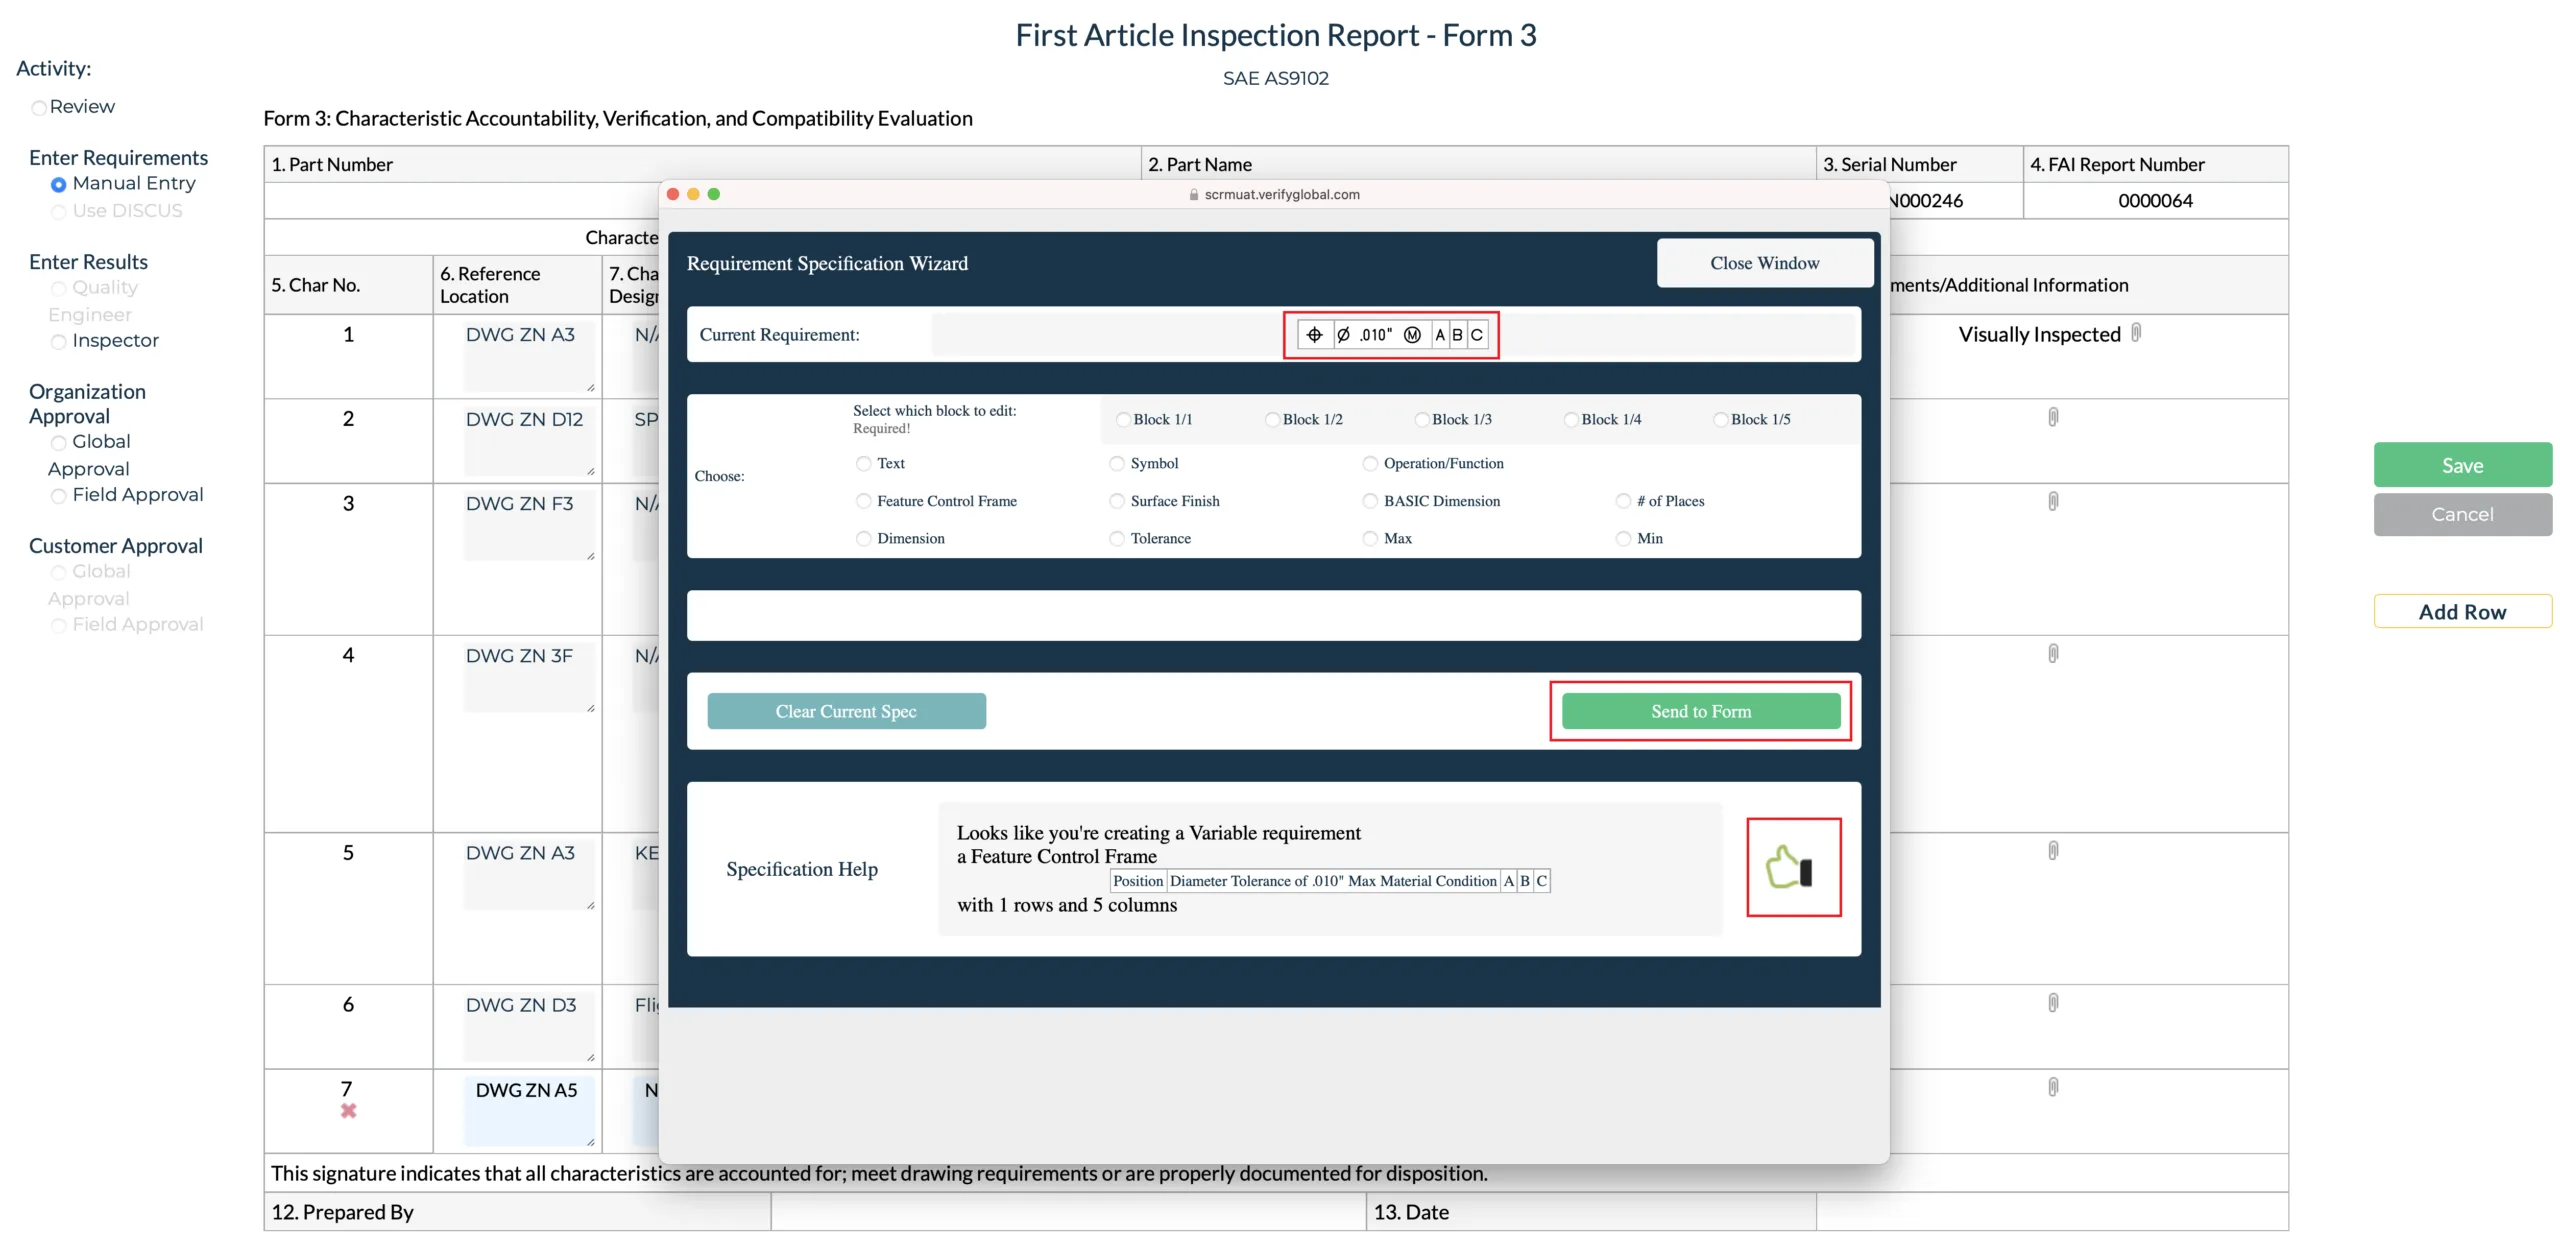
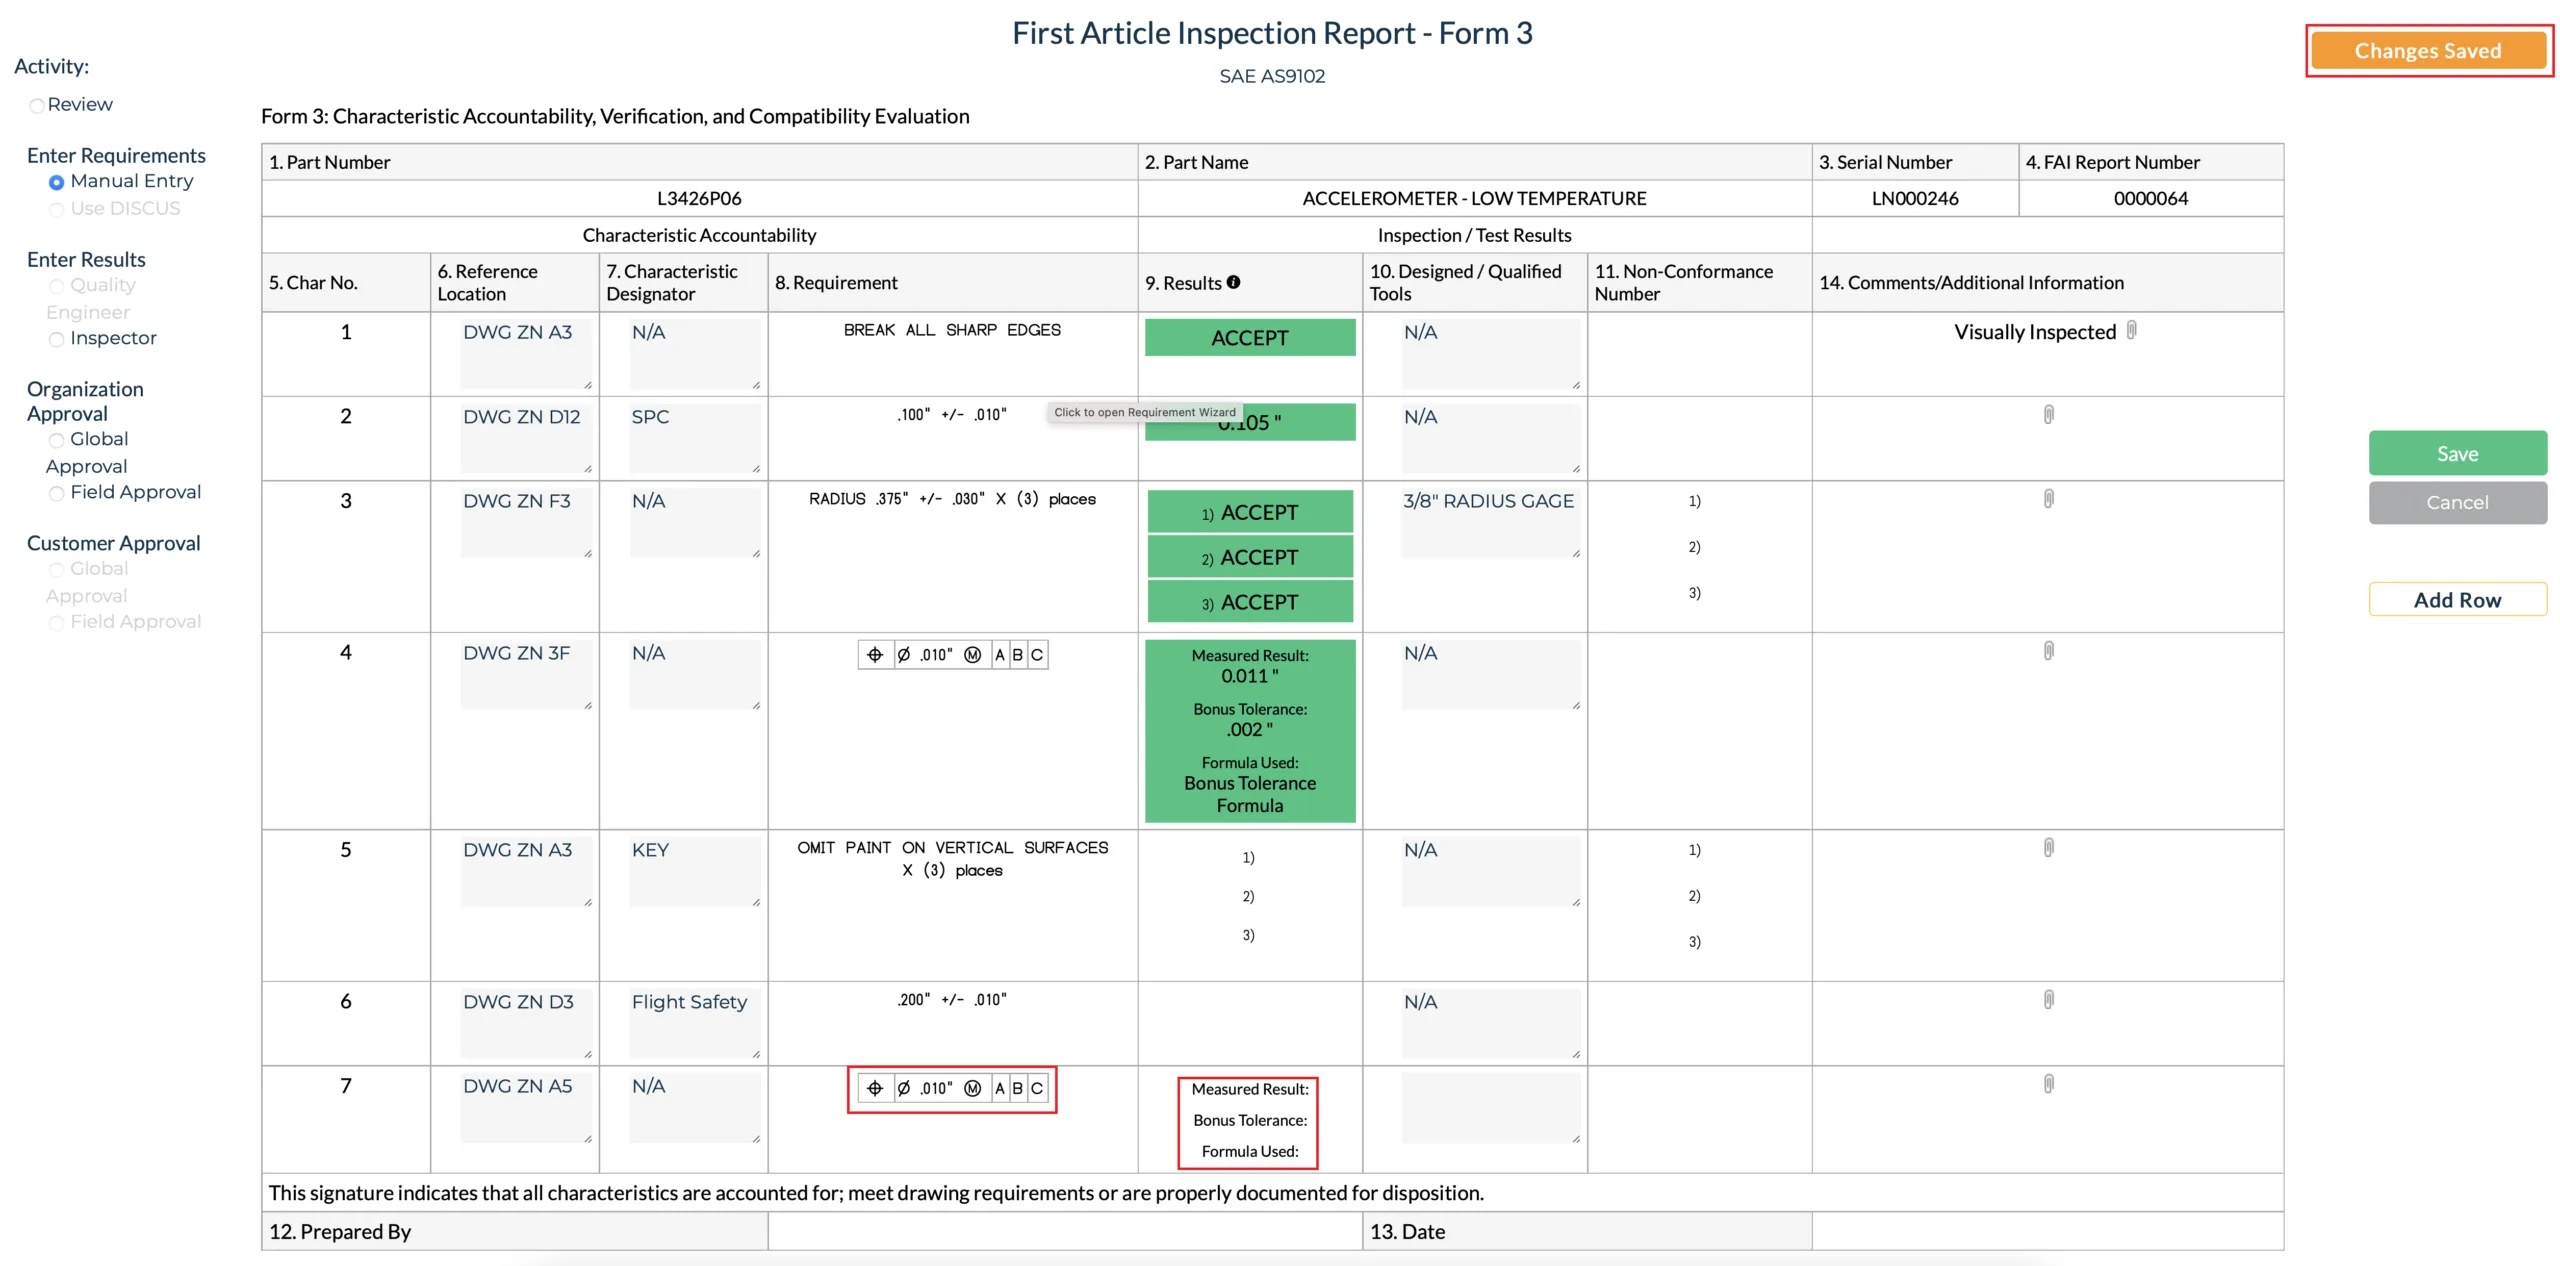
The requirement from the Wizard, will populate form 3, field 8. In the results field nine, it will provide for an actual result and, since we used Maximum Material Condition, the bonus tolerance and a place to enter the formula used to determine the bonus tolerance. The Bonus tolerance will be applied to the requirement when determining if the result is within tolerance. The FAI application will provide visual feedback your information has been saved.
To exit the FAIR and return to the Main Menu, click “FAI”.
You can now logout by clicking the logout button or the down arrow next to your name.
