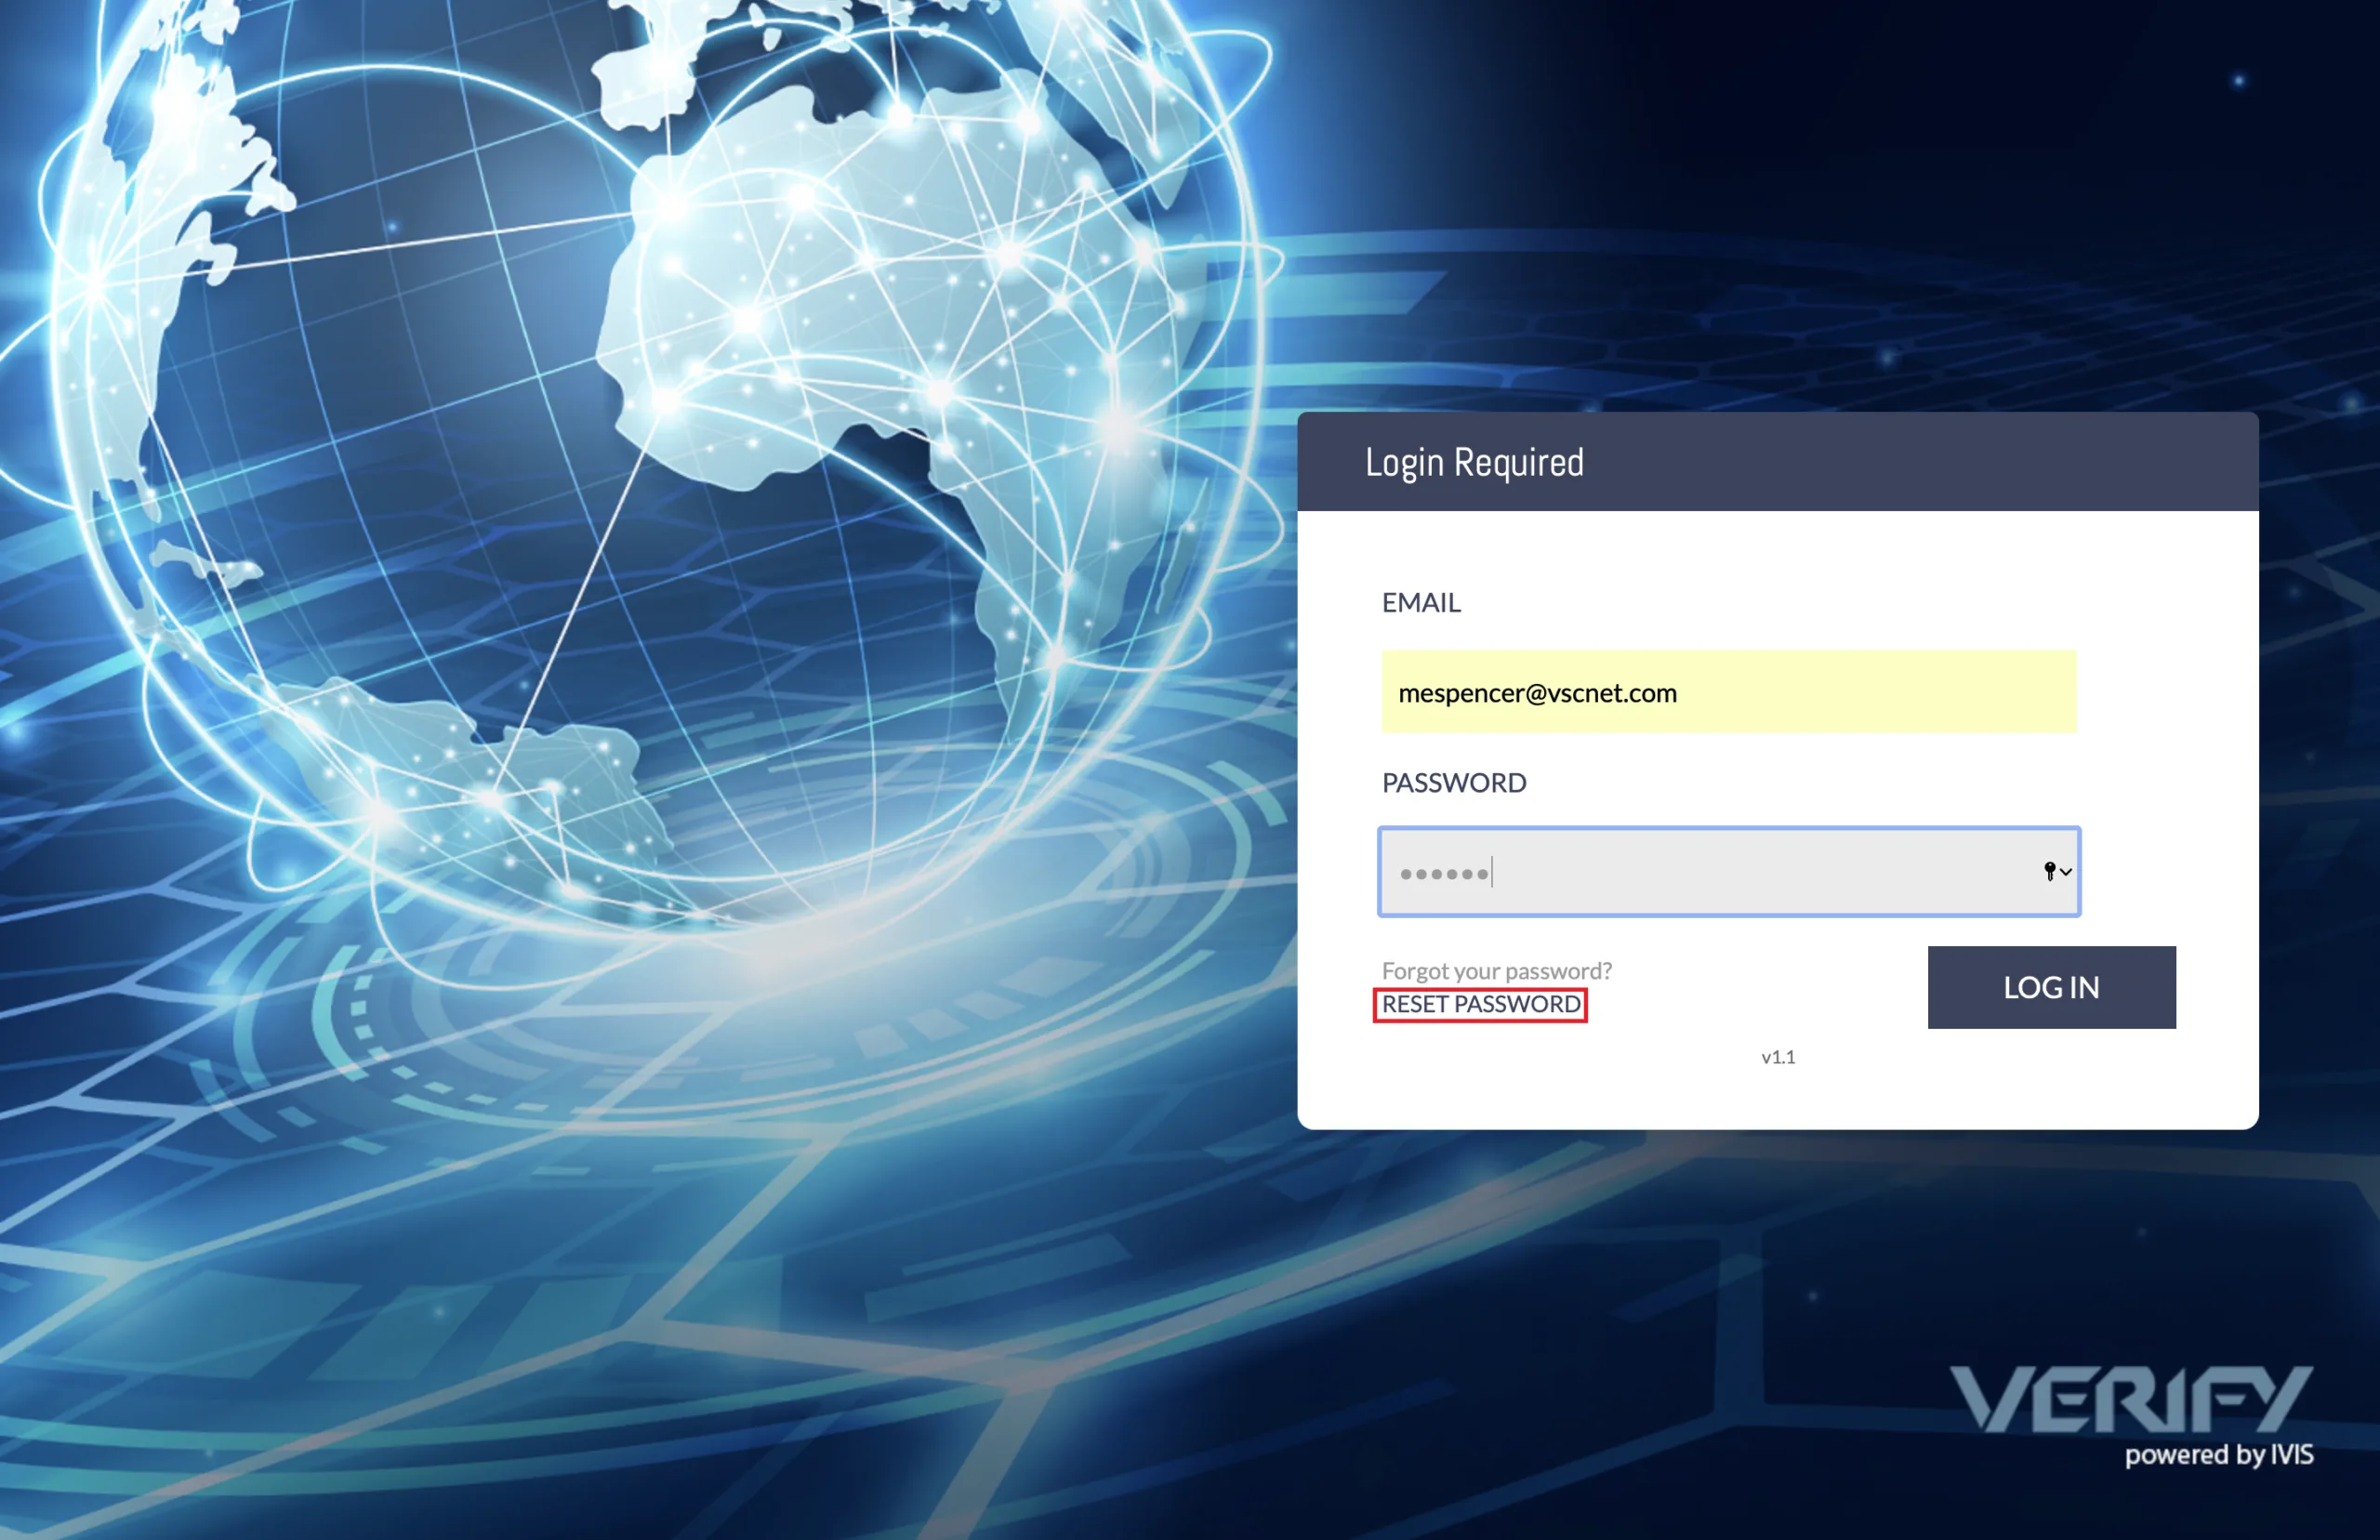
To begin, login to SCRM with your username and password. Your username is your email address, and your initial password is assigned by the system. If you forget your password, you can reset it by clicking the “Reset Password” link.
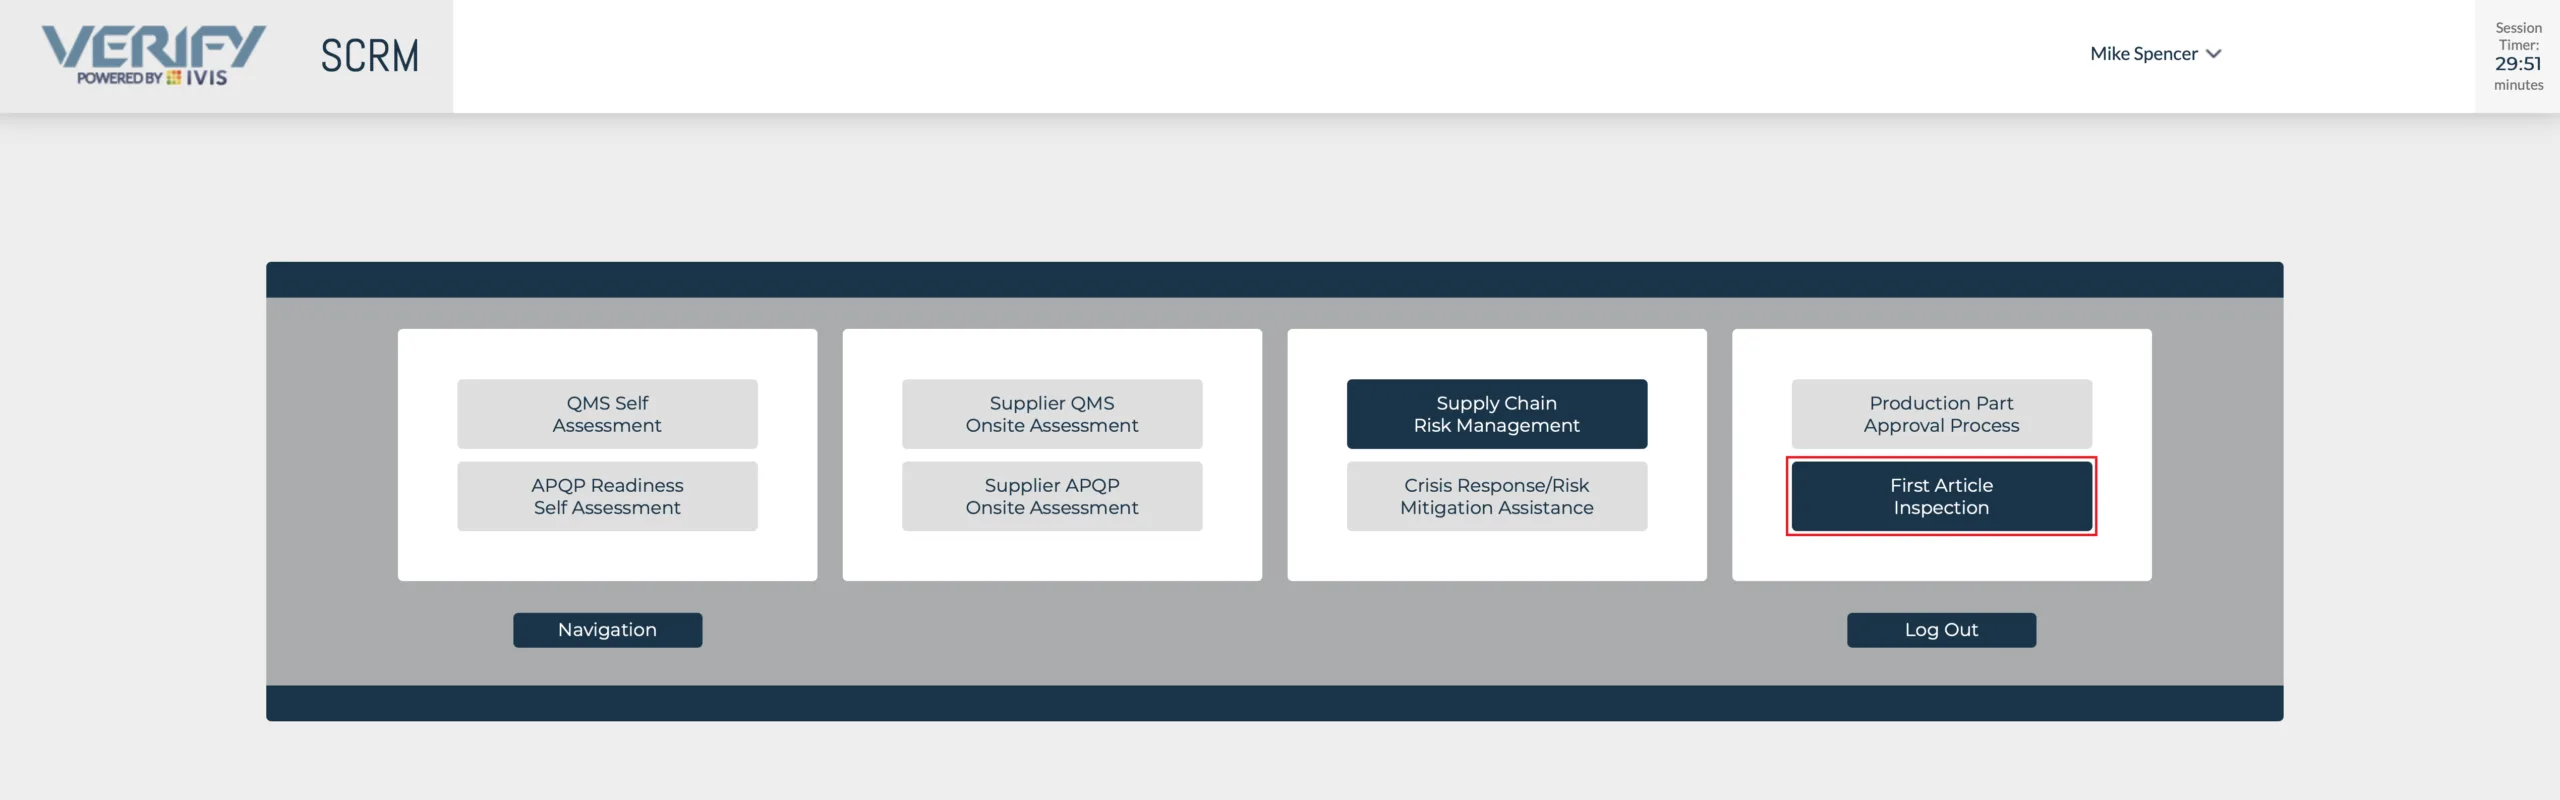
After login, every user will arrive on their landing page. The landing page consists of the various modules contained within the Supply Chain Risk Management Application. Only those applications that you have permission to access will be active, those that are not will be grayed out. We want to access the First Article Inspection Application. To do so we left click on the button titled “First Article Inspection”.
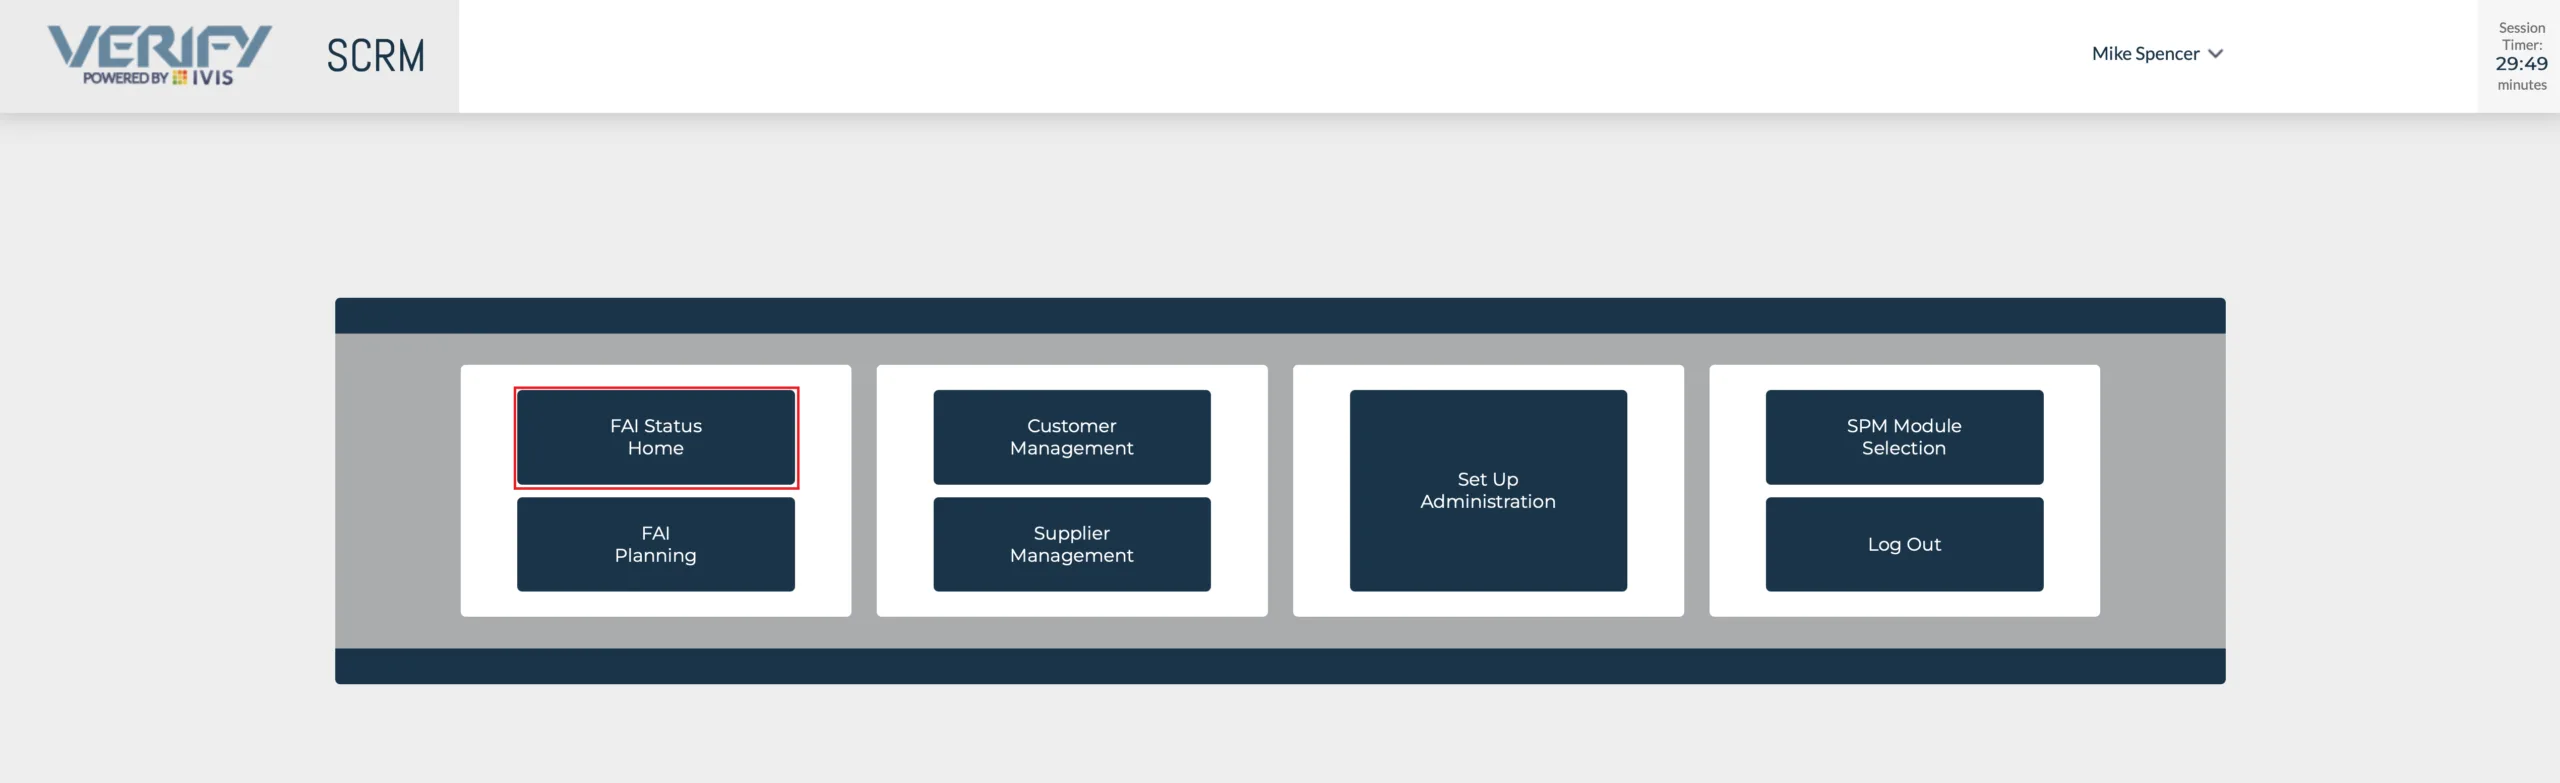
As in the prior menu, only those items you have permission to access will be active. There are several sub menus and actions you can access in the FAI menu. You can “Log Out”, Return to the previous menu, access; “Setup Administration”, “Supplier Management”, “Customer Management”, “FAI Planning” and the “FAI Status Home” page. For the purposes of this user guide, we’ll access the “FAI Status Home” page by left clicking on the button.
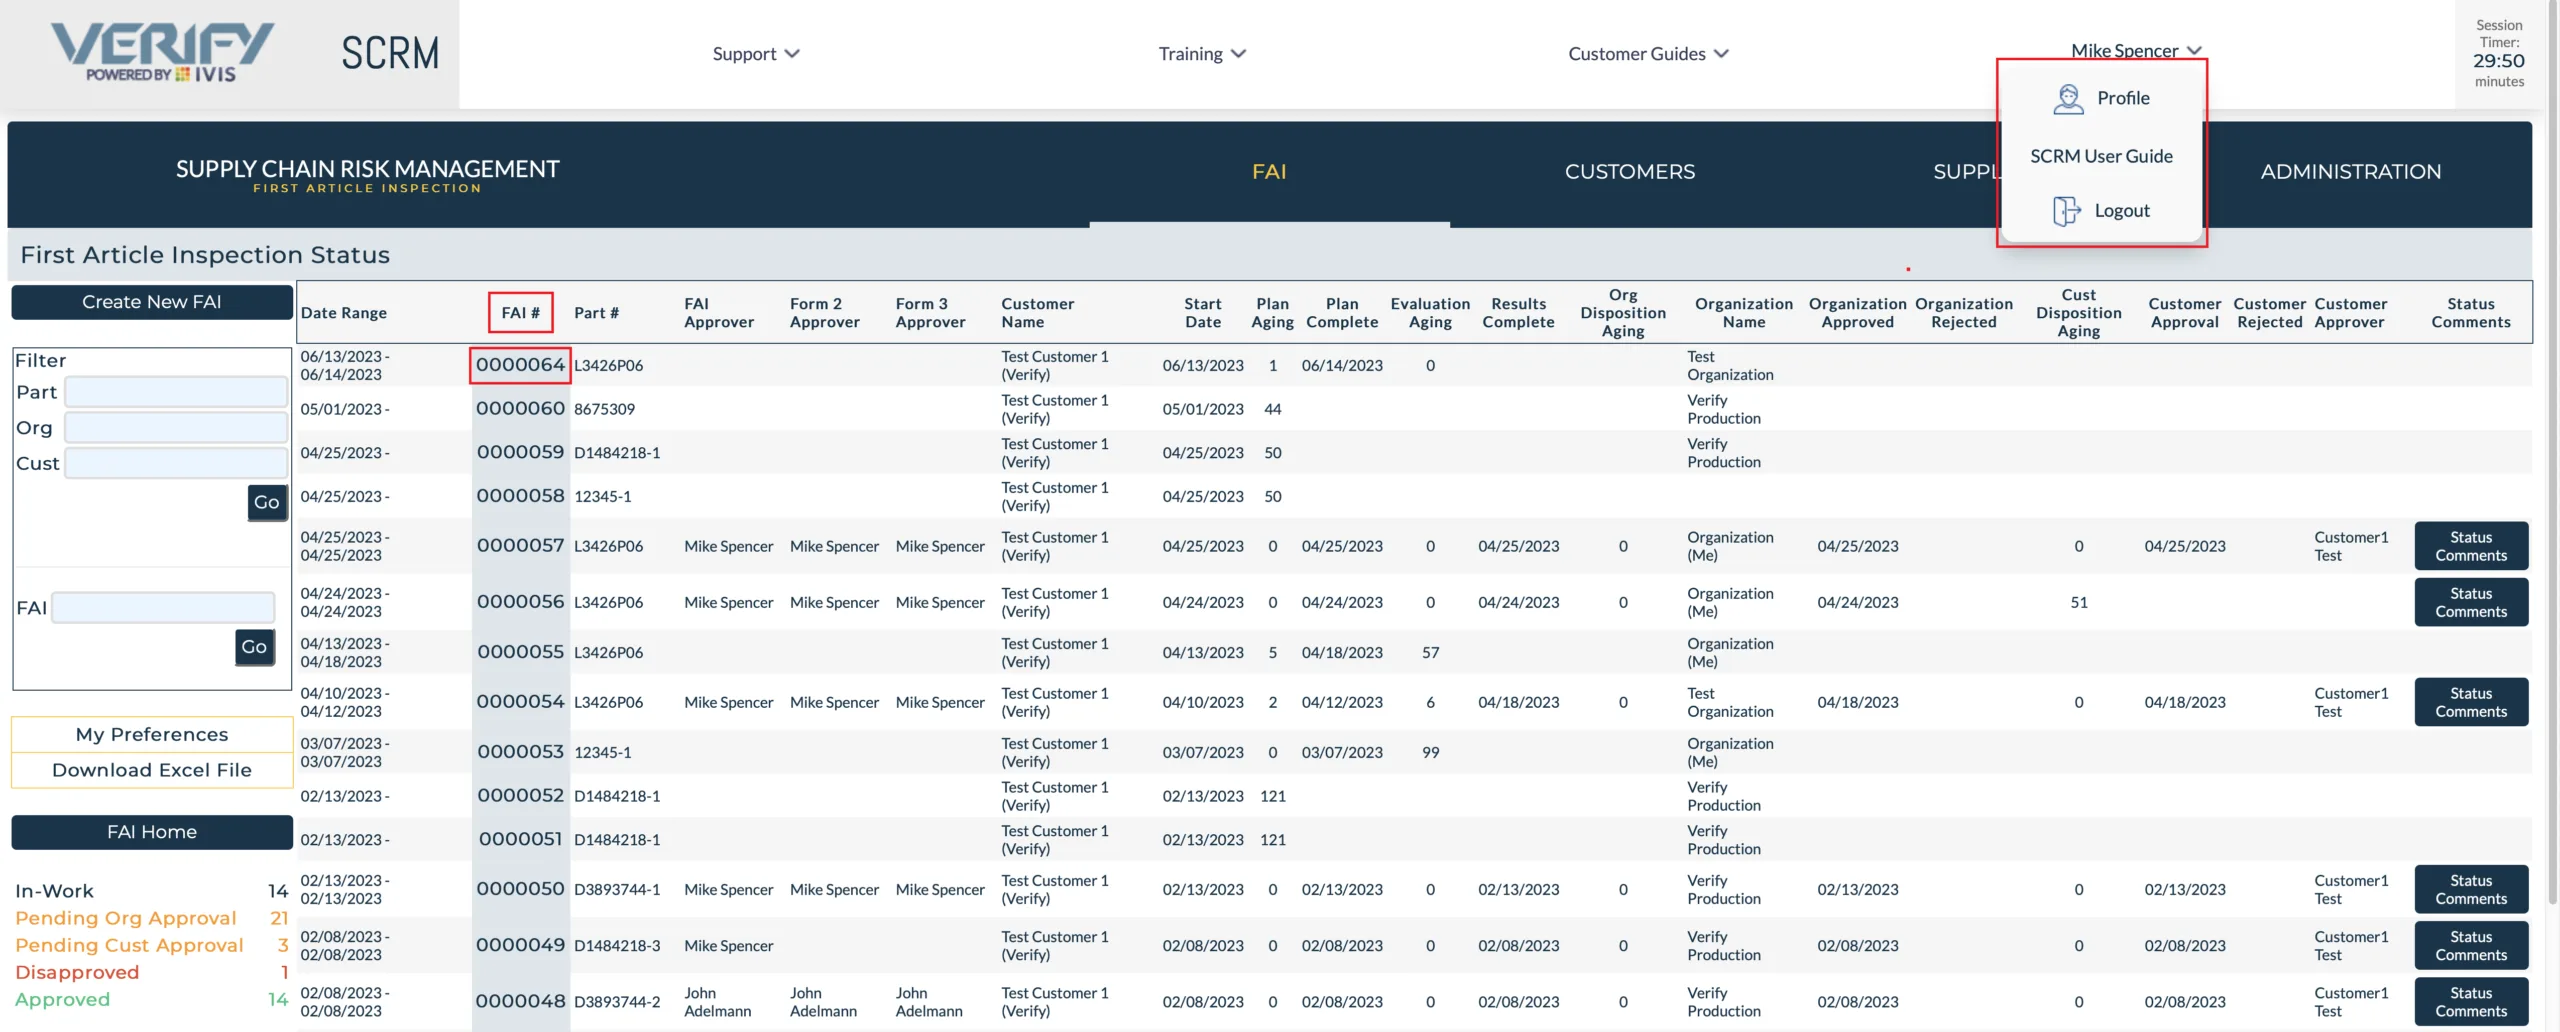
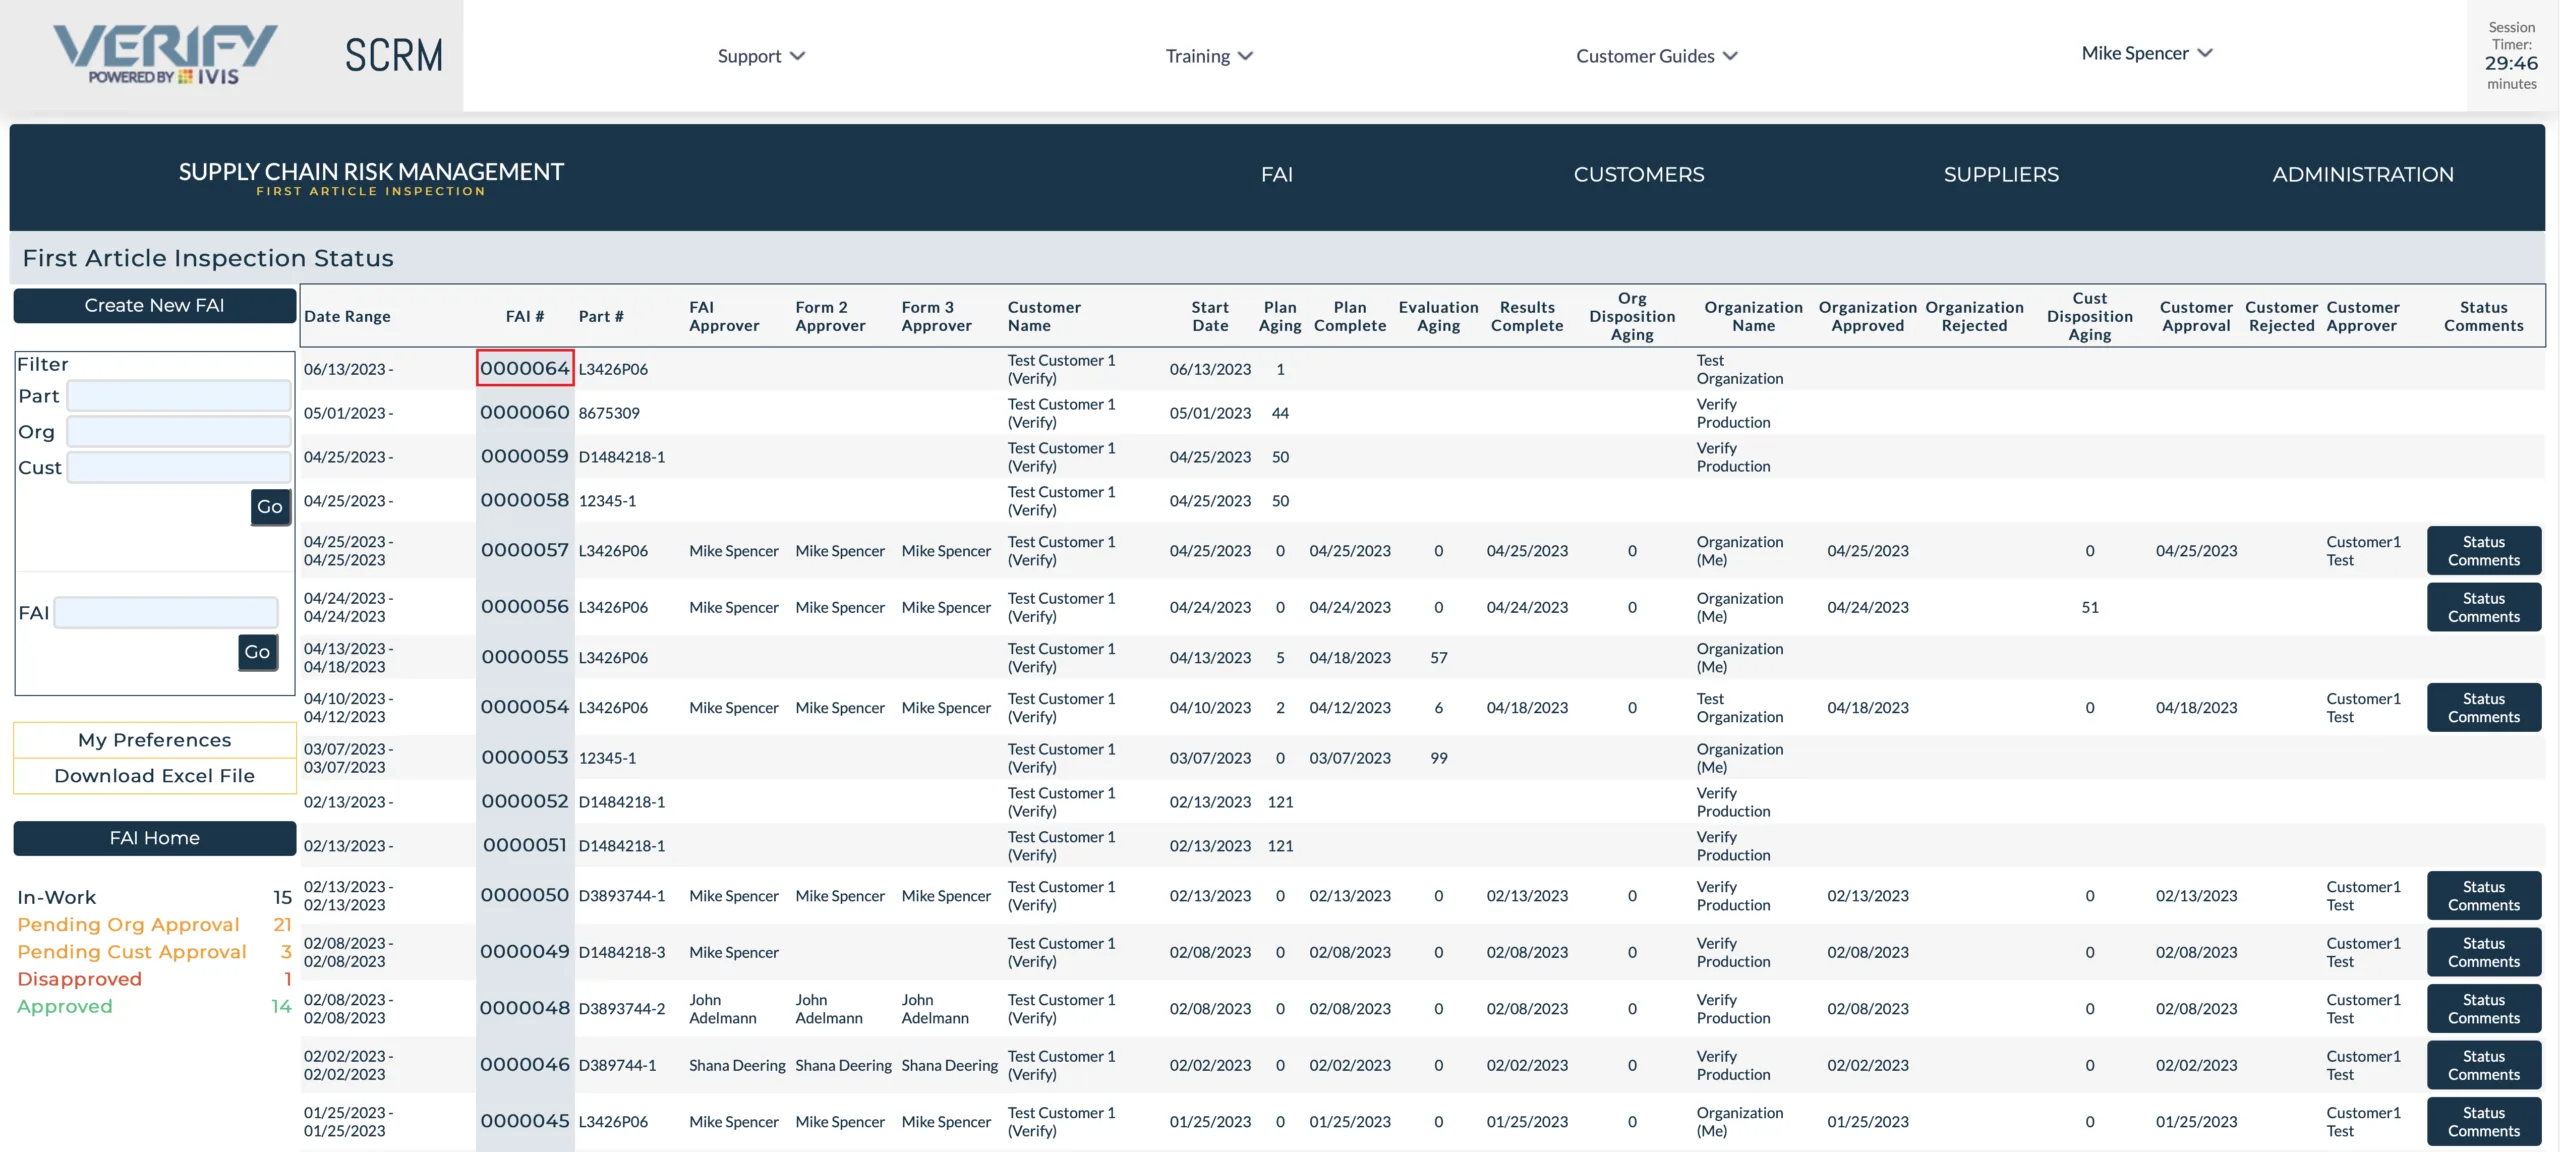
After clicking FAI Status home, you will land on the First Article Inspection Status page. Here you can determine the status of all the FAIs your company and your suppliers have in-work or finished. To enter requirements in a First Article Inspection report, left click on the FAI you want to work with. (We will use FAI0000064 for this training Guide)
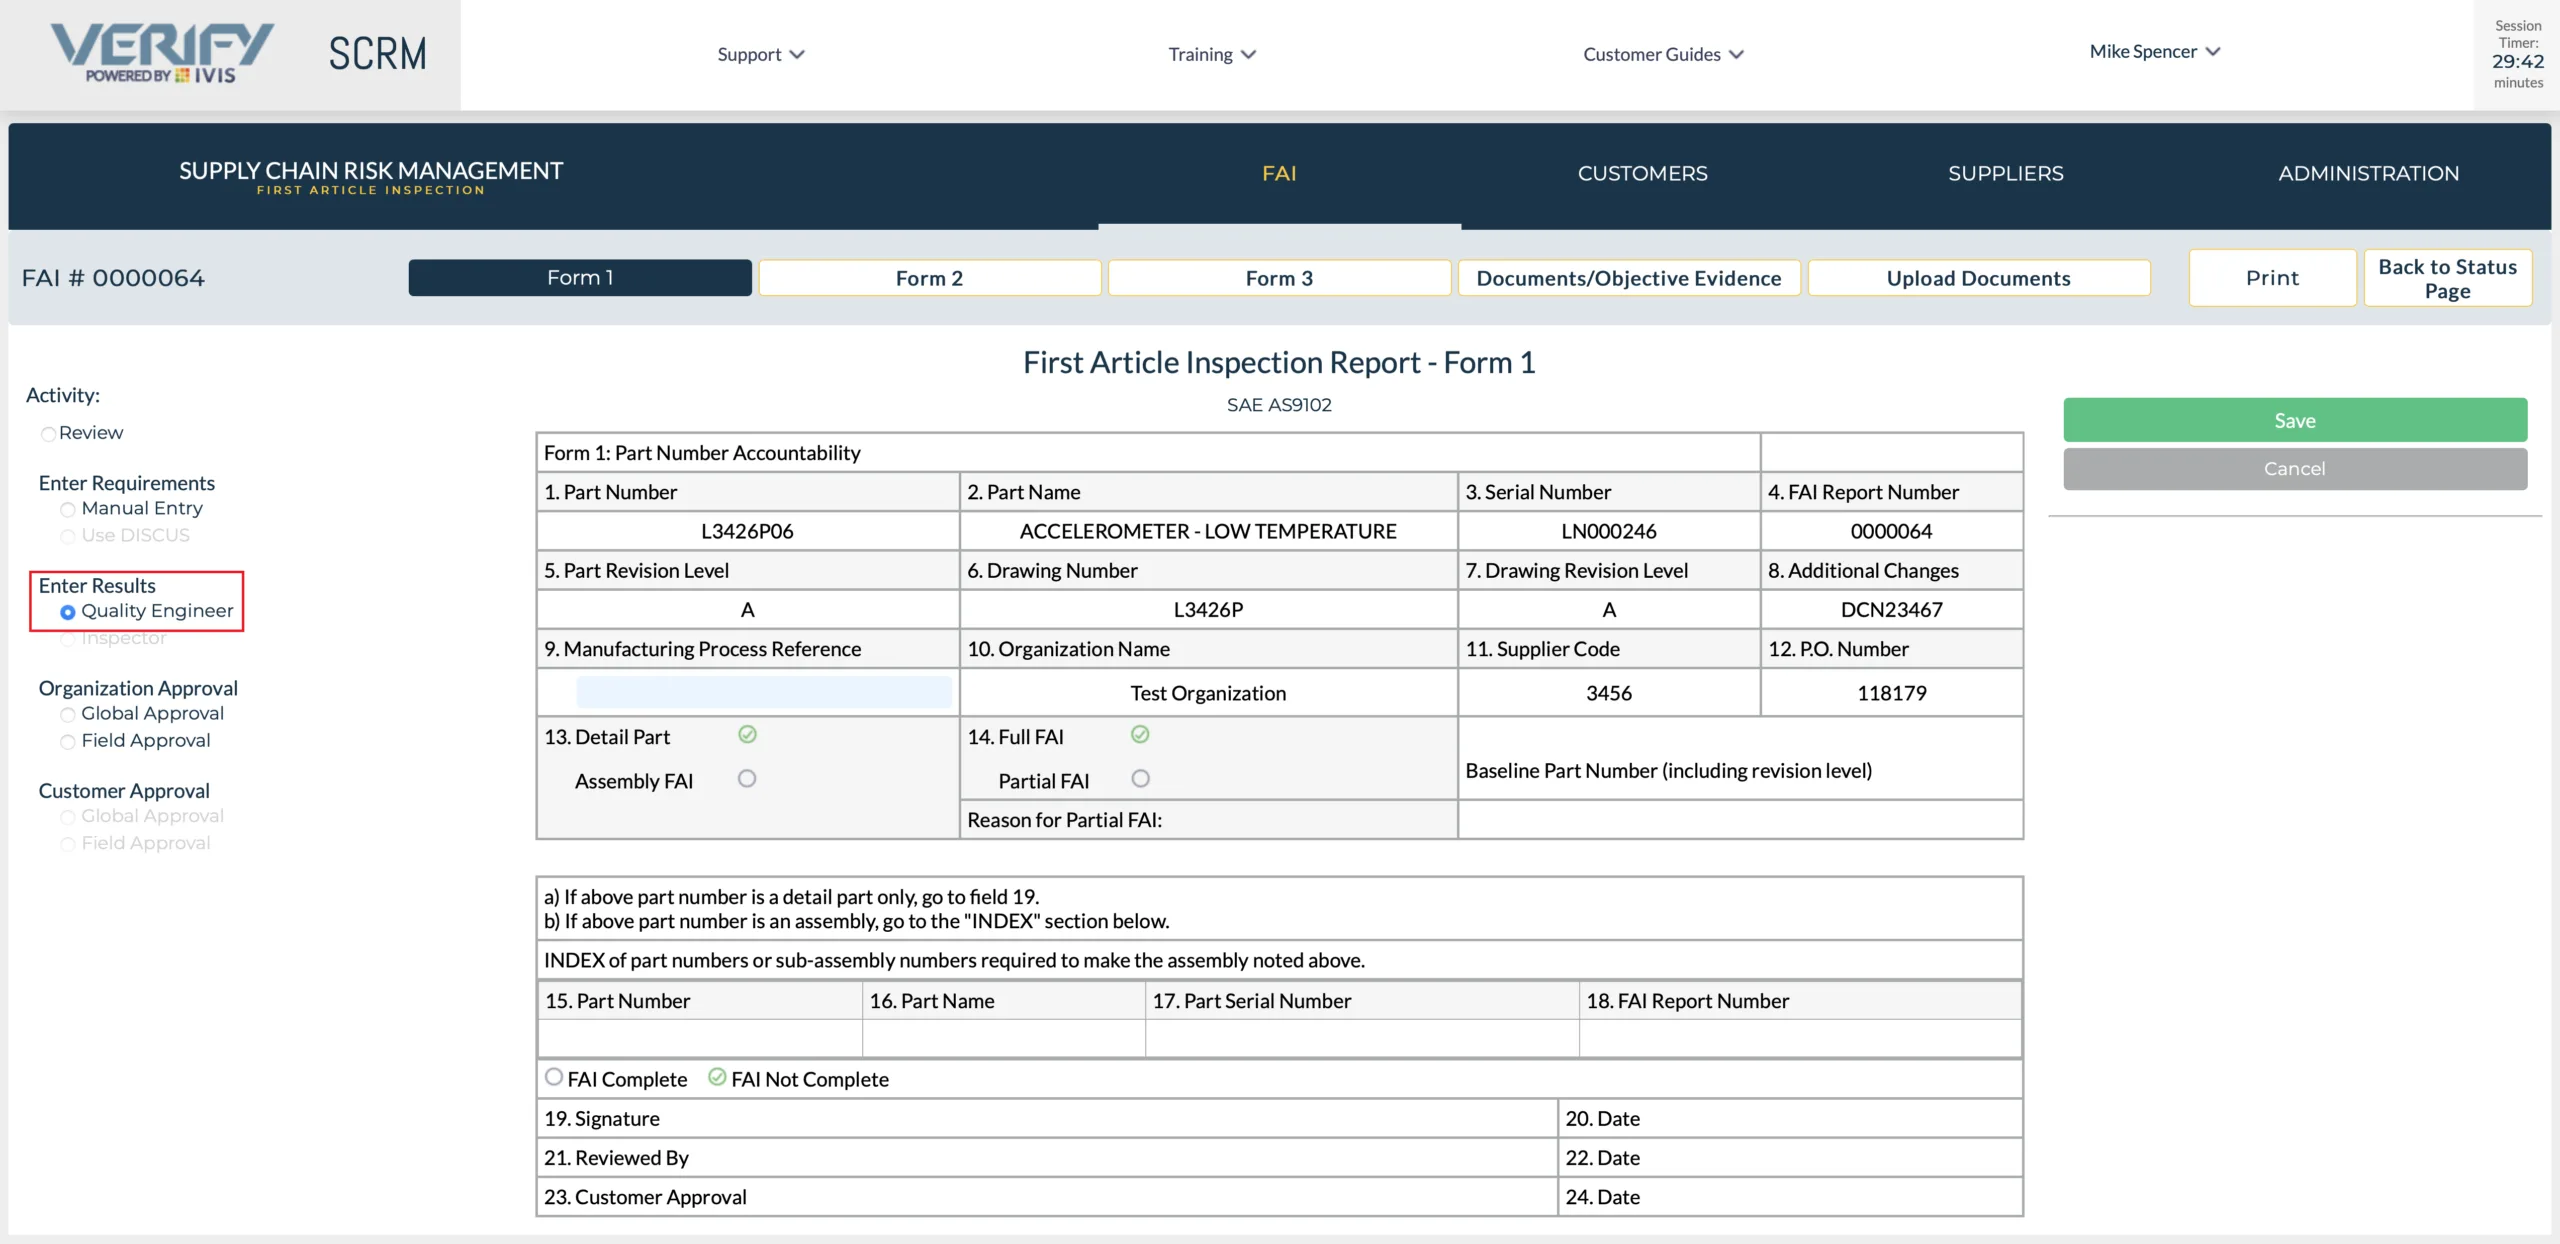
After clicking on the FAI number, on the “FAI Status Page”, the FAI form 1 will be displayed. Click on “Quality Engineer” under the “Enter Results” heading in the left margin. If you have permission to enter Results on Form 1 (Requires a Quality Engineer Role), the fields requiring an entry on form 1, will turn light blue. If you do not have permission to enter requirements the fields will remain grayed out and un-editable.
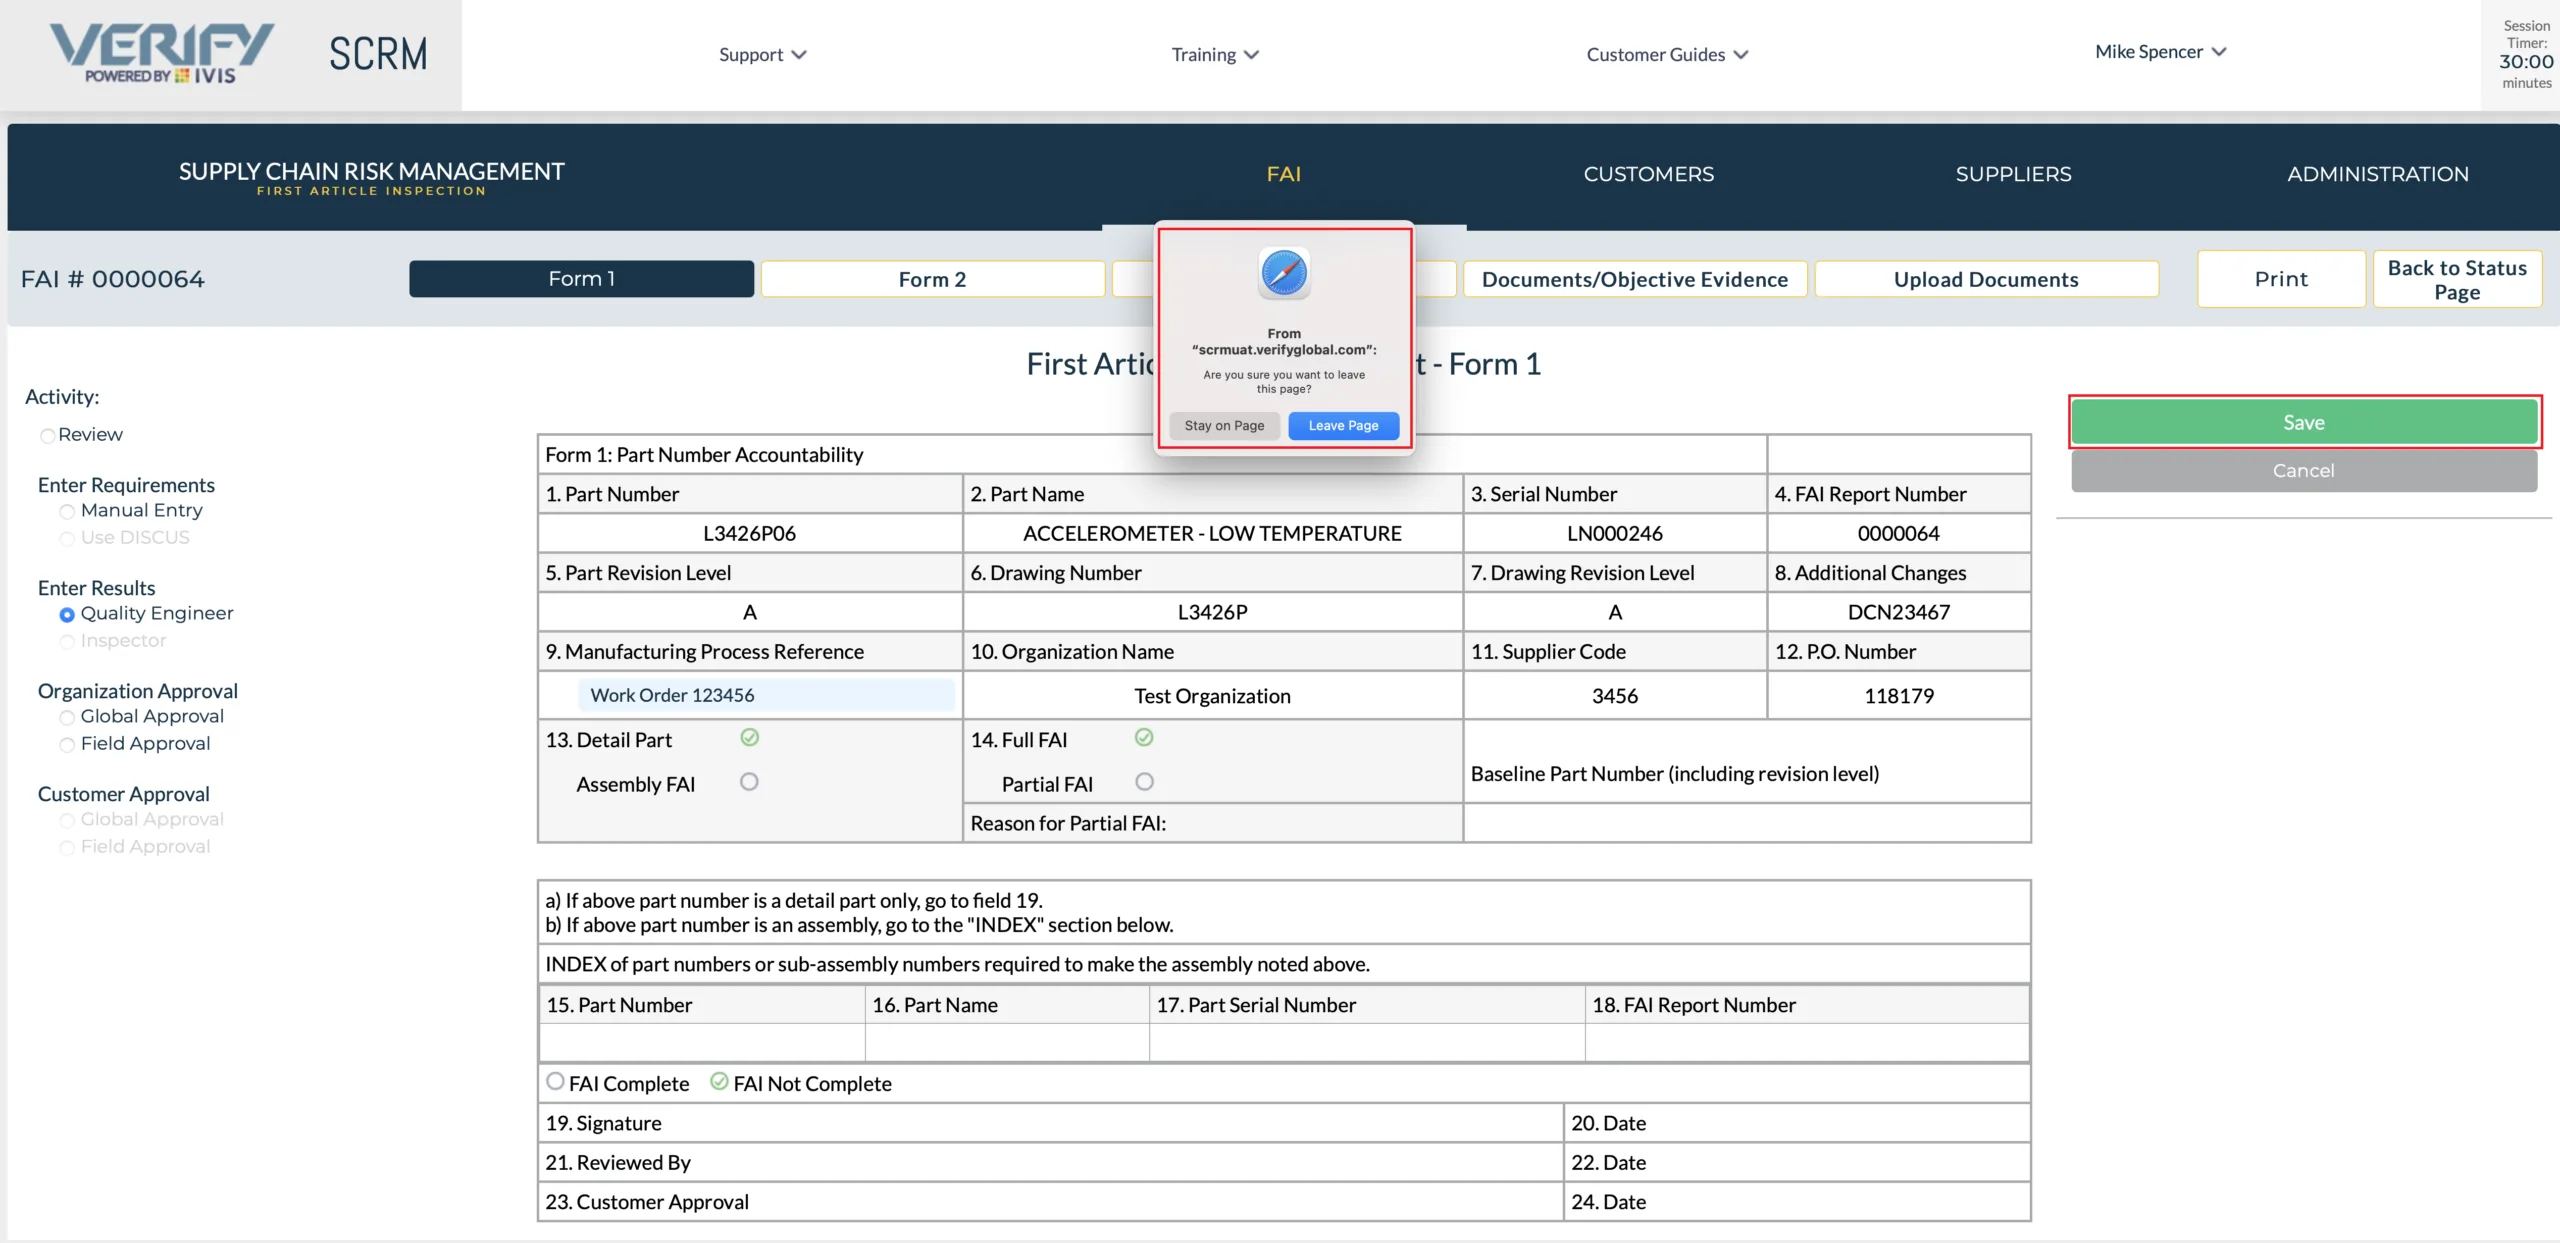
Enter the required information in the light blue Fields, in this case the “Manufacturing Process Reference” in field 9. If this were an assembly FAI, fields 15-18 would be active or light blue and require entries. Fill in all the required fields in light blue and click save. You can click save anytime in the process to save your work. If you try to navigate away from this form without saving your data, the FAI Application will display a warning message asking if you really want to leave the page without saving.
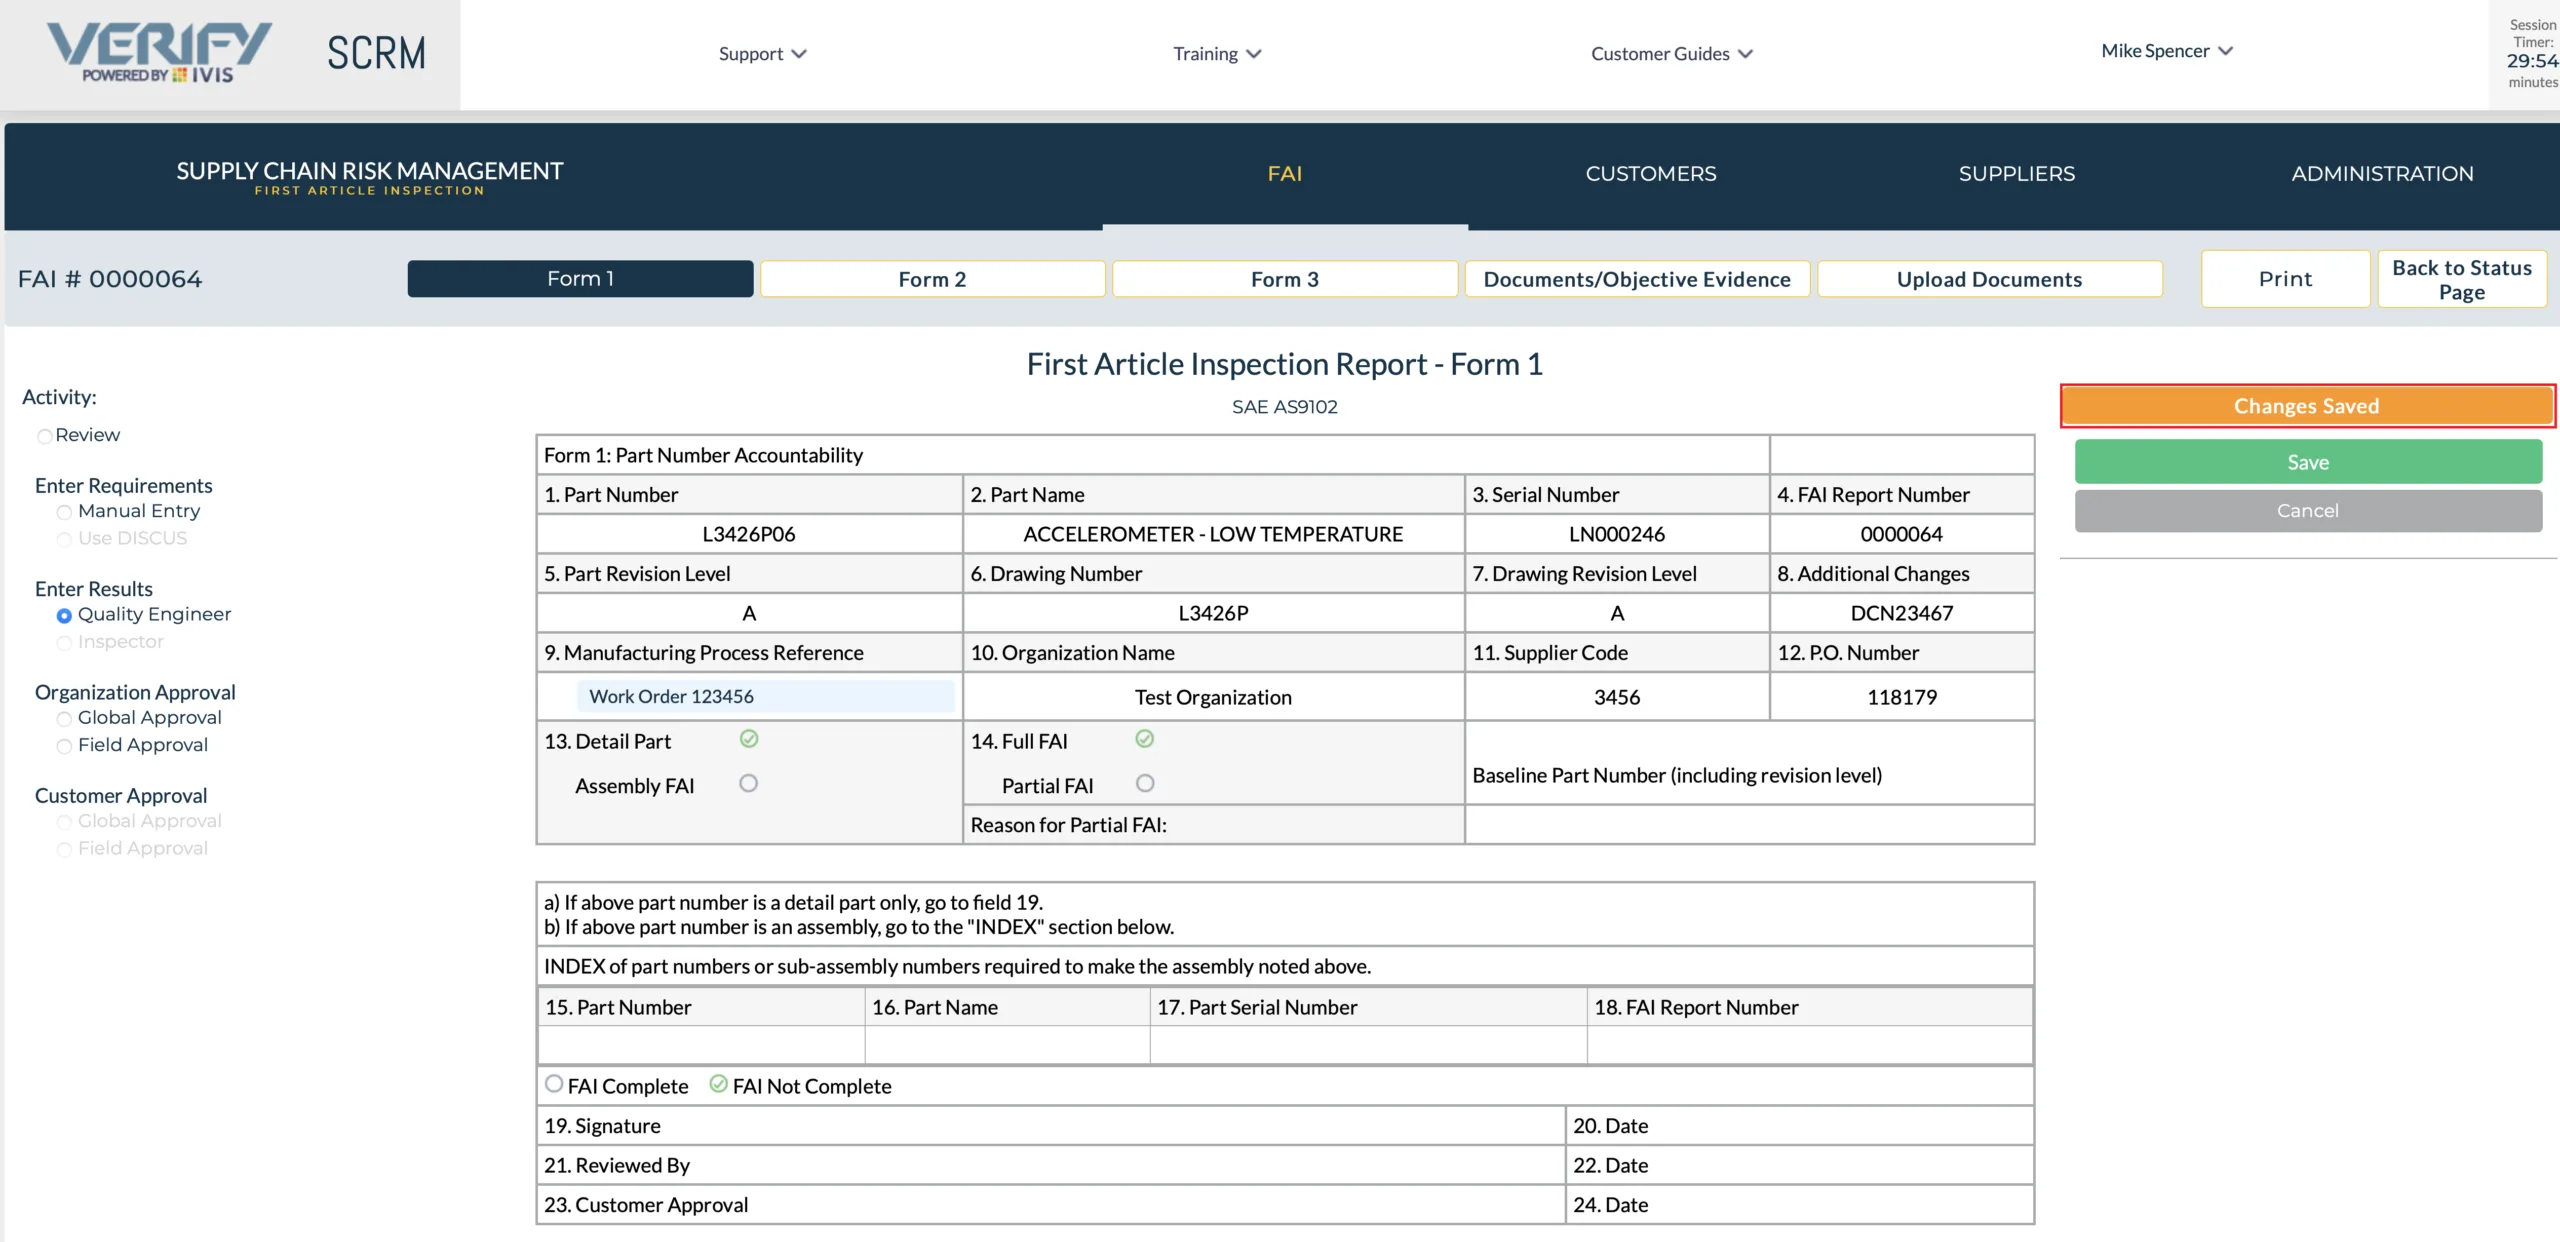
Once you have saved your entries, you will receive positive visual feedback that your data has been saved. Click on the Tab “Form 2”.
If there are no entries for form 2, you can simply move onto form 3. If you have Special Processes or Raw Materials to account for, click the first box in column 8, “Supplier”. Fields 8, 9, 10 and 13 turn light blue meaning they are editable.
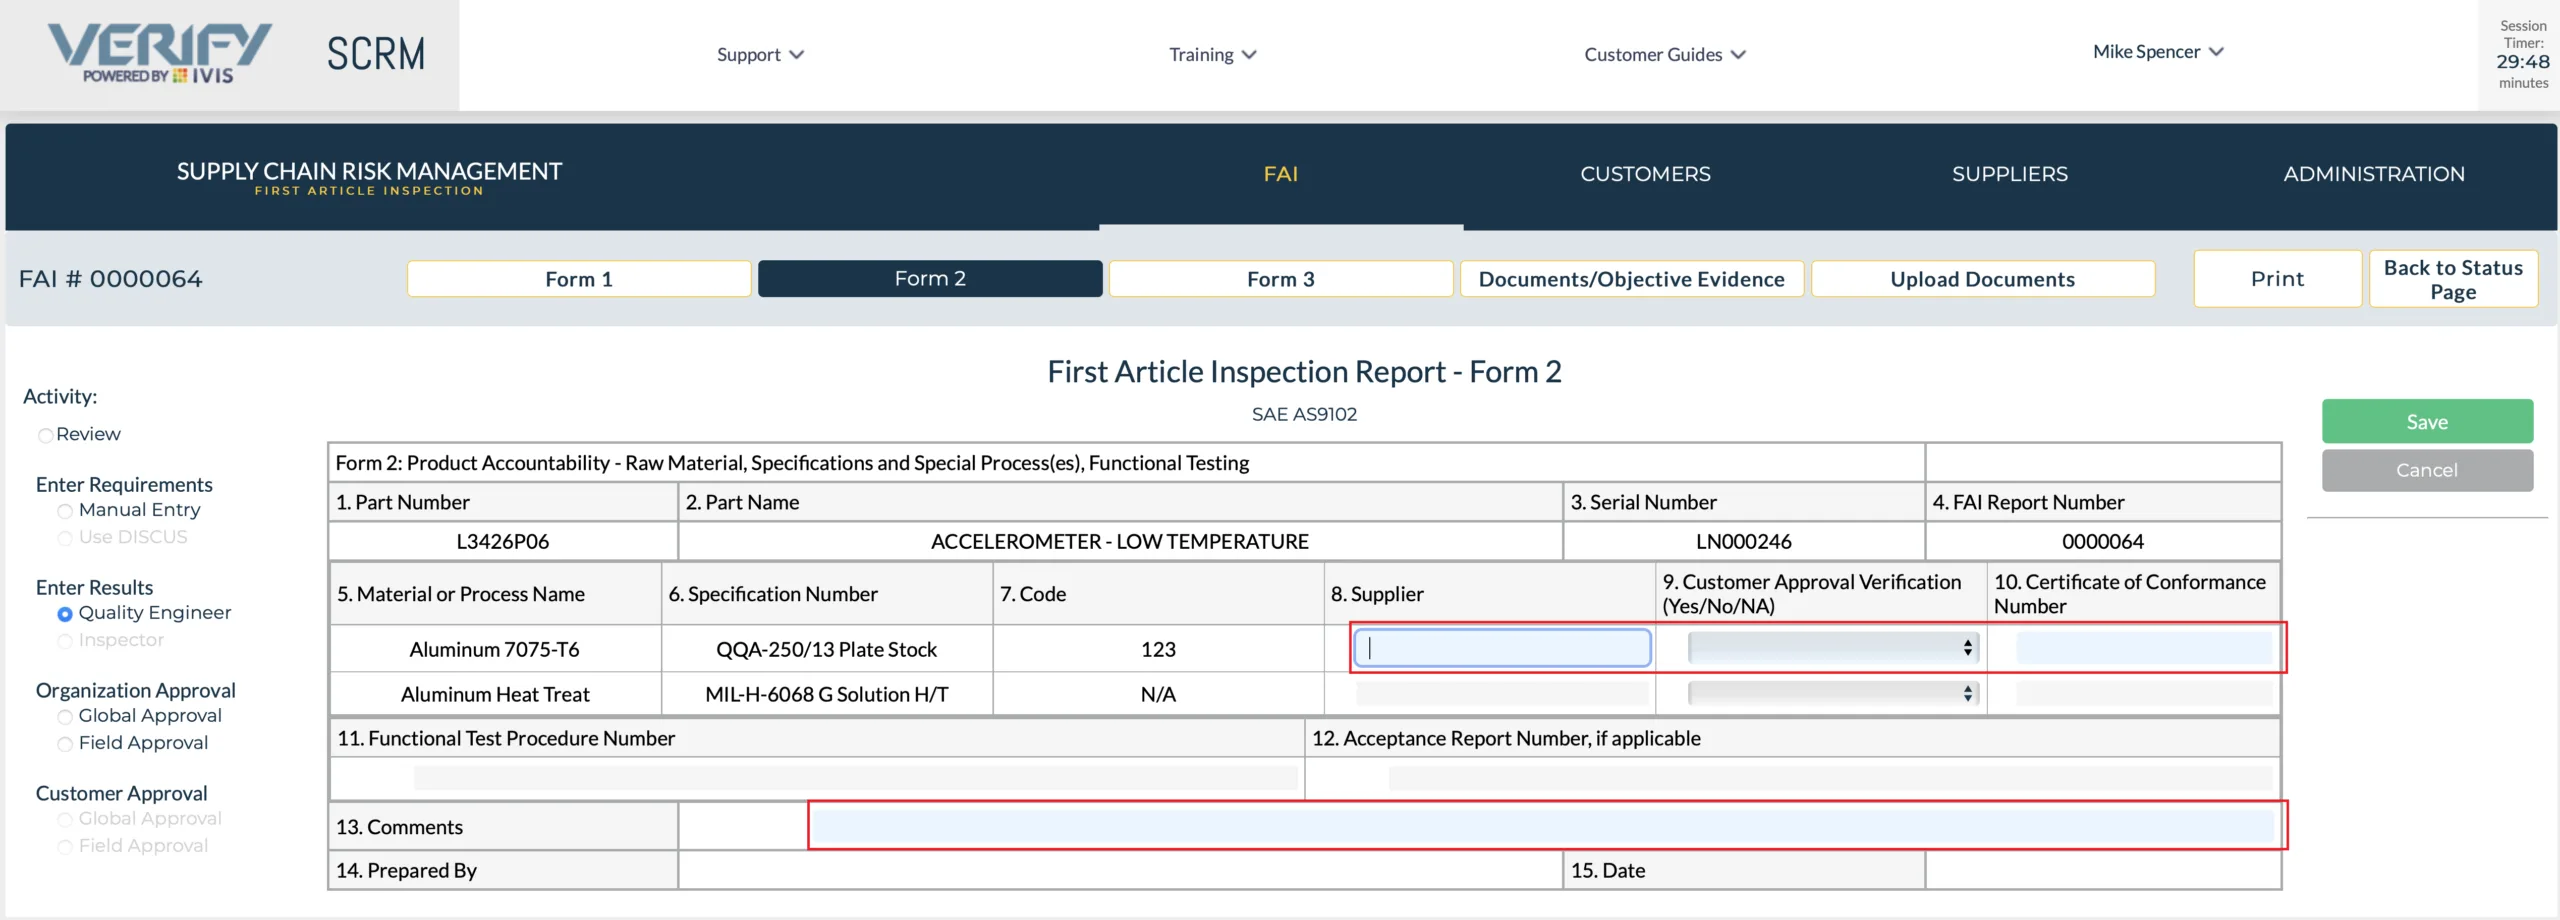
Enter the required information in fields 8 through 10 and click “Save”. You will receive positive visual feedback that your data has been saved.
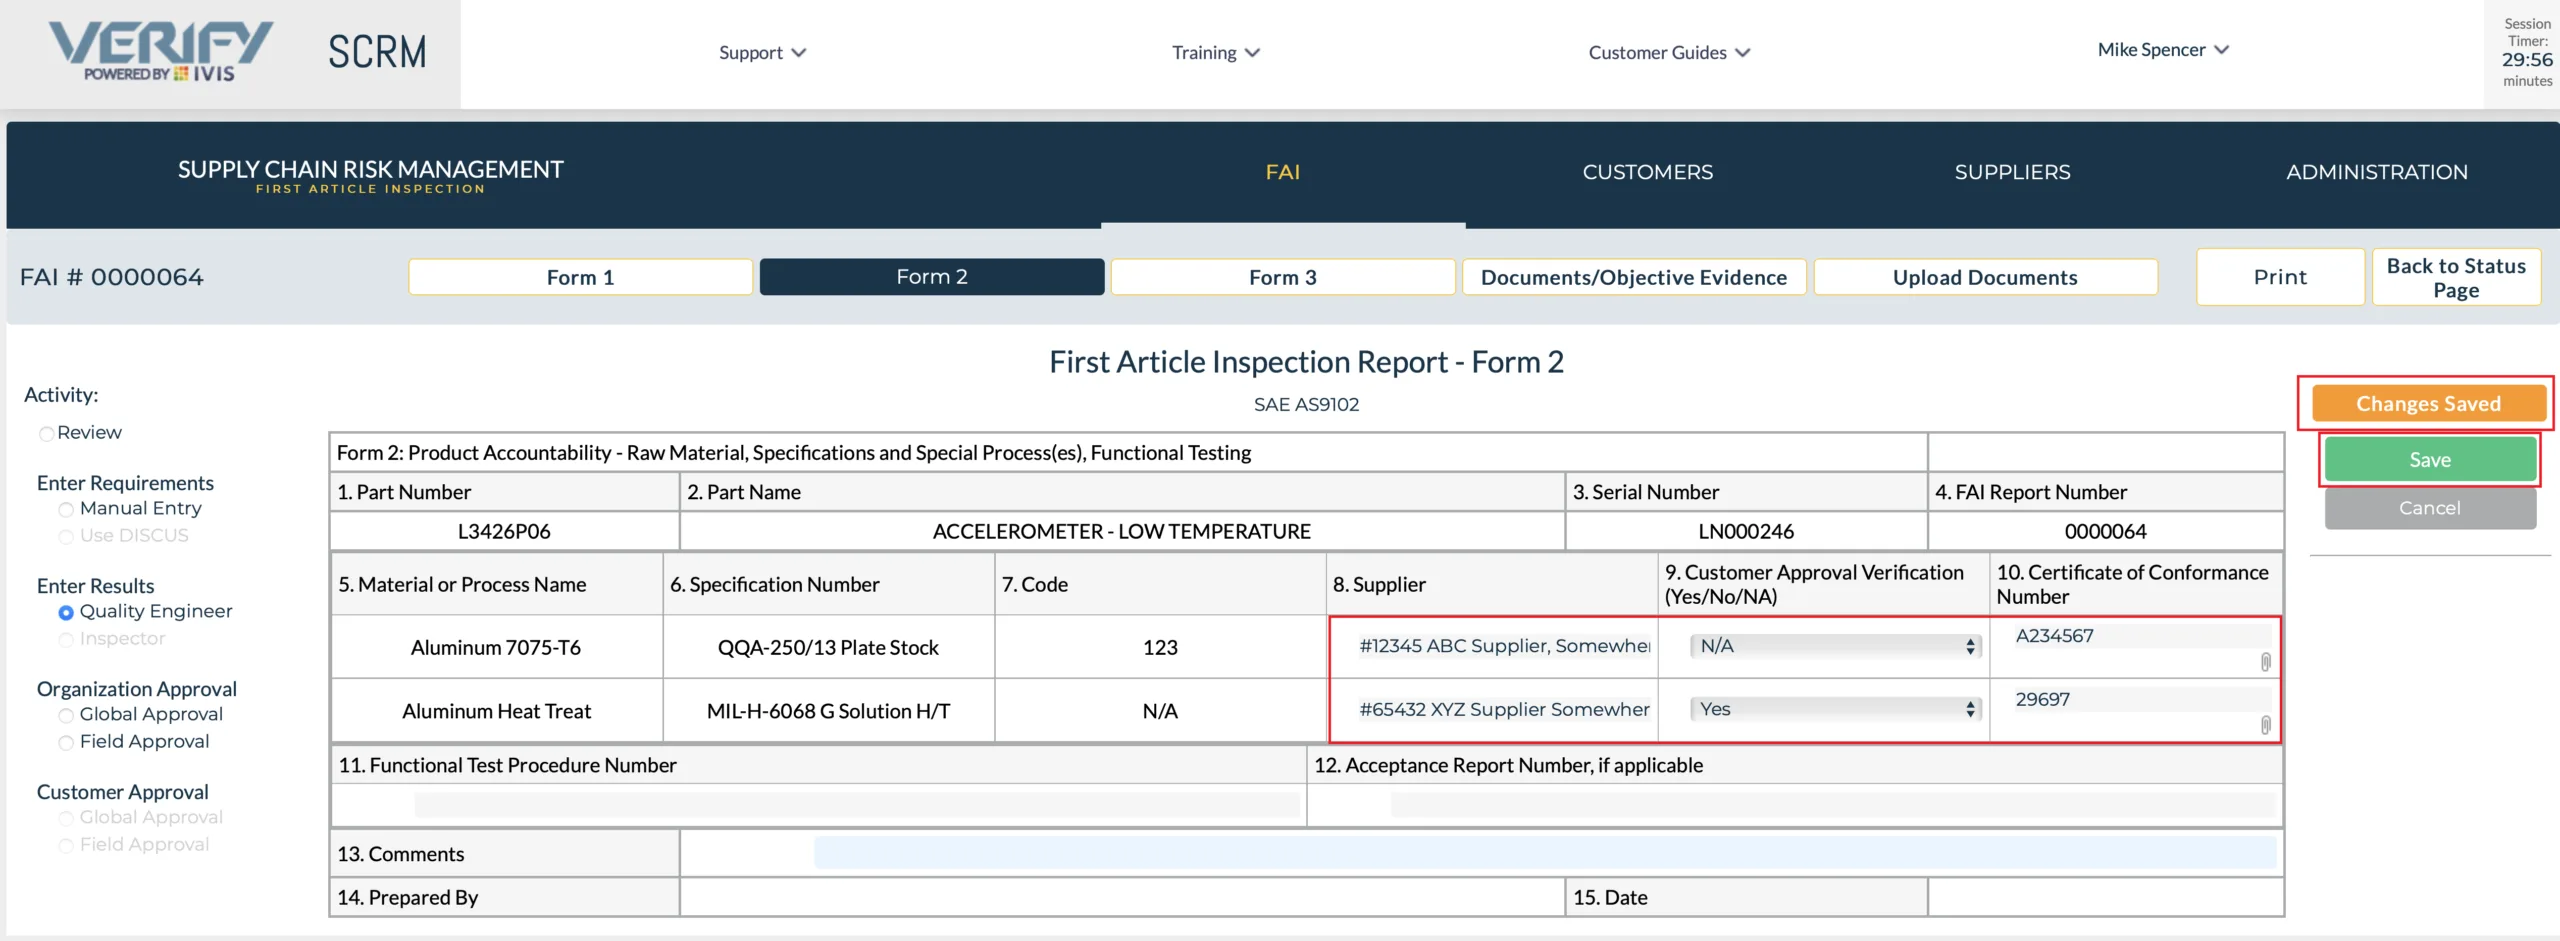
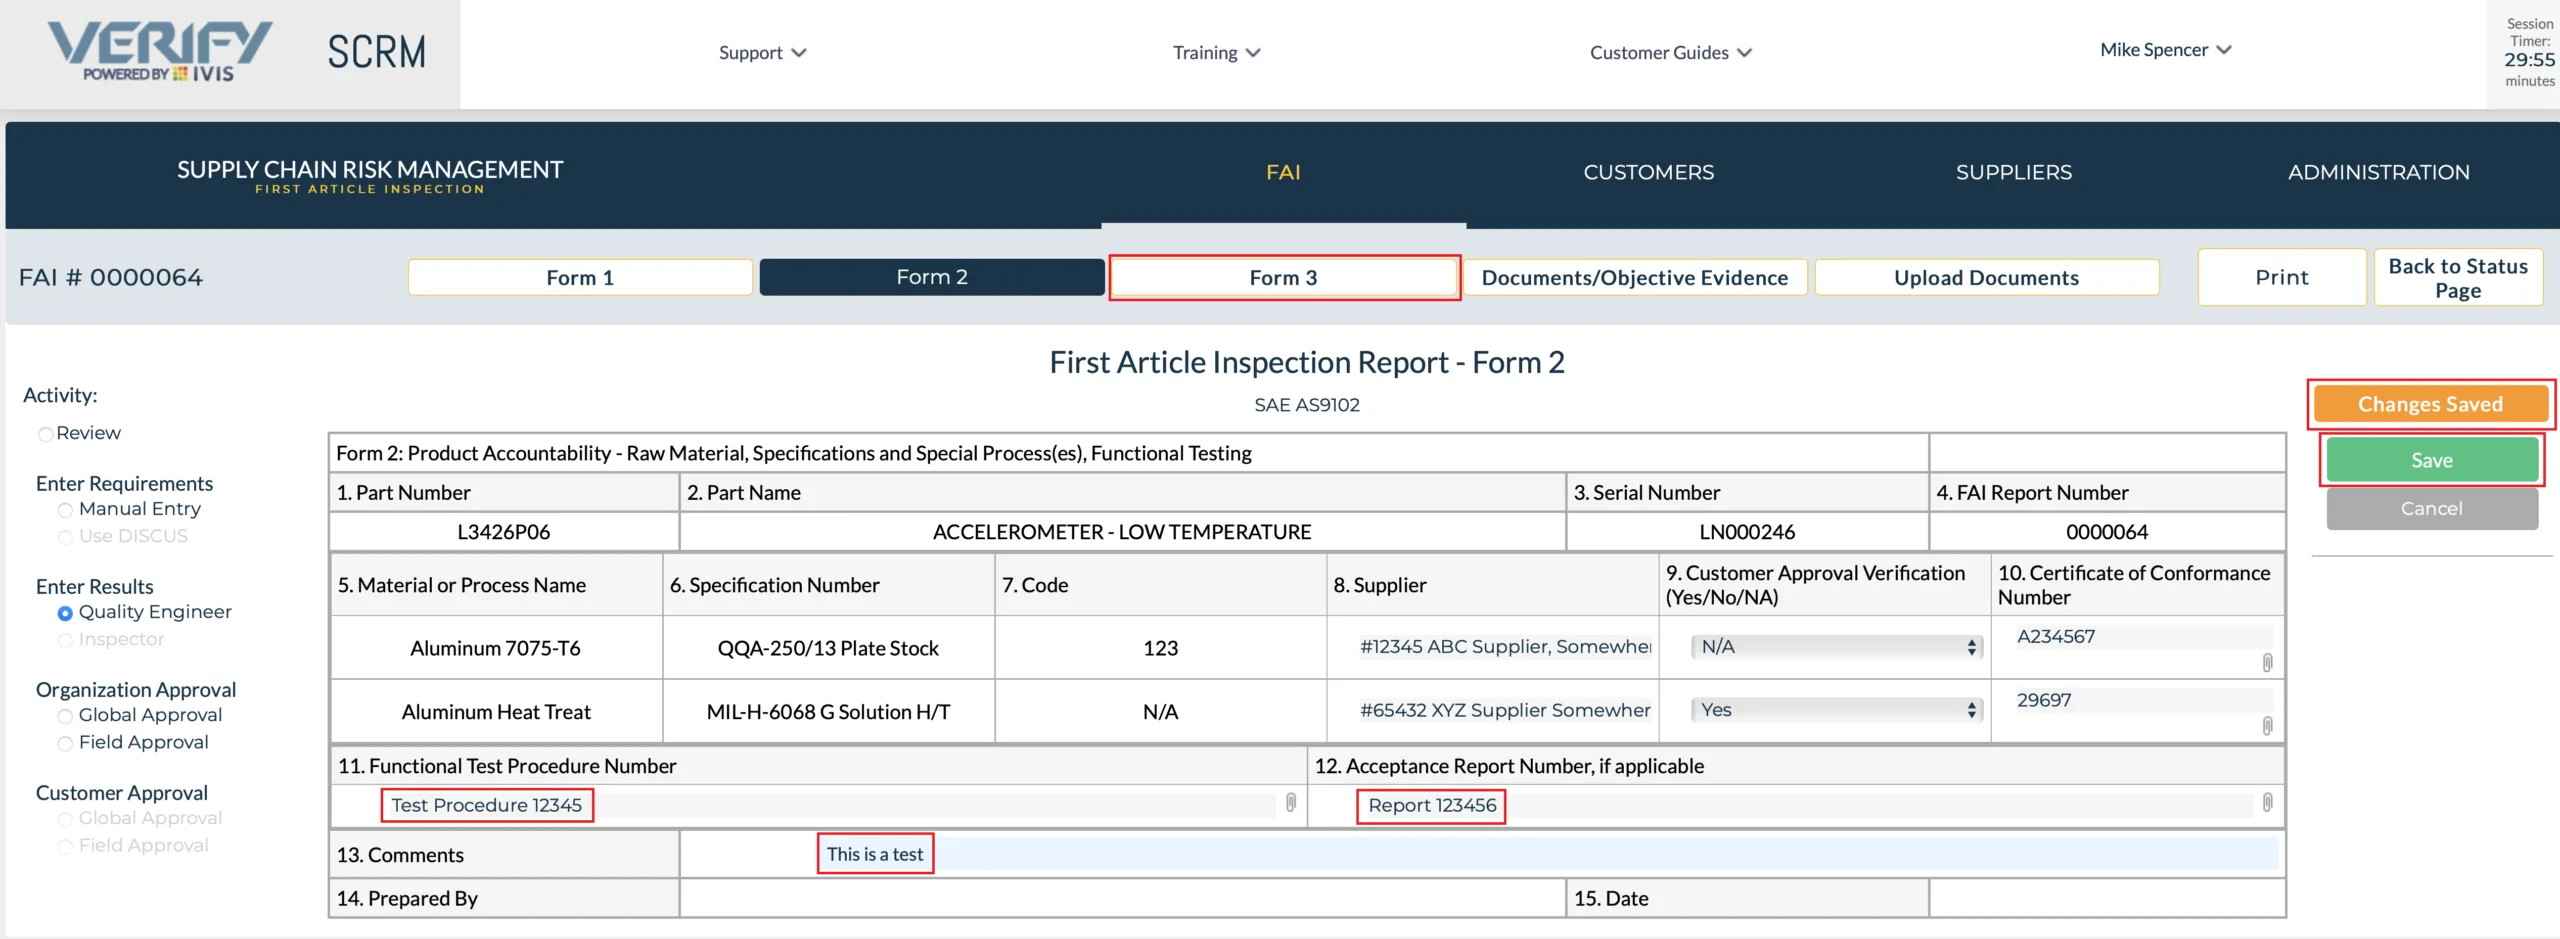
Next click in Field 11 and enter any applicable “Functional Test procedures”. If there are none, leave the field Blank. Click in Field 12 and list the “Acceptance Report Number”. If there are none, leave the field Blank. Add any comments in Field 13 and click the “Save” button. You will receive positive visual feedback that your data has been saved. Click on the Form 3 Tab to move to form 3.
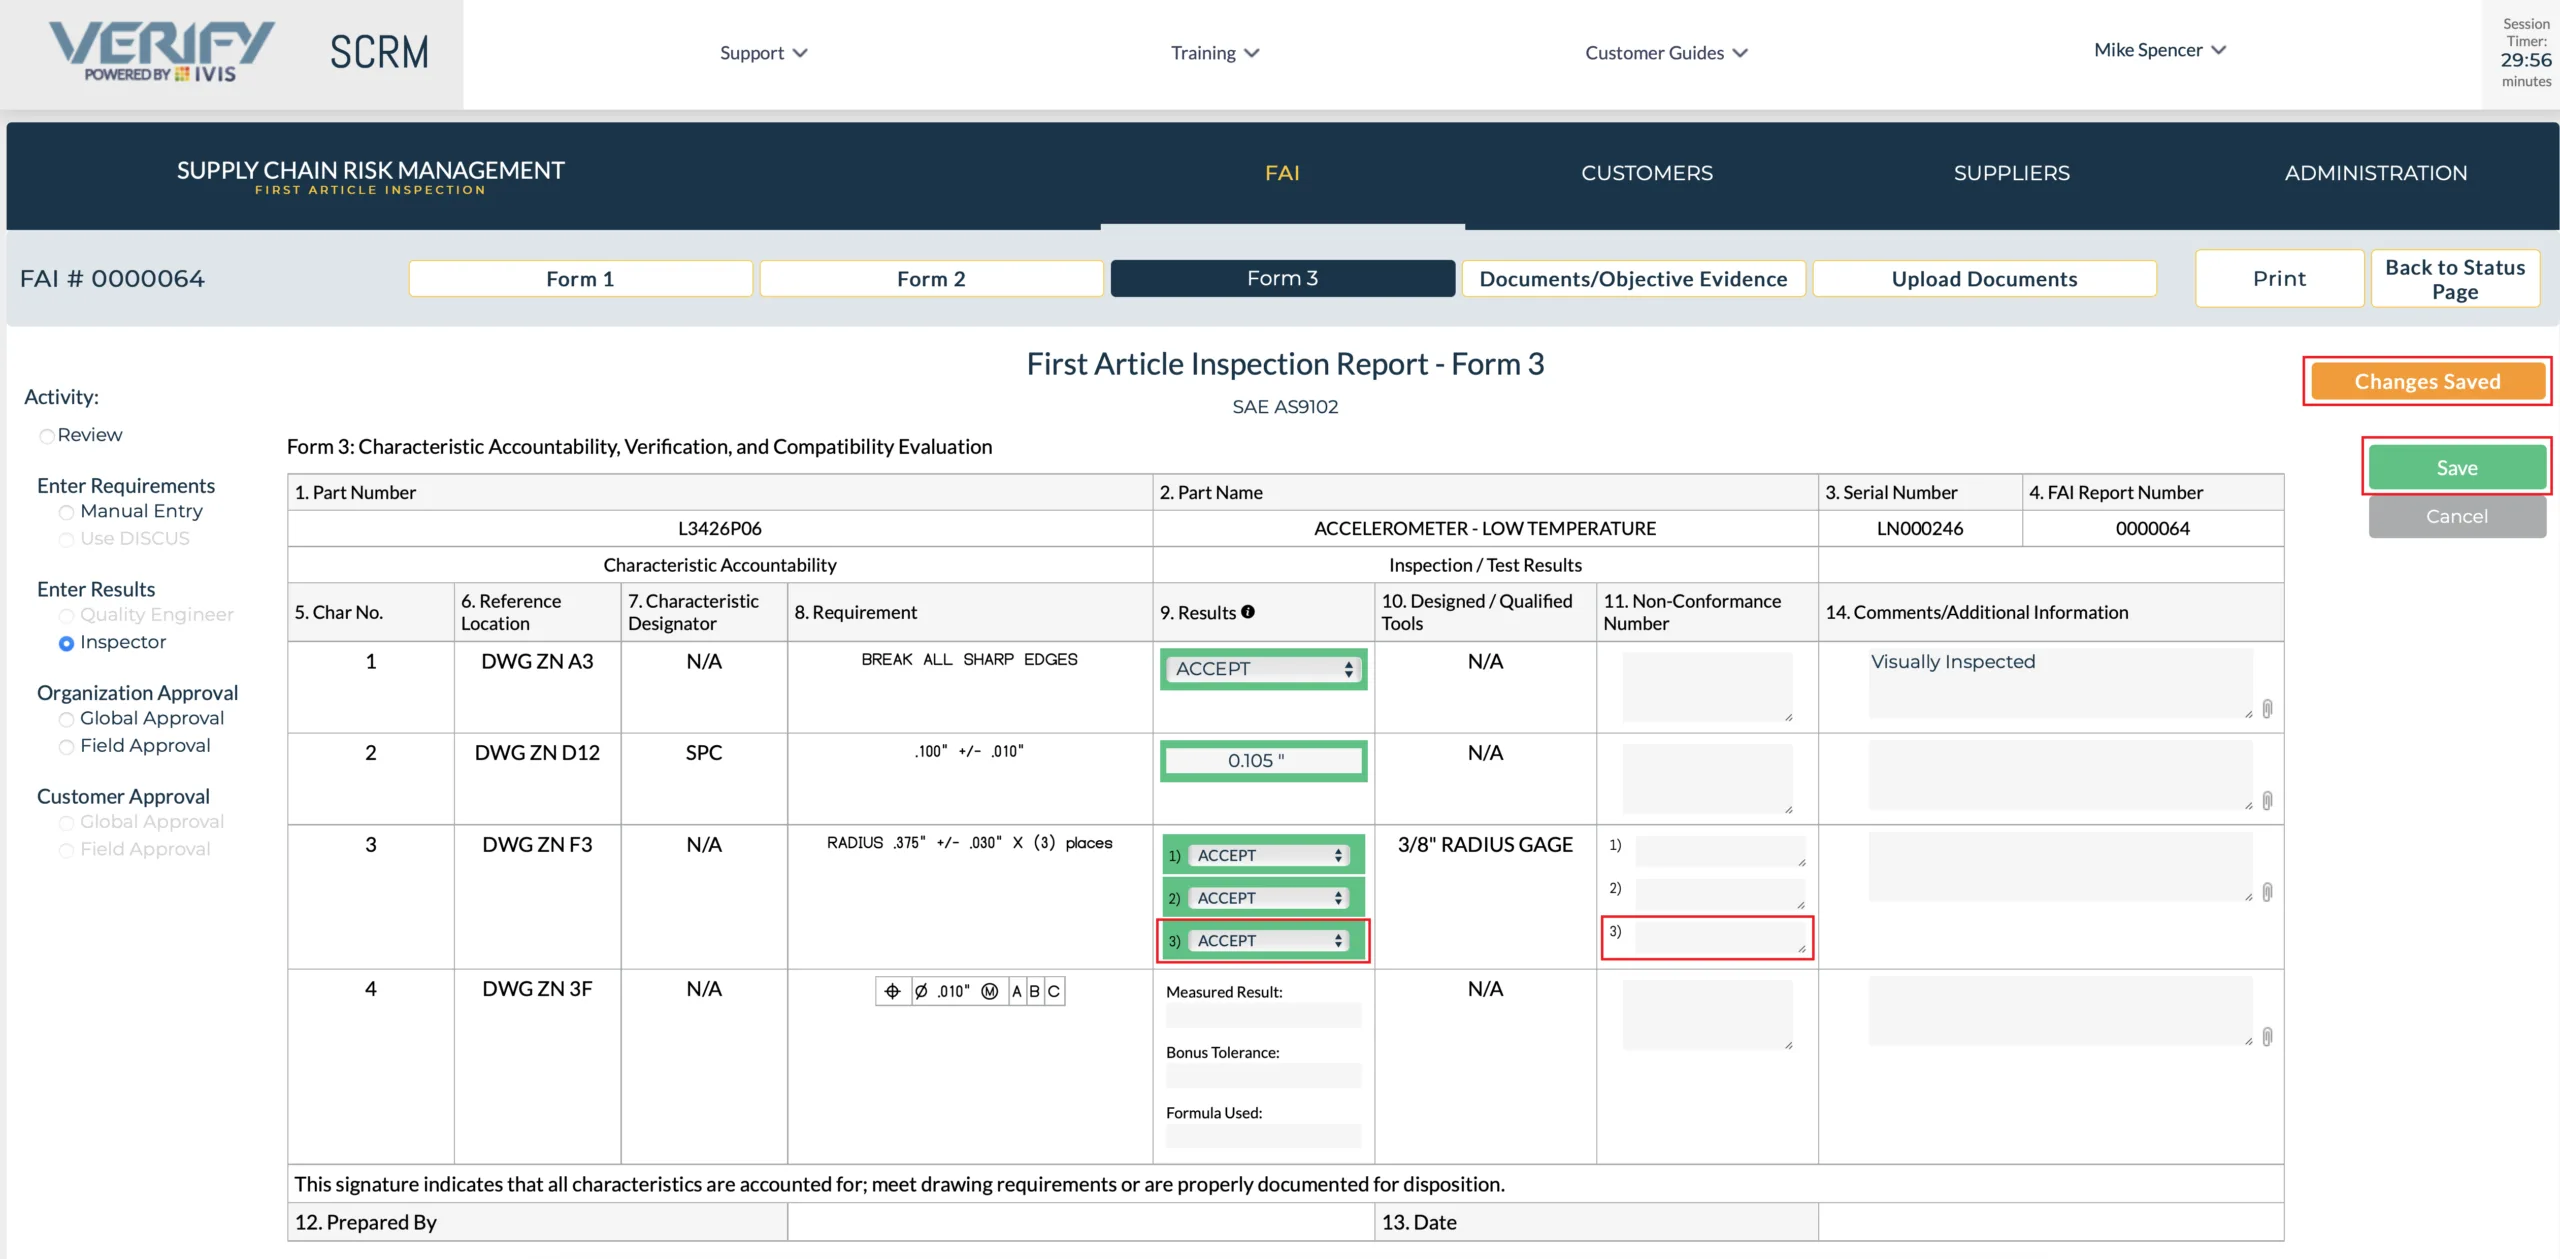
After navigating to form 3, Click on “Inspector” under the “Enter Results” heading in the left margin. If you have permission to enter Results on Form 3 (Requires an Inspector Role), the fields requiring an entry on form 3, will be editable. If you do not have permission to enter requirements the fields will be un-editable.
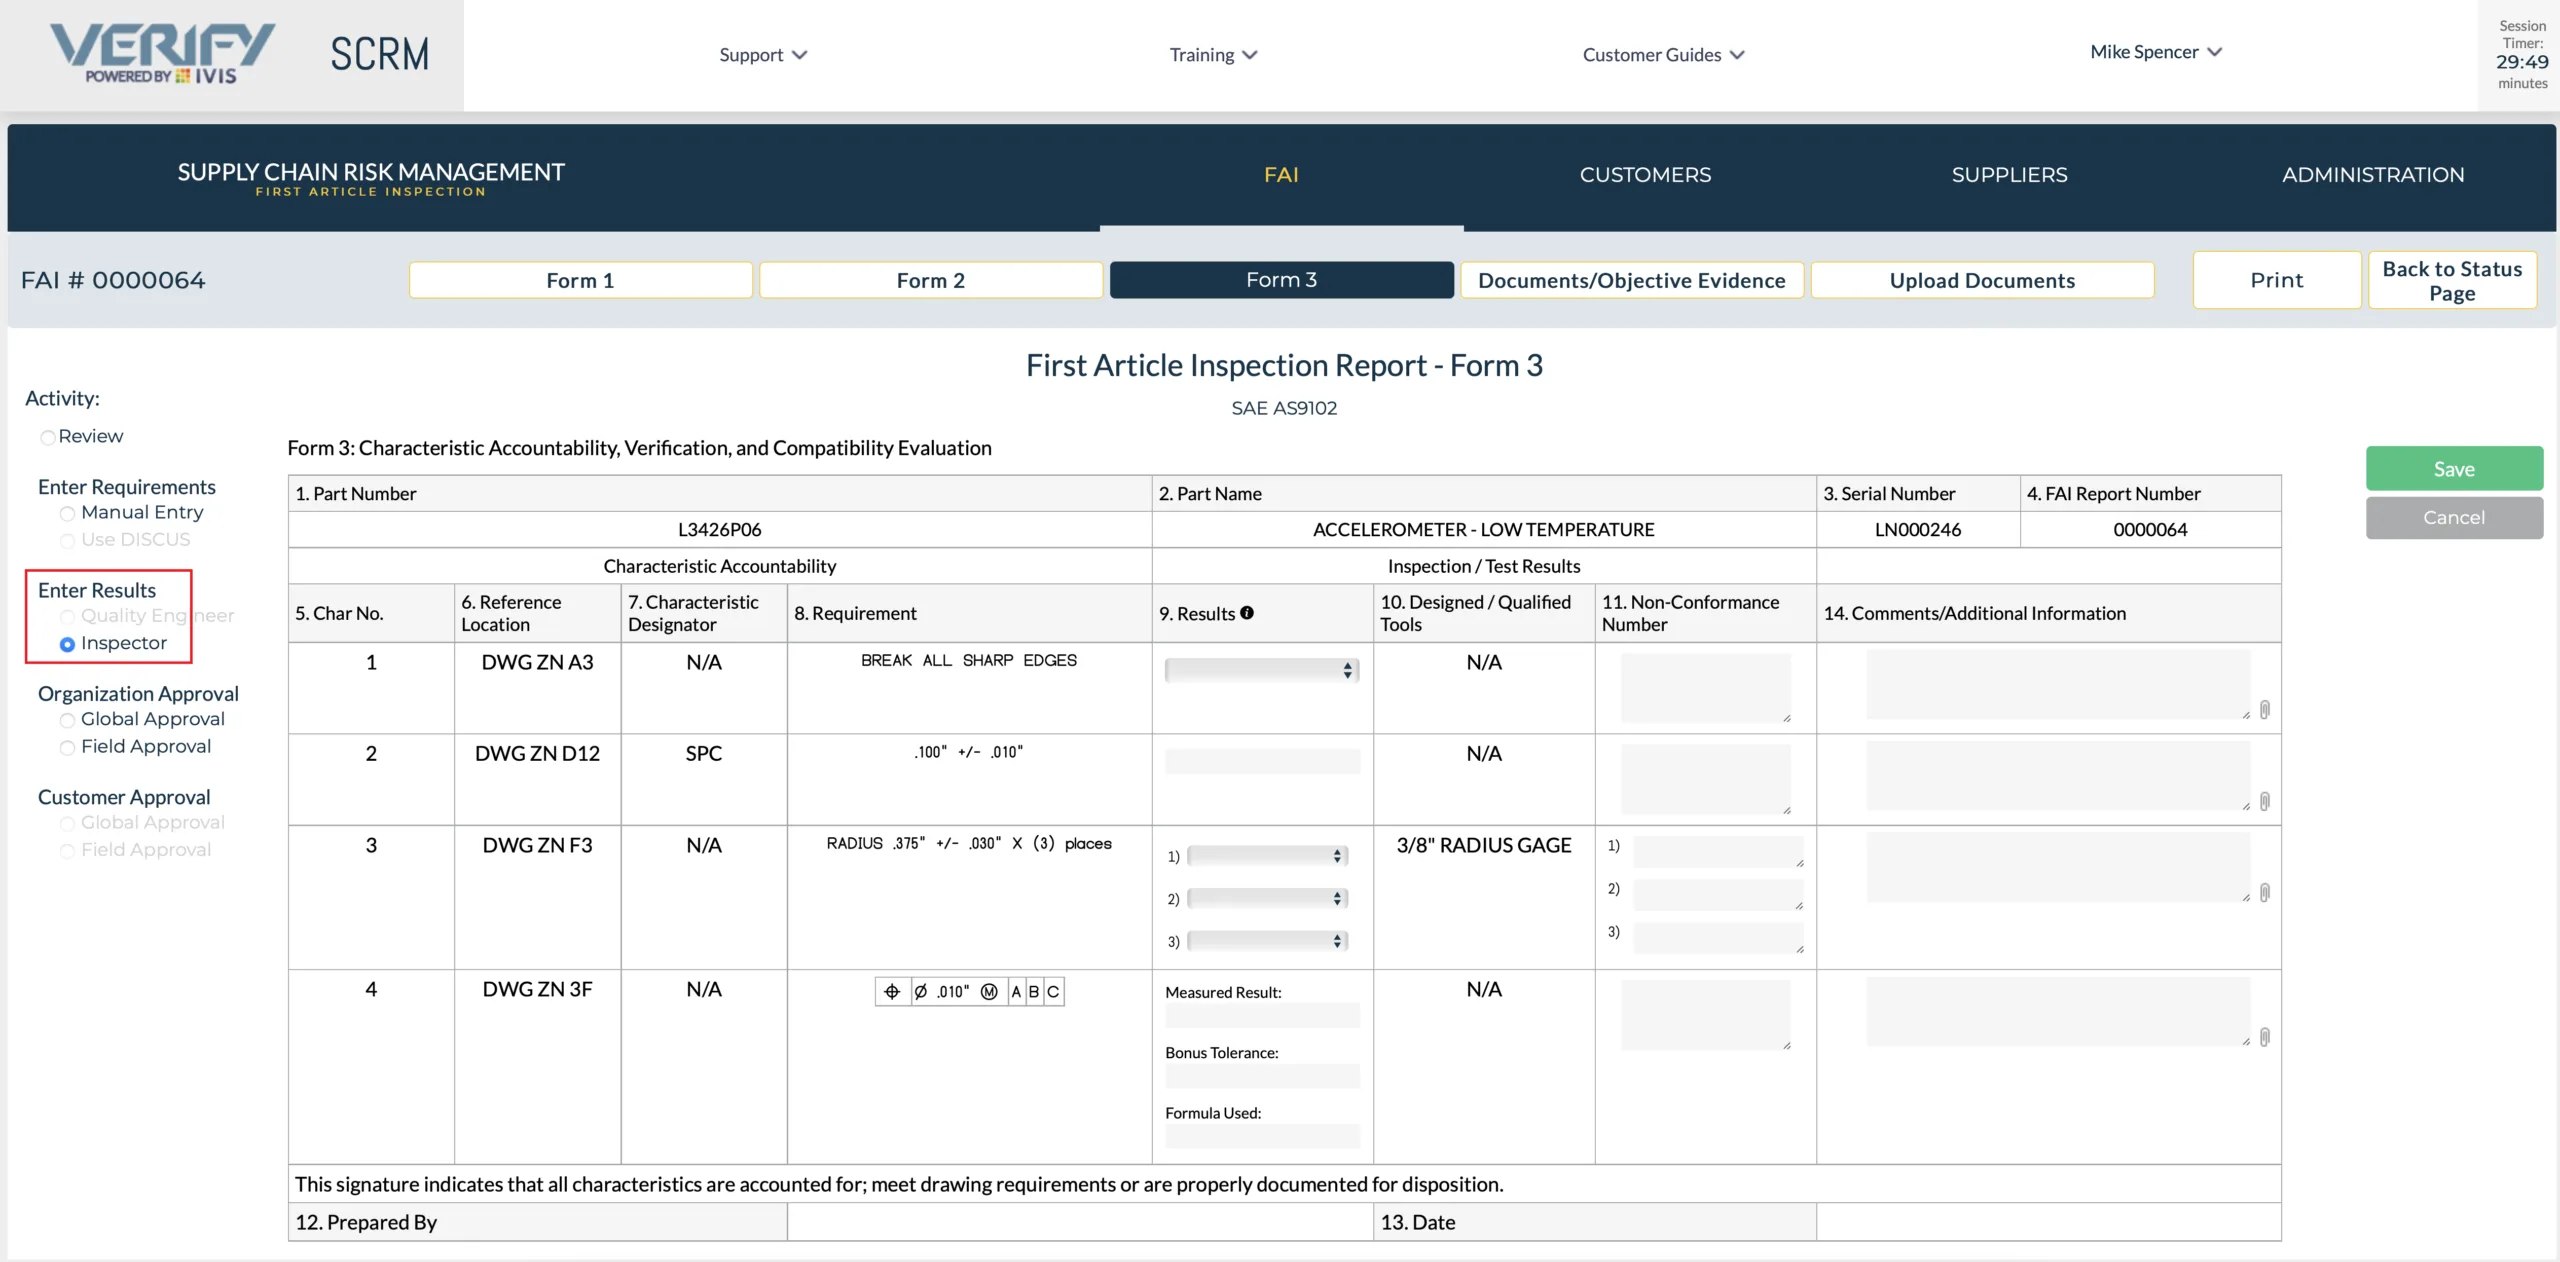
For each characteristic enter the result(s) in Field 9 and a comment, if required, in field 14.
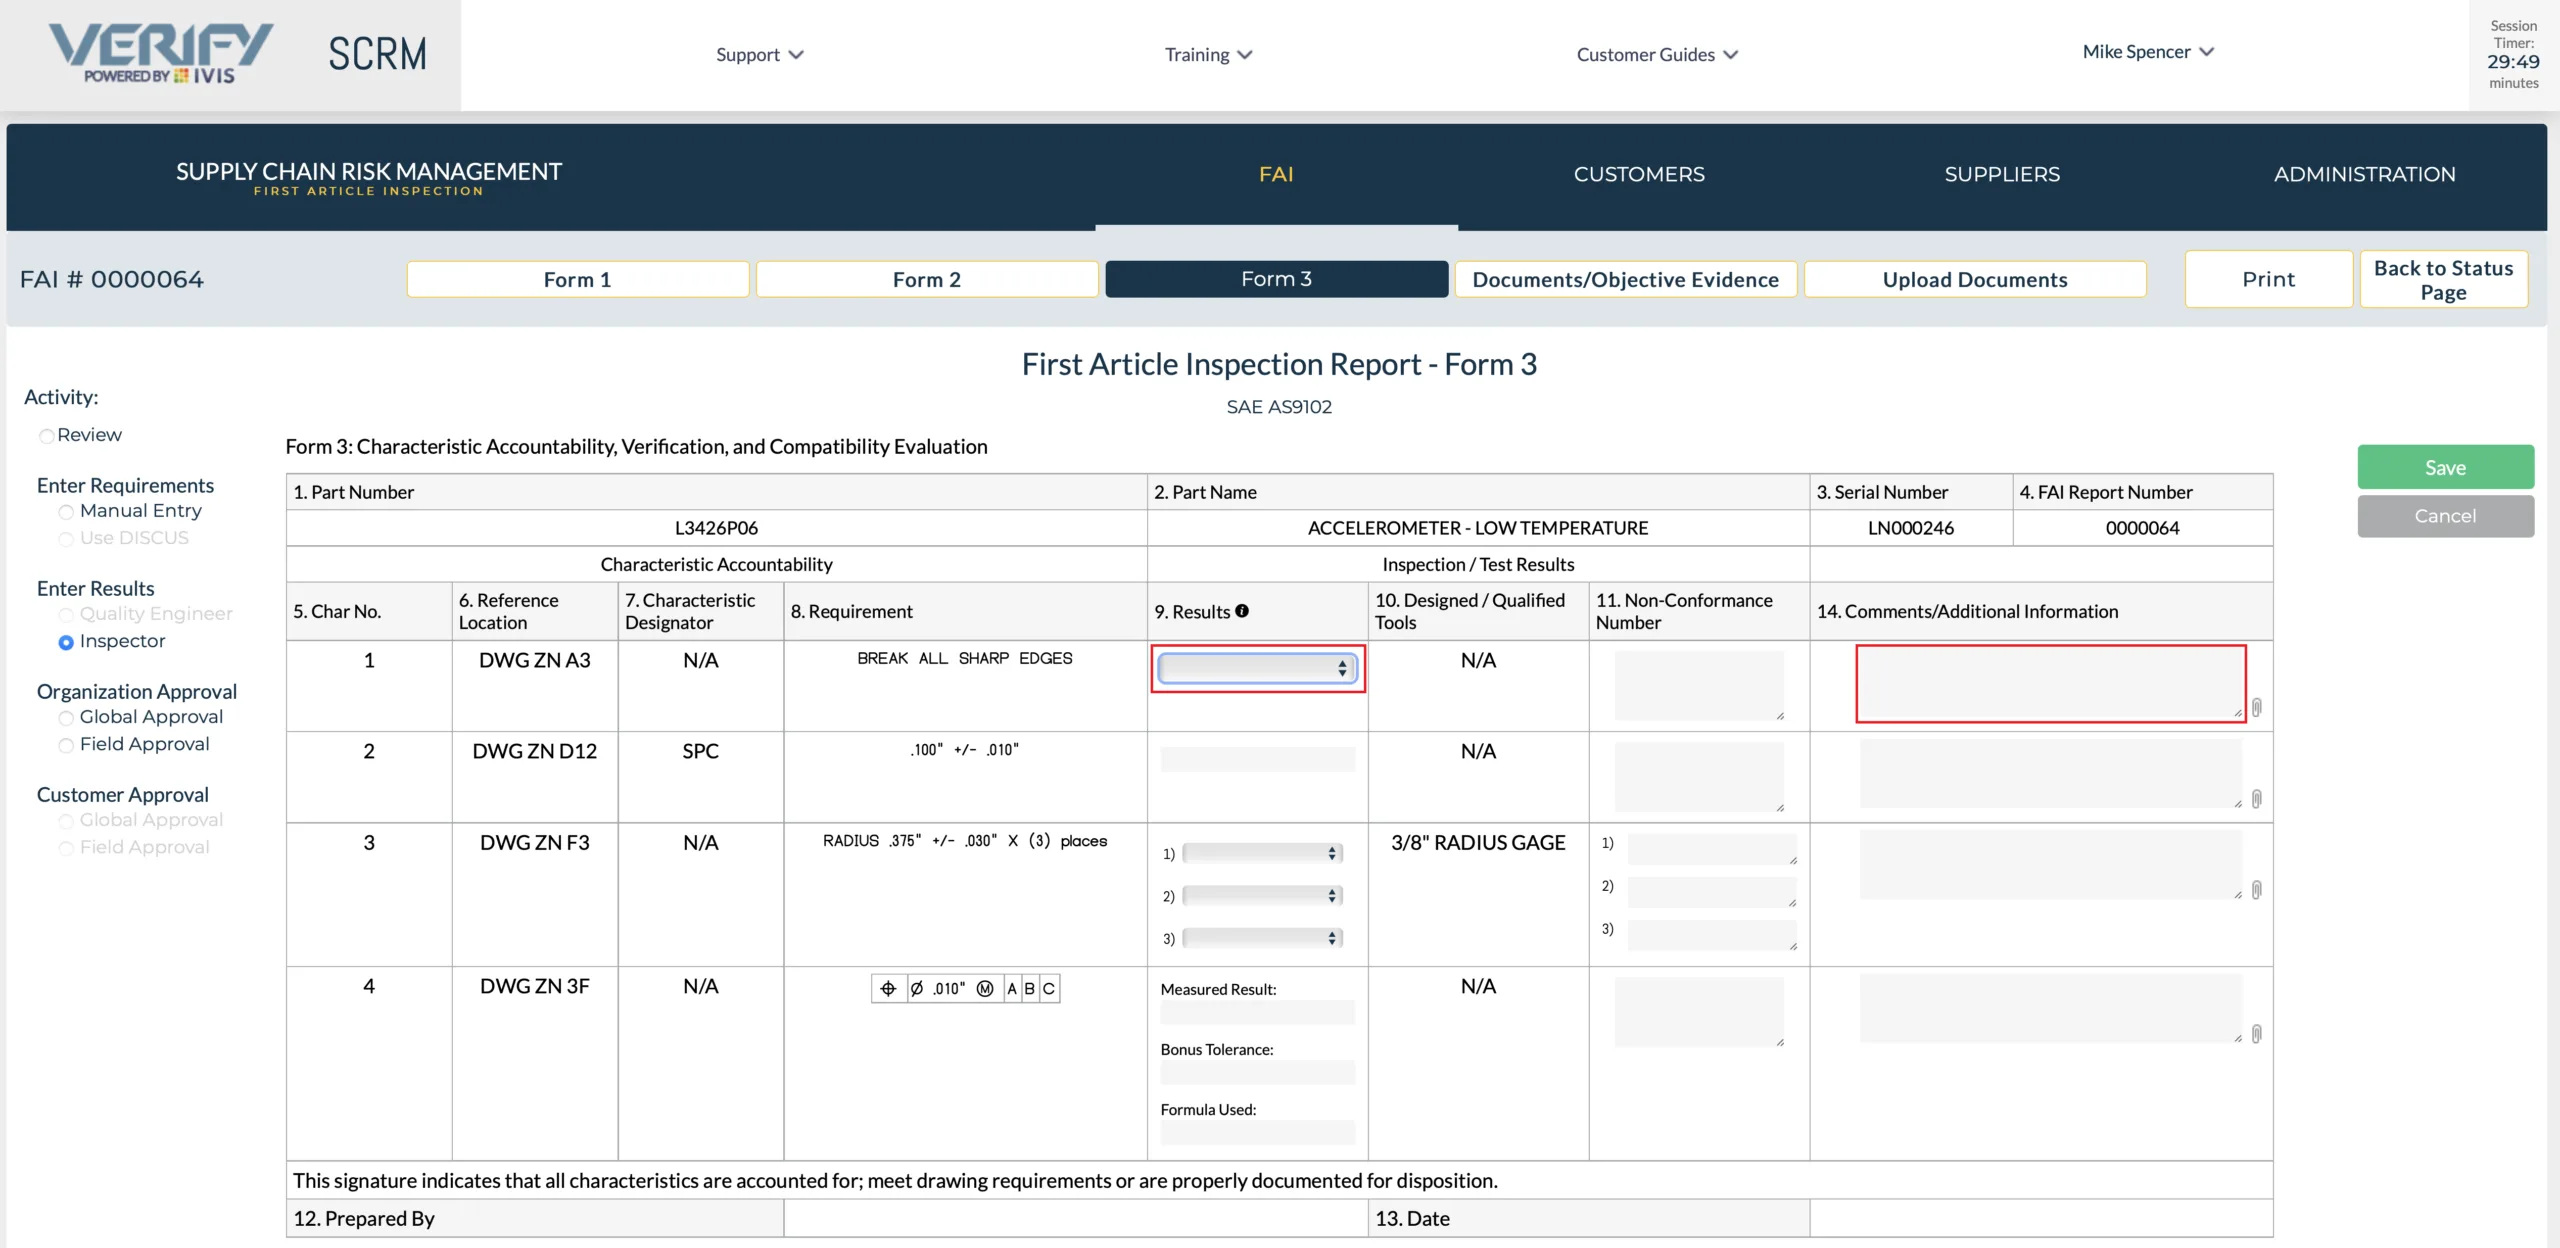
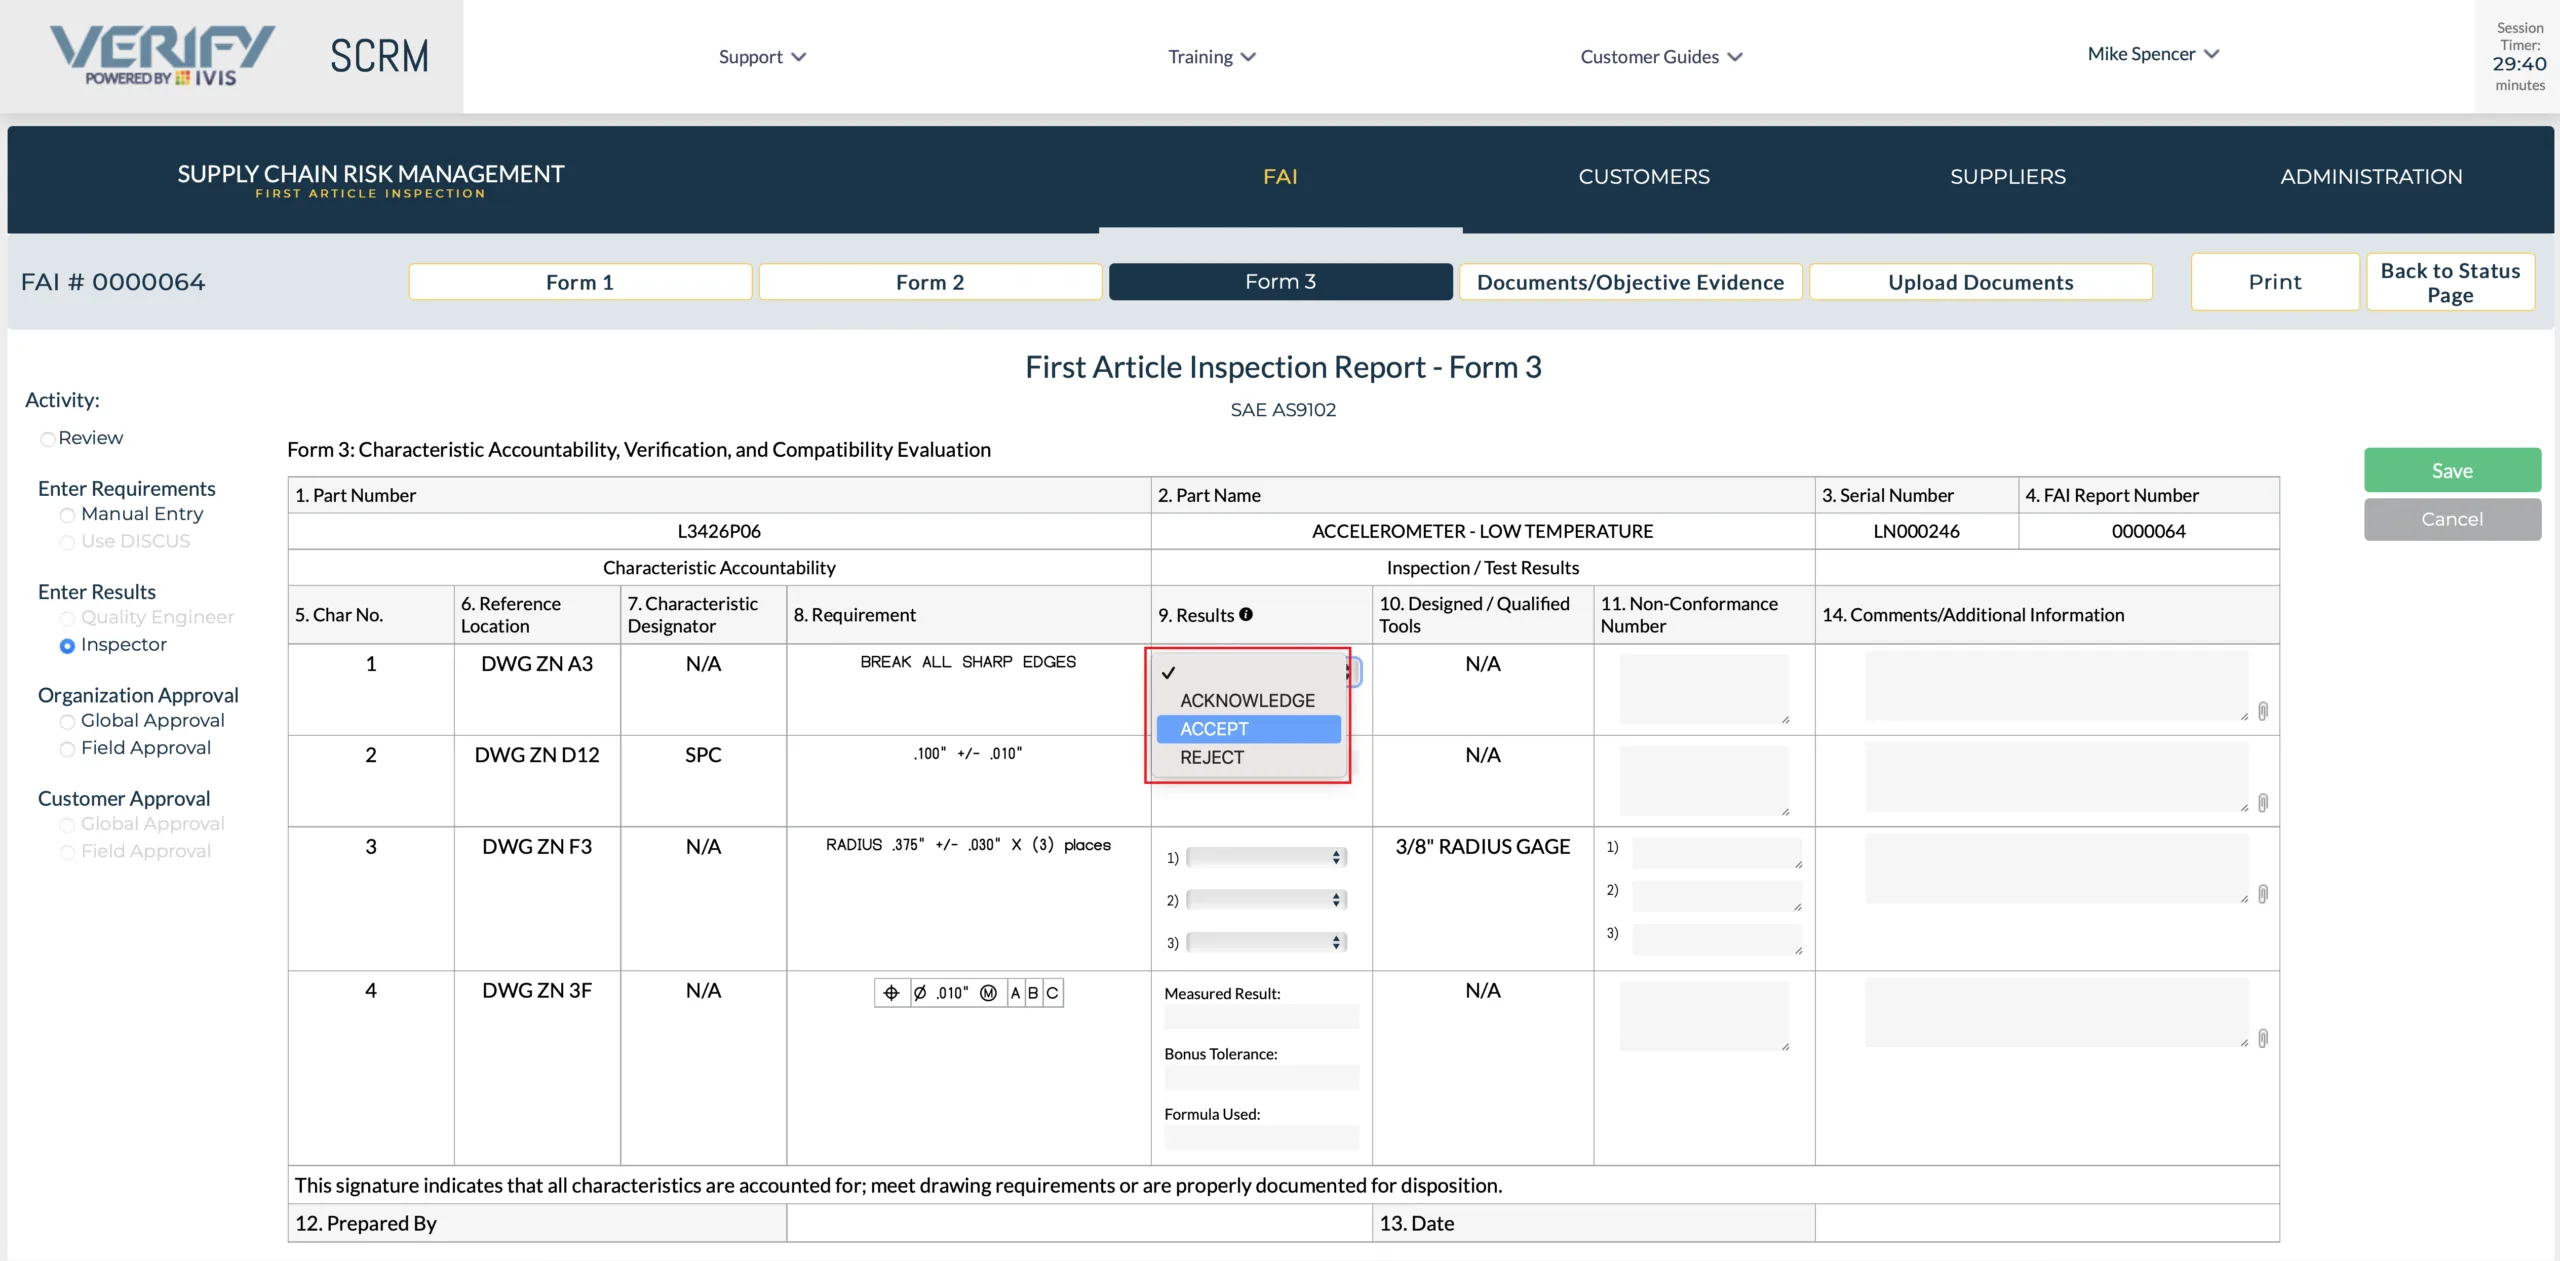
Characteristic one is an Attribute requirement. The results column 9 will have a dropdown box with 3 choices. Select one of the three choices (Acknowledge, Accept or Reject).
After you select your attribute result in Field 9, enter any comment desired in Field 14, then click “SAVE”. You will receive positive visual feedback that your data has been saved and the Field border for your result will turn green if the result is acceptable or within tolerance.
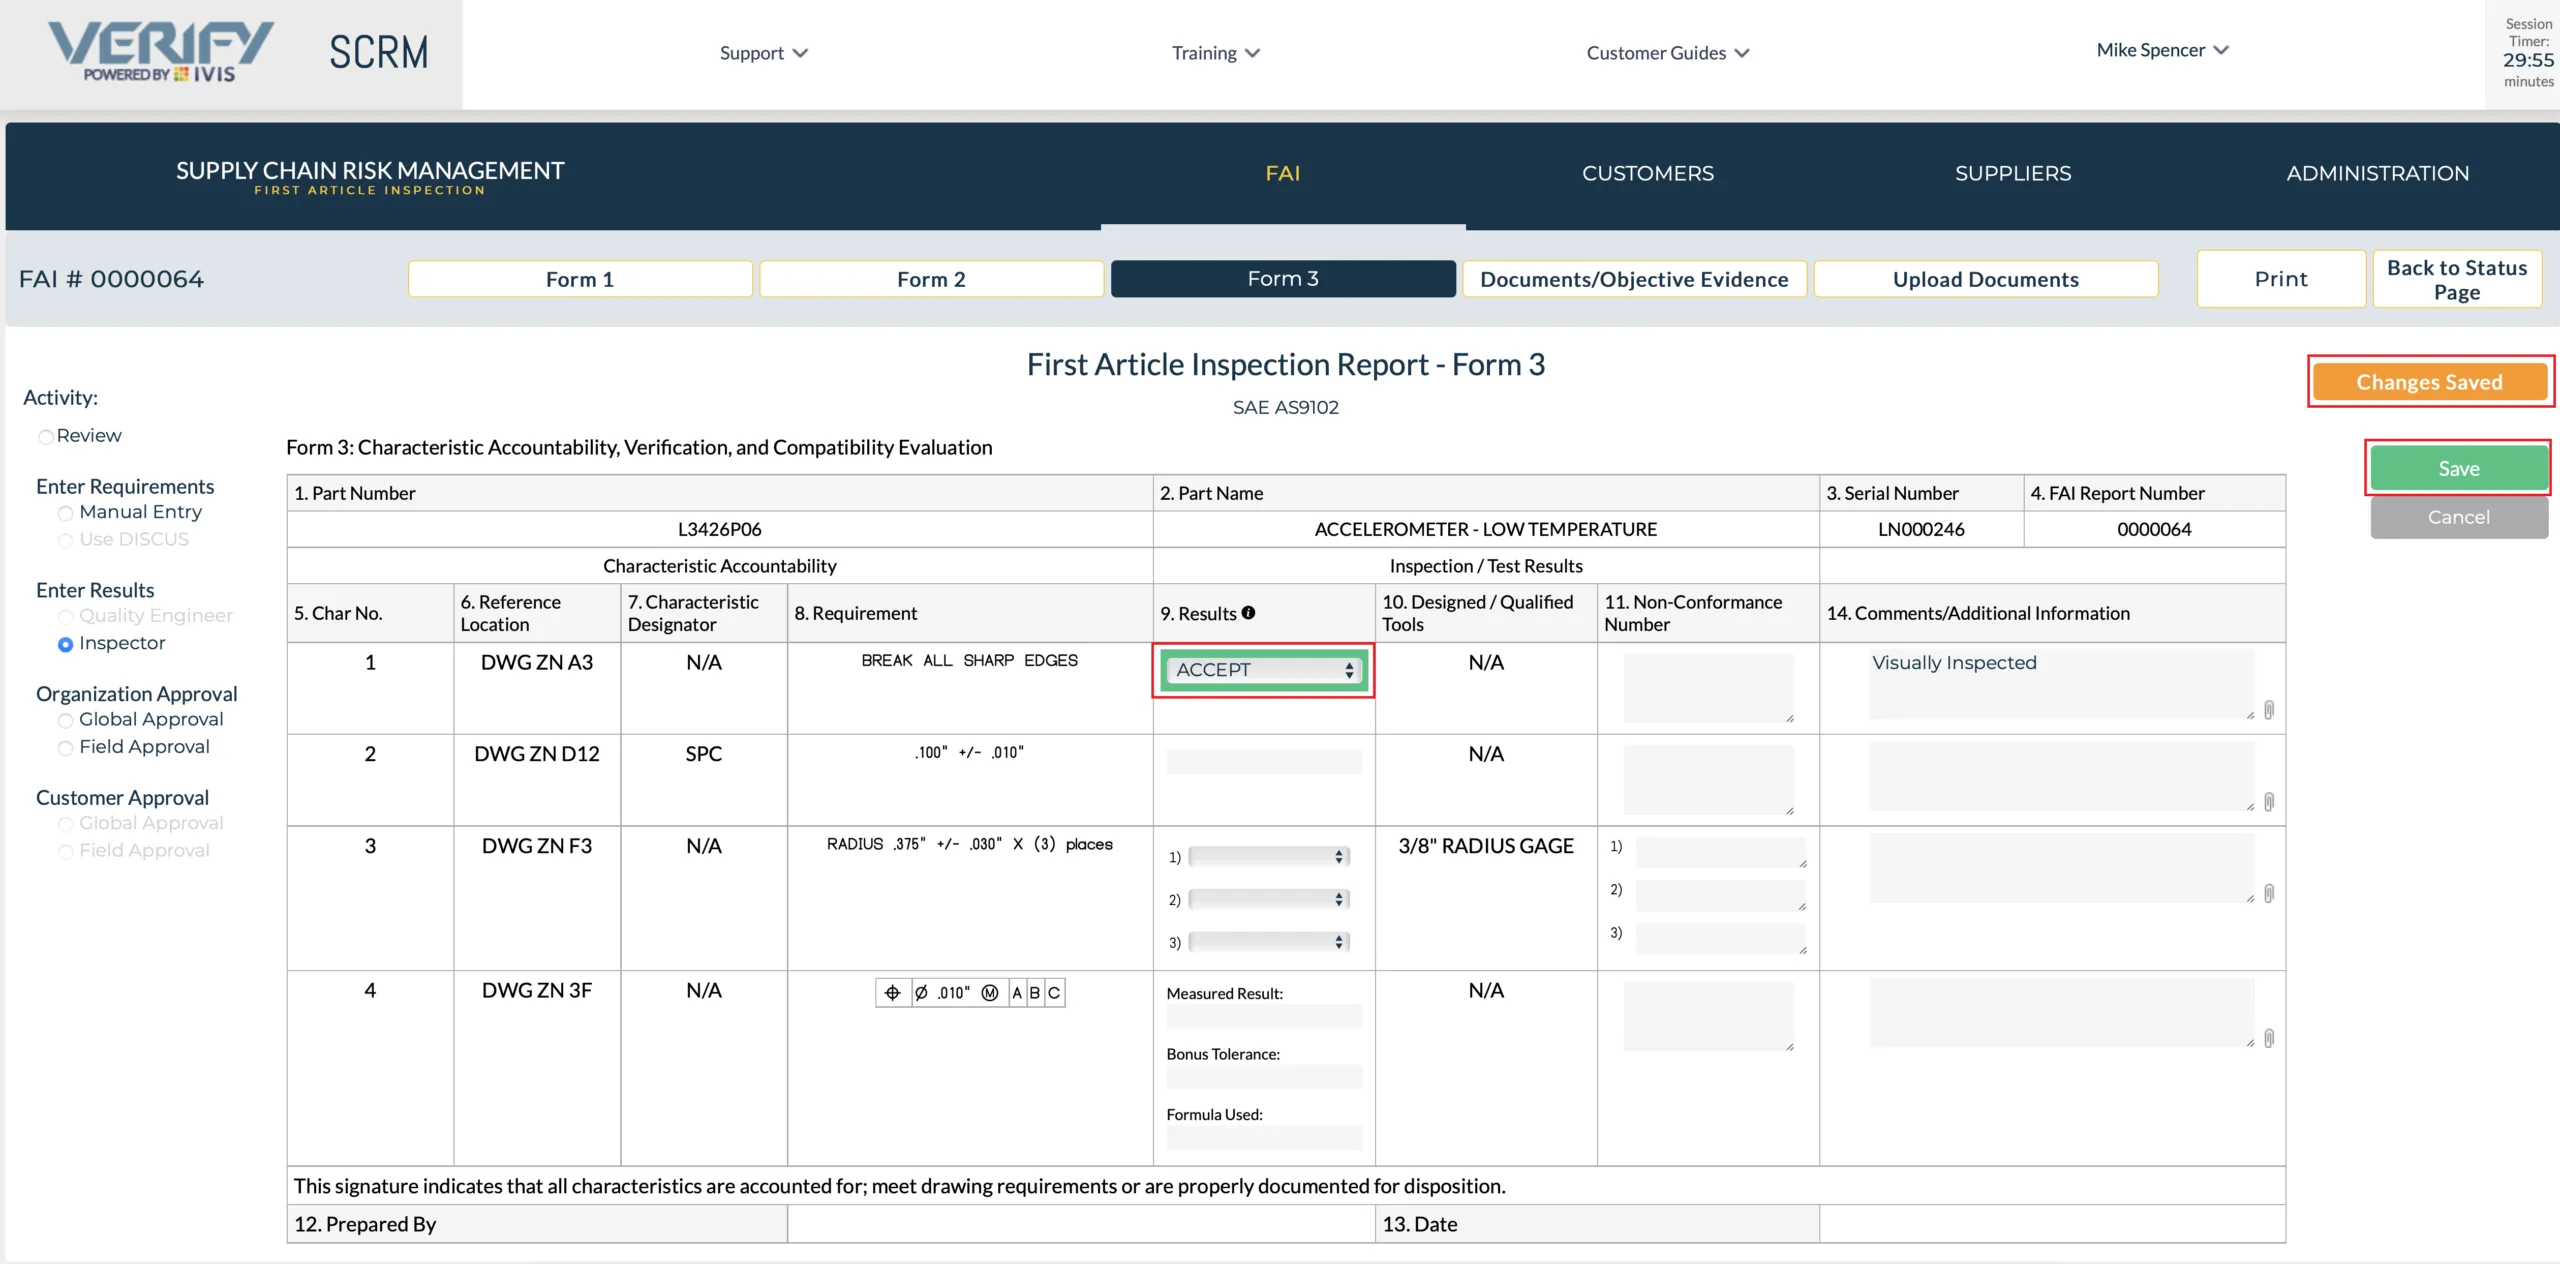
Characteristic # 2 requires a Variable result. We enter .105 and select “save”. The FAI Application will save the result, turn the results field 9 green, and provide visual feedback your data has been saved.

Characteristic 3, a Radius of .375” +/- .030, (3) places, is set up as an attribute requirement since we are using a “Qualified Application” to measure the radius. One of the three results is rejected. After Saving the data, the FAI Application has turned two accepted results Green and the rejected result field red. The FAI Application will not allow further results to be entered until the Nonconformance report number is entered in Field 11.
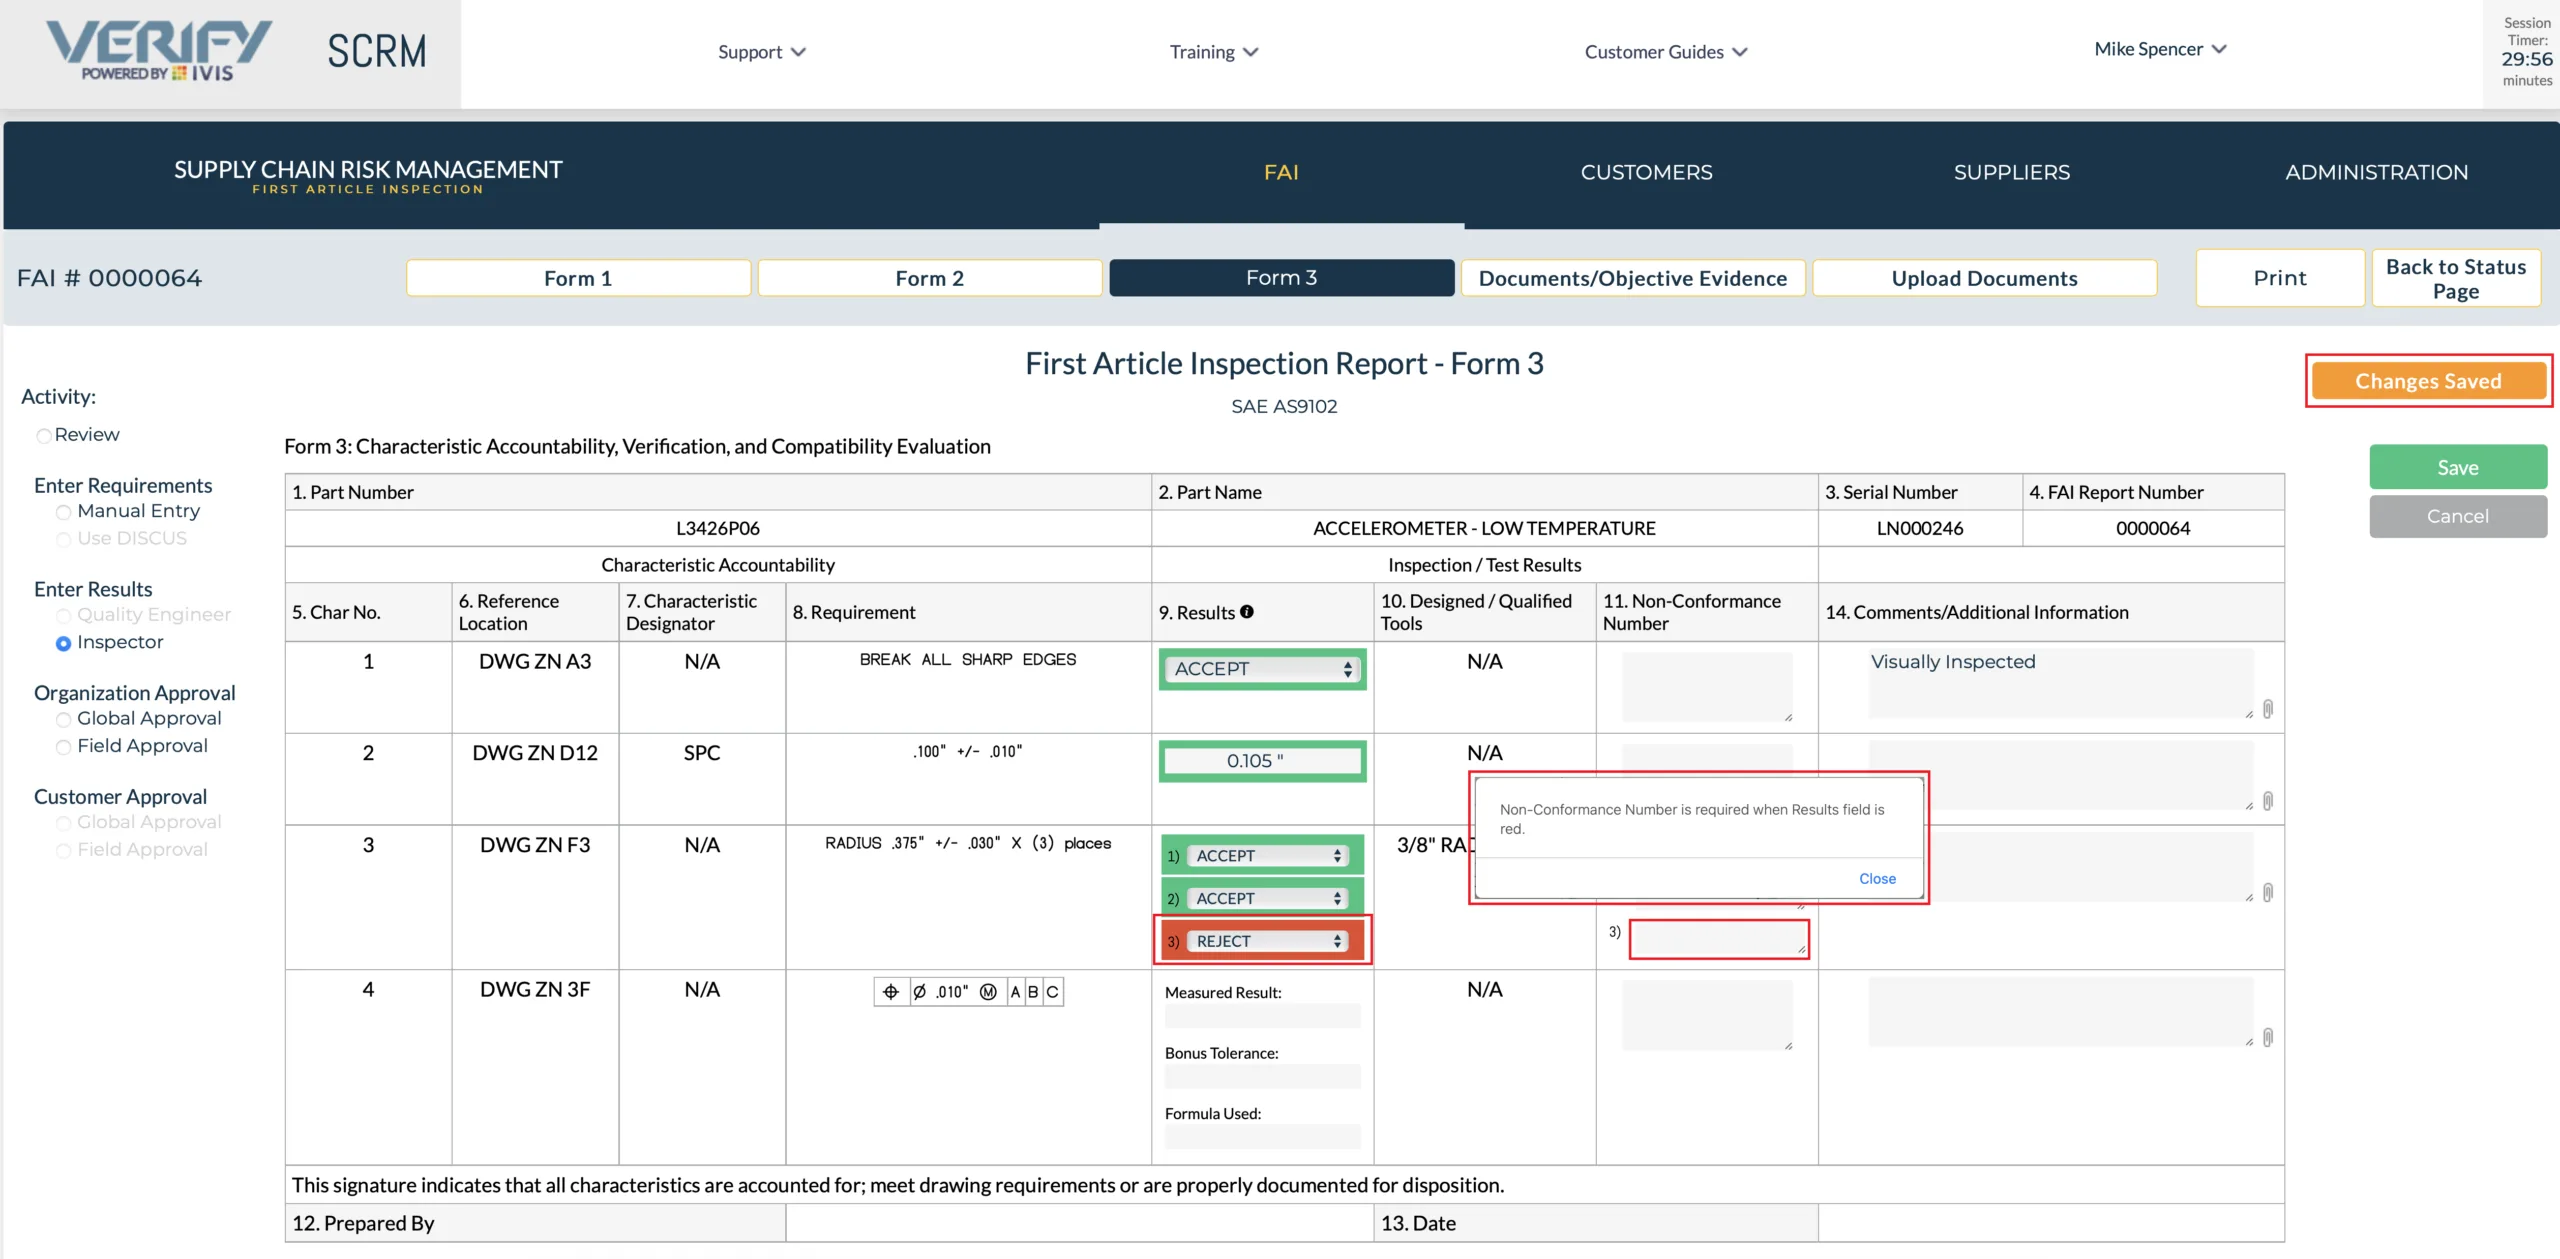
Enter the nonconformance report number in field 11, measurement #3 and select save.
If you have entered a rejection or made a variable result entry in error, simply re-enter the conforming result and save. The field will turn green, and the non-conformance report entry will be deleted.
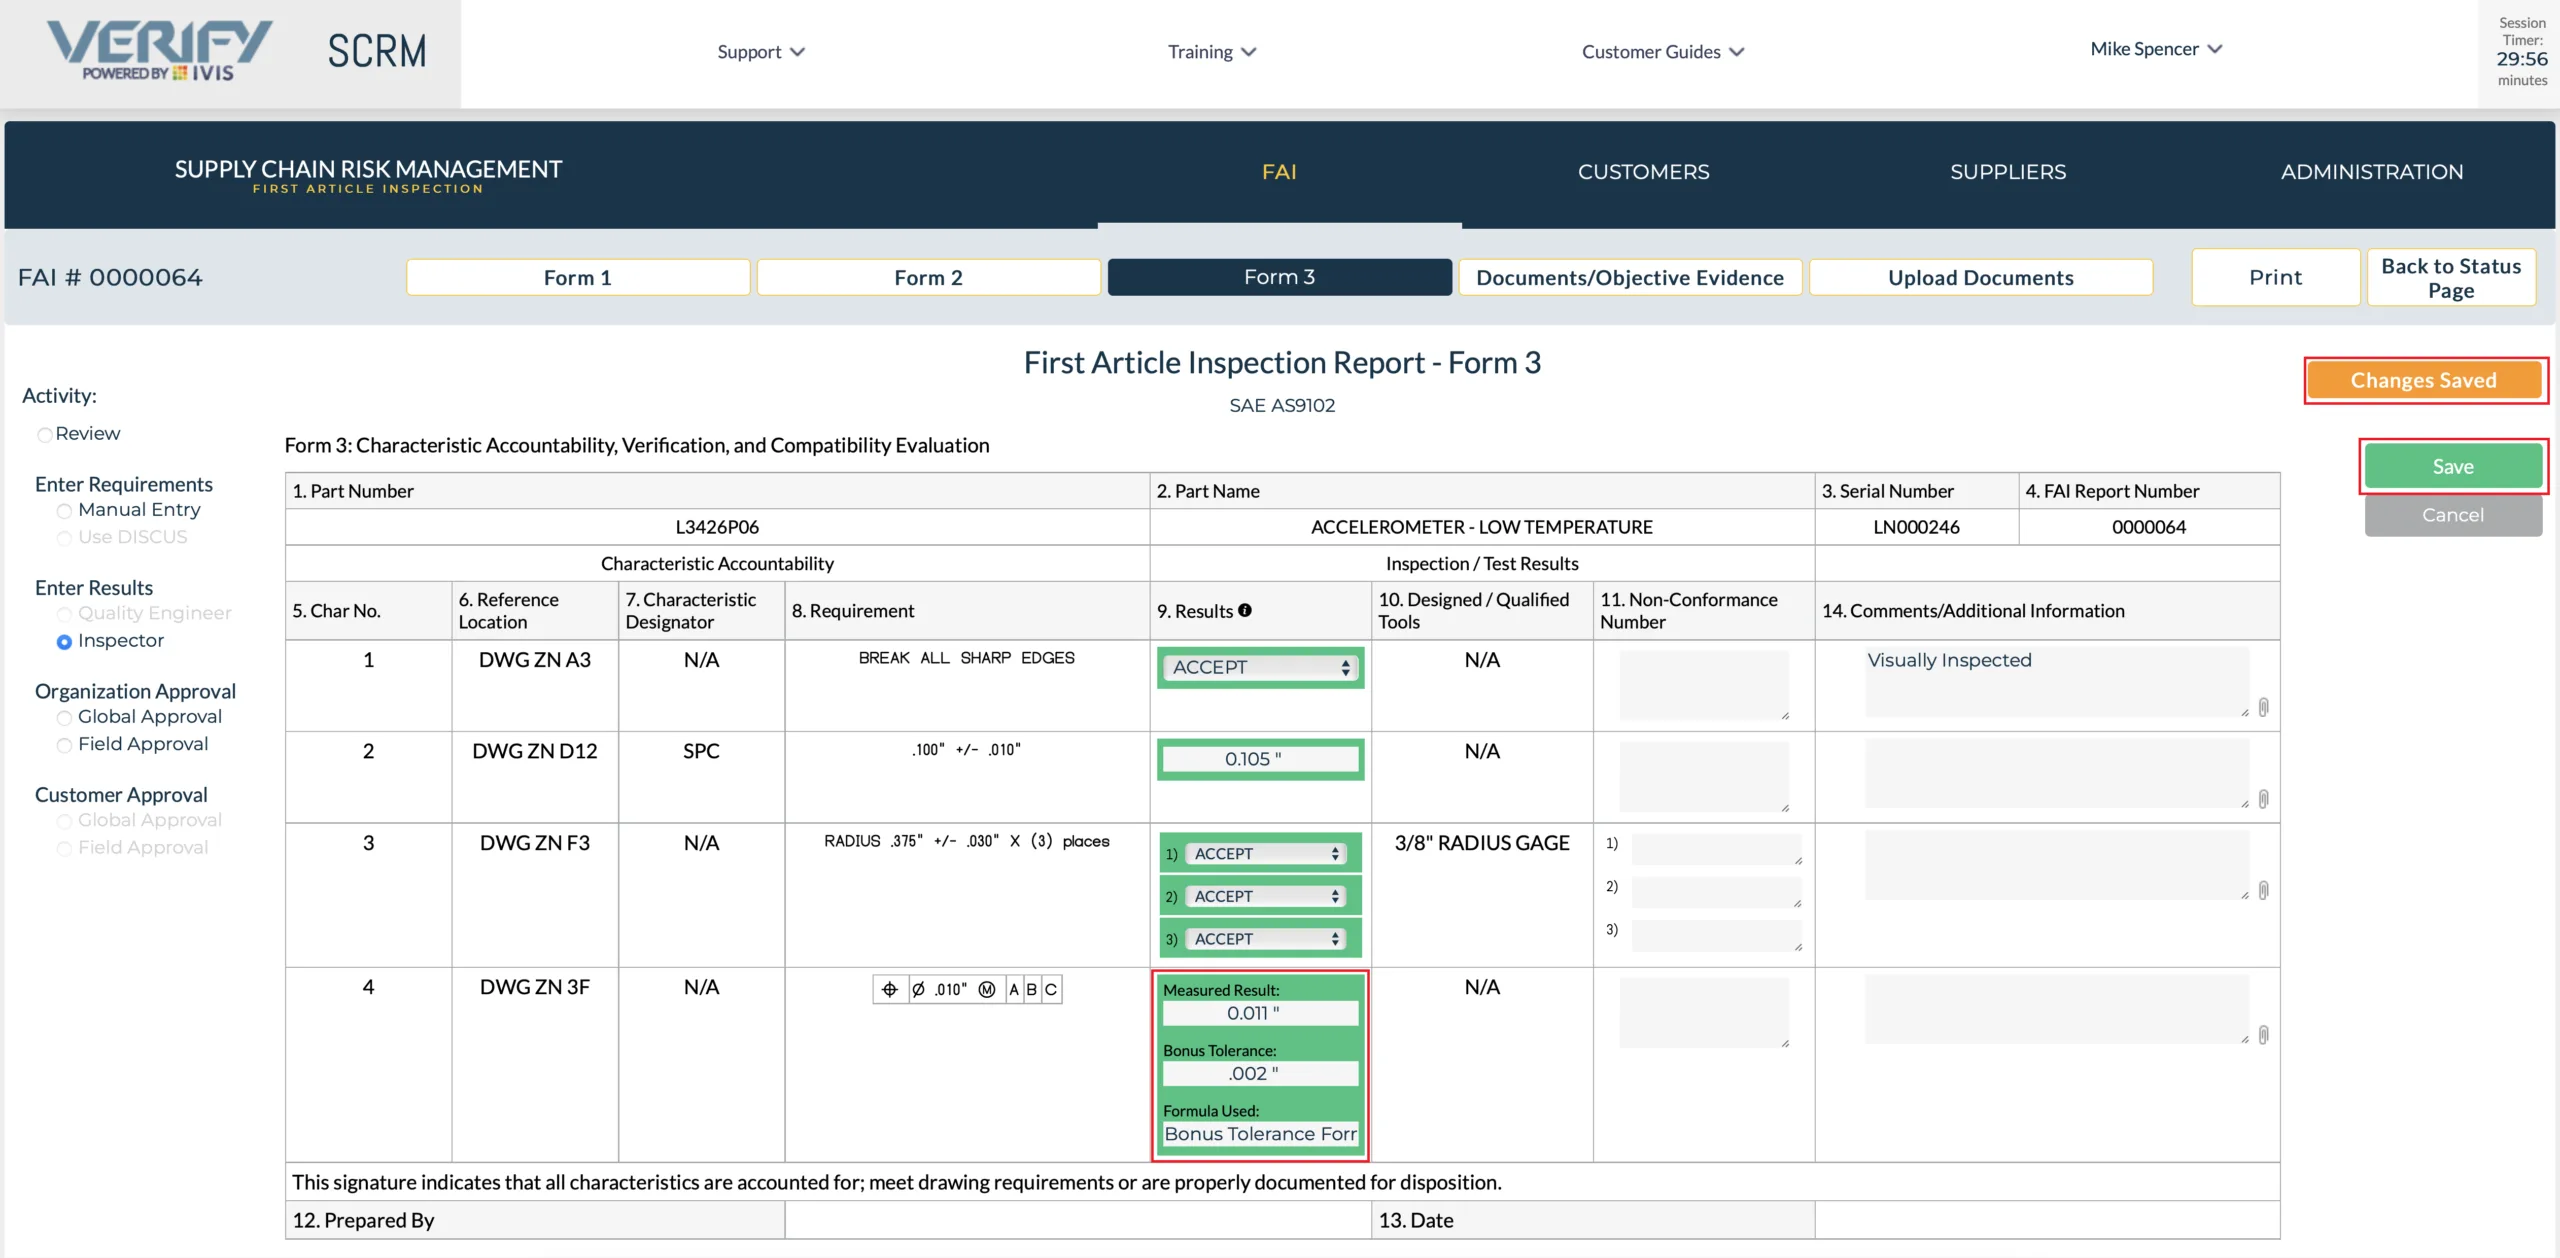
When entering results for a GD&T feature control frame, such as in characteristic 4, enter the actual result, the bonus tolerance (if any) and the formulae used to calculate the bonus tolerance. The FAI Application will add the bonus tolerance to the requirement and calculate whether the result is in the tolerance range. If conforming, the result(s) will turn green, and you will receive positive visual feedback your data has saved. Left click on the “Back to Status Page” button.
From here you can work on other FAIs, navigate back to the FAI menu or you can left click on the FAI number you were working on and return to that FAI. To logout, click on the drop-down arrow under your name and select logout.